07 -
embedded programming
The goal of this week's assignment is trying to read microcontroller data sheet, and trying to program the board.
In this week, I installed Arduino IDE in both Windows 7 and Mac OS, and burn bootloader through Arduino UNO.
On Windows 7
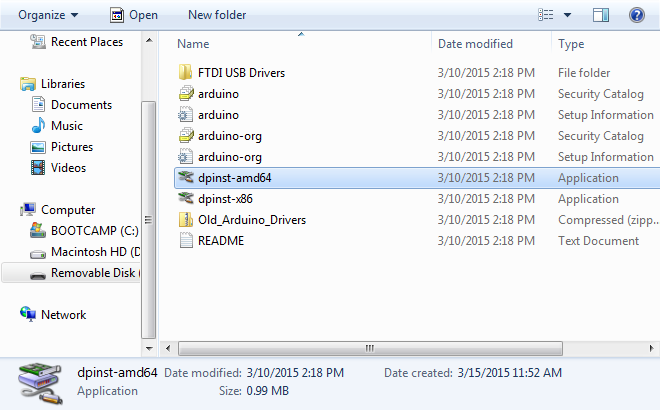
Install Arduino IDE in Windows 7. First of all, you need to download Arudino here , I use Arduino 1.6.1. After extracting, you have to run arduino driver. for me, I run dpinst-amd64.
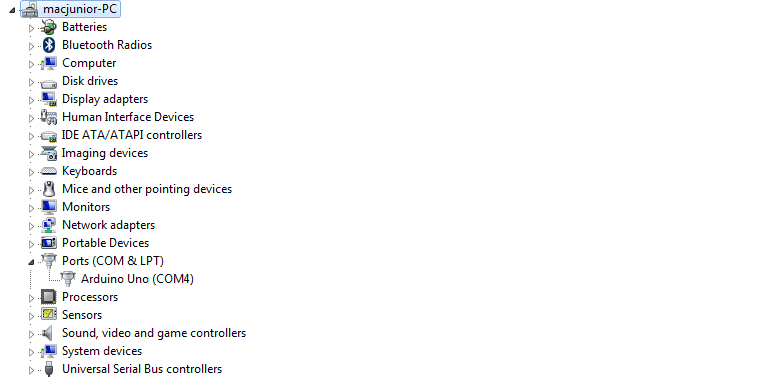
Then, I can see Arduino UNO is conntected to my compter COM 4.
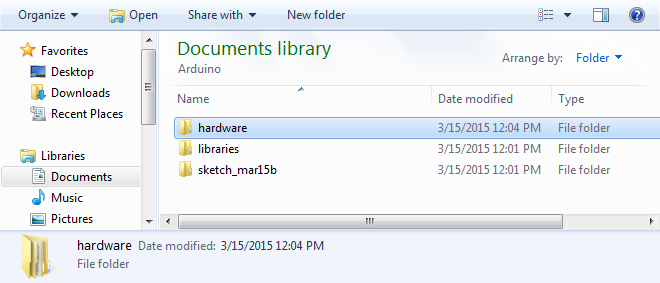
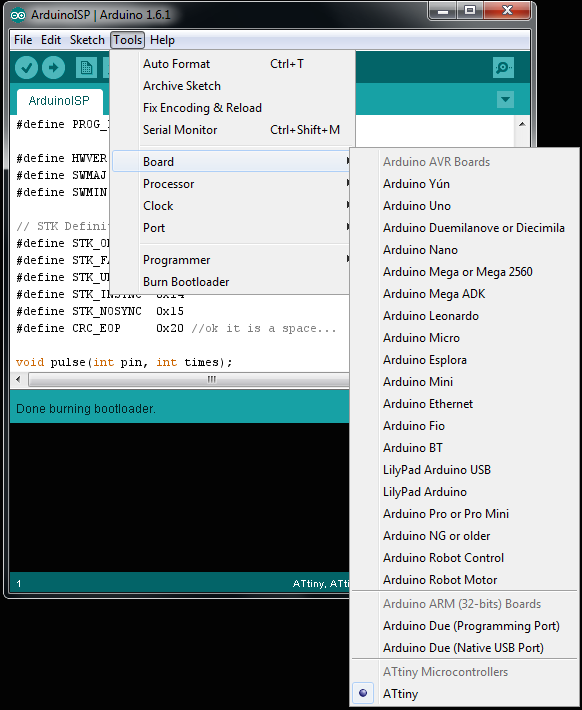
Here comes to the most important part. Download ATtiny support for Arduino in high-low tech. For my case, I download ide1.6x.zip (or you can also get ATtiny suppot for Arduino in Damellis Github) and then find your Arduino sketch file (mine is in Libraries > Documents).
creating a new folded named hardwar. Put all your ATtiny support into it.
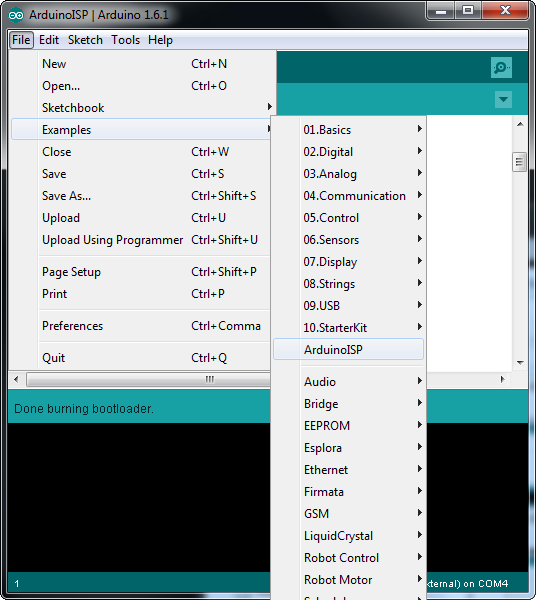
Now gose to Arduino IDE. Setup all nessary settings as following:
a. open ArduinoISP sketch
b. Tools > Board > ATtiny
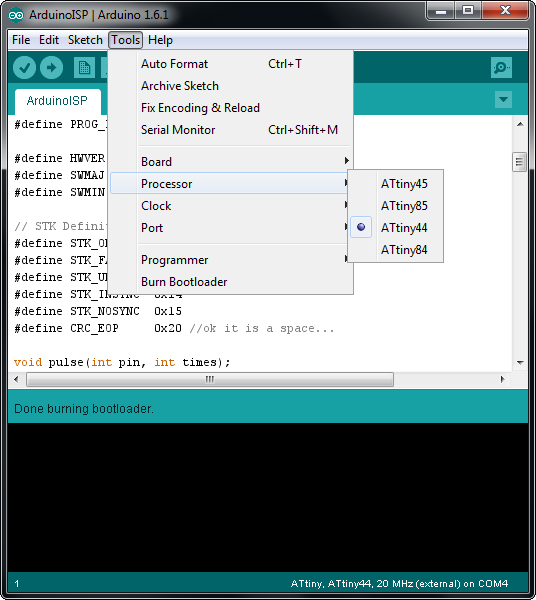
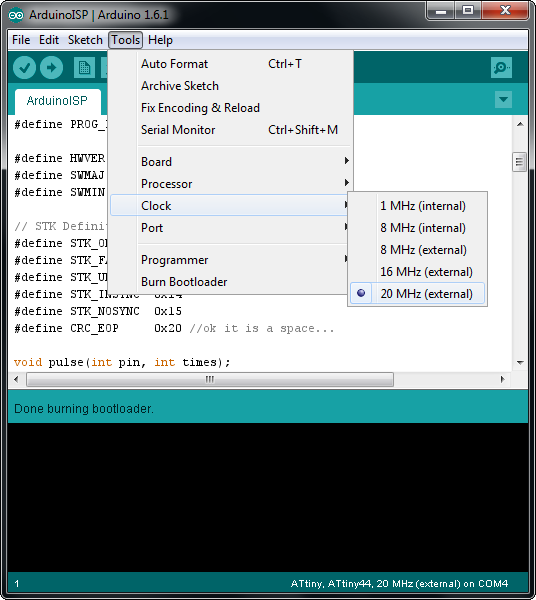
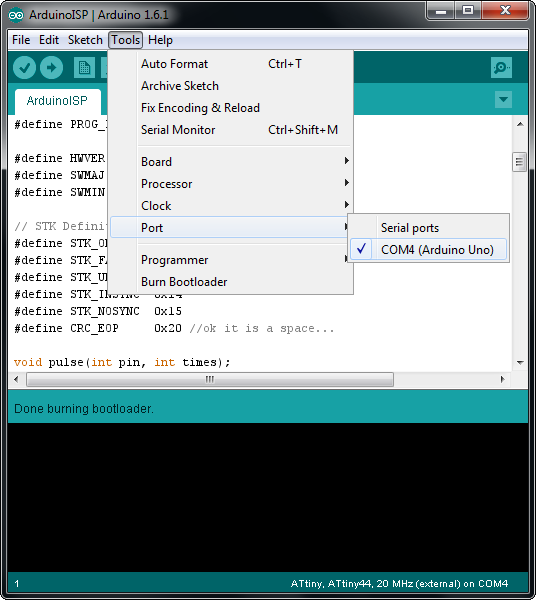
c. Setup Processor, Clock, and Port.
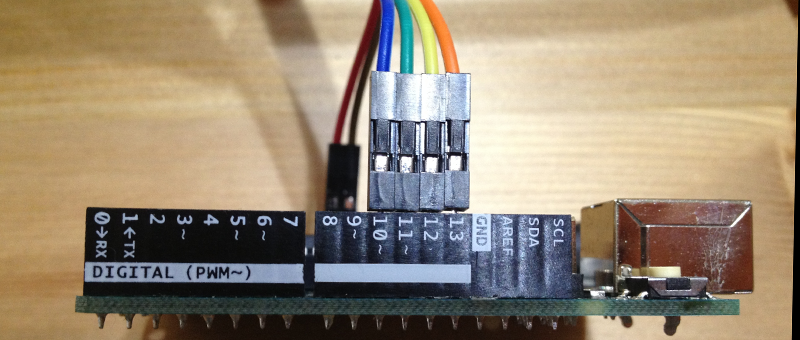
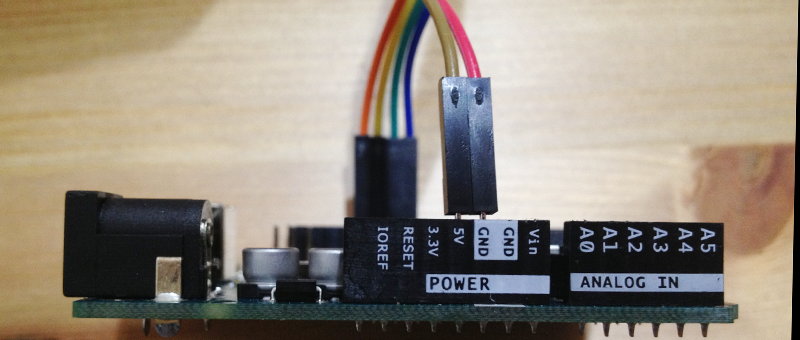
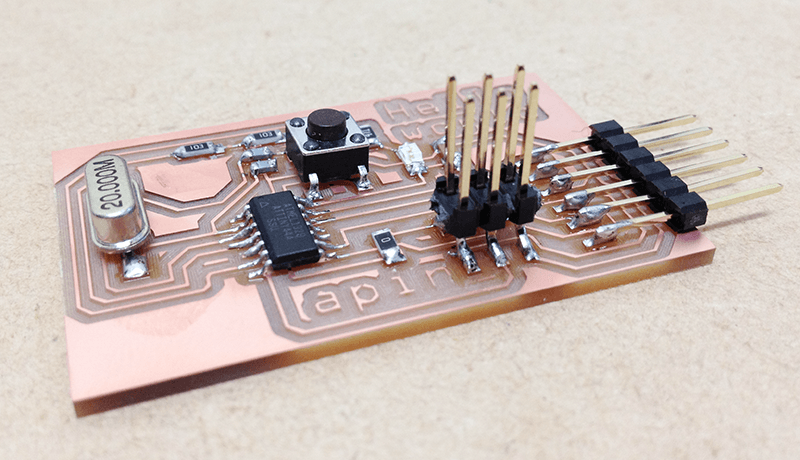
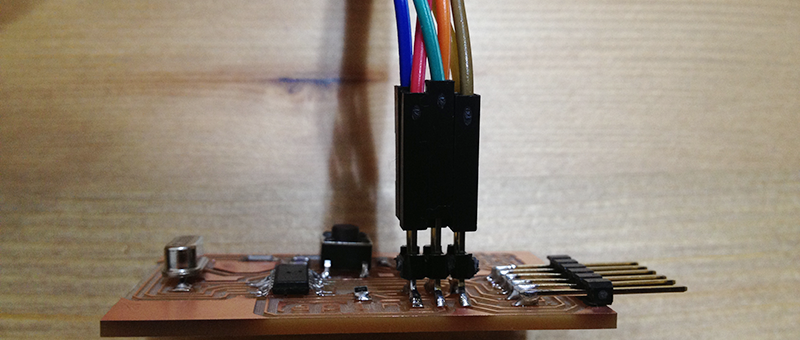
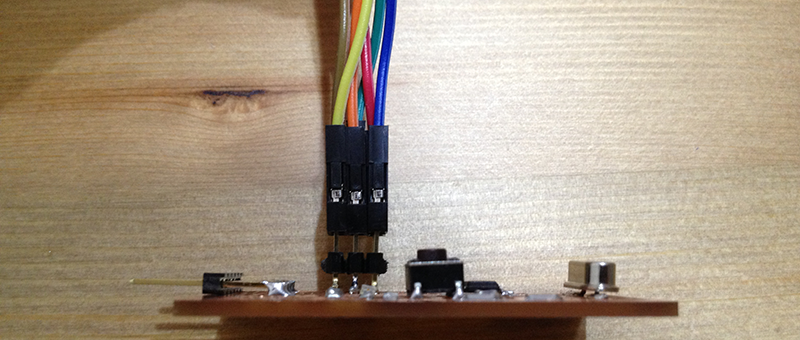
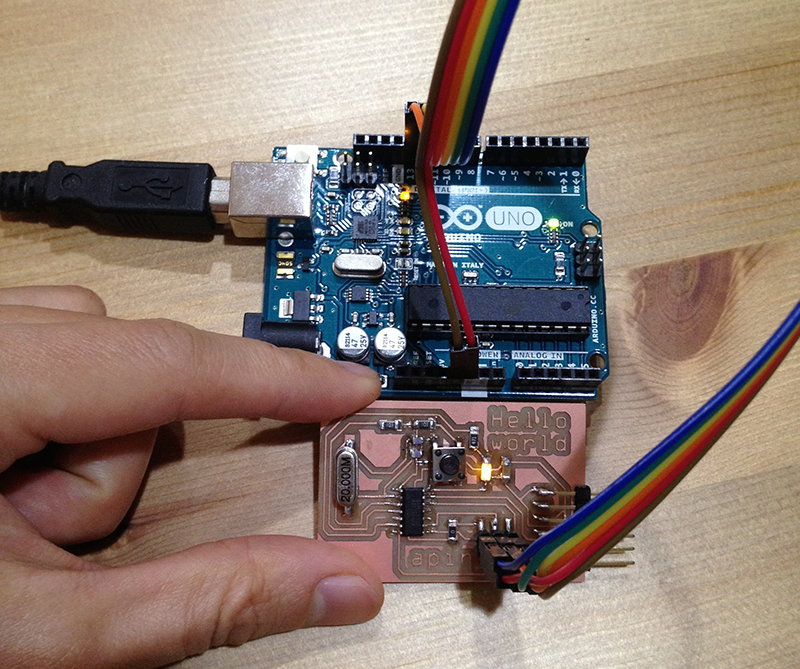
D. Connect Hello World to Arduino UNO:
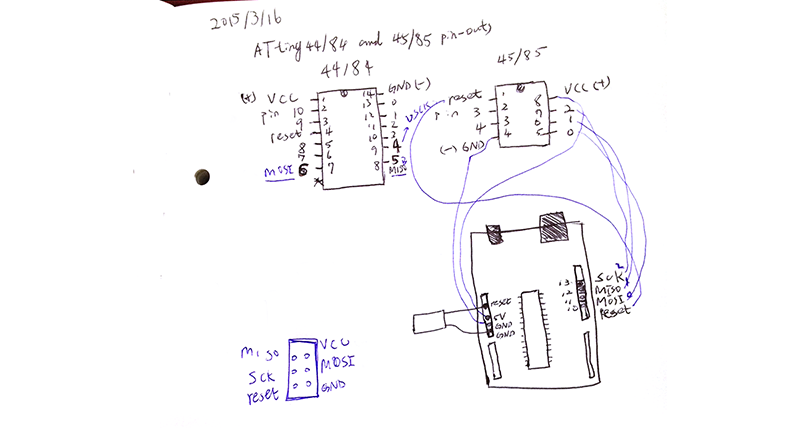
Based on ATtiny 44/84 pin-outs, we need to connect VCC(+), GND (-), Reset, SCK, MISO, MOSI to Arduino (as ISP).

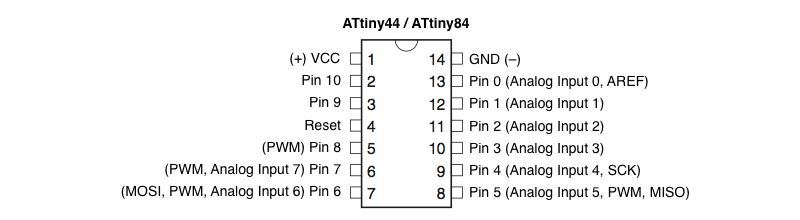
Here is another reference from HOW TO GET WHAT YOU WANT specifies how to connect Arduino (as ISP to ATtiny 45/85).
In my case, I don't add exterianl 10uf capacitor on Arduino UNO, and it still work.
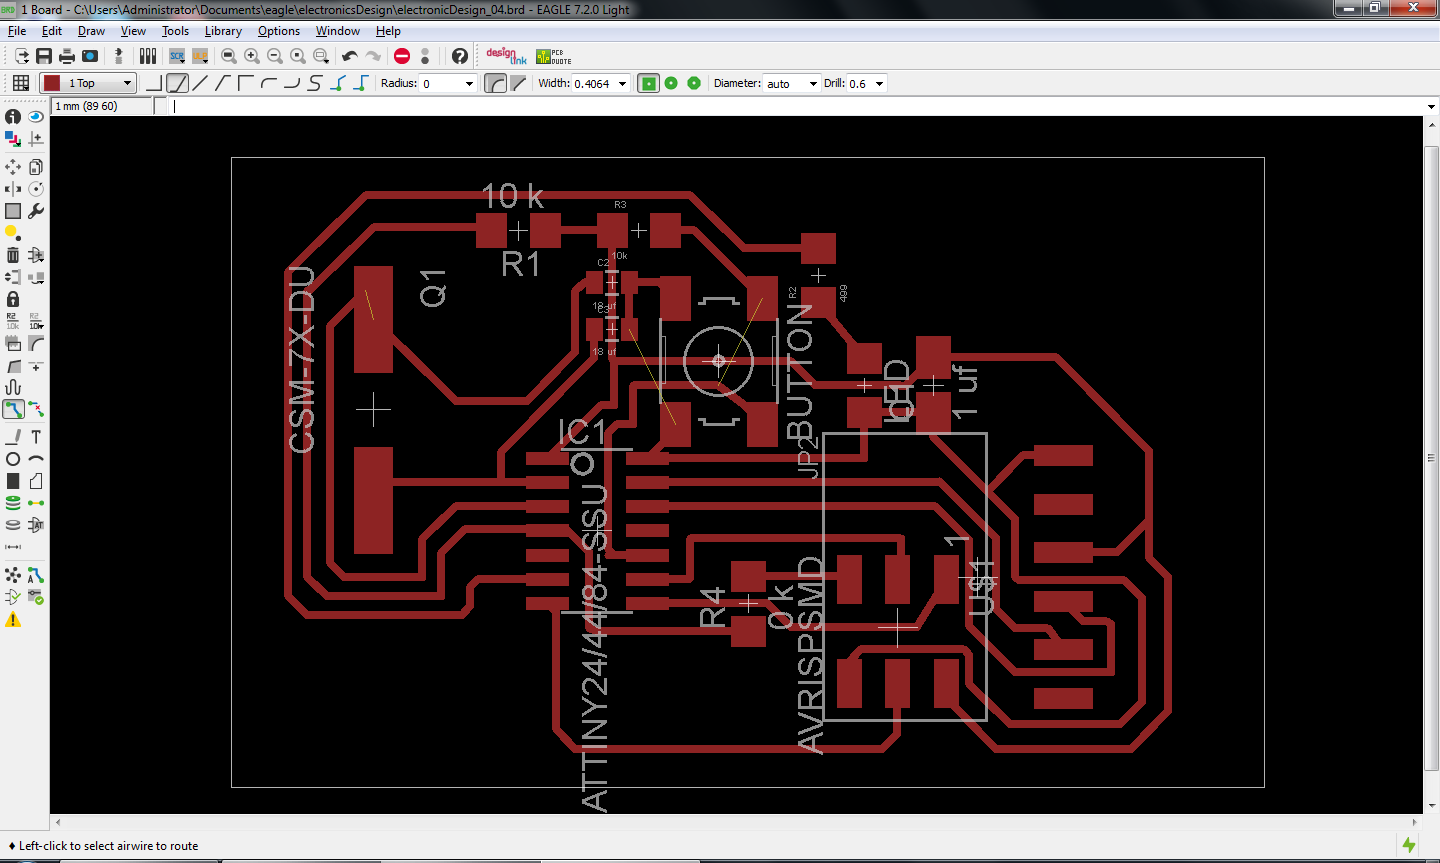
E. Meanwhile, I check the scheme I created in week 6 for making sure my AVRISP SMD's pin order is correct.
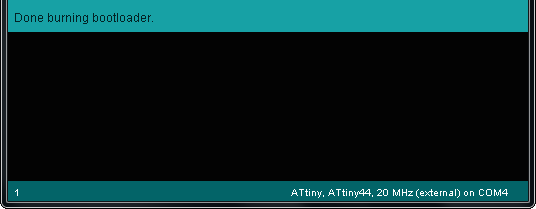
F. Now you can go back to Arduino IDE, and run tools > Burn bootloader. Done!
F. Here are some notes on connecting the pins.
Now, what I want to accomplish is when someone pushes the button, the LED will blink. Here comes my code:
int btnStatus = 0;
void setup() {
pinMode(7, OUTPUT); // LED pin
pinMode(3, INPUT); // Button pin
}
// the loop function runs over and over again forever
void loop() {
btnStatus = digitalRead(3);
if(btnStatus == 1){
digitalWrite(7, HIGH); // turn the LED on
delay(1000); // wait for a second
digitalWrite(7, LOW); // turn the LED off
delay(1000); // wait for 1 sec
}else{
digitalWrite(7, LOW); // turn the LED off
}
}
On Mac OS 10.9.5
The process is just like whan I've done on Windows 7.
What I learned:
1. Use Arduino as ISP instead of AVRISP
2. Read data sheet and connect the pins.
Source File: