Week 4 - Electronics Production
Creating a Fab ISP
To create a circuit board in Fab lab I milled copper clad board using the Modella MDX-20. The fist step in the process was to clean the sacrificial bed on the machine until there was no tape/adhesive patches on the surface. This was done with the aid of nail polish remover which helps get rid of the old double sided tape easier than using a damp cloth and elbow grease. Once I had a clear surface I attached double sided tape to the bottom of my board.
*TIP* Our boards were already cut down but generally you should always cut down the copper board to just over the size of the final board. This makes it much easier to get a flat board as there is less area for error in attachment and deviation of the board surface. From experience the most recurring problem with milling boards is getting it flat on the bed and so time spent on this stage will save you many failed boards in the future.
Next I attached the double sided tape to the underside of the copper board ensuring to closely pack the tape without overlapping. The close packing of the tape again is essential in creating a stable support structure for the board without allowing any room for deviation. If you are to overlap or get a bubble or some dirt under the tape simply take off clean and apply a new piece. Again time spent here is crucial to cutting a board successfully. Once the tape is applied I pushed the board to the bed of the machine choosing a clean position on the bed and trying to attach it in parallel to the x-axis.
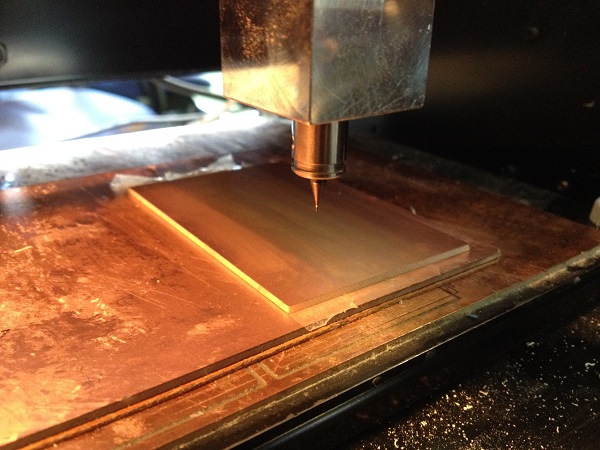
Next I inserted the 1/64th" bit and loaded Fab modules from Ubuntu terminal - command sudo fab. I did find that using sudo to open fab modules gave a more advanced version of the software which uses 3 pass cut-outs instead of the old system of 1 pass cut-outs, but this could be a local set-up issue.
When first inserting the bit I put the bit very far into the chuck initially and then tighten the grub screw. The reason for this is it allows you to bring the tool further down and closer to the board surface when zeroing the z-axis, which means less tool is hanging out and it is less able to move around whilst cutting. next you measure from the absolute zero of the machine to the x and y board position for the origin and input those values to the fab modules (bottom right of window). Happy with the x and y position I then zero'd the z. This is done using the tool down button on the Modella to bring the head close to the board.
*TIP* Check your available distance of travel on the z-axis and make sure there is enough room for the head to come down and complete the cut.
Once in position I supported the tool whilst loosening the grub screws and carefully brought the tool down to touch the copper board. Then I kept a small amount of pressure on the tool in the downwards position whilst tightening each grub screw in turn. This ensured that the tool did not come away from the surface as it was tightened.
*TIP* When tightening the grub screw you need them tight but don't put all your force into turning them as you will thread the grub screw, once feeling tight give it a quarter (90 degree) turn and then leave them. the Modella saves the z-axis postion form the last position the head was in. This means if you send the tool up you will loose your zero position and have to follow through the process again.
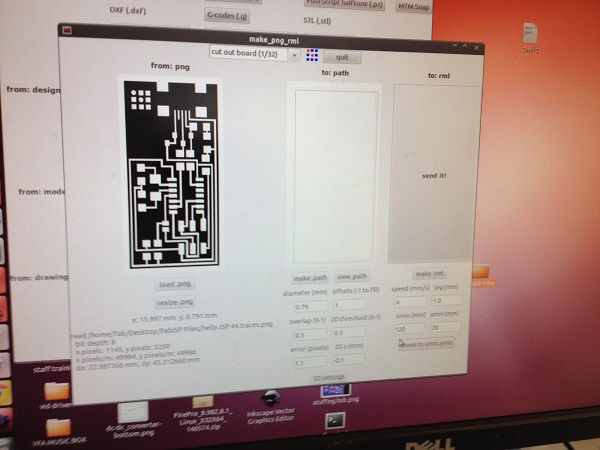
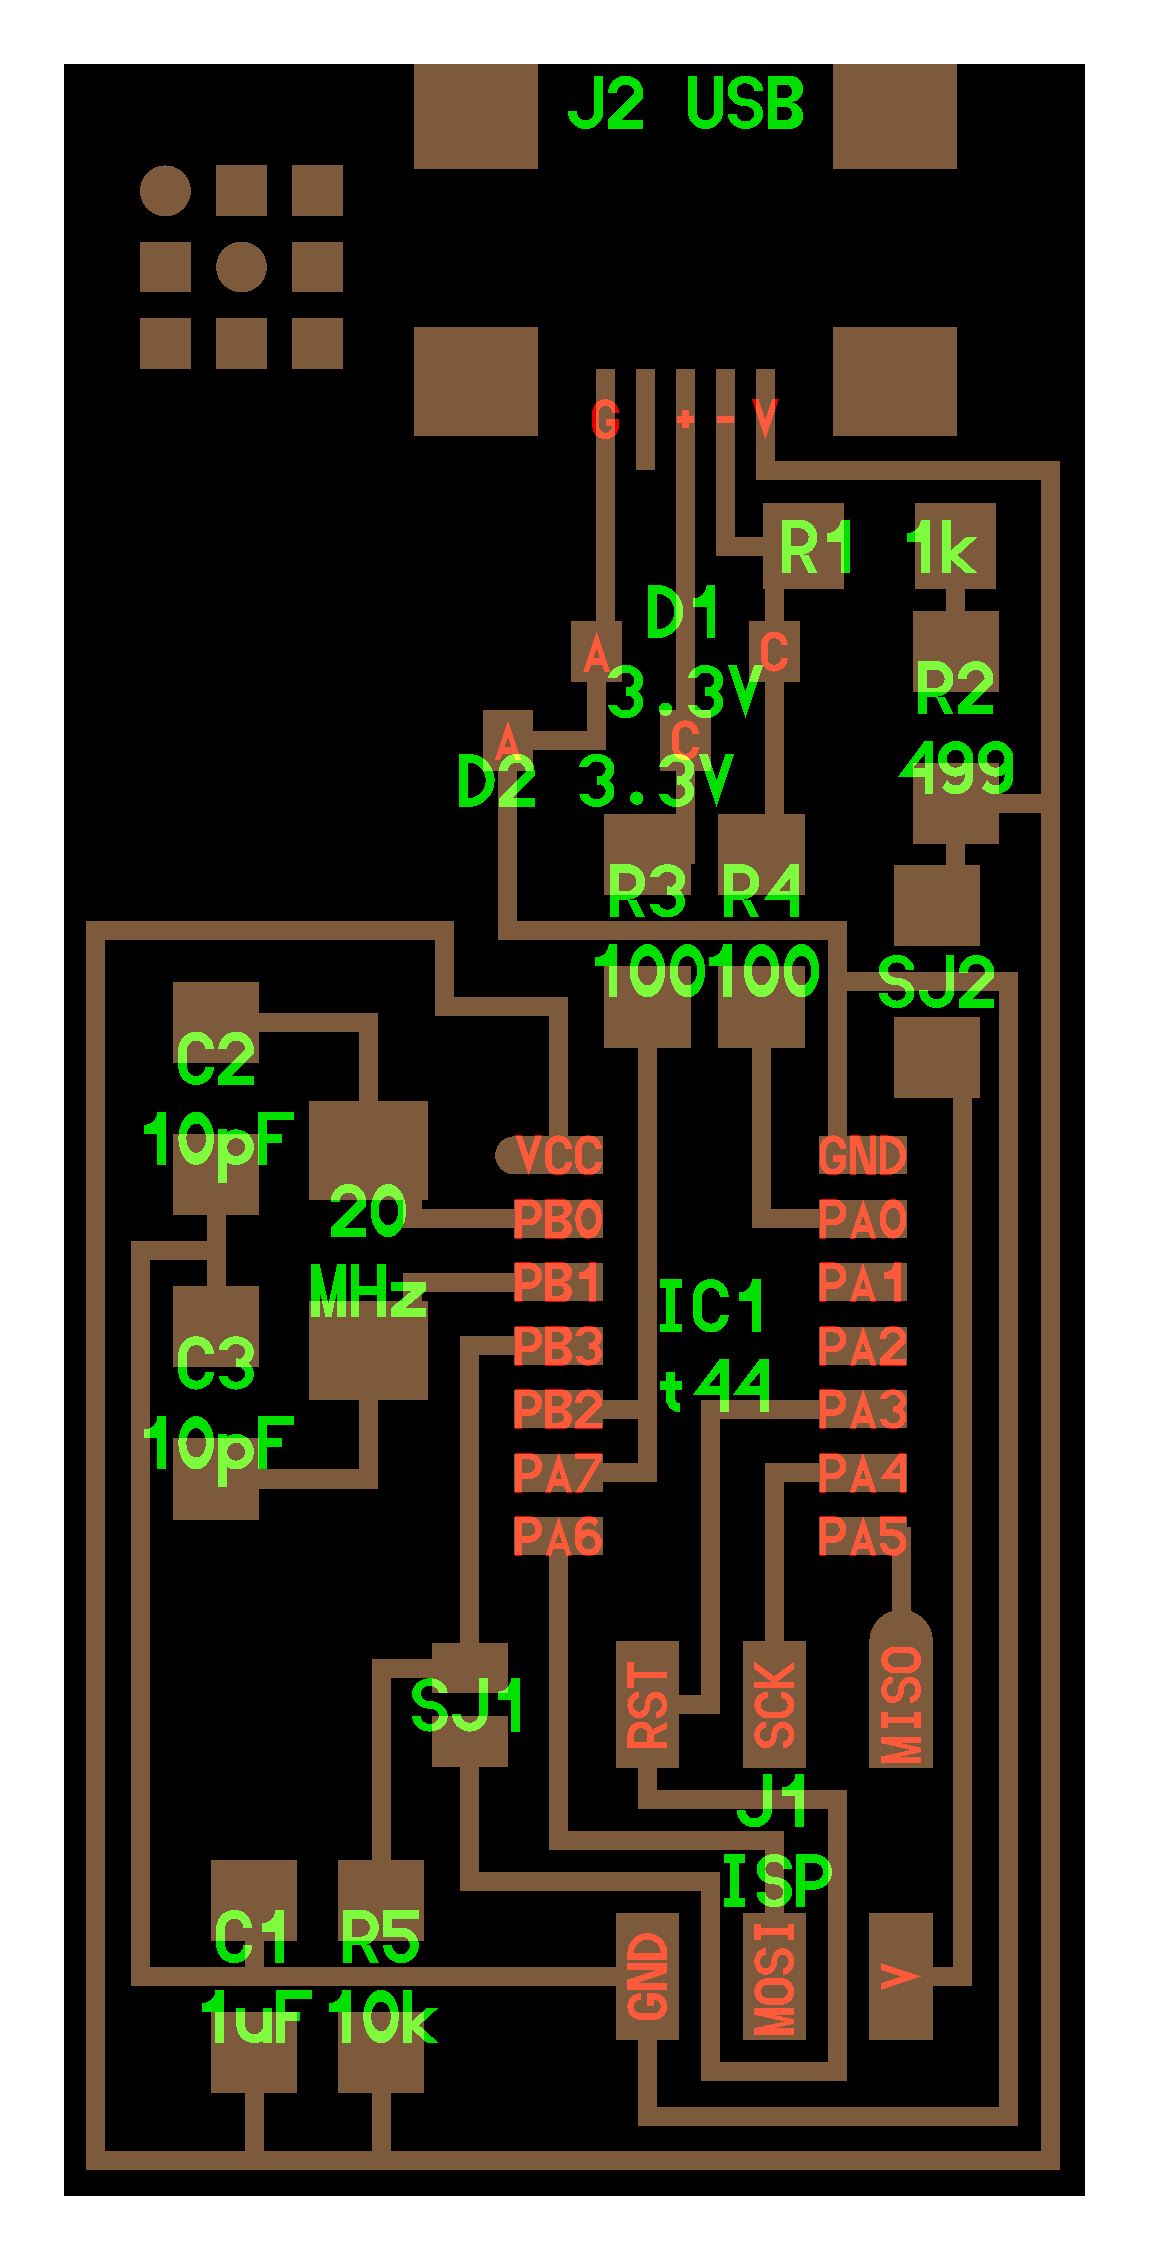
I then loaded the png from the downloaded FabISP files, selected mill traces from the dropdown menu, made path and then made rml and sent to start the milling.
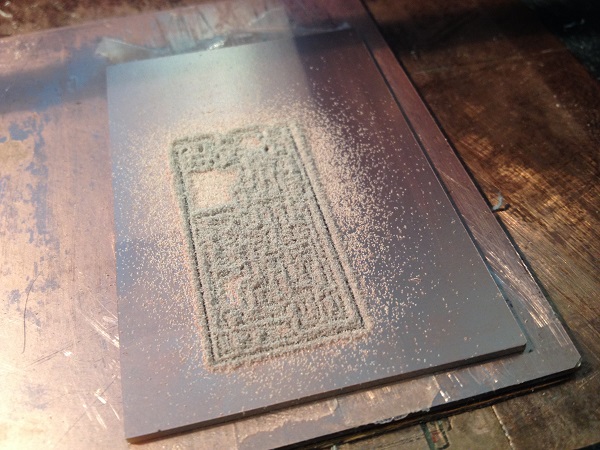
As the tool didn't break and it cut every area of the board I was expecting a successful cut.
*TIP* You usually know if a cut will be successful in the first few minutes of cutting as the bit moves around you should check it is making contact with the board at each point and if the sound changes suddenly something is wrong and the bit may have broken or be cutting too deeply. If you see that the tool is not making contact in all areas you should cancel straight away and work out the problem (board flat? tool tight? tool broken?) and redo the necessary set-up stages.
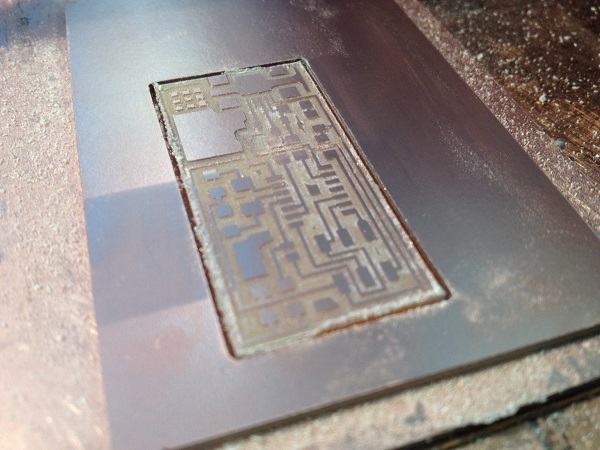
The traces were cut successfully so I loaded the 1/32nd tool and the next png and cut the board out using the same method.
I then used a small metal rule to de-burr the board and washed under the tap using a sponge to clean and get rid of any dust/residue.
Next I used the soldering iron, tweezers and magnifying glass with lamp to stuff the circuit. I used the circuit parts png and picture to reference the look of the boards and the position of the parts.
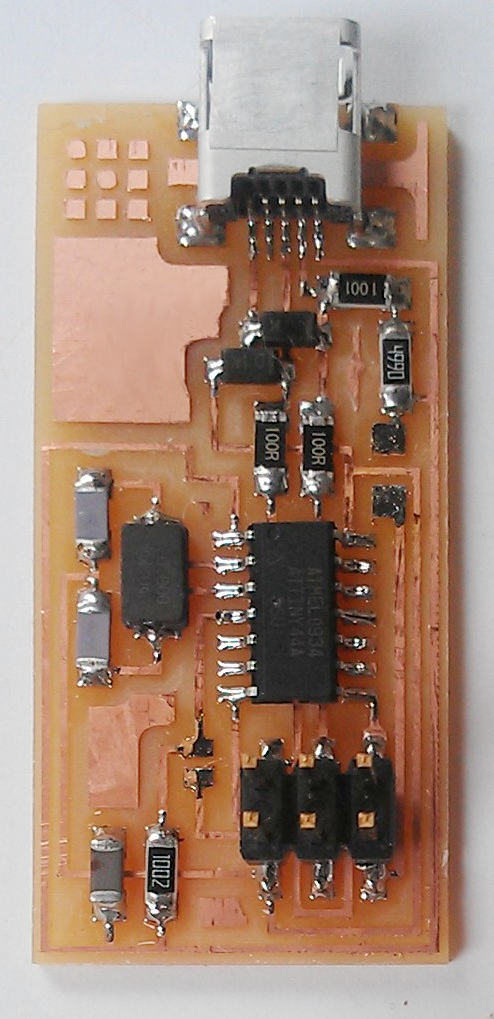
Here is the result
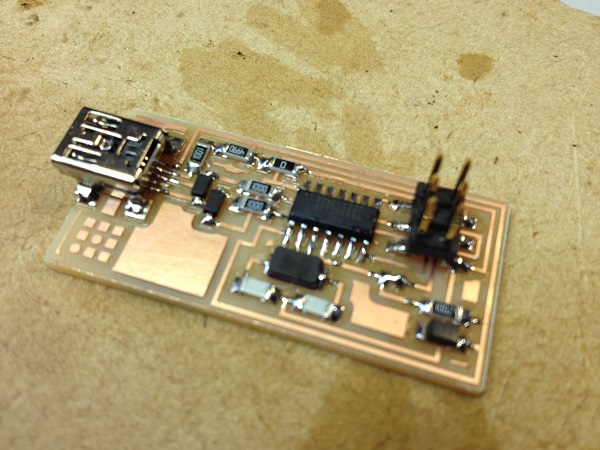
After stuffing the board I followed this tutorial to program the board in ubuntu and now I have a Fab ISP, yippee.