input devices
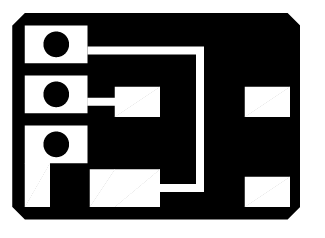
button traces
I made a simple button shield for the 44aRDUINO and used it conjunction with the LED Shield and wrote a switch script with some de-bouncing.
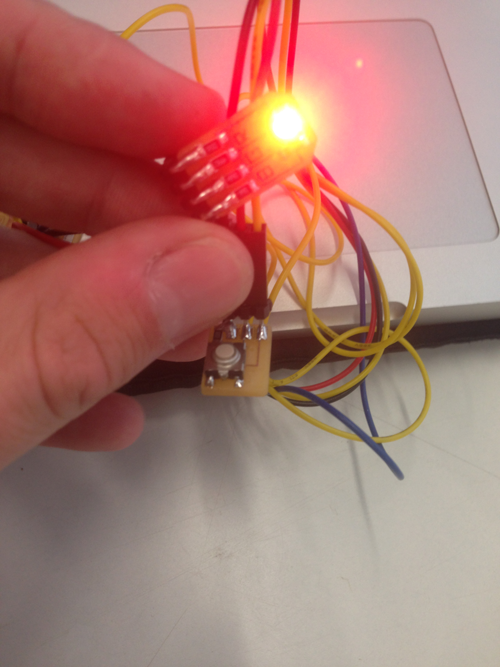
button
/*
Output Devices
FabAcademy 2014
Henry Skupniewicz
-----------------

Simple RGB LED programing using 44aRDUINO and a little RGB LED sheild with debouncing.

connection diagram:

VCC =----=-[RES]-|____
A4  =----=-------|r L |
A3  =----=-------|g E |
A2  =----=-------|b_D_|

A6 ____________
               |
A5 ----------- BUTTON
GND ---\/\/\/__|

*/

#include

SoftwareSerial mySerial(0, 1); // RX, TX

// Set pins
const int R = 4;
const int G = 3;
const int B = 2;
const int button = 5;
const int pwr = 6;
// Variables
int ledState = HIGH;
int buttonState;
int lastButtonState = LOW;

long lastDebounceTime = 0;
long debounceDelay = 50;


void setup() {
  // Set pins to output
  pinMode(R, OUTPUT);
  pinMode(G, OUTPUT);
  pinMode(B, OUTPUT);
  // 'pwr' will power button; 'button' will read and communicate with board (other pin to 'GND' pin)
  pinMode(button, INPUT);
  pinMode(pwr, OUTPUT);

  // Start will all LED pins HIGH :: LED==off
  digitalWrite(R, ledState);
  digitalWrite(G, HIGH);
  digitalWrite(B, HIGH);

  // Set 'pwr' pin to HIGH to power button
  digitalWrite(pwr, HIGH);
  mySerial.begin(9600);
}

void loop(){
  int reading = digitalRead(button);
  if (reading != lastButtonState) {
    lastDebounceTime = millis();
  }
  if ((millis() - lastDebounceTime) > debounceDelay) {
    if (reading != buttonState) {
      buttonState = reading;
      if (buttonState == HIGH) {
        ledState = !ledState;
      }
    }
  }
  digitalWrite(R, ledState);
  lastButtonState = reading;
}