EMBEDDED PROGRAMMING
Goals:
The Goal of this week is to read the datasheet of Atmel ATtiny44A and program the hello-echo-board we made a couple of weeks ago to do something in as many programming languages as we can.
Using Arduino IDE:
First of all, I use a tutorial from the High-Low Tech research group at MIT Media Lab, with it, I will be able to use the Arduino software to program the ATtiny. With this I can use the Arduino SW and I can read the the ATtiny specifications from a library.
Before programming you have to think that the pinouts of the microcontroller are not the same numbers in the Arduino code than in the ATtiny. See below.

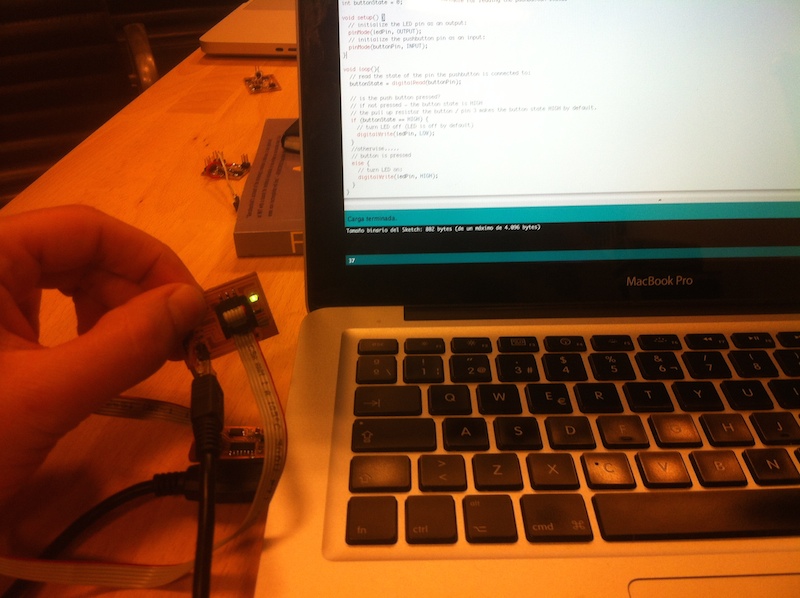
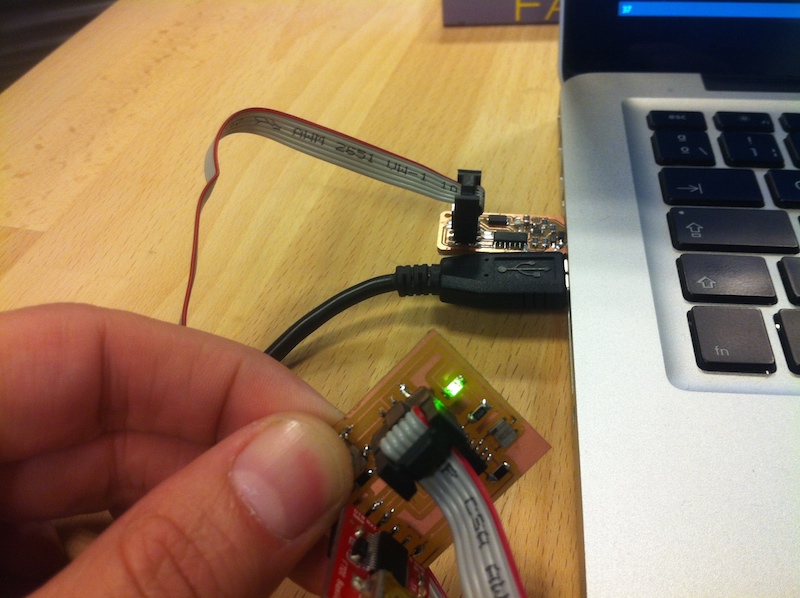
Once we have installed the ATtiny and the Arduino program we can porwer and connect the boards with the FTDI cable; in this case: the Hello board with 1 led and 1 button and the FabISP. We configure the ATtiny to run at 20 MHz.
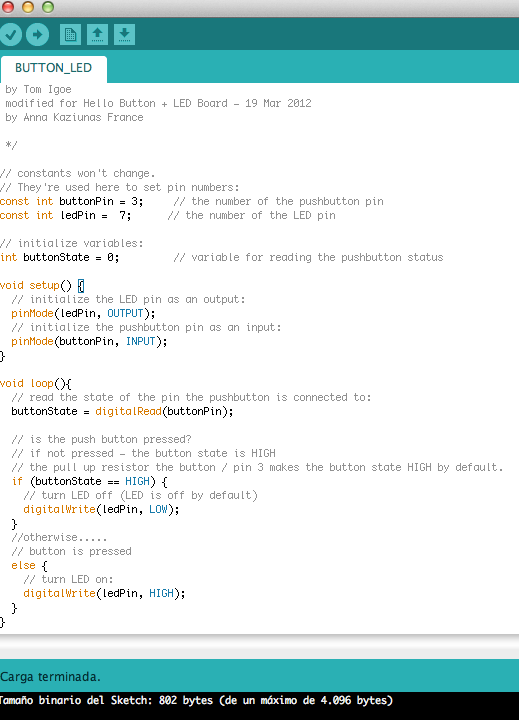
To start understand the process of programming through Arduino, I am playing around with the functions within the program. Due to this you can alter the program so that when you press the button the led blinks, for example I use this code from Anna Kaziunas:
// constants won't change.
// They're used here to set pin numbers:
const int buttonPin = 3; // the number of the pushbutton pin
const int ledPin = 7; // the number of the LED pin
// initialize variables:
int buttonState = 0; // variable for reading the pushbutton status
void setup() {
// initialize the LED pin as an output:
pinMode(ledPin, OUTPUT);
// initialize the pushbutton pin as an input:
pinMode(buttonPin, INPUT);
}
void loop(){
// read the state of the pin the pushbutton is connected to:
buttonState = digitalRead(buttonPin);
// is the push button pressed?
// if not pressed - the button state is HIGH
// the pull up resistor the button / pin 3 makes the button state HIGH by default.
if (buttonState == HIGH) {
// turn LED off (LED is off by default)
digitalWrite(ledPin, LOW);
}
//otherwise.....
// button is pressed
else {
// turn LED on:
digitalWrite(ledPin, HIGH);
}
}
Conclusion:
Arduino is convenient, once you have it set up correctly and you program it, you can easily upload functions to any board. The Arduino sketch will give you a clear description of any errors in the program making troubleshooting and debugging.
You can download all the files related to this week here.