3D SCANNING AND PRINTING
Goals:
Design and 3D print an object (small, few cm) that could not be made subtractively
- 3D scan an object
- extra credit: print the object you scanned
- extra credit: make the scanner
At the Lab:
We start the assignment by installing Skanect programme in our computer. We all feel a little bit “crazy” because we have one kinnect equipment and we want to use it...a lot. Excitement is in the air the minutes before we scan; everyone wants to be scanned and there is no time to loose, it has to be done now. More excitement.
Well, after downloading it in several computers we need special graphic hardware requieremnts so we try to find one of our computers that can accept the Skanect.
My computer has a graphic driver GeForce 320M 256 MB and Skanect accepts only higher capacity. So the program is not working in my laptop.
We finally try it with the computer we have in the lab and the kinetic is finally well connected. Once it is connected we try to scan our classmate Carlos Sanchez and we realize something that we knew it was was going to happen: the kinetic is pretty slow.

Later on we use another computer from a classmate who runs windows 8 and has better graphic hardware and things are different: the kinetic works faster and smoother. We are able to scan our lab friend and the result is pretty amazing.

So first conclusion for the moment is: hardware requirements for scanning are a must in order to work well; make sure your computer has a powerful graphic machine.
3D Printing:
I'm going to use the 3D printer Ultimaker II that uses PLA material. I'm thinking what to design and I realize that next day after tomorrow is my cousin's birthday so I think in something he would like.
I know he likes writing graffiti and painting a lot so I will make a piece with his name and I will extrude it in order to use it as a pencil holder.
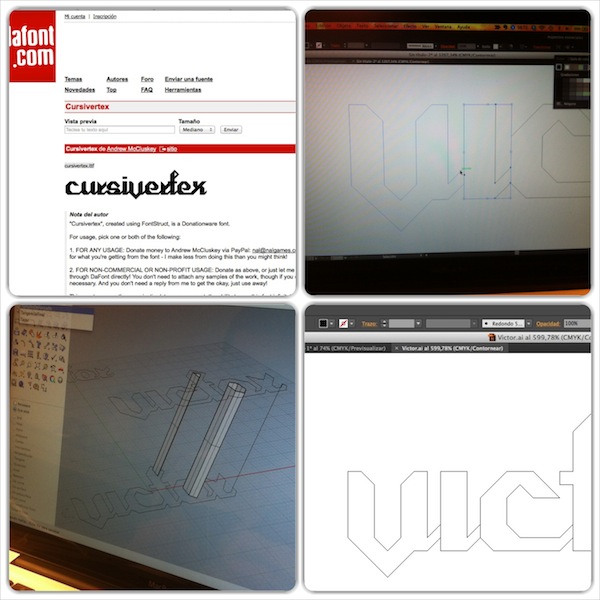
So I find a free font and I export it to Adobe Illustrator to vectorize it, then I cut some edges and later on I export it to Rhino.
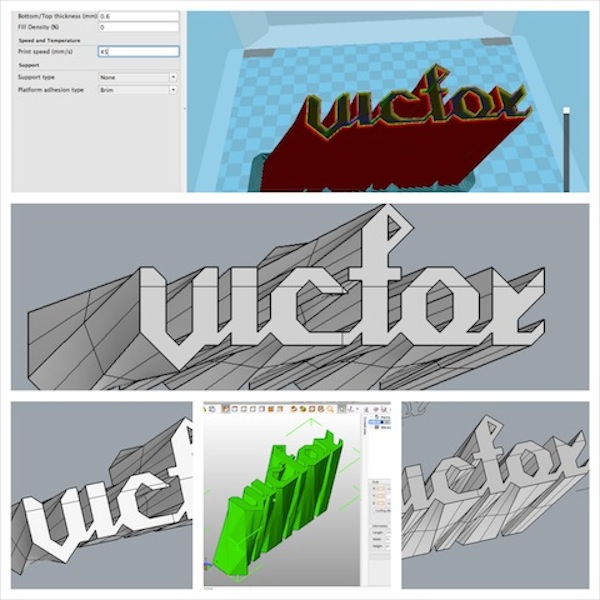
In Rhino I work with the fonts in order to extrude the letters. After that I send the file to Netfabb Basic so I can test that the file is not damage and there are not any mistakes.
Once I have my file clean I use Cura which is the software that uses the Ultimaker II to print files. These are the basic setting I use:
- Layer height (mm): 0,2
- Shell thickness (mm): 0,8
- Bottom/Top thickness (mm): 0,6
- Print Speed (mm/s): 45
- Platform adhesion type: Brim
- Printing time estimation is 4 hours 23 minutes.
I send the file to an SD card and then bring it to the Ultimaker II. After few hours of printing the result is the following:

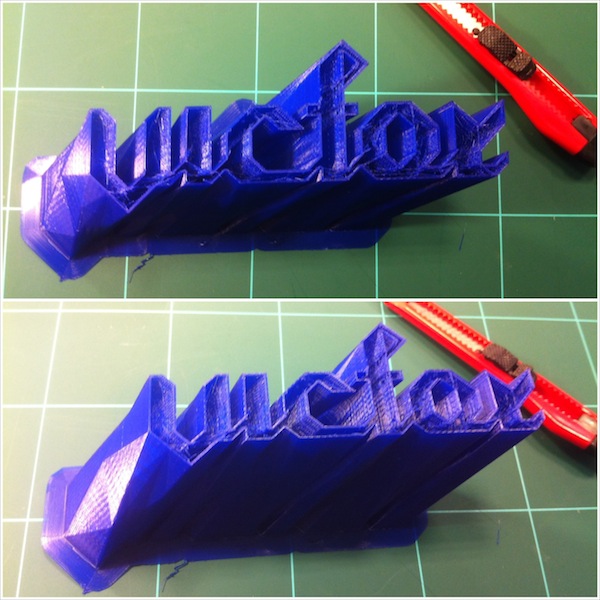
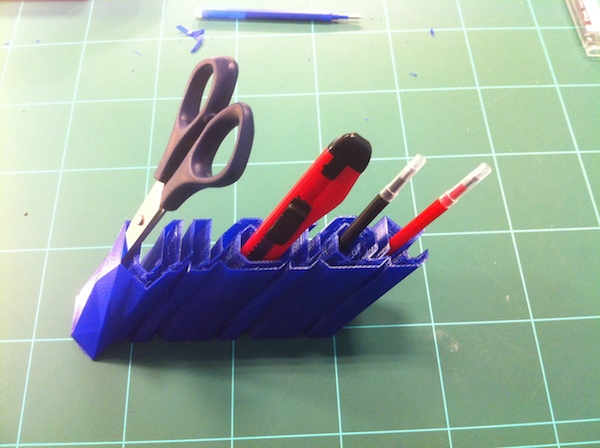
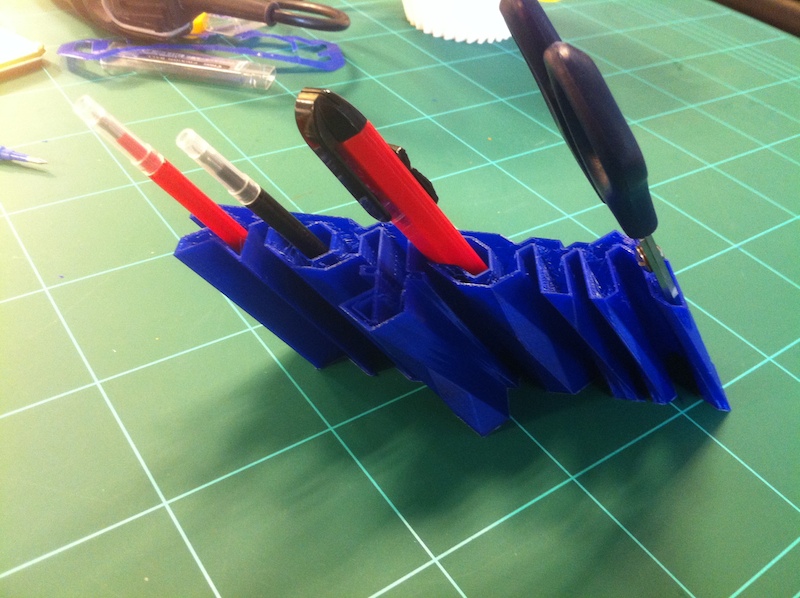
I use the blade to clean the inside of the pencil holder and and I test that you can easily insert any pencil, scissors, or any drawing tool for painting.
The next thing I have to do, and the easiest one is to give the present to my little cousin. I can assure you that he liked it a lot. We already have some plans in mind to make his graffiti arts in 3D... To be continued.
Conclusion of what I learned:
Andrew Leek gave us a master class in 3D printing and Ultimaker II. We got very useful tips to 3D print in the correct way.
The second thing that I learned is that after seeing printing many times and after printing many objects I can say that this technology is still in an early stage. People think 3D printers like if the future has come already, but I think 3D printers will have to develop very fast in the next time They have to improve a lot in order to increase their reliability and their accuracy. But at least we are in the correct way to do that. After that moment 3D printing will become a step forward for digital fabrication.
You can download all the files related to this week here.