COMPUTER CONTROLLED CUTTING
Goals:
The assignment of this week is about designing, making and document a press-fit construction kit.
At the Lab:
One of the difficult parts for this assignment was to chose a design for making the kit. After speaking and discussing with the colleagues in the Beach Lab and seeing different “marketplaces” for CAD; we agree to choose one of the designs from Autodesk 123dapp.com; Its marketplace for the designs is wide. So we all are using the 123D Make software that Neil showed us the week before.
From the very beginning we realize that the software works pretty good for rendering 3D models. It has some functionalities that able you to choose different “Construction techniques” so you can re-design easily the model that you like.
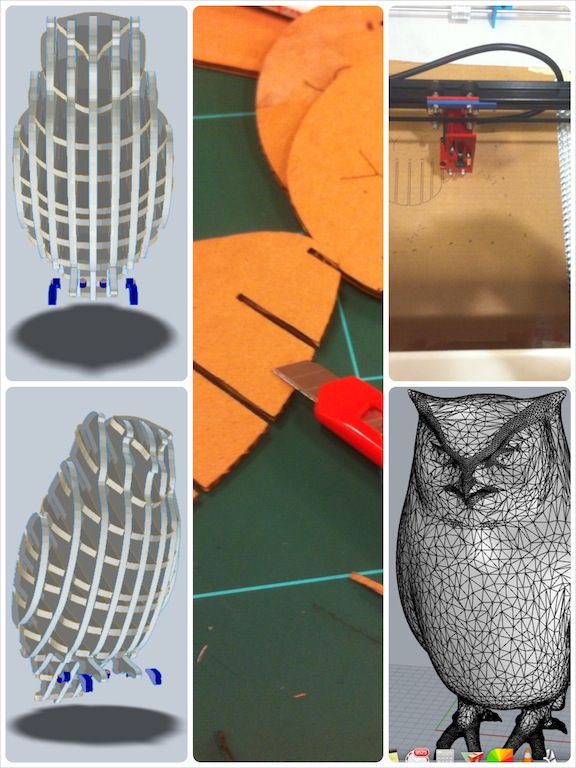
After working for a while with the software and checking some designs I have decided to make a press-fit construction owl. Just because I like owls. First of all I have used Rhino in order to see the details of the owl.
After that I open it with 123D Make and “slice” into different parts; and this is the result that I have:
I change a bit the thickness of the card board and write it at 2,4 mm because I'm going to use a thin cardboard. I save all the parts of the owl in Adobe Illustrator; All the pieces can fit in 2 cardboards. I measure that all parts fits in there.
Then I use the software retinaengrave to use our Laser Cutter, the Full Spectrum. I chose a grabbing speed of 15 and a cutting speed of 85.
After testing all the parameters are OK I calibrate the laser lens. It works.
Before starting cutting I check that the laser is going to cut in the correct perimeter and then I finally push PLAY (And I attached myself to the laser cutting).
The cutting has been 95% correct. There is one part of the cardboard that didn't cut properly.
This might be possible because the cardboard is not perfectly flat to the base or because the Laser Cutting is not plane either. So I choose to attached a piece of tape to the base so the cardboard is flatter.
Once I have done this the laser cuts perfectly.
Now it's time to assemble the pieces and press-fit the owl. The first thing I'm realizing is that pressing the pieces is not as easy as I thought in the beginning and doing it t's becoming very difficult. I think I didn't give enough space to the tabs. I try my best to fit them and after a while this is the result:
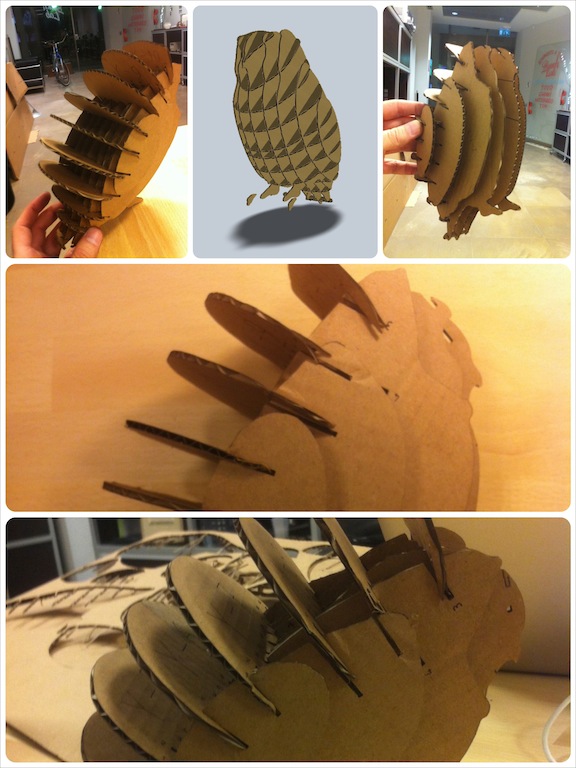
Seems like my owl has turned into a hedgehog. Not all the parts fit perfectly well to each other. So I decided to change the thickness of the pieces to 2,5mm.
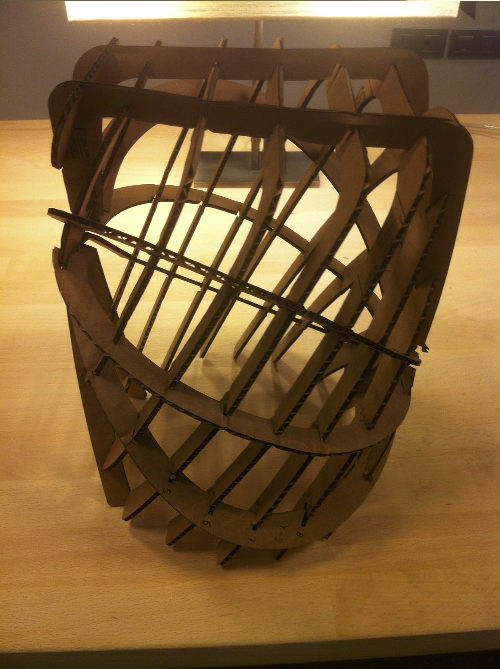
I'm also changing the design and I will try a Lamp that I also found in 123app.
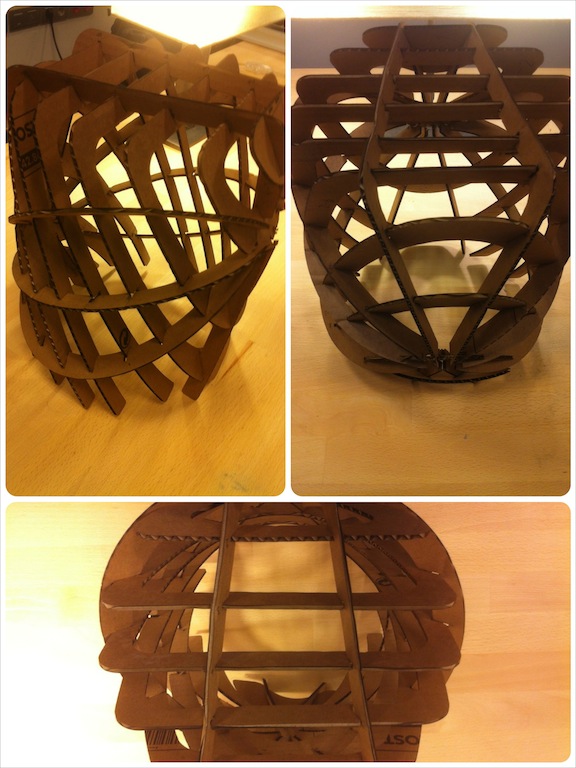
I change the cutting speed to 87 and I increment the thickness to 2,7mm. The cardboard fits better one to each other and the whole object is more stable, so I think it is a good decision to change the parameters.
And this is the result that I get:

Conclusion:
I realize that laser cutting is fast. But is not as fast as all the previous process you need to do before. It's specially difficult to know perfectly the parameters that you need to command to the laser cut in order to have a good work. I think is very important to try different parameters earlier and make some tests before you want to make the final piece. Calibrating is crucial. The previous work is as important as having a good design or having a good laser cutting machine.
You can download all the files related to this week here.