José J. Lazarte R.
redraw the echo hello-world board,
add (at least) a button and LED (with current-limiting resistor)
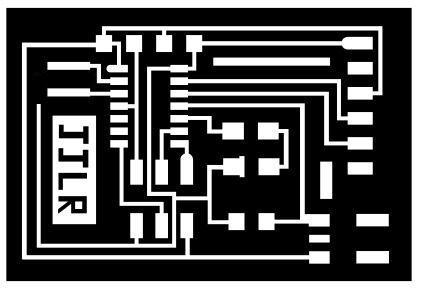
Scheme
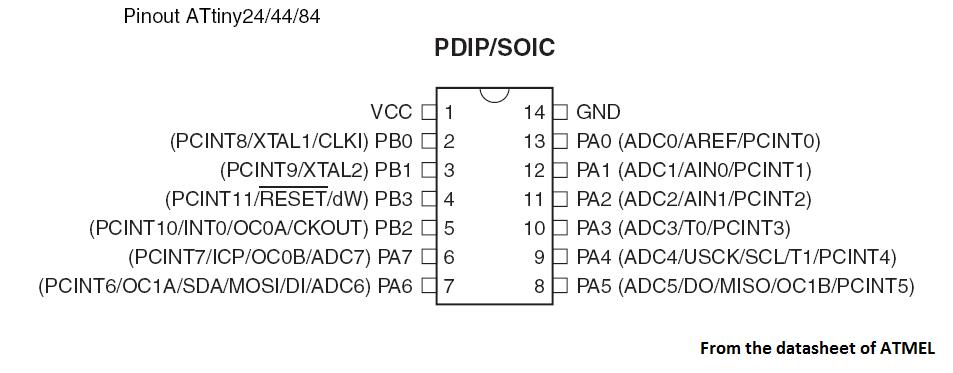
of tracks to add an LED and a button was modified. considering the
description of pin ATiny44. According to the description shown in the
figure, we decided to use the terminals 11 and 10, which correspond to
pins 2 and 3 respectively.
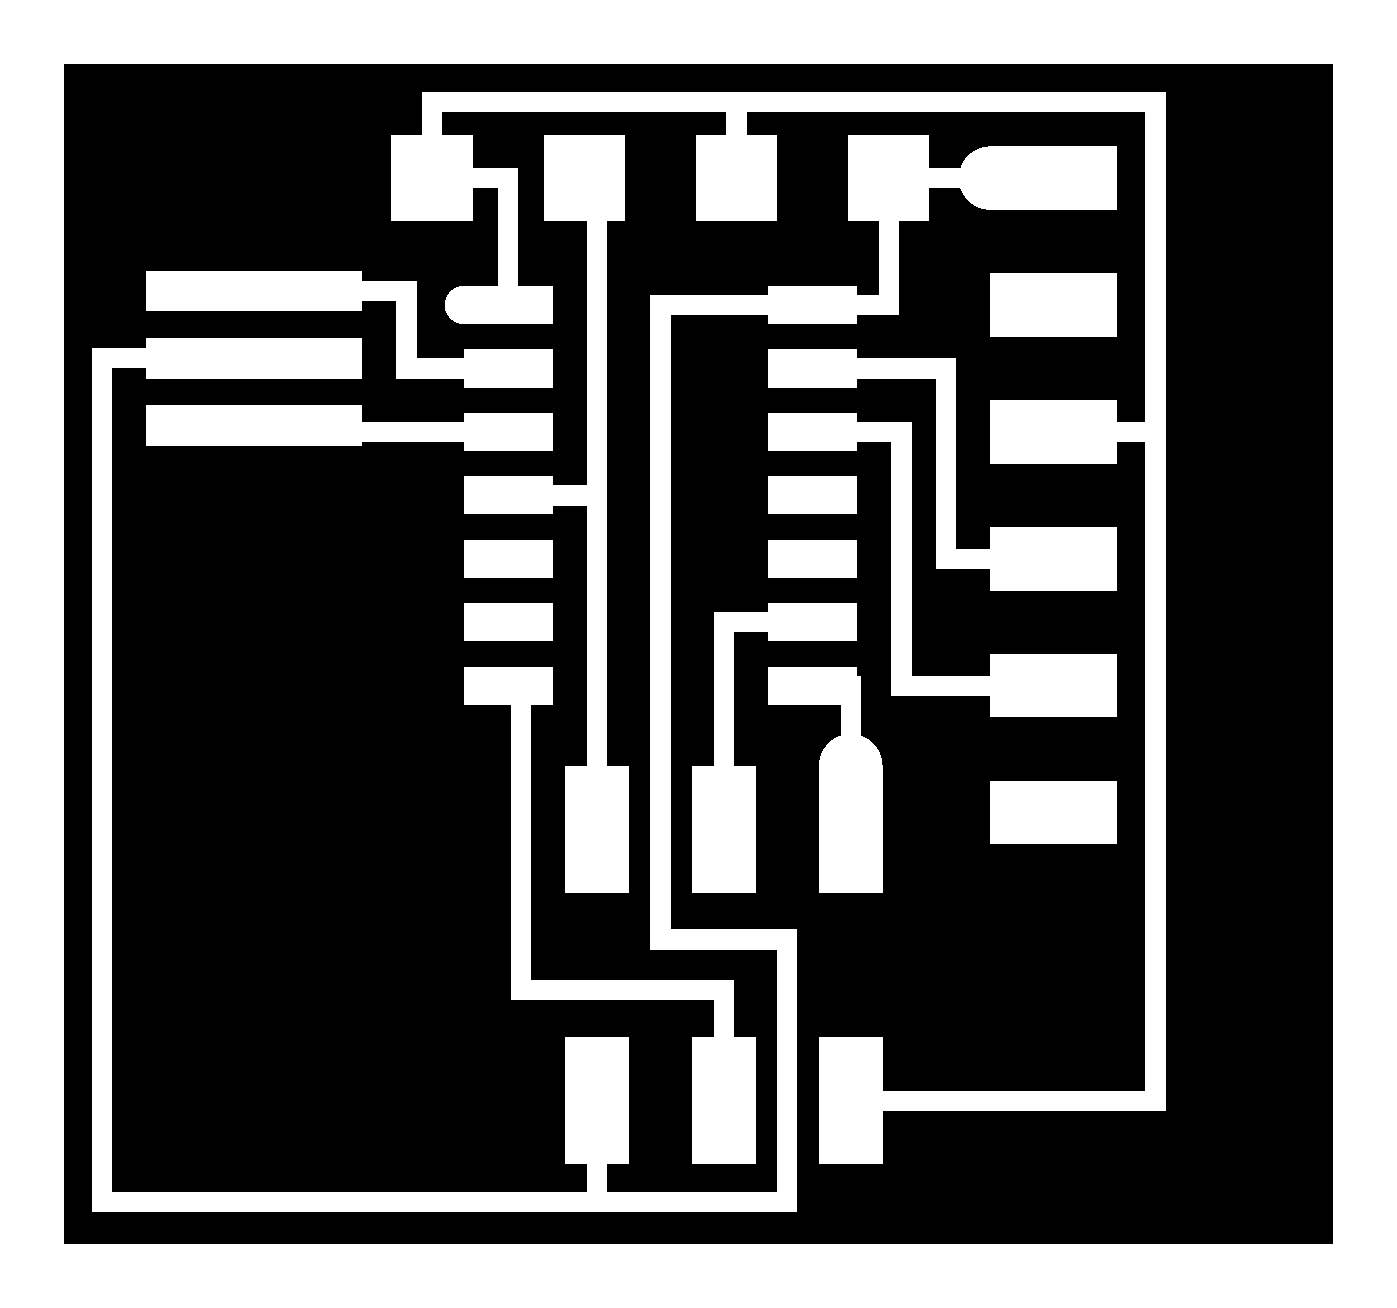
The images of the initial and the modified scheme below in which I added two resistors, an LED and Button.
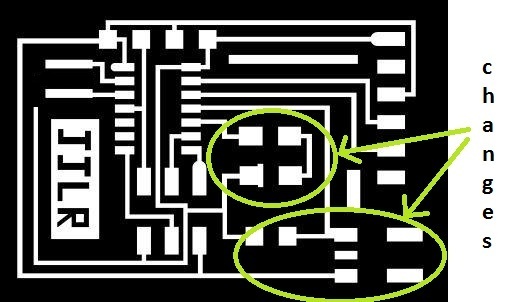
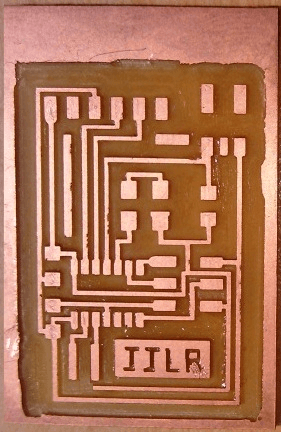
With the file in png format proceed to drill the hole of the tracks on the card. Obtaining the result shown. imperfections
are observed at the edges but the routing went very well. With the
experience gained in the assigment 4, the assembly of the card was
made.
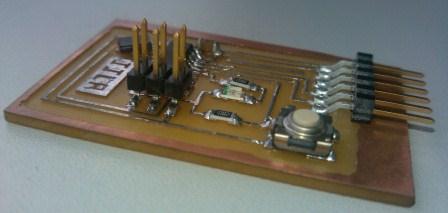
Where we can see the button, the LED and current limiting resistors.
Check the design rules, and make it
The design rules are based componetes Additional characteristics to consider voltage and current limits.
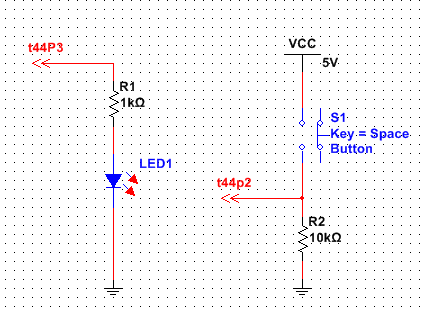
Whereas the level of supply voltage is 5 volts. for the case of the diode led.
Agree
to the datasheet it has a LED test current of 10mA. In our case
to reduce the power consumption in the device I considered
that the main current for the diode is 5mA.
Using Kirchoff's laws we can calculate the value of resistance needed to obtain the required current in the LED.
V= IxR => R= V/I : R = 5v/5mA = 1KOhm
An for the button i used a pull down resitor. Both connections are shown in the following image.
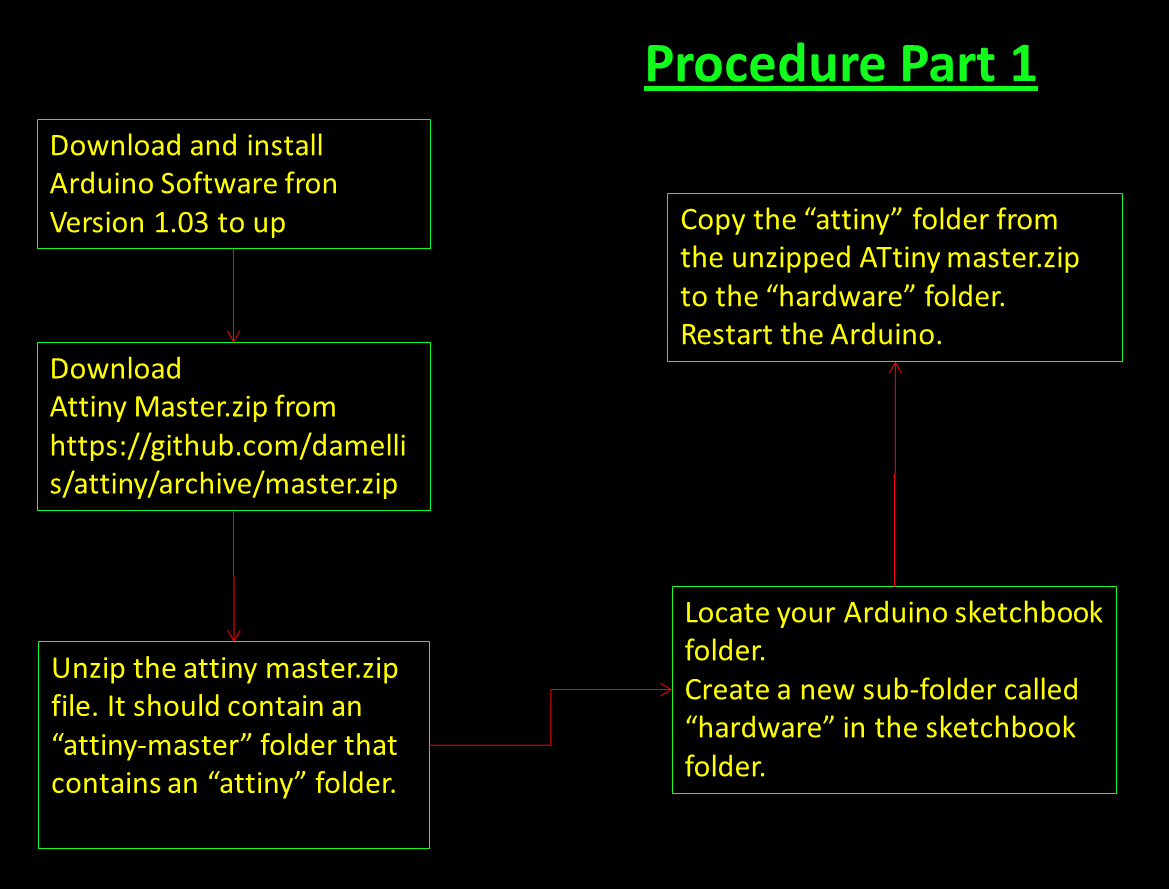
To check the funcionality of the implemented circuit, Reviewing referecias given for this assignment I found the following precedure:
For
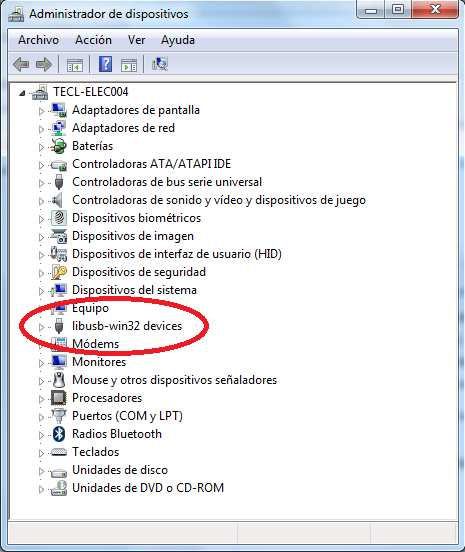
me to program the ATtiny44 on a windows environment use the
USBcard built in assigment 4 and the appropriate drivers.
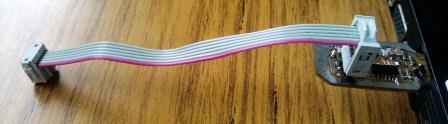
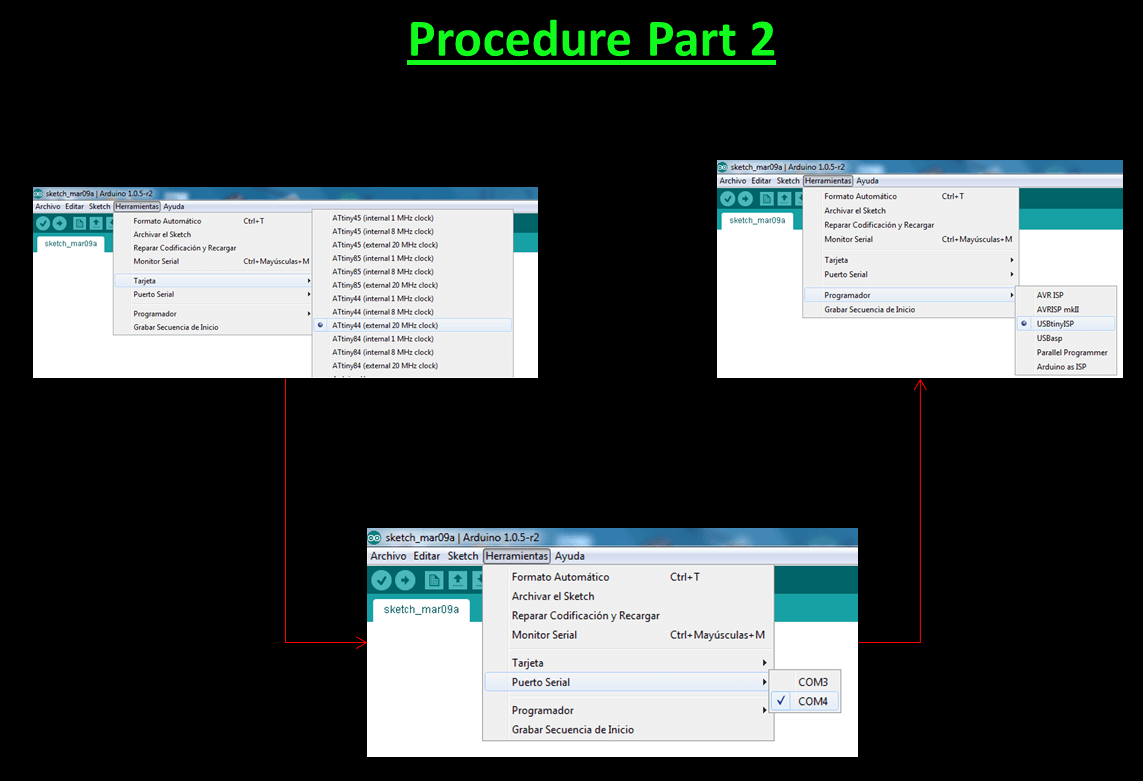
We loaded the Arduino program and he configured the Card used, the port and programmer type.
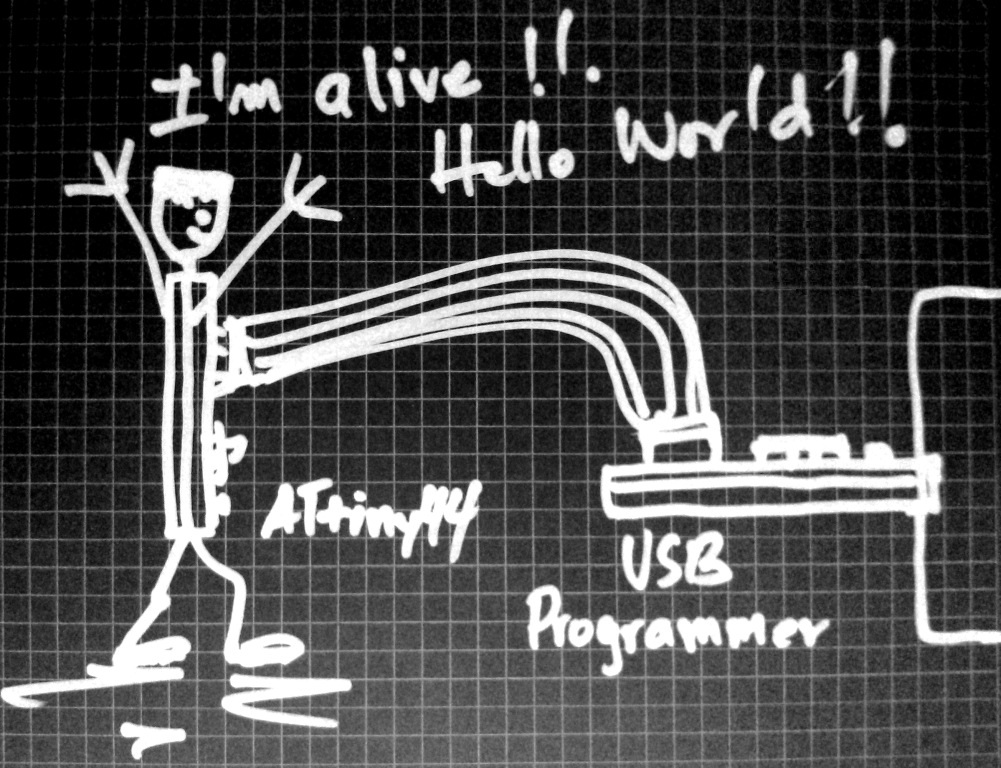
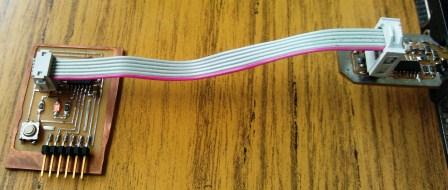
The following figure shows how to connect the programmer to the ATtiny44 card.
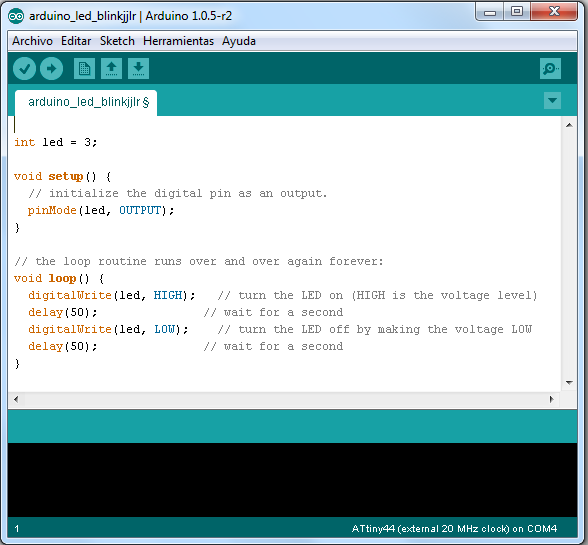
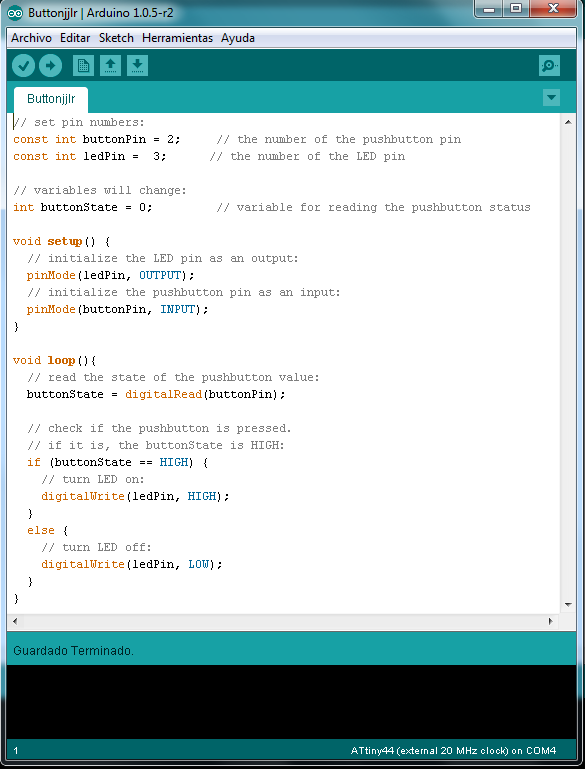
The
programs used to test the card is obtained from those who are in the
examples in the Arduino program, modifying the terminals used to
interact with the LED and button using the ATtiny44. Below is the code
of the demo programs and video shows.
http://stackoverflow.com/questions/8491111/pyserial-for-python-2-7-2http://stackoverflow.com/questions/8491111/pyserial-for-python-2-7-2http://stackoverflow.com/questions/8491111/pyserial-for-python-2-7-2http://stackoverflow.com/questions/8491111/pyserial-for-python-2-7-2http://stackoverflow.com/questions/8491111/pyserial-for-python-2-7-2http://stackoverflow.com/questions/8491111/pyserial-for-python-2-7-2http://stackoverflow.com/questions/8491111/pyserial-for-python-2-7-2http://stackoverflow.com/questions/8491111/pyserial-for-python-2-7-2http://stackoverflow.com/questions/8491111/pyserial-for-python-2-7-2http://stackoverflow.com/questions/8491111/pyserial-for-python-2-7-2http://stackoverflow.com/questions/8491111/pyserial-for-python-2-7-2