This week's summary
This week's exercise was to design and build a mold
and then use the mold to make a final product. My project is based
on the college logo and the goal is to make small chocolate bars
in the shape of the logo.
Tools and References
Inkscape was the primary tool used for the design.
VCarve Pro Trial Edition 7.0 was used to simulate the design.
Design Notes
A .png file of the official logo was imported
into Inkscape.
The image was scaled to ensure that a 1/32 inch bit would fit
through the smallest element of the design (the diagonal line).
The file was saved as a .pdf and opened up in VCarve Pro at the
Shopbot.
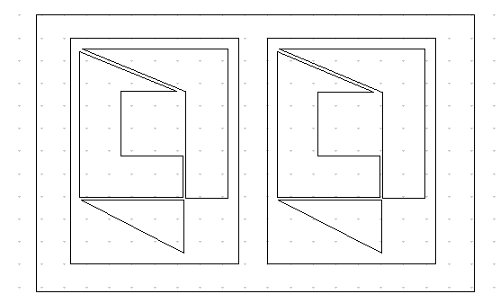
Logo design view from VCarve pro
Design Simulation
The original plan was to use the Modela milling
machine, but we migrated to the Shopbot since the Modela was
occupied.
VCarve Pro Trial Edition 7.0 is an excellent tool to simulate the
design.
Several iterations were required to get a good bitmap image. It is
important to get a source file with the image. Much time was
wasted with poor quality images.
Mold Tool Fabrication Notes
The mold tool was fabricated using the Shopbot
milling machine.
The material was 6 x 3.5 x 1.25 inch machineable wax.
The material was secured in position using double sided tape on
the base and hot glue around the edges.
The material was cut using 4 separate pockets (waste material was
removed and recycled after each profile cut):
- Pocket 1 was 0.25 inch deep with a 1/8 inch end mill and
reflected the top edge of the letters in the logo.
- Pocket 2 was a further 0.15 inches deep with a 1/8 inch end mill and routed the
letters on the logo (see picture).
- Pocket 3 was a further 0.15 inches deep with a 1/8 inch end mill and
routed the base.
-
Pocket 4 was a finishing cut with a 1/32 inch end mill and finished
the entire profile.
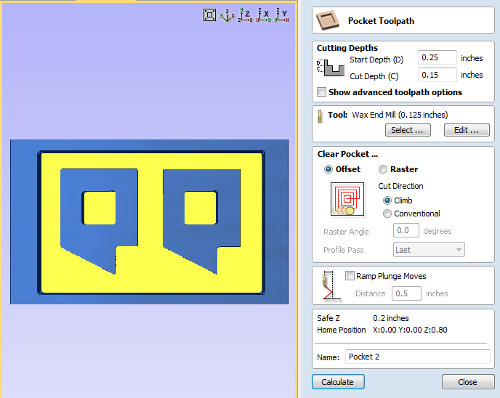
Pocket 2 simulated on Vcarve Pro
The Outcome
The job ran well and the outcome was very good.
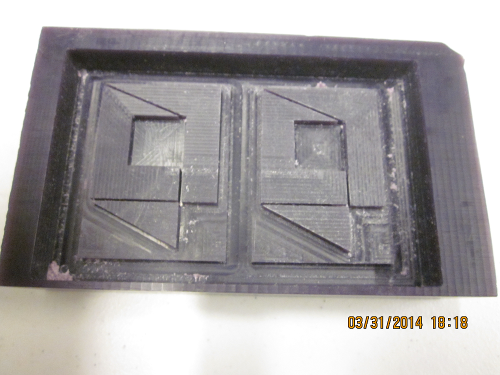
Mold Tool after Shopbot
Building the Mold
The material used was Smooth On SmoothSil 940 food
safe silicone rubber.
This is a 2 part mix, 90%/10% by weight.
The directions recommend 3 minutes mix, we mixed for approximately
10 minutes to get the mix correct.
The mixing process was quite difficult and took a lot of effort
with a wooden tongue depressor.
The pour was done slowly due to the high viscosity of the mix.
The pour was done in one corner location and the material slowly
moved across the mold.
Some material flowed over the edge, this was a significant benefit
to provide a grip for demolding.
The tool and material was heated for 3 hours at 200 degrees F. It
was then left overnight (for convenience).
The demolding was extremely easy and was completed in 30
seconds. The result was excellent.
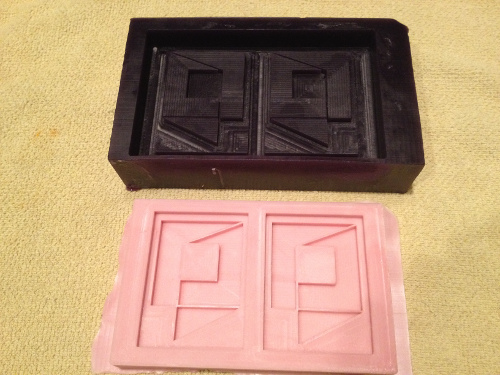
Tool and Mold after demolding
Molding the Chocolate
The chocolate needs to be "double boiled" for
melting. I used a coffee cup inside a pot of heating water.
Gentle heat should be applied to melt the chocolate, and frequent
stirring is required.
I tried a number of pour methods. I tried a syringe but the
viscosity of the chocolate does not allow that to work well.
The best method was simply to gravity pour from a spoon.
The corners are difficult. I used a wooden toothpick to "help" the
chocolate run into the corners.
I did not use a release aid but I will try more attempts with
Lecithin liquid.
I also intend to try different types of chocolate.
There is no process waste since I have 3 kids who are readily
available to consume material!
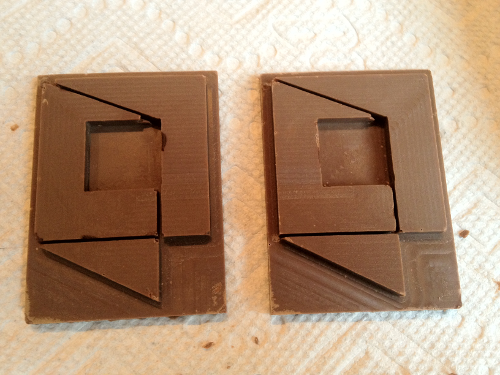
Chocolate bars from mold (further experimentation
planned to improve finish).