Week 4: Electronics Production
On this week's assignment we were challenged to create our first FabISP and program it afterwards. The process of fabrication of this programmer was, in my opinion, and excellent experience. I had never soldered any electronic components in my life and I just loved it. The programming part was more difficult because I was not getting it right the first time, but after a good night sleep I tried a second time and I was successful.
Below there is a full explanation o how I made my FabISP and programmed it.
Mill It!
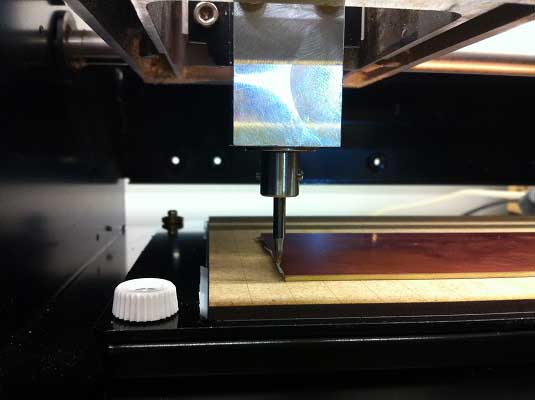
The first part of this assignment was to mill the traces for our board on the Modela using the Fab Modules.
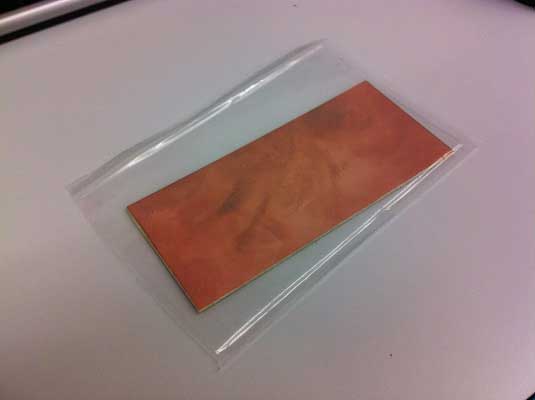
This is the copper sheet used to fabricate the board.
First of all, we need to make sure that our sheet is not skewed so with our sheet on top of a planar surface, press each corner to check if your sheet is right or not. It it ain't, just bend your sheet carefully until it is right with your surface.
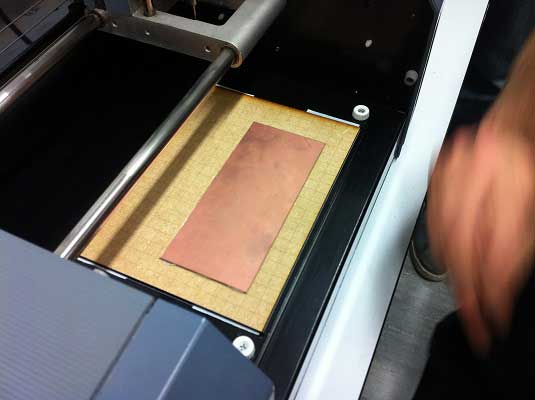
On the next step, we glued our copper to the Modela base layer. Never forget to make a perfect align between the base layer and your sheet. There is a grid on the base layer that will help you with this alignment. It is extremely important to align your board perfectly with the base layer, otherwise the calibration of your point zero to mill a perfect trace will be inaccurate.
After gluing your board to the table, make sure to define point zero for your Modela that will be right on top ot the left low corner of your board. Move your mill in Z axis until the mill slightly touches the board. This is will the perfect height to start milling.
From here you can downlaod the Circuit Board Traces and Board Outline.
Don't forget to: mill using the fab modules. For the circuit board traces use a 1/64'' mill and for the board outline use a 1/32'' mill.
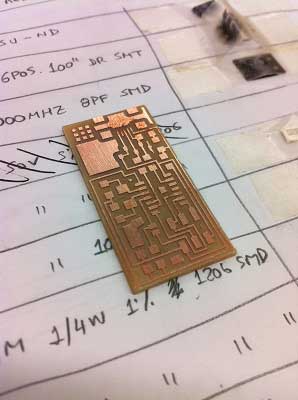
After milling process is complete, you should get something like this:
Stuff it!
Now comes the most interesting part of all and probably the most difficult, for some!
It is time to solder all the components into our board. Don't forget to make a list of all the components you are going to use in order to simplify your work. To help you where all the components should be soldered, there is a labeleb board diagram that you can download here.
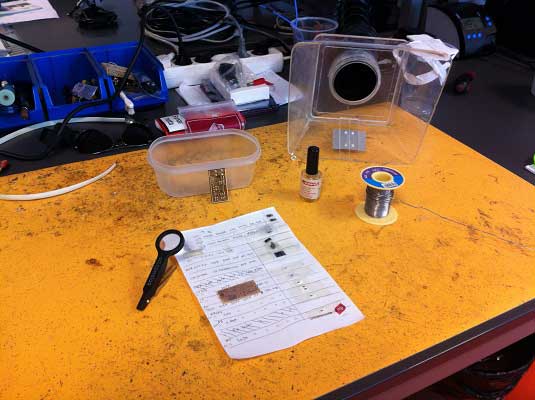
To solder this components into your board, it will be very useful to have the following material: solder wire tin 60% lead 40% with 0.5mm thickness, a soldering iron, flux, ethanol, tweezers and soldering wick.
First step, clean your board with a tissue and some ethanol. This way you will guarantee that your board will be free of any dirt it may possible have. Don't forget to try and not touch the board with your hands because of the oil from them or wash your hands if you want to be able to touch the board.
Second step, after cleaning your board, pass some flux on top of it. The flux is a very good friend of solder wire, because sometimes solder is not that easy to put on the circuit. Maybe the soldering wire it's not hot enough or the point is damaged, but with flux you will be able to easily make your solder stick to the board.
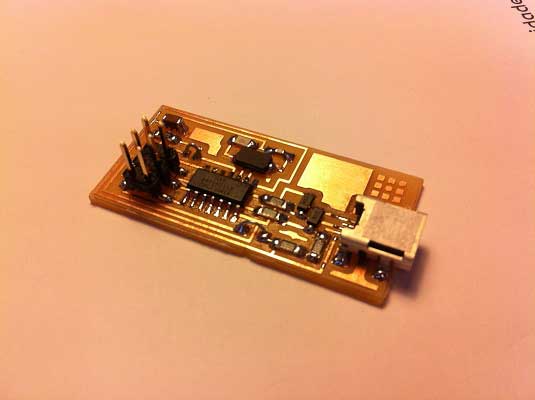
Third step, start soldering components. After you solder all the components needed for the FabISP you will have something like this:
After soldering process is complete, you can make some fixes to get everything smooth and shiny. With some soldering wick, touch the solder joints you think are too big and then pass the solder iron on top of it in order to absorb all the unwanted solder in that joint. To make the solder joints shine just pass some flux on top of them after soldering the component is complete, and touch with the point of your solder iron to "resolder" the joint. This way the solder joint will become shiny because of the flux used in it.
Don't forget to close the jumpers on your board in order to program it on the next phase. It is extremely important you do this and depending on which programmer you are going to use to program your FabISP you can check the documentation needed here.
Program It!
OK, so since I'm a Windows user, I always want to try and do whatever I can on it, but I have to admit that Linux is starting to get on my good side and maybe will become my future OS, especially for this operations, because it's much easier. Besides that, I have to say that learning a new OS appeared to me as something bad, but that is not the case. Electronics Production made me vote for Linux :).
It got me a day to understand how to program my FabISP, but after some research and focus I was able to do it.
I strongly recommend you do this on Linux, because there is far more documentation on it and it is much funnier.
Here you can get all the information needed in order to program you ISP.
After completion of process you should get something like this:
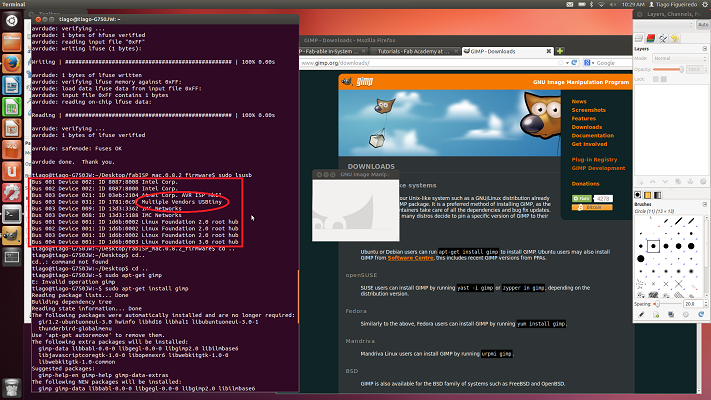
Congratulations! Your FabISP is programmed and recognized as a USB Device in your devide manager panel. Now you can program your future boards from this programmer.
Project's Files
Here are the files for this week assignment:
Under the assignment title you can find every file you need for this project
Thank you for watching!