Week 2: Computer-Aided Design
For this week, the assignment was to model (draw, render, animate, simulate, ...) a possible final project, and post it on our class page.
Since my final project is the based on a jellyfish and the study of its locomotion, I used this week assignment to model a jellyfish in Cinema 4D and animate it to to start analyzing it's way of swimming.
Below will be a complete tutorial on how you can get to model a jellyfish like this one.
Cinema 4D is a commercial software with great features more suited for motion graphics, but you can do anything there if you take the time to learn it. It has an exponential growth environment where easily you can learn new technics and rapidly become a pretty skilled person using it.
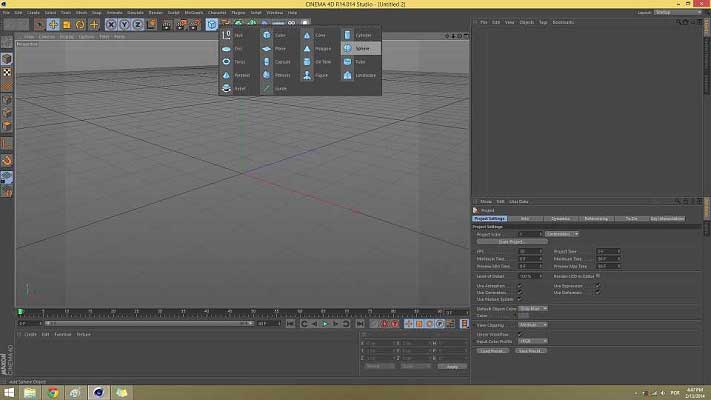
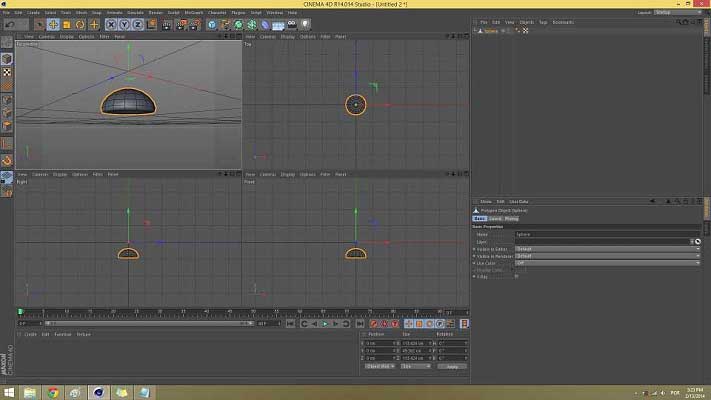
When you open the software a new document is automatically opened so that you can interact with the interface right way. Cinema 4D has six main areas: a top navigation menu, a top and left toolbars, the viewport, the tree and object's properties windows.
The top navigation menu is where you can acess every option on the program. The toolbars are very special partners in an environment like this one, because you can have a really quick acess to the most used features. The object's tree and properties are two important windows, located on the right side of you screen and where you can see the history and hierarchy of your objects and acess every option available for them. Last but not least, the viewport where the show takes place. Everything you build, modify, animate will be seen on this windows.
Now on the top toolbar select the Objects menu (or the cube icon) and under objects select Sphere. On the right hand corner of your screen, under object properties, change the value of segments to 16.
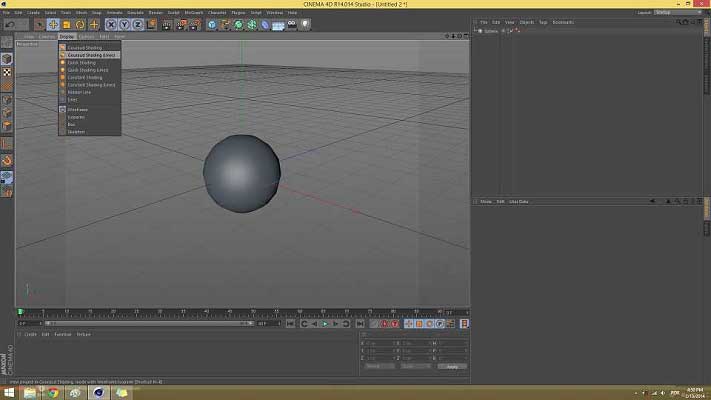
In order to see the object's segments that where set on the last step, go to the viewport menu and under Display choose Gourad Shading (Lines). This way you will make the object's composing lines visible.
Now on your top toolbar go to the deformer menu (the little blue bended parallelepiped) and choose the Spherify deformer. Click and drag it inside your object, the Sphere. In Cinema 4D, the correct way to make a deformer affect an object is to drag it inside it, no the other way around, always remember that!
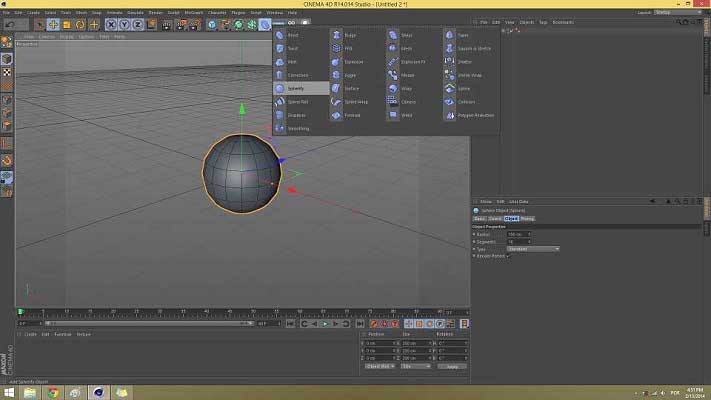
Go to the Deformer menu on the toolbar and select Spherify. Click on the deformer and drag it inside your object. In Cinema 4D, the correct way to make a deformer affect the object it is to drag it inside the object, no the other way around. You'll notice that some purple lines defining the deformer appeared on screen. The centre of the deformer will be the center of the effect taken so you can move it where you want in order to get the result you want.
On the deformer properties window, change the radius to 75 cm and set the strenght to 80%. We are going to work a smaller shape to make it easier.
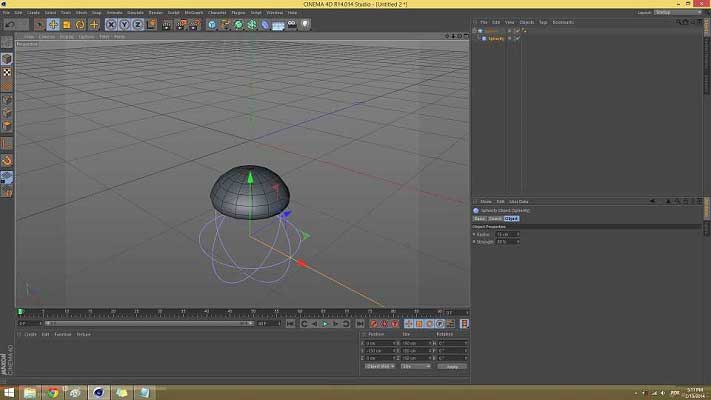
Move the deformer down by 150 cm to get where we want. If you rotate your viewport and look right under your object you'll notice that now it is convex because of the deformer movement you just applied.
Now we want to turn our object into an editable object. Go to your object's tree and right click your sphere and select Current State to Object. A new object appeared with the same name of the previous one but if you look carefully you can see a different icon before the object. This icon means that your object is now editable in a way you can edit its vertices, edges and faces.
Delete the previous object with the deformer inside. Since you transformed your current state to an object and no longer require to change the deformer properties because you got to the shape we want in this tutorial, you can delete the previous one and leave the new one be. The information you edited until now is no longer available, but that is not relevant to outcome we want.
Click on the top right corner of your viewport to see the four viewports. Now click on the top right corner of the Front viewport to make it visible.
On the left toolbar of your screen select Enable Axis. This option enables you to move the axis' origin of your object in order to align with whatever you want. In this case you want to move it closer to the object's center. When you used the Spherify deformer a while back, your object's axis was moved along with it and now you're just fixing that.
Deselect the Enable Axis tool and drag your object 70 cm up to align it to ground (X and Y axis of your viewport)
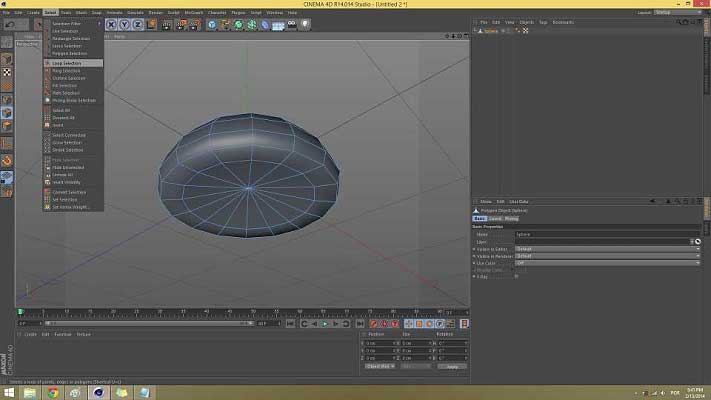
Turn back your viewport into Perspective mode and on the left toolbar select Edges. Now you can edit the object's edges.
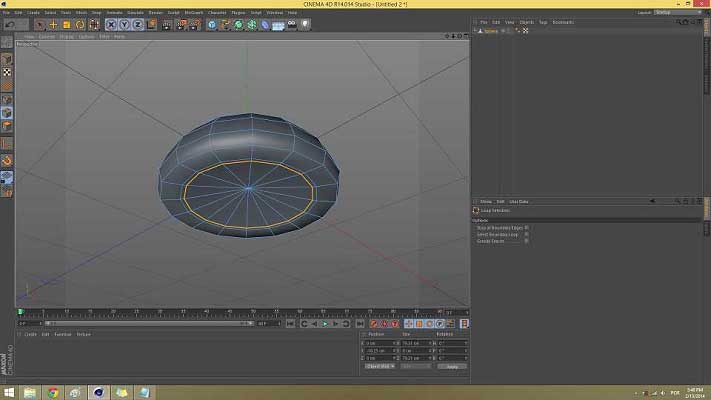
On the top menu bar of your interface go to Select - Loop Selection. Now select the bottom ring of your geometry and right click anywhere on your viewport and select Bevel. Under the object properties give it a value of 1.2 in the Inner Offset propertie.
Make another loop selection choosing the most inner ring of your geometry and scale it down by 40 %. Now with the same selection, move it up just a little bit, like 5 cm or so. This way the head of our jellyfish is starting to get its shape. Make another Bevel to the selected ring and give it a low value of 1.1 cm.
Make another loop selection of the most inner ring this time and scale it down by 5%. Nest move it up by 1.5 cm.
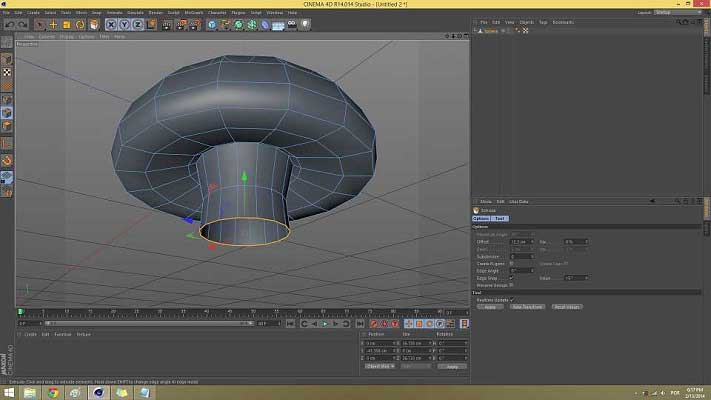
Go to the left toolbar and select Faces. Now select every bottom face of your object and right click on the viewport and choose Extrude. Extrude faces down by 23.9 cm and then scale them down by 12.5%

Go to your Front viewport and scale it down once more about 197 %. After that, under the viewport on the right side, you can see the Position, Size and Rotation tables of the current object. Under Size, zero out the Y row. Now you have the base of your object parallel to the ground.
Move the face up by 6.5 cm.
Extrude the faces down by 13.3 cm and then scale them up by 5% or so. Finally, delete those faces.
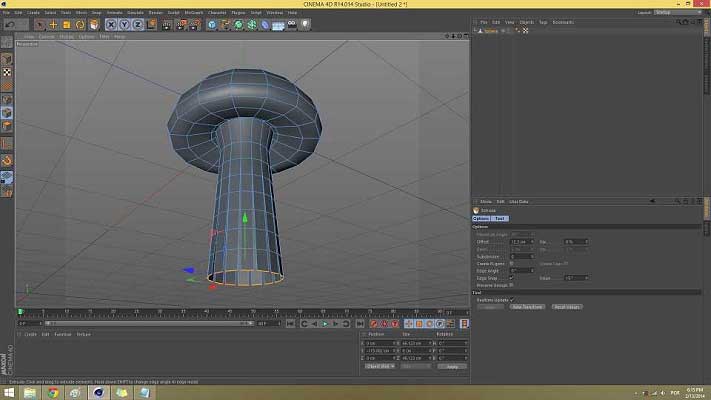
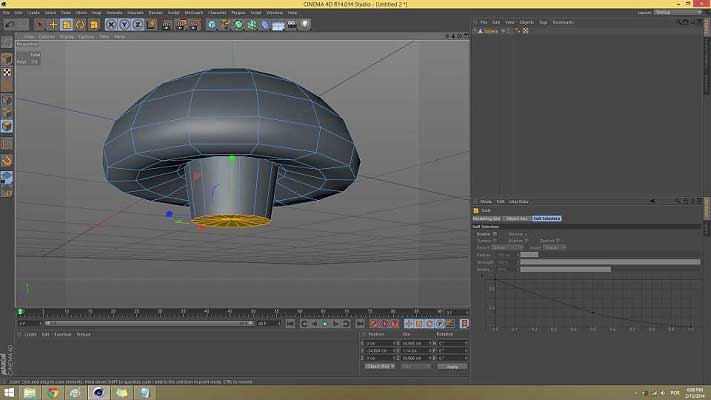
Make a lopp selection of the bottom ring and extrude it without preserving groups. You can uncheck this option on the right side of your screen under the Extrude properties. Extrude down by 12.3 cm. Repeat this process six more times.
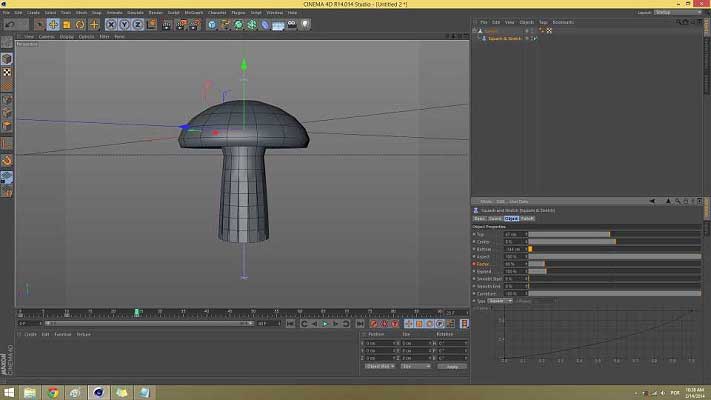
Go to the top toolbar and under under deformers, select Squash and Stretch. Click and drag it inside your object.
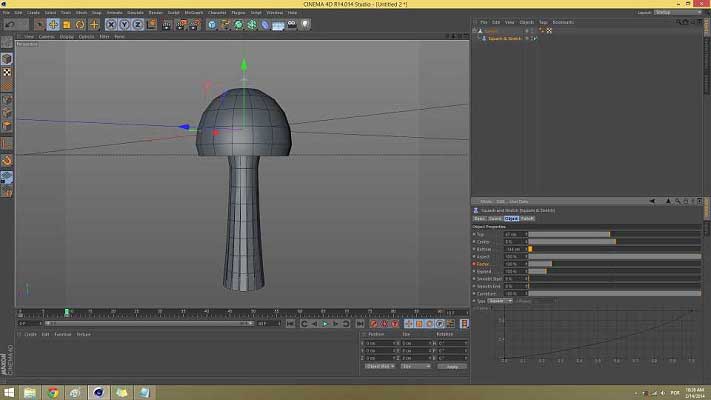
Go to your Front viewport and under Squash and Stretch properties change the Top value to 47 cm and the Bottom to -144 cm.
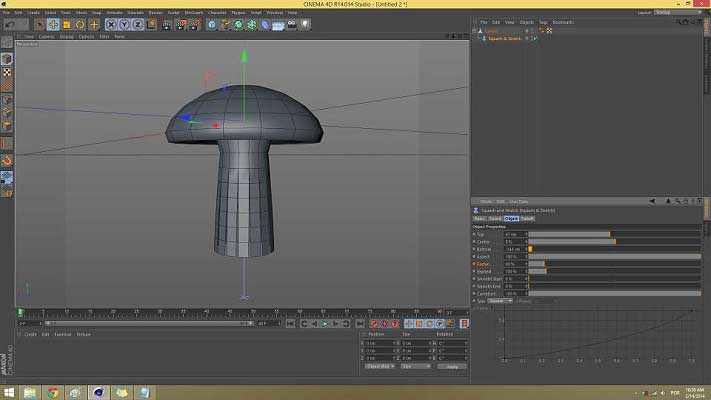
Now we have our final shape. It's time to start the animation.
Go back to Perspective mode and remember to check if your timeline is set to frame 0. Your timeline is just right under your viewport. From there you can set frame and animate your object.
With your timeline set to frame 0, go to Squash and Stretch properties and set the Factor value to 90 %. Aftert that click Ctrl + left click mouse on the little square before the word Factor. If you notice, a keyframe was set to frame 0 of your timeline. Whenever you see one of this squares it meens that you can animate that propertie in your timeline.
Repeat the same process now, but this time set the Factor value to 130%. Remember, first move your timeline into frame 10, then set the Factor value adn to finish click Ctrl + left click mouse to set the keyframe on that specific frame.
Do the same for frame 25 and set the Factor value to 90 % again. After you complete this step press Play on the toolbar to watch the effect you just created. You'll see the object stretching at the beginning and right after that it will start squashing.
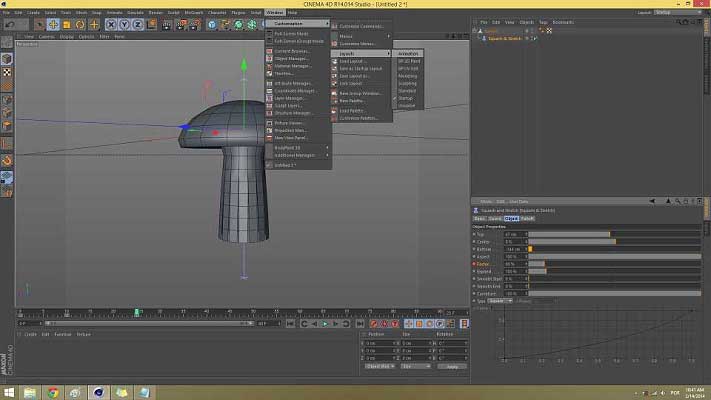
Go to your interface top menu and click on Window - Layout - Animation.
Now you're at the Animation layout of Cinema 4D. On the left lower area of your screen you can see your object's summary. Click on the Squash and Stretch deformer and open to see the properties you animated before. Click on Factor and then go to Key - Cycle and set the copies to 10.

Press play on the toolbar to watch the loop effect. In order to make it smooth and not with that break at the beginning/end, we will add more frames to our current scene. You can see that your timeline is set from frame 0 to frame 90. Rise the last value to 250 frames. Aftert that you will notice that the bar under your timeline got shorter. Click and drag it to maximize to the full frame input. Press play and watch the perfect loop transition.
Return to your Startup layour from the Window menu.
Right click on your sphere object and select Simulation Tags - Soft Body.
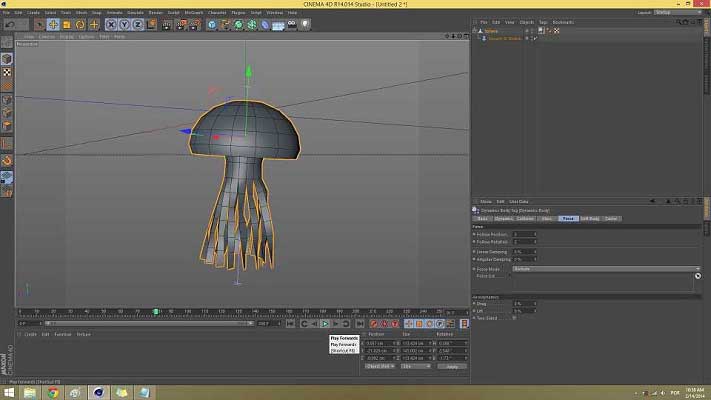
Under the Force tab of you Soft Body properties, set the Follow Position to 4 and the Follow Rotation to 2. Next press play on your toolbar and notice that your object will start to flicker its legs.
For the final touch, just simply select point mode and select all points of your object. Right click on your viewport and select Optimize.
Project's Files
I will have the documentation ready by the end of today, and I'll place a link for this file here:
Open your file in Cinema 4D and hit PLAY. Watch the jellyfish move.
I hope this tutorial can be of use in the future. Thank you for watching!