Week 11: Composites
Trying to decide what to do...
This week I didn't have a clue of what I was going to work on. Many techniques were introduced in class and I was not sure which one I should choose so, at first, I started studying the different ways of making a composite part, with fiber glass or carbon fiber. I've watched many videos explaining the how to work with different types of fibers and the materials you need for the job to be done.
But then I remembered something: when I was at the university, I never had the chance to work with fibers because or there was no materials for the job, or simply there was no space to work with them at the workshop. I've always had an interest in fibers and the processes people undertake to make a nice composite part and discover new possiblities. I've told myself the following: If you were at the university, and since there weren't any type of digital machines to work with, what would I do? I would have to turn over to arts and crafts, and in my opinion what would be more interesting to work with than a mask?
With this thoughts in place I decided to try and make a mask out of myself. But there was one problem, how could I work on the mask alone? It is very difficult to make a mask of your face all by yourself. It is needed a high level of coordination and relaxation in order to endure the time until the mask dries.
The Test Subject
Lucky me that I found one of those styrofoam heads you can find in chinese stores inside my Fab Lab, and that was great. So the first thing to do is to create a mask out of the styrofoam head. For that I decided to buy some plaster gauze and make the mask.
Material you will need for this job:
1) Applying tape on the styrofoam head
The mask I found inside the Fab Lab, was from a colleague of mine and I didn't want to ruin it by dropping water or plaster on top, so I decide that the better way to preserve the integrity of the model, wasto apply tape on the face. This step needs to be done as accurate as possible, because you don't want to loose any details of the face. This way you can later remove the tape preserving the integrity of the model, and another thing, with the tape the removal part will be much easier, because it will help you take out the mask.
2) Covering the model's face with vaseline
This step is mandatory! After you finished applying th plaster gauze, it will dry and become stiffer. If you don't use vaseline there may be the danger of hurting the model or cracking the mask when removing it. This model is not an actual person, so you don't need to care about hurting it, but it will surely be much easiser to take out the mask when completely dried if you use vaseline all over the model's face.
3) Preparing the plaster gauze
You will need to cut equal strips of plaster gauze to apply on top of your model. Cut small strips, no longer than 10cm wide, and cut some smaller strips (or squares) to help you cover hard details that bigger strips don't, like the nose or eyebrows, the mouth, etc.
4) Applying plaster gauze
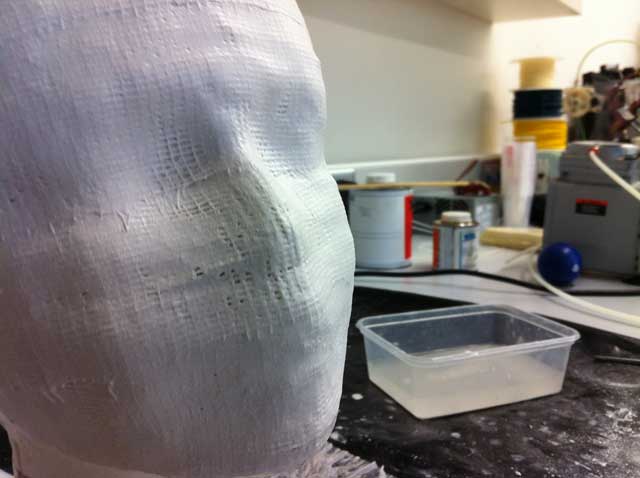
Wet the plaster in the warm water and with your fingers remove the excess water. You'll notice that the gauze will start turning in to plaster. Apply the gauze on top of your model and repeat this process until the face is all covered. Let it dry for few minutes and apply more gauze to it until you cover the face again. Do this process until you think that you've created enough layers for the mask.
5) Removing the mask
After the mask is completely dried, after a full day maybe two, depending on the weather, it is time to remove the mask from your model. Remember when I told you that the tape would make the removing process much easier? The next images shows why:
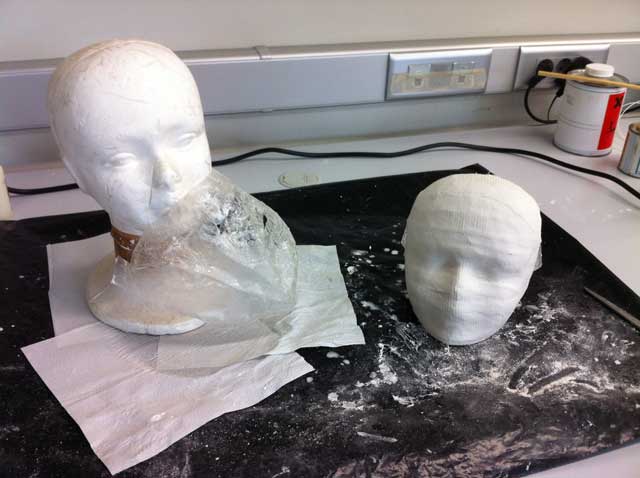
As I told you, I used the tape in order to preserve my colleague's stryrofoam head, but to my surprise (because I didn't think of this outcome) when I was removing the tape, because the same was covered in vaseline from the previous appliance, the mask just slided while the tape was getting removed.
For the composite part, my idead is to fiber glass this mask so that I can take out a fiber glass mask of it. The styrofoam head served as a mold for the plaster mask, but the plaster mask will serve as a mold for the fiber glass mask.
The same method will be used to create the fiber glass mask, but this time we will need some resin to "glue" the different fiber panels to each other. In order to easily remove the fiber glass mask, you'll need to apply some mold release agent so that the fibers will not glue to the plaster mask. If you don't do this, you'll make the fibers glue to the mask and ruin the work.
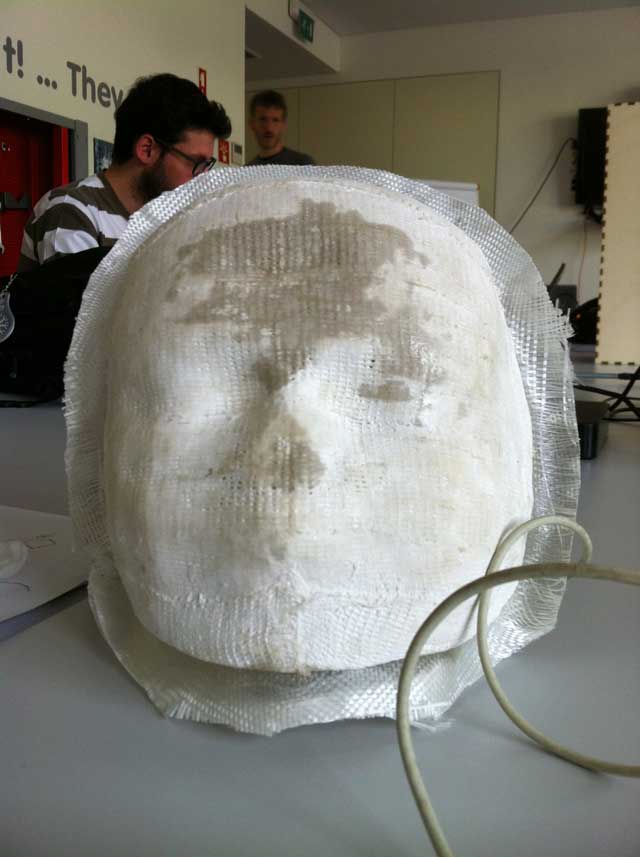
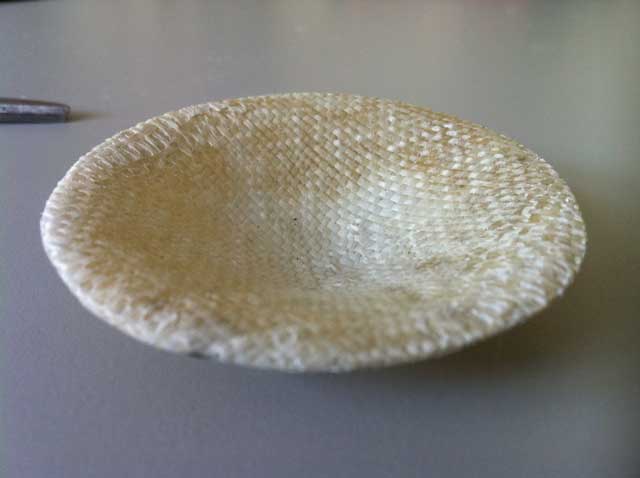
This is a photo of the finished plaster mask:
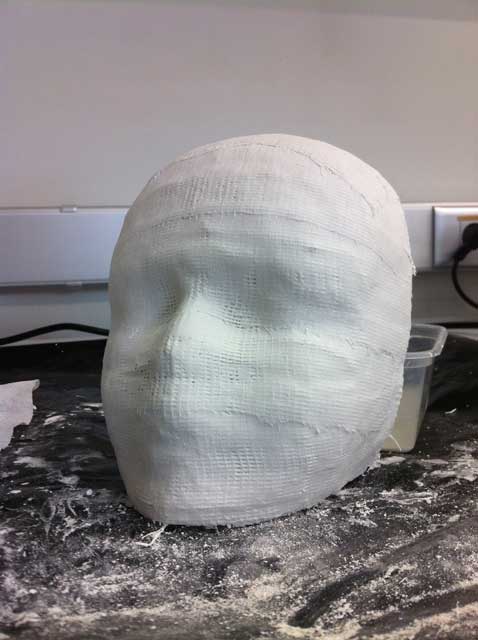
I thought about sanding the mask in the oustide, but since the part used for the fiber glass composite will be the inside, there was no need to do this.
I'm sorry for not posting here the photos of the fiber glass appliance, but I forgot to take pictures, my bad!
Instead I'll show you the photos of removing the plaster mold from the fiber glass.
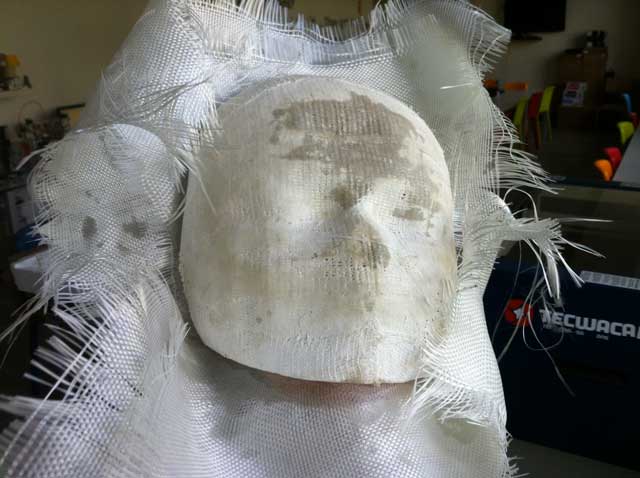
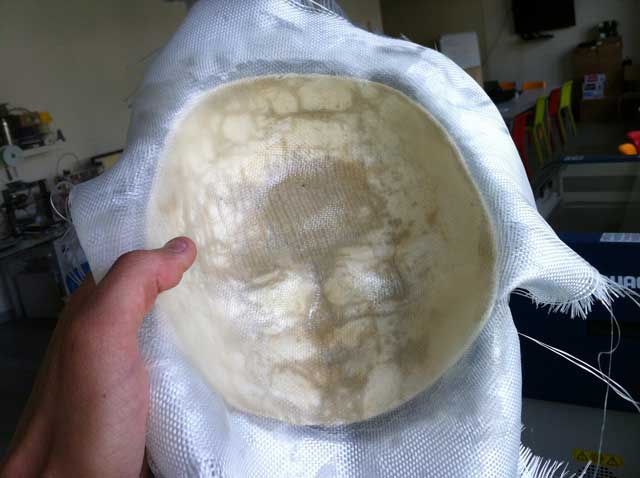
These two pictures show the fiber glass composite with the resin already dried on the mold. As you can see, the plaster layers were not enough and resin passed through the fiber onto the mold. But, since this was an arts and crafts experiment, I think it turned out exactly the way I wanted.
Next step is to cut the remaining fiber glass around the mold to easily remove the plaster.
Then I just grabbed a tool with a sharp edge in order to help me remove the plaster. The resin wet the plaster and so it was becoming really difficult to make the fiber glass pop out of the plaster, so using a tool with a sharp edge was the best way to remove all the plaster. After completing this mission, this was the result:
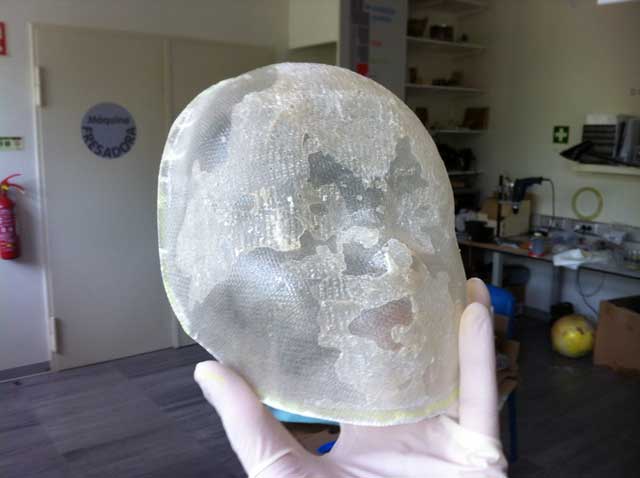
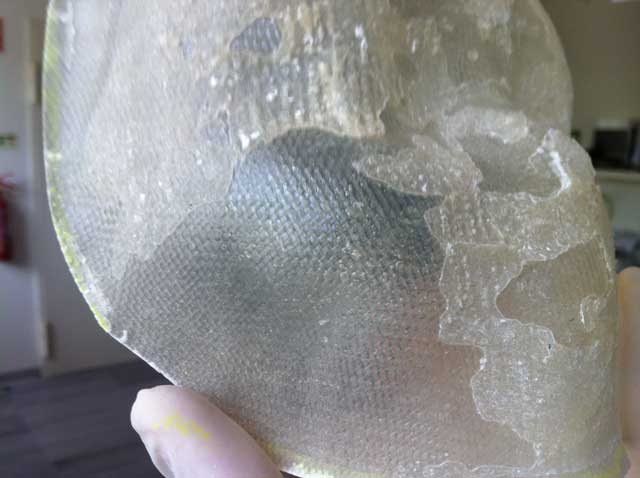
The last photo shows how it turned out. The cheek of the mask came out with a smooth and shiny surface, but the majority of the mask came with these strange spots. I think it was because of the plaster, it seems both materials merged and then it came this strange surface that looks like a "fiber plaster glass" (laughs). Maybe it is just my eye. This was an excellent experience and I'm really excited to try again until I reach perfection. Besides all, I think this mask would turned out an amazing job with the vacumm bag method, a job for another day.
Another experiment
So, I didn't want to stop my experiments with the fiber glass and I had the idea to 3D print a small plate and try to apply fiber to it. This was the result after fibering the part:
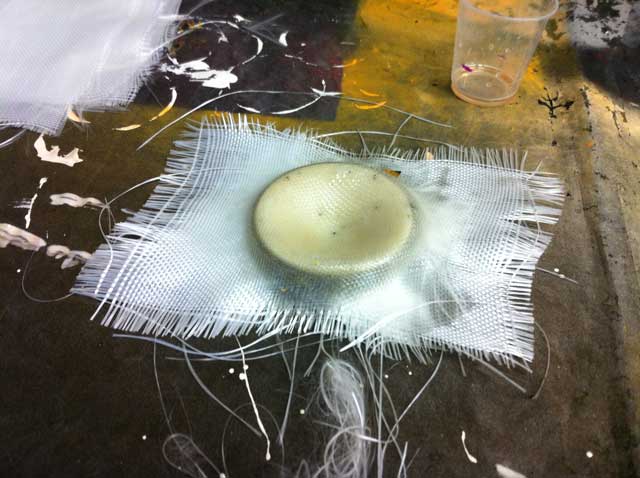
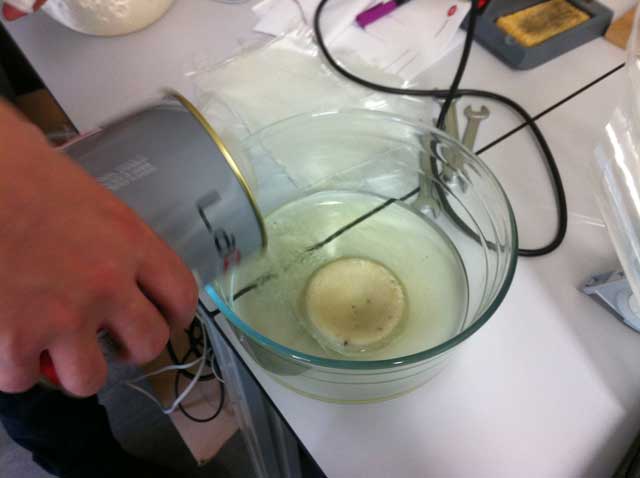
I cutted some fiber cloths to aplly to the 3D printed part. Mixed the resin in a cup and then applied one layer or resin and one of fiber until there were like 3 or 4 layers of fiber.
After a day passed by and letting the resin dry, I noticed that I totally forgot to aplly some mold release agent to easily remove the fiber composite from the 3D printed part. It was not easy, it was impossible, so I decided to use some acetone to dissolve the ABS and luckly have my composite part intact.
After dissolving the ABS and cleaning the fiber glass part, I let it dry for a couple of days. After that, this was the result:
As you can watch in this picture, this time I didn't apply much resin and the fiber didn't became shiny and with a smooth surface. And these are all my experiments and what I've learned about this week. Thank you for watching.
Project Files
For the first part of this assignment there are no computer files for it because it was all done from different objects and materials that you either find or buy, and the 3D printed part was just a simple test. I'm really sorry but I don't have the 3D model of the printed part, it got lost at the computer. I model it again though, so if you need it, please ask for it and I'll be pleased to send it to you.
See you next time!