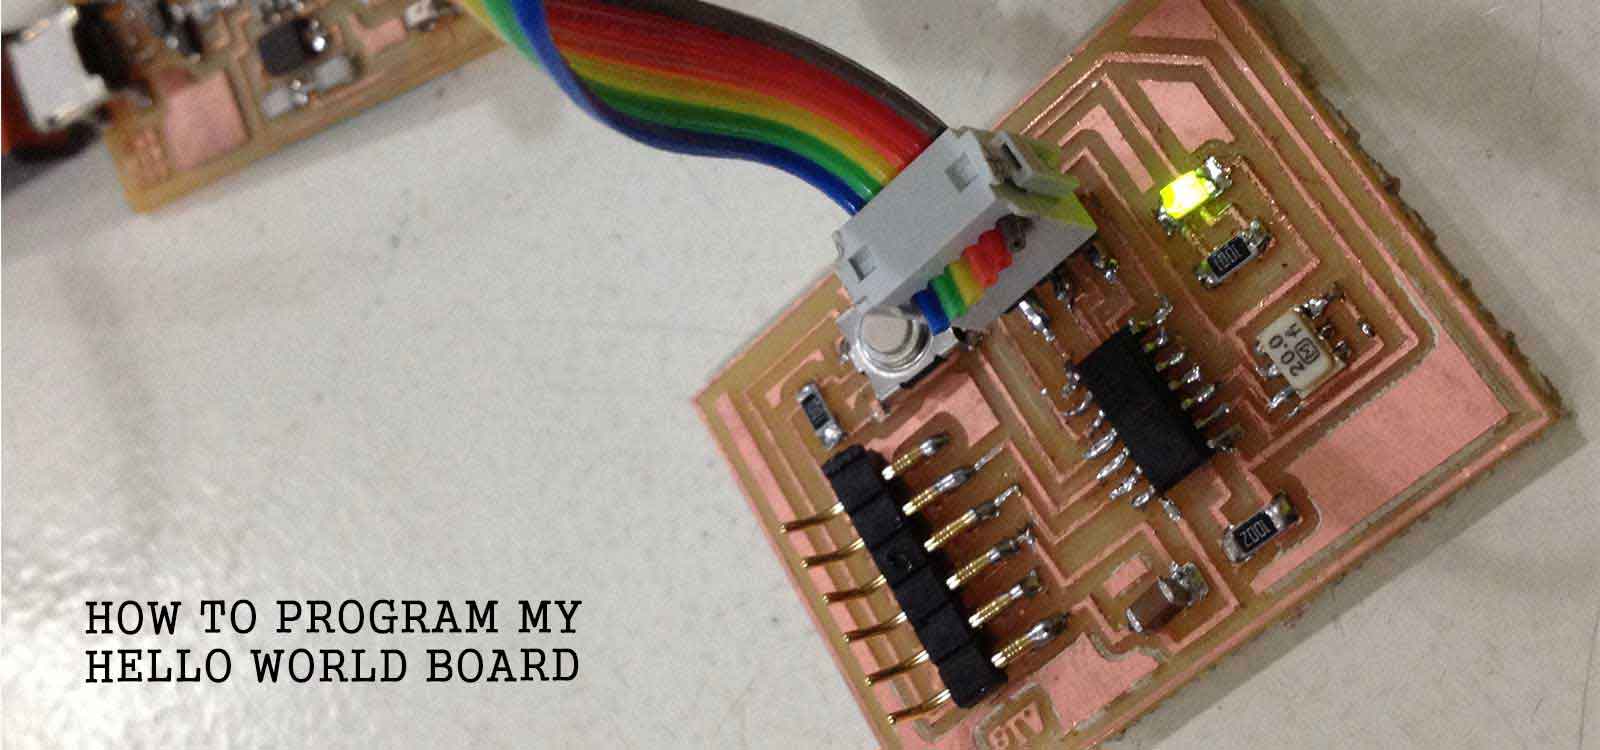
The aim of this assignment is to program the board we designed in week 6 . It is a Hello World Board with an extra pushbutton and a LED. It was a real challenge for me to make this work, mainly because my computer didn't recognize the FabISP. For programming it I used one of the examples that come with the Arduino 1.0 software and just changed the Pin numbers. Here is the process...
Download the files here:
Arduino IDE Push button Example modified [Arduino File]
For this assignment we had to programm the Hello World Board with added components we designed two weeks ago. For it, I followed three stepts that seemed easy, but didn't work for me:
01 Download the Arduino 1.0 software
02 Download and install the ATtiny Board Files
03 Make sure I had the necessary drivers installed (ftdi)
I have a PC laptop with Windows 7 and for the FabAcademy I've been working in Ubuntu. I installed the Arduino 1.0 software for Linux, as well as the attiny44 Board files and the drivers. However, when I connected my FabISP and Hello World Board to my computer, it was not recognized. I talked to Luciano and he told me that I had to have the Board Files and Drivers also installed in Windows because my Ubuntu was virtualised , which means that it's running through Windows 7. So I did it.
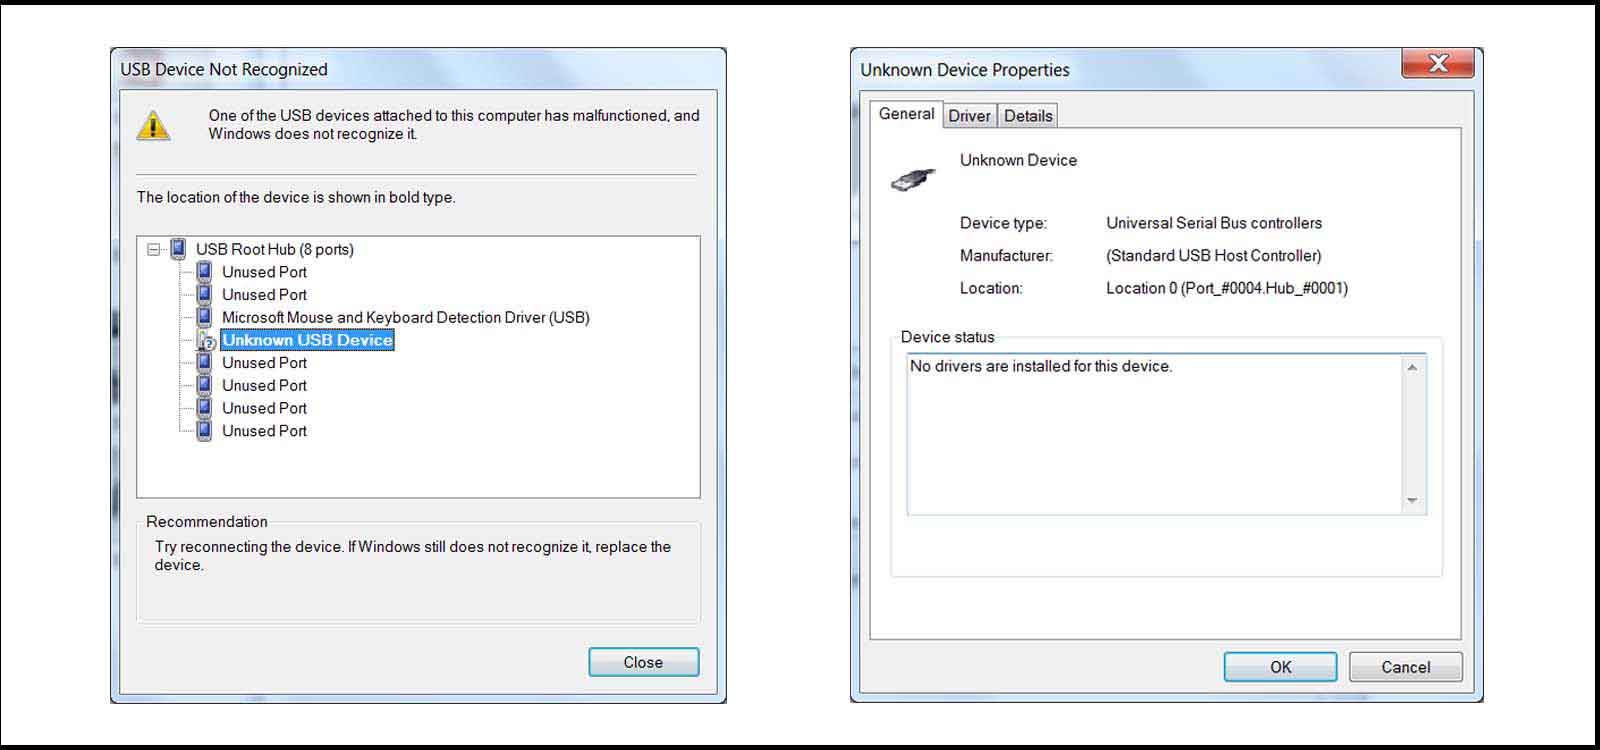
I successfully installed Arduino 1.0 and the board files in windows 7 but the FabISP was recognized as an "Unknown Device" . When I looked at the device properties, I got a message saying "No drivers are installed for this device" so I went and tried to installed them.
It didn't work!.
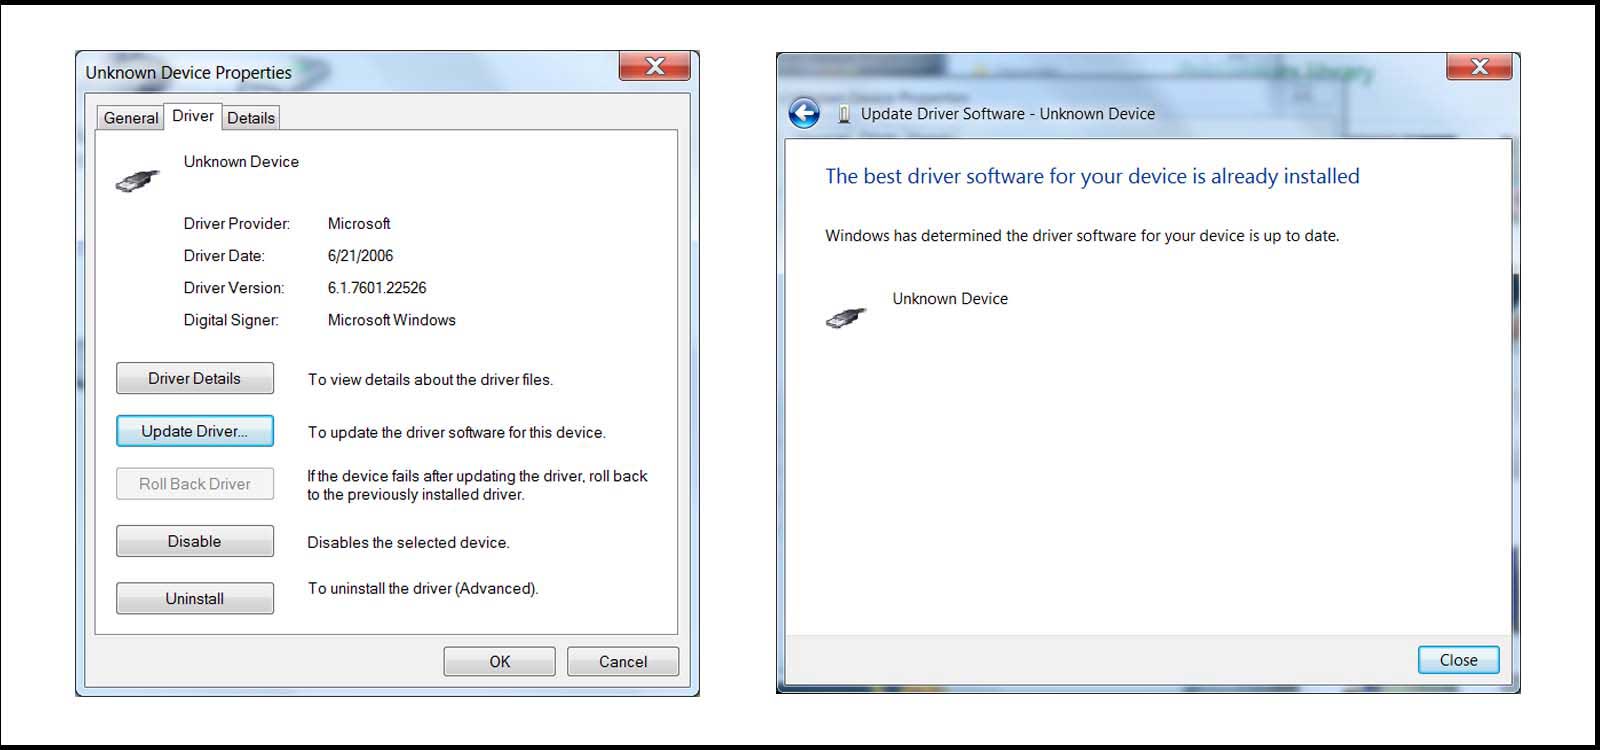
Everytime I tried to update or reinstall the drivers, I got a message saying "The best driver software for your device is already installed. Windows has determined the driver software for your device is up to date". Looking for an answer in google, I came out with a special driver for 64bits windows 7 (usbtinyisp_libusb-win32_1.2.1.0) but it didn't work either.
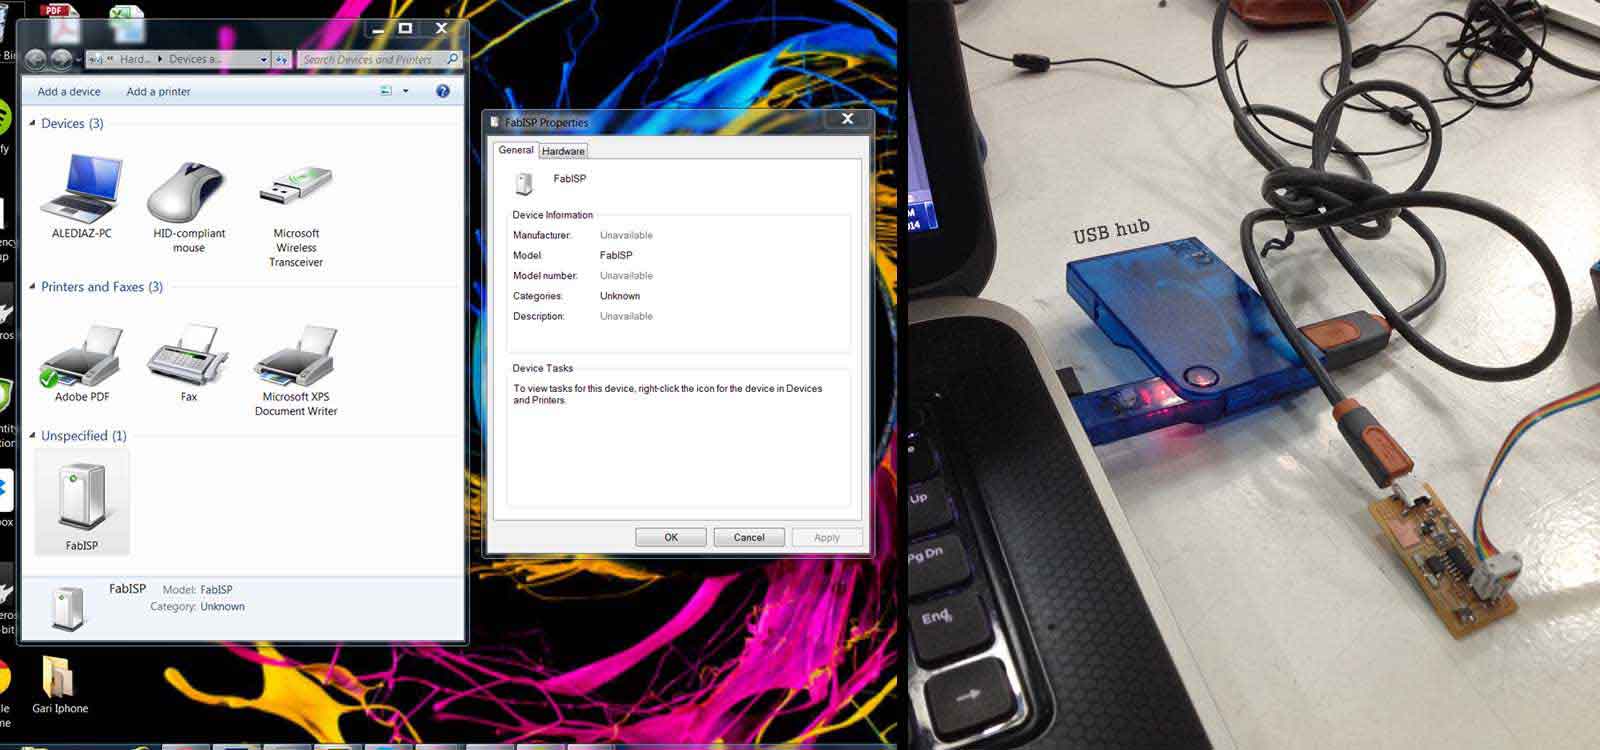
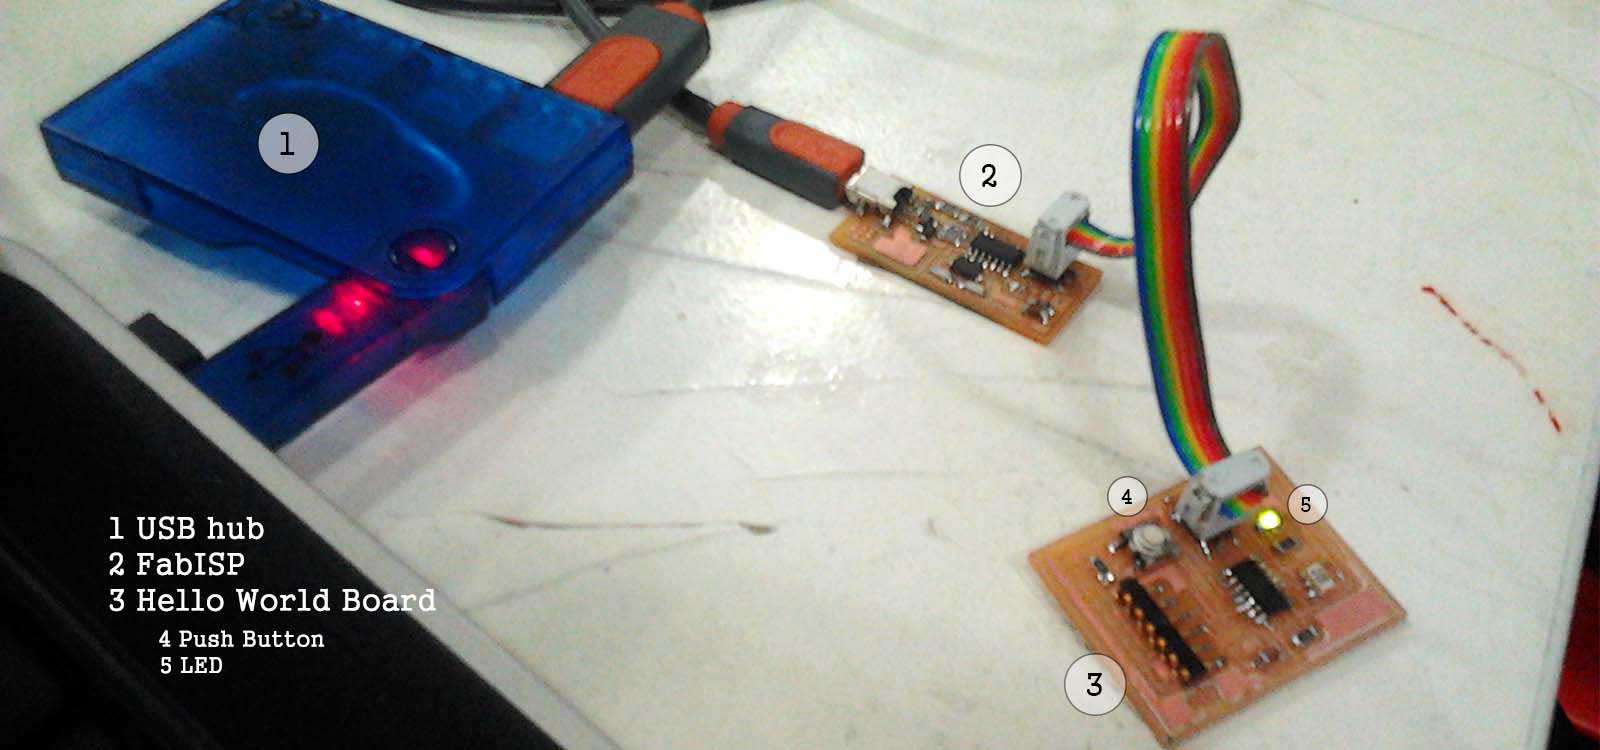
I tried different installation ways, different drivers and with several FabISP to make sure it was not a physicall mistake but I nothing seemed to work. I finally decided to write an e-mail to the FabAcademy2014 group and I got an answer. Our groupmate Francisco suggested to try plugging the board through an USB hub because sometimes the board is not recognized in USB3 ports.That was it!
I just had to connect the FabISP to my computer through an USB hub and it worked.
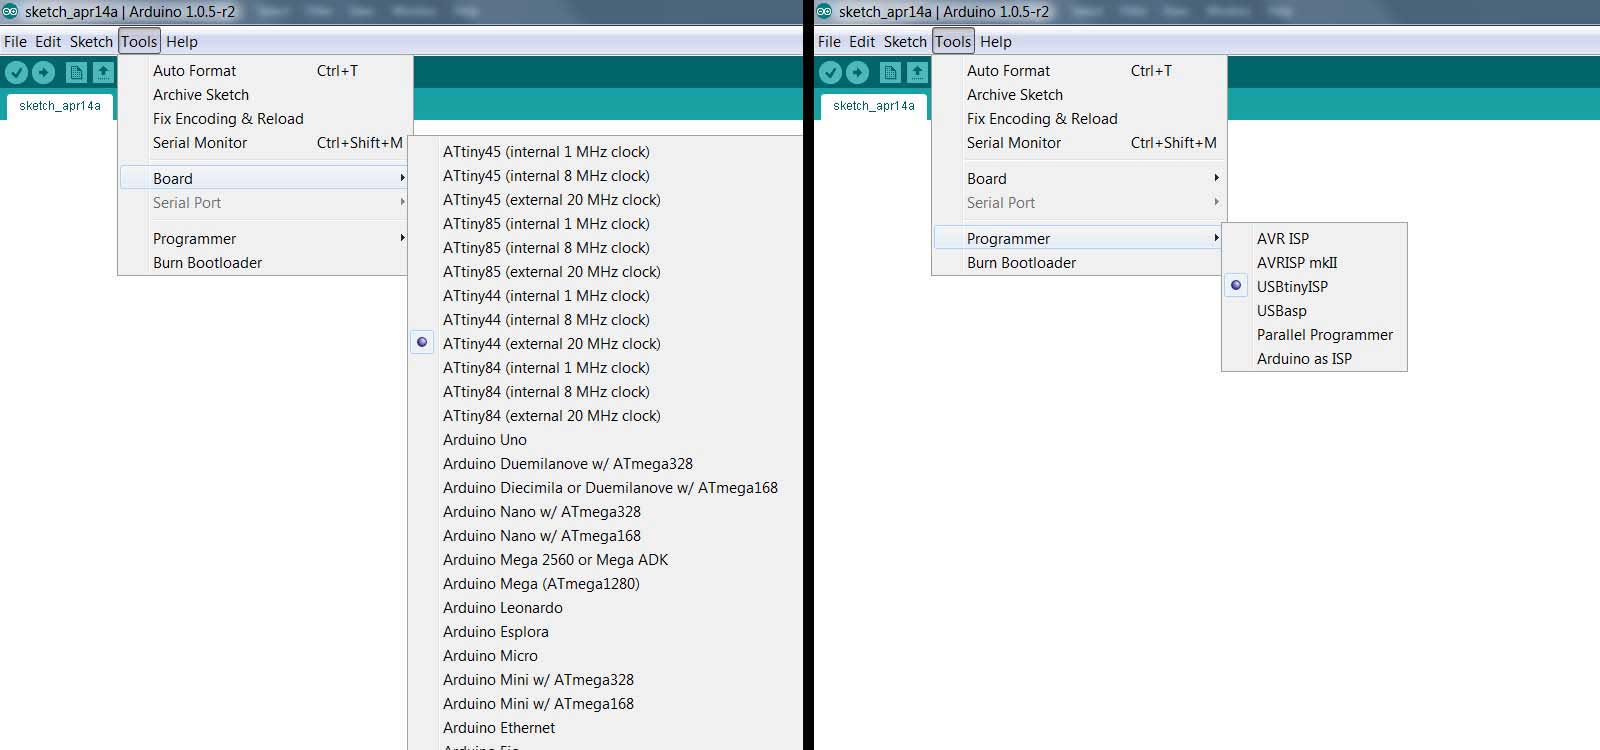
For the rest of the assignment I didn't have any trouble. I used the Arduino 1.0 software because it's simplier to understand. In arduino, I chose the attiny44 (external 20Mhz cloack) Board and the USBtiny Programer and I was ready to go. I burnt the bootloader successfully.
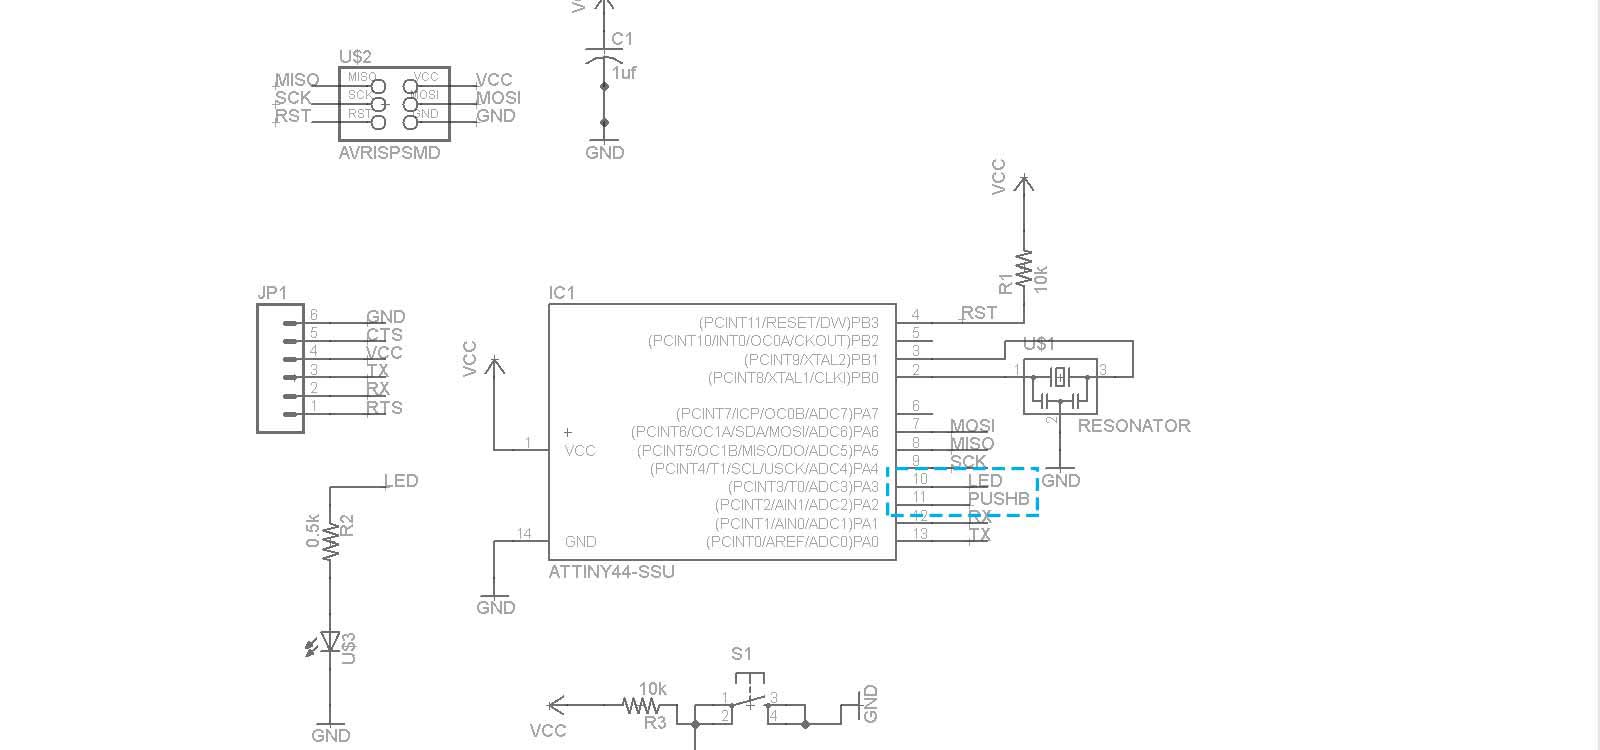
To program the microcontroller,I used one of the examples that come with the Arduino software. Since the pins of the arduino board are not the same as the attiny4, I just had to find the pin numbers where my LED and Pushbutton were connected and find the equivalent pins in the arduino board, like this:
LED = Attiny pin: 10 / Arduino Pin: 3
PUSH BUTTON = Attiny Pin: 11 / Aduino Pin: 2
Finally, I downloaded the code into my board. It works! When you push the button the LED switches off.
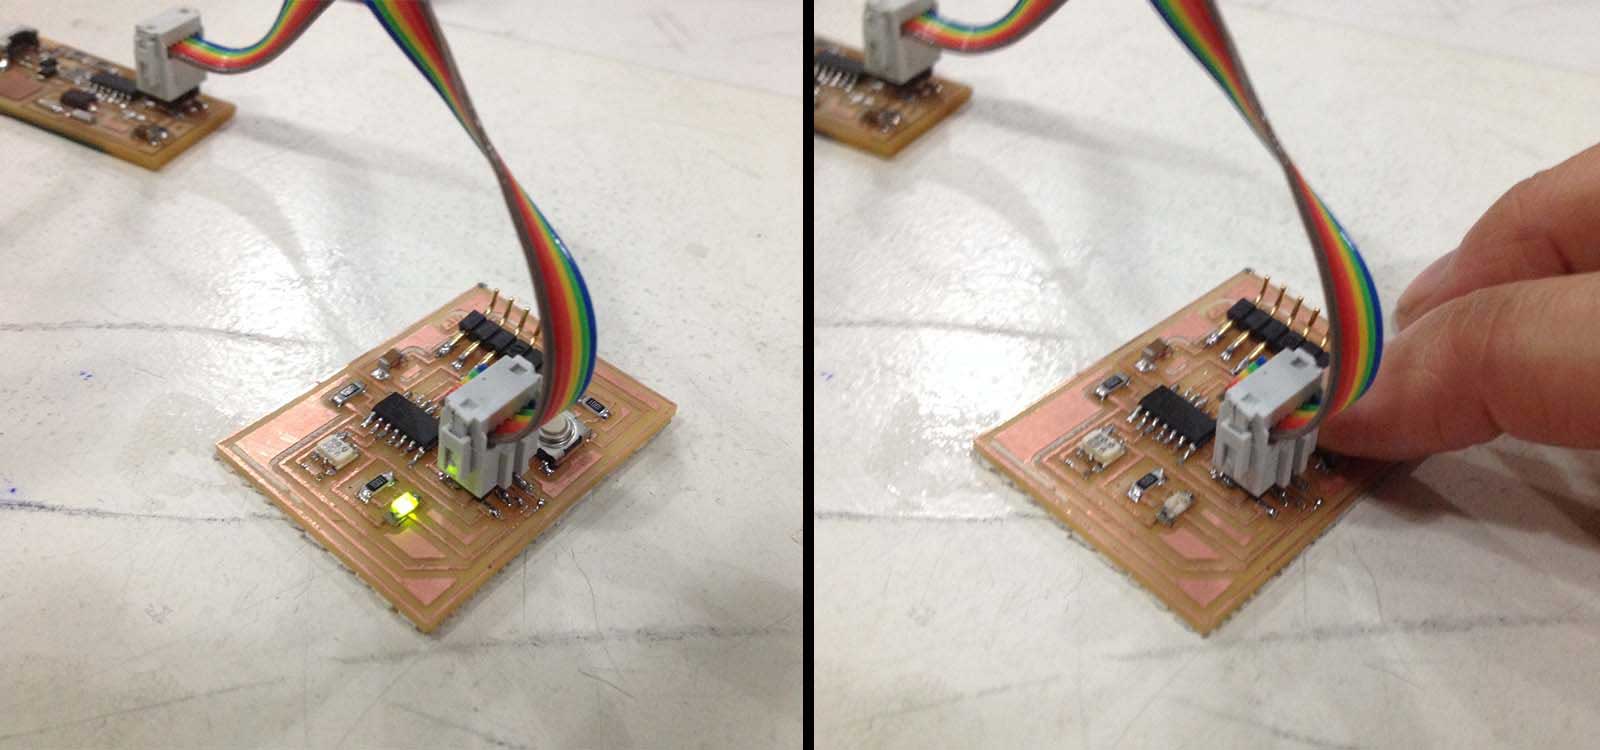
Here is the video to see the Led blinking when pushing the buttom:
FabAcademy 2014: Embedded Programming from Alejandra Diaz de Leon on Vimeo
