-
A preview...
The project started at the beginning at the semester as a Ludic Tool for kids in developing countries to learn electronics and programming by creating little robots of recycling materials. As I started learning about these subjects, I realized that the first idea I presented was way too complicated for this final project. Therefore, I brought it down to a smaller scale but trying to keep the same concept.
The FrankensToy
what will it do?
The idea behind the FrankensToy consists in designing an interactive module that allows kids to play with electronics and create small robots or machines with day-to-day items. The aim is to provide kids with a game that teach them about electronics and how they can prototype little systems or machines using things they find at home.
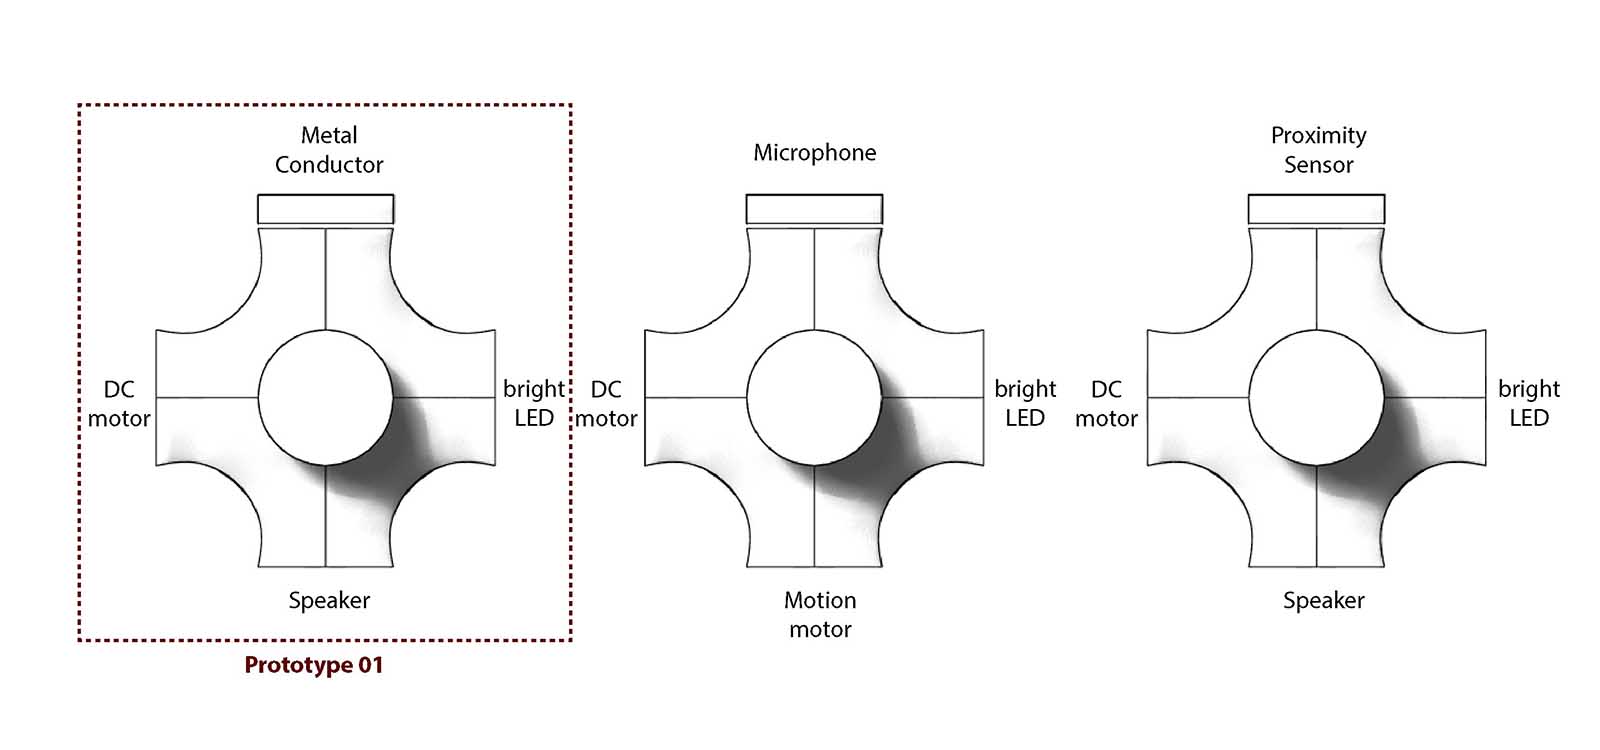
Each module contains the following:
*One activator (input activated by metal conductive materials like paper clips, a metal fork, etc)
*Three different outputs (speaker, LED and servomotor)
*One selector (designed by me) for choosing one or two of the three outputs to make the robots interactive.
*One potentiometer to control the behavior of the outputs (speed of the servo, sound and brightness of the LED)
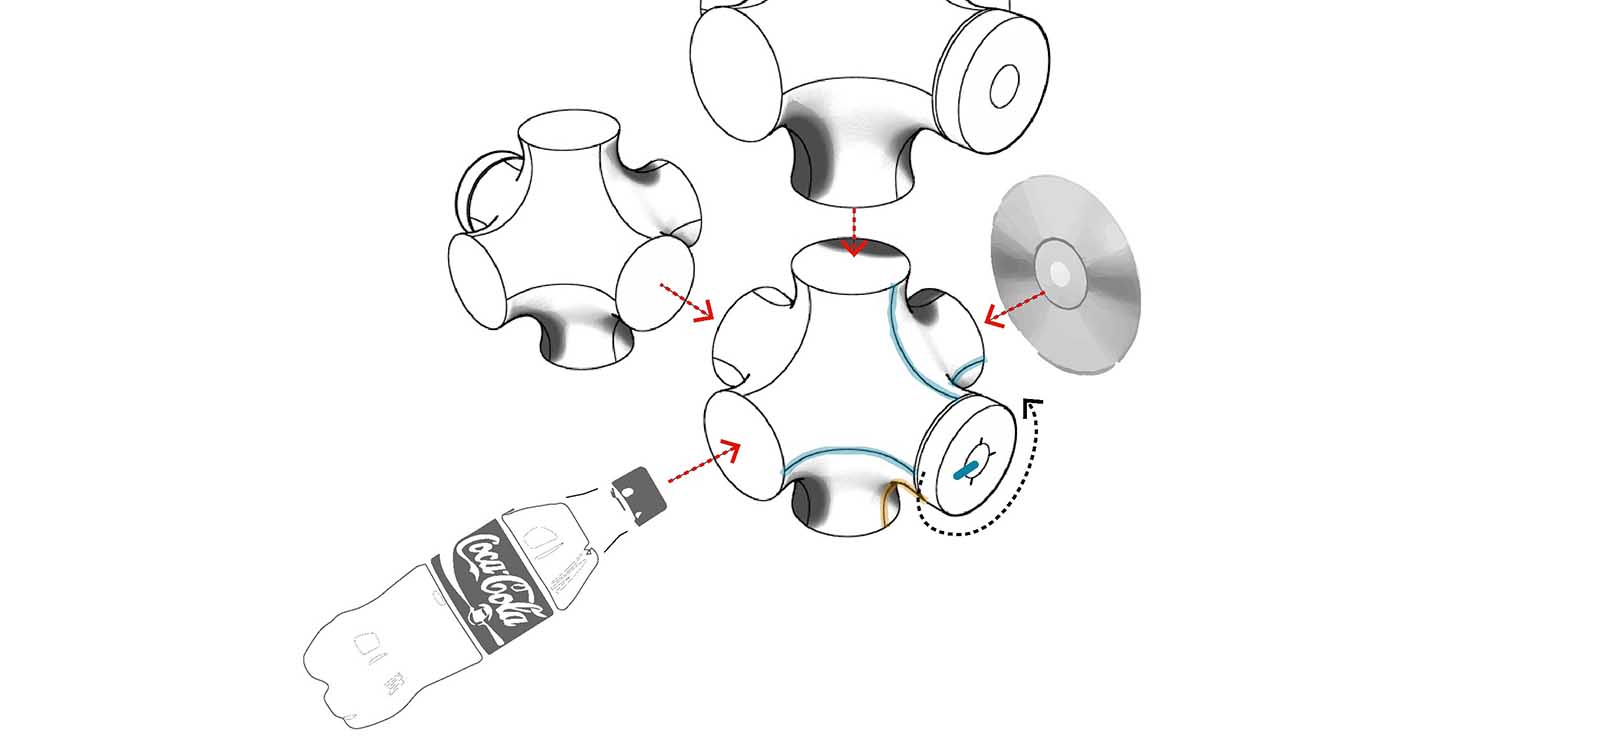
*Connectors that attach recycling materials such as plastic bottles, cans, cardboard boxes among many others, as well as other modules to create the FrankensToy. 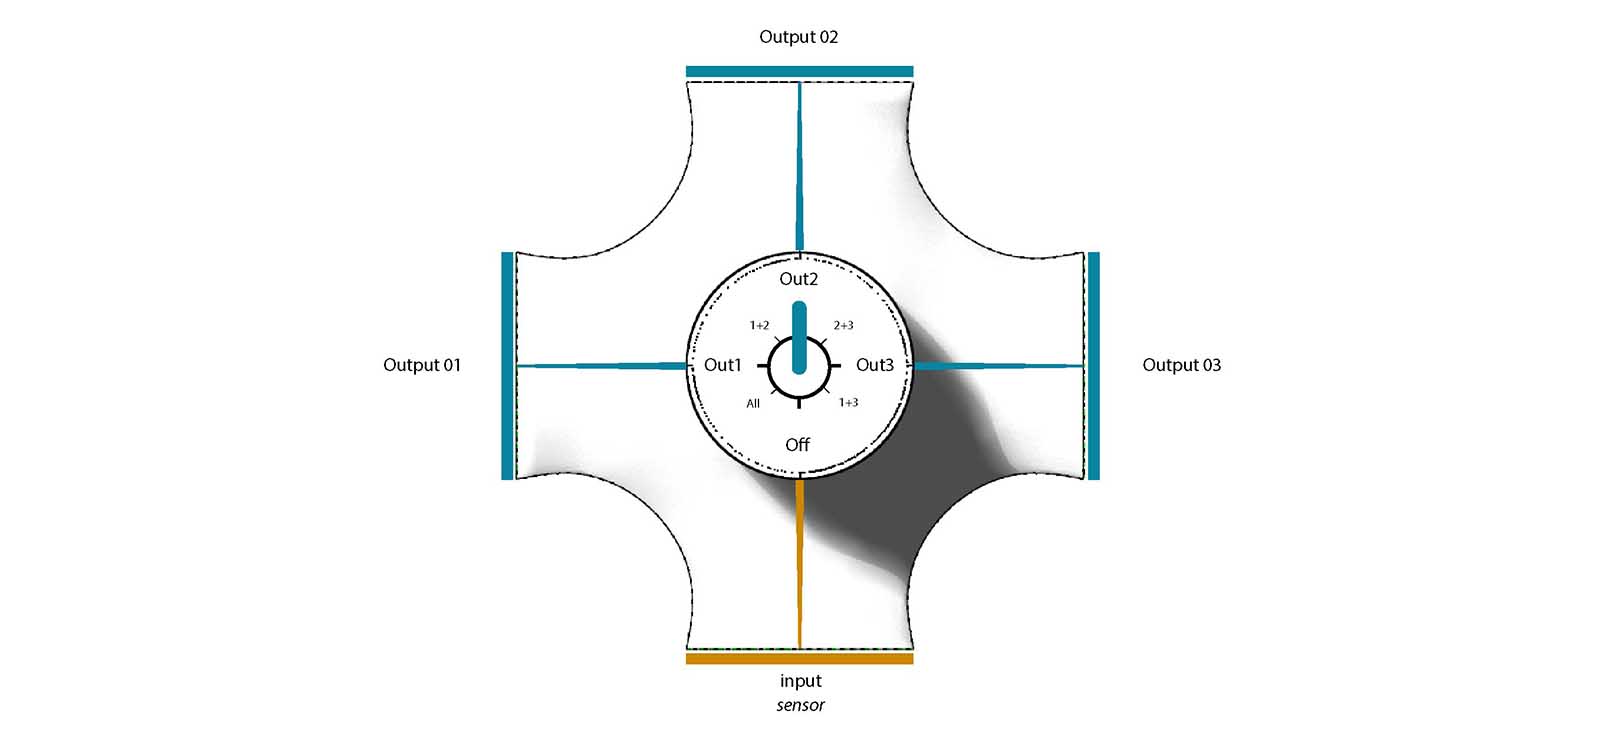
-
who's done what beforehand?
I have some references that helped me develop the idea:
Regarding electronics:
Little Bits, Cubelets, Atoms Express ToysRegarding design and mechanisms:
Free Universal Construction Kit, TechniBricksHowever, I will be using a board with an Attiny44 microprocessor and I will add the inputs and outputs based on the output boards of Fab Academy. For programming I will use the Arduino language and my FabISP.
-
what materials and components will be required?
For each module I will require the following componets:
For the electronics:
In Fab Inventory
*1 Attiny44
*16 Female pin headers
*4 10k Resistors
*1 499 Resistors
*1 Mosfet PMOSFETSOT23
*2 LEDs (red and green)
*1 six-pin headers
*Cooper sticker
*1 cooper board
*Soldiery wire
In Digikey
*1 Potentiometer (Digikey: P3C3103-ND) (9 mm Square Rotary Potentiometers with Insulated Shaft, Panasonic)
*1 Speaker (Digykey: CDMG16008-03)
*1 9v batteries (Digikey: N104-ND)
*1 9v battery holders (Digikey: 235K-ND)
*2 Magnets 0.500"ø (Digikey: 469-1002-ND)
*1 Voltage regulators (Digikey: LM2940IMP-5.0CT-ND)
*1 47uf non-polarized capacitor (Digikey: 1276-1734-2-ND)
*1 22uf polarized capacitorIn Hobby King
*1 Microservo (Hobby King: PRODUCT ID: BA-TS-25)For the module
In Fab Inventory
*PLA (Polylactic acid) filament for the MakerbotServei Estació
*1 30x30cm sheet of 2mm transparent acrylic.
*2 little springs
*screws
-
where will they come from?
As I mentioned above, the material and componets will come from the Fab Inventory, DigiKey, HobbyKing and Servei Estació.
-
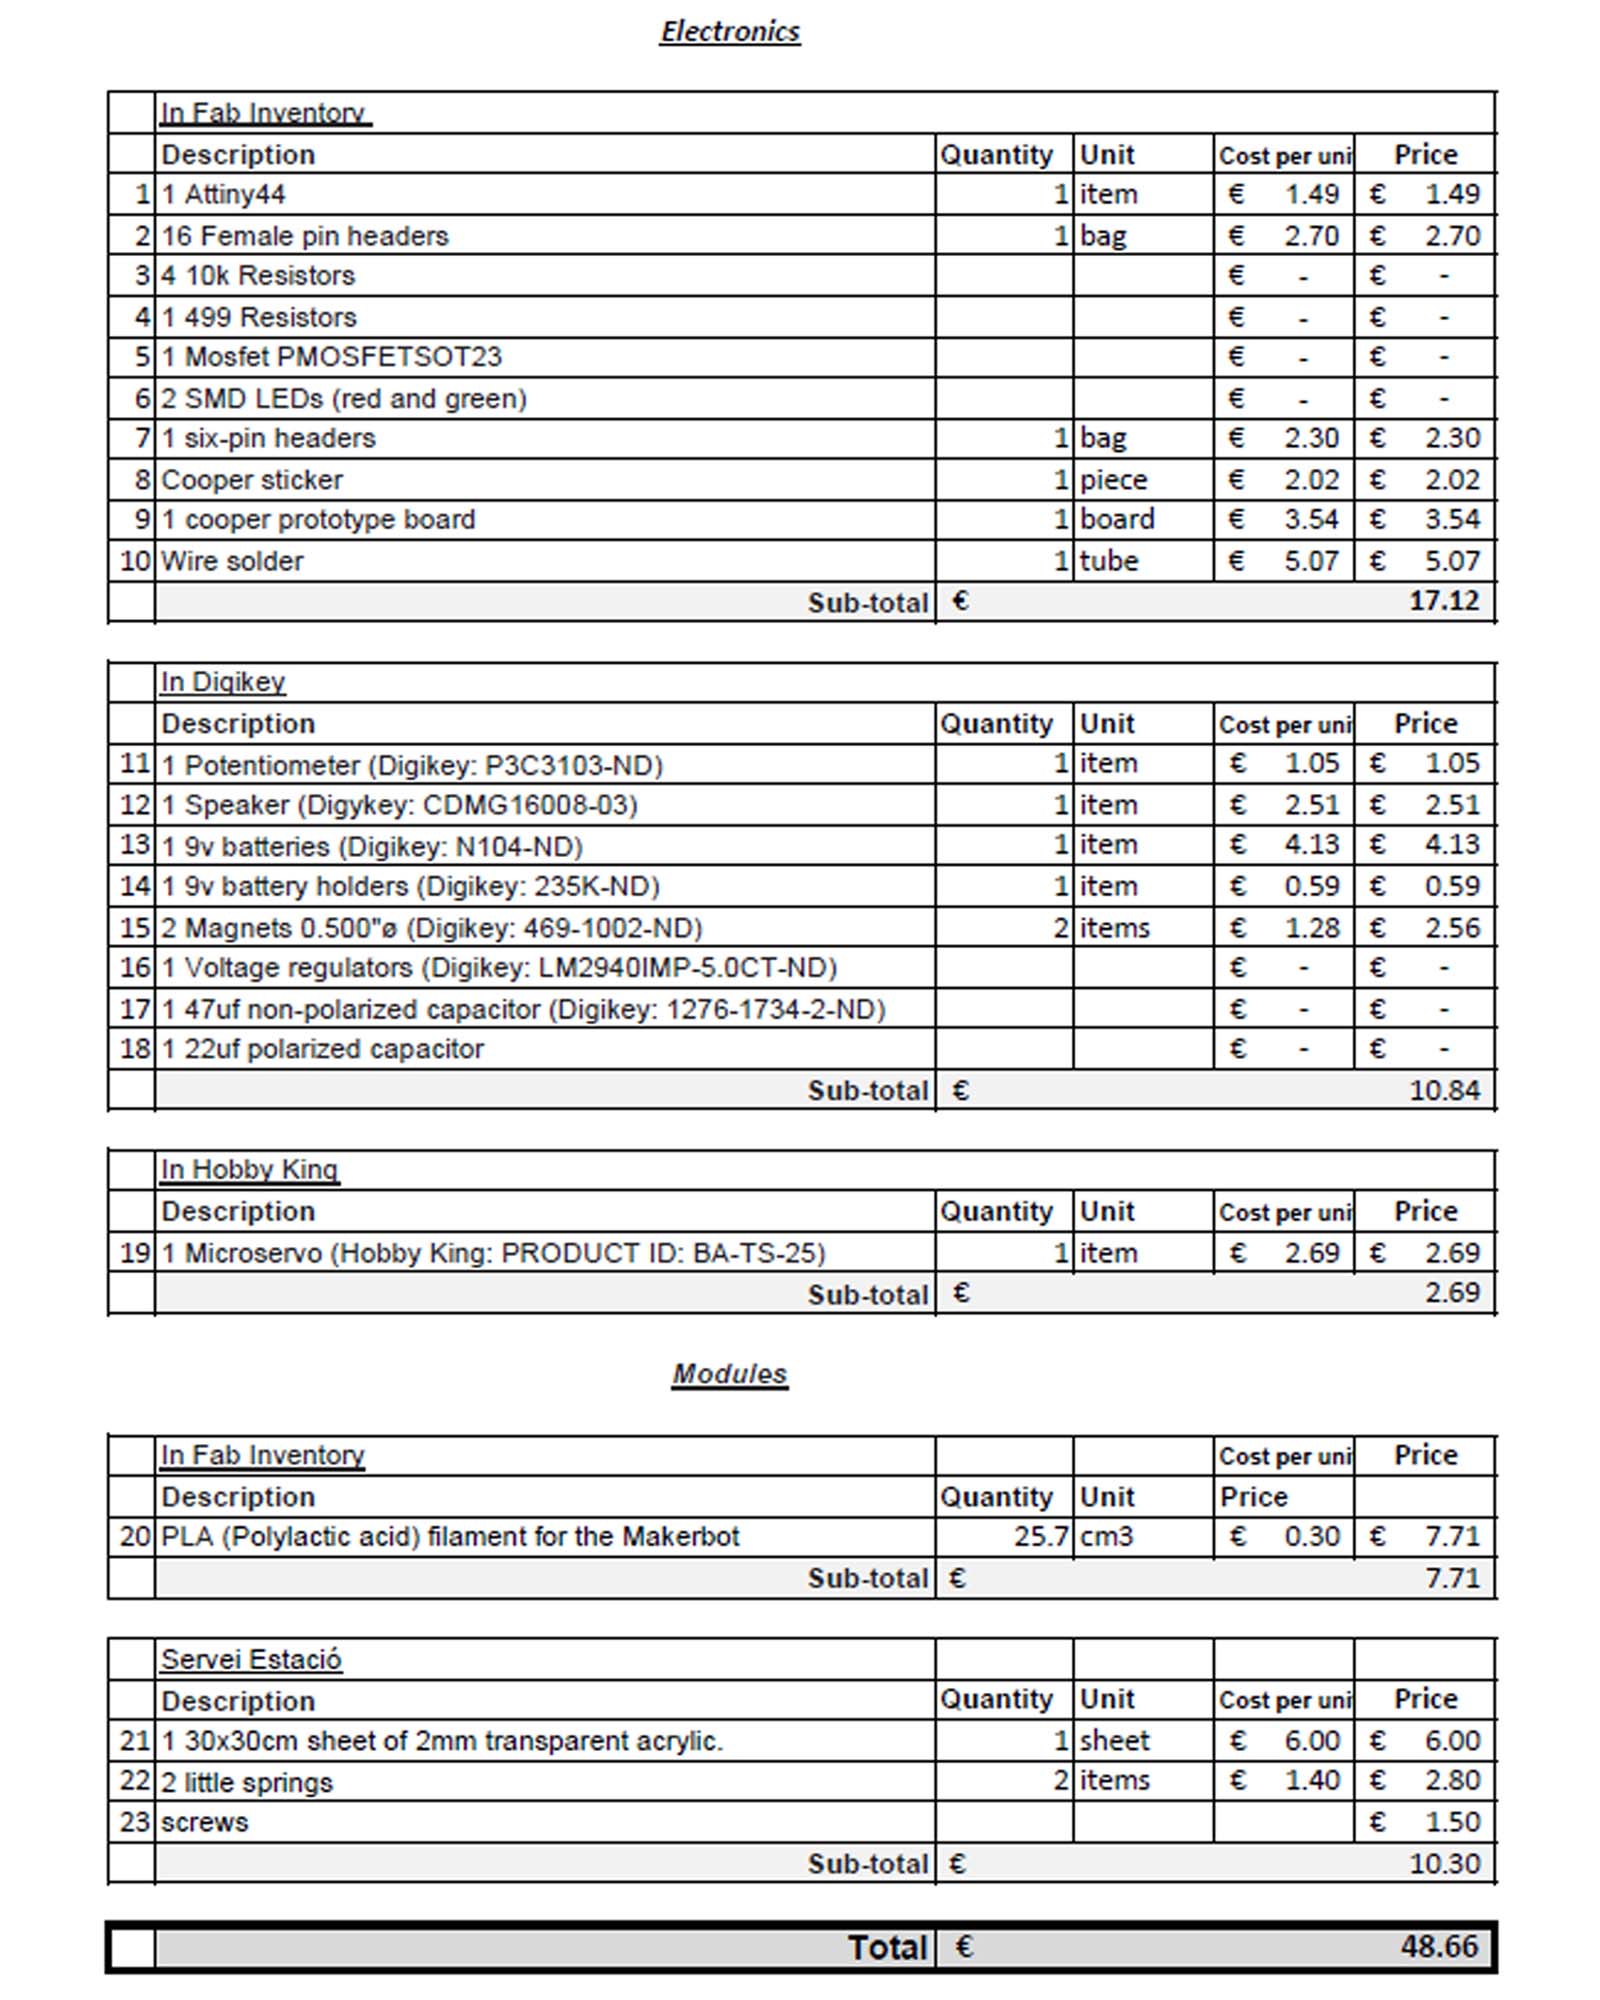
how much will it cost?
Around €48.00 euros. The most expensive part is the PLA for 3D printing the body of the modules. However, making more than two would reduce its cost considerably.
-
what parts and systems will be made?
The module is composed by:
*The body (3D modeling and 3D printing)
*The selector and potentiometer (mechanism design and laser cutting)
*The “brain” (attiny44 board inputs and outputs)
*The connectors (mechanism design and 3D printing)
*The assembling system (joints)
-
what processes will be used?
3D designing and modeling (rhino): Design of the shape of the module, the ensambling system and the internal pieces that will hold the electronics components.
Electronics: One board with an attiny44 (3 inputs and 3 outputs) per module.
Programming: Using the Arduino IDE
Mechanism Design: There will be two mechanisms in the module: the selector/potentiometer system and the connector (for attaching other modules and recycling items)
3D printing: The body of the module will be 3D printed
Laser-cutting: The plain surfaces where the outputs and connectors will be placed, as well as the selector will be cut in the laser cutter in transparent acrylic.
-
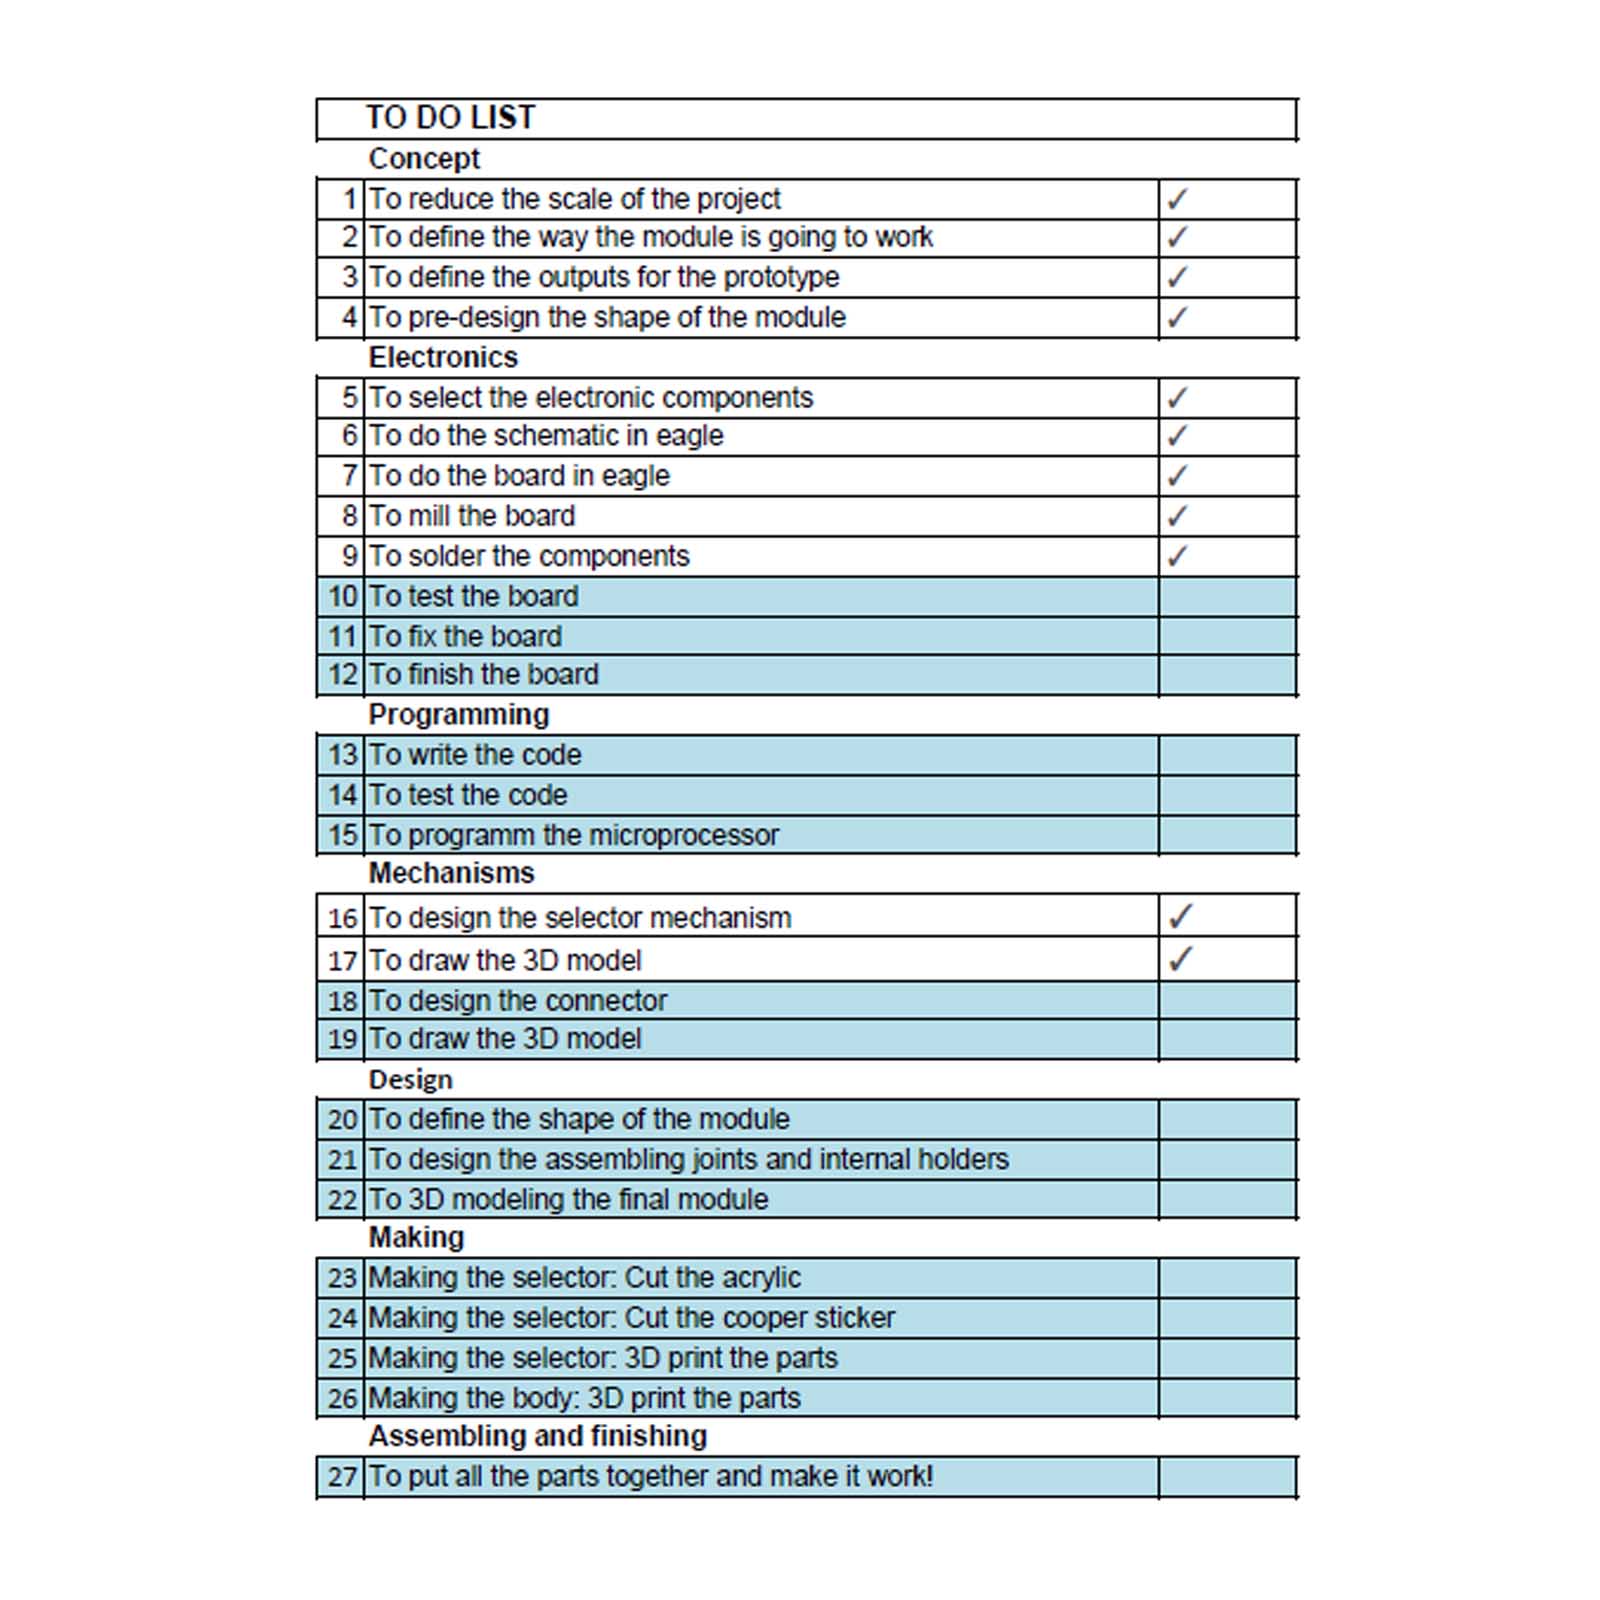
what tasks need to be completed?
Here is my “To Do List”. The tasks that are highlighted in blue are not completed yet.
-
what questions need to be answered?
Design wise I am not worried about the final result because I have a very clear idea of how it will be. However, the questions I will be facing in the following week will be related to programming.
-
what is the schedule?
Week01
Thursday 21st - Programming
Friday 22nd - Programming (questions with Guillem)
Saturday 23rd and Sunday 24th. – designing and 3D printing testing
Week02
Monday 25th to Wednesday 27th – Trip to FabLab Sitges to finalize the electronics and programming part. Thursday 28th – final details of body and mechanisms design.
Friday 29th and Saturday 30th – Assembling and putting parts together.
Sunday 1st – Finalizing component (make all the parts work correctly). Playing with the module and documenting.
Week 03
Monday 2nd – Video
Tuesday 3rd – Preparing final presentation and PUSH
Wednesday 4th – Final Presentation!
-
how will it be evaluated?
THE GOAL: Since one module requires combining different processes (electronics, programming, 3D designing and modeling, 3D printing, laser-cutting and mechanism designing), my objective for the final presentation is to have one single module assembled and working.
My knowledge and skills in electronics and programming were almost inexistent when I began the Fab Academy 2014. I consider I still have a lot to learn but if I can make the FrankensToy to work smoothly, it means I succeeden in learning how to incorporate different devices into one mechanism. To have this module working will show my understanding of electronics programming, and how they can be applied to the fabrication of systems and mechanisms Finally, I consider that it’s a project that puts multiple fabrication processes together in logical way. Having it working proves that, even though I have a lot to learn, I am on the way to be able to make almost anything.

Alejandra Díaz de León Lastras
Go back