>> Week 09, Mar 26: Molding and casting
Design a 3D mold, machine it, and cast parts from it
 |
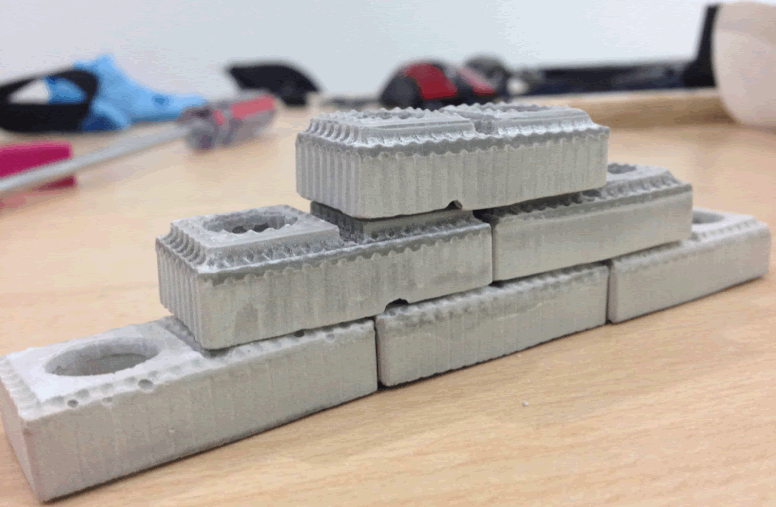
For this task, I prepared the prototype of a brick, copying a design with decorative finishing and structural features. The procedure was:
>> Create a Positive Mold Model
>> Mill the Wax on the Modella
>> Make a Mold from the Wax
>> Cast Final Object
Create a Positive Mold Model:
During and after the design, it should be taken into account: Machine and material to be used (I used Modella and machinable wax), the wax block size to be machined (150x89x32mm), milling cutter diameter (3.175mm) and milling cutter’s rod size, from the tip to the milling machine head (25 mm), in order to calculate the design depth.
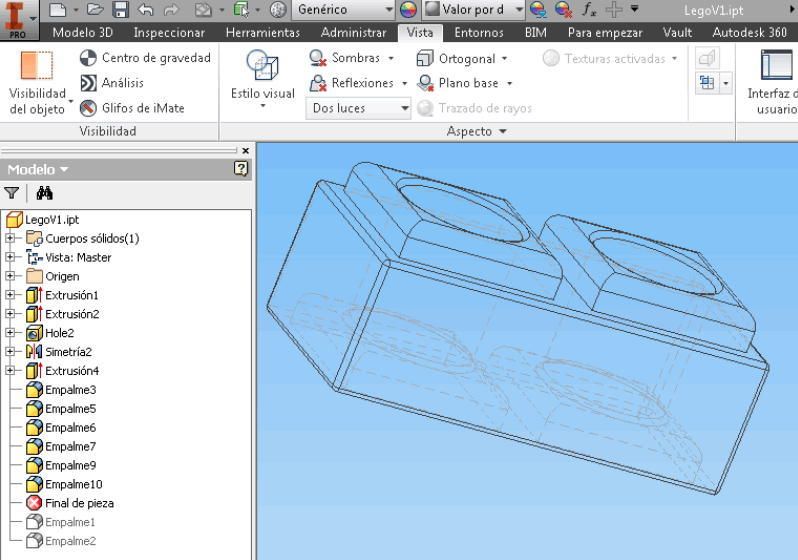
The brick design was made using Autodesk Inventor 2014.
 |
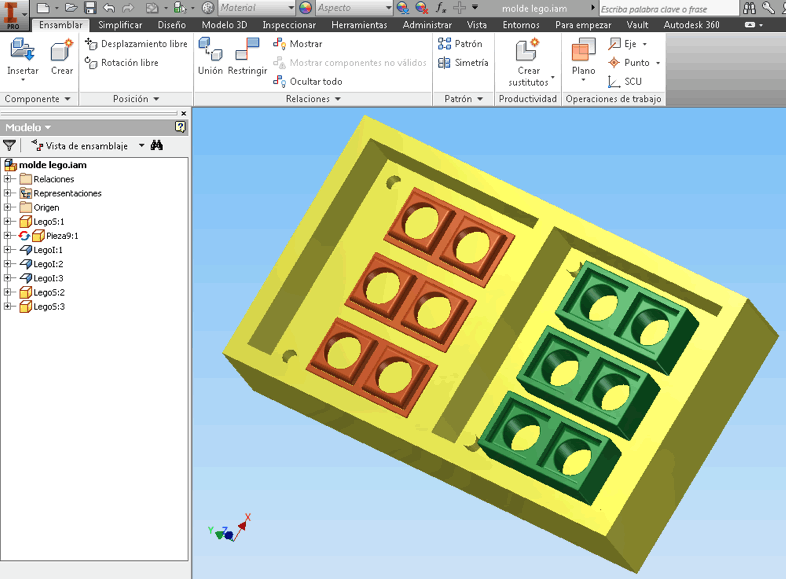
| Once the object was designed in 3D, I cut it in two parts and placed each part in a tray to be coated with liquid rubber. |
 |
| This figure shows I also added the record points, which are useful as support when the mould is assembled. |
Finally, the model is exported at scale in .STL format. |
Mill the Wax on the Modella
 |
Materials:
- Machinable Wax
- Modella MX20
- 3.175mm Round head milling cutter
- Fab Modules
Note: machinable wax can be made at home, as you can see in this: link
 |
 |
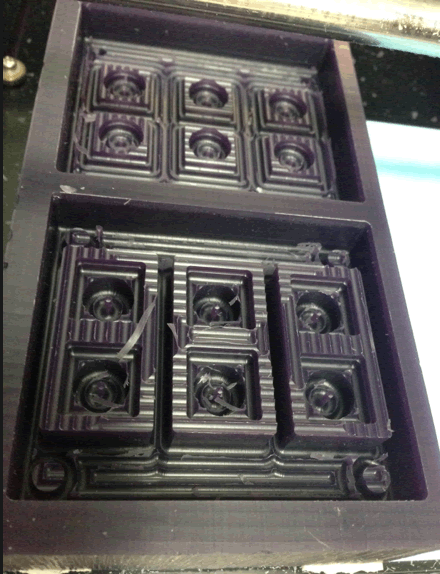
Wax machining implies at least two stages: smoothing and finishing.
In some cases, depending on the material used, a prior procedure will be necessary: surface leveling. In this case, it was not necessary.
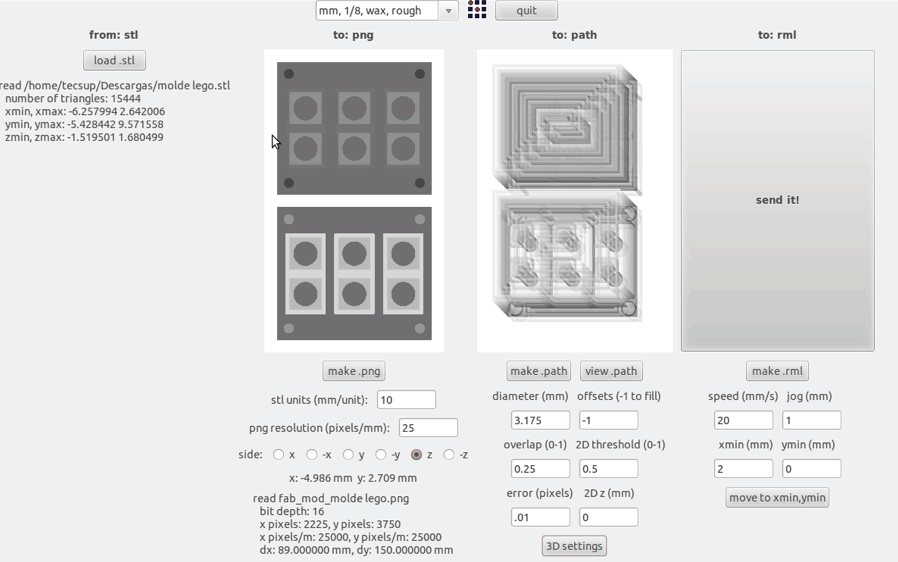
Connect Modella to a PC with Ubuntu / OSX and open Fab Modulus, select a mesh in .stl format to Roland Modela .rml Adjust the software, install the milling cutter and place the wax rod with a double contact strip in Modela.
This sequence shows the steps to adjust the parameters, before the machining of smoothing process.
- Load .STL file
- Select milling cutter size, material and process: mm, 1/8, wax, rough
- Make .png
- Verify the design loads with the side in z, and if the size matches with the design. Resolution by default is 25 pixels/mm
- Before generating the path, verify the milling cutter diameter has been adjusted: 3.175mm, Offsets: -1, overlap: 0.25, 2D threshold: 0.5, error: 0.1, 2D z: 0
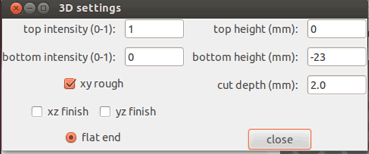
- Adjust the 3D parameters, the design depth: for my design, it was -23mm and cutting dept: 2mm
- Make .path
- Before generating the .rlm file, verify speed parameters: 20mm/s and jog: 1mm
- Adjust Z, X, Y axis of Modela
- Make .rlm
- Send it!
- Time required by Modella for this process was 2.5 hours (it was calibrated so it took the few time possible, only in this case quality was not a priority)
Then, without moving the wax, the adjustments in Fab Modulus are done for the finishing process.
- Parameters are verified before creating a new .path
- Select milling cutter size, material and process: mm, 1/8, wax, finish (given the depth of the design and availability of milling cutters, I used the same size for this process, so no change was made).
- Make .path
- Adjust Z, X, Y axis of Modela
- Send it!
This process took 30 minutes.
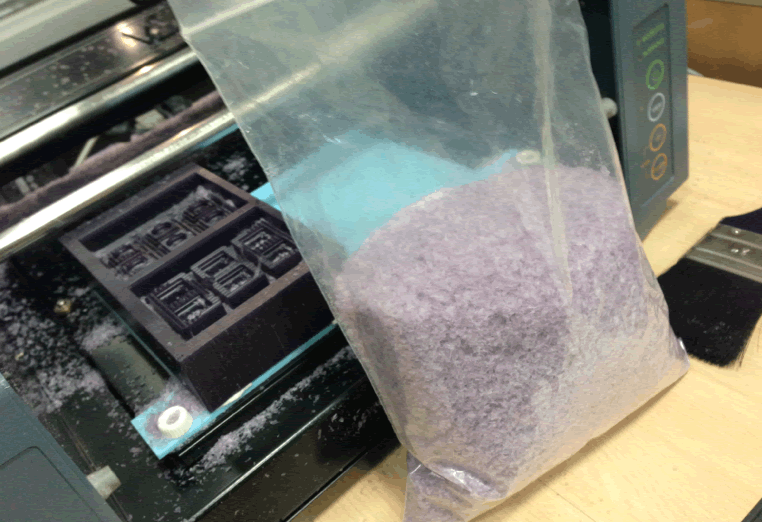
I recommend not disposing the machined wax, since it is recyclable and it can be moulded again.
Make a Mold from the Wax
Materials:
- Recipients for the mix,
- Paper towels
- Gloves
- Wood trowel for mixing
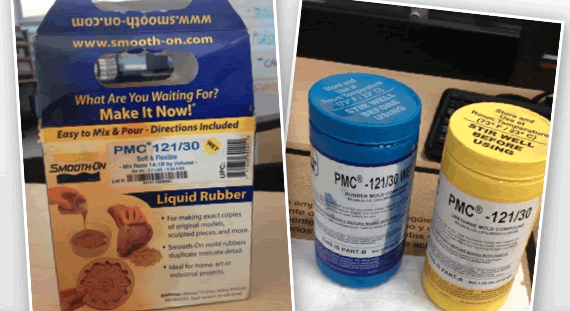
- Liquid Rubber
Procedure:
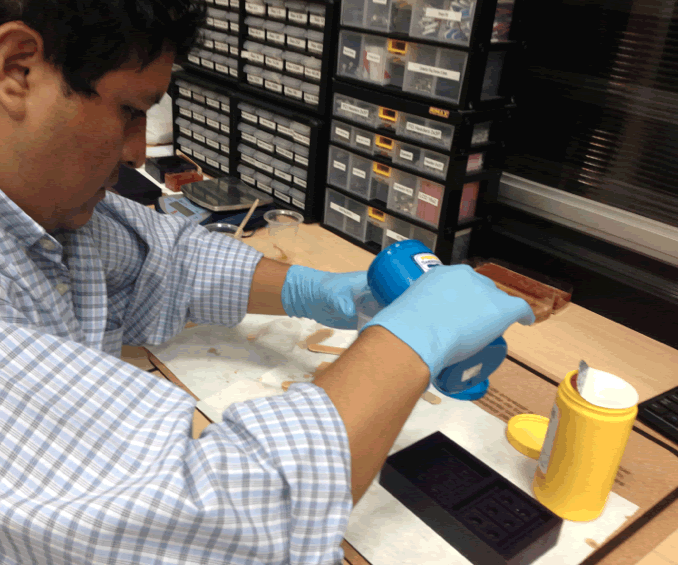
- In an opened, clean and aired space, place all the materials to be used
- Pour the liquid rubber components in the recipient, indications state there should be a 50-50 proportion
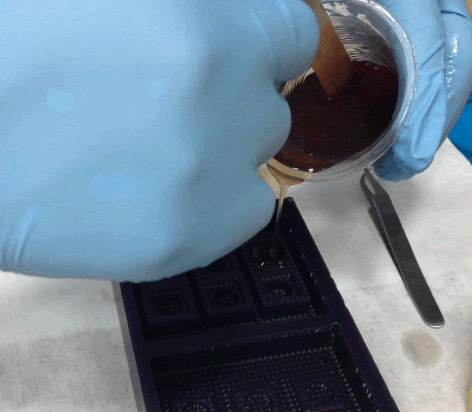
- Once the mix is homogeneous, pour it on wax mould
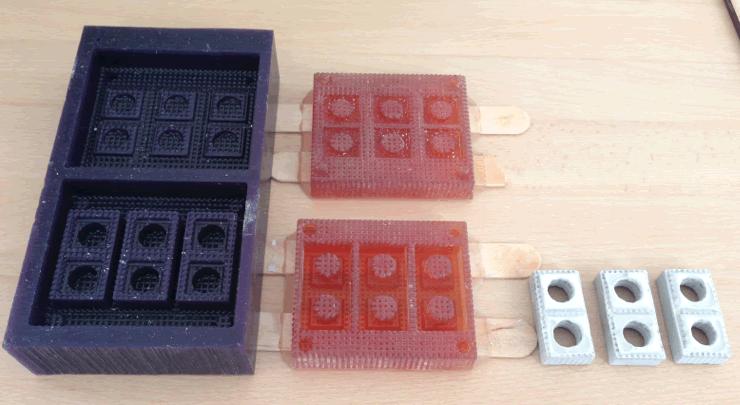
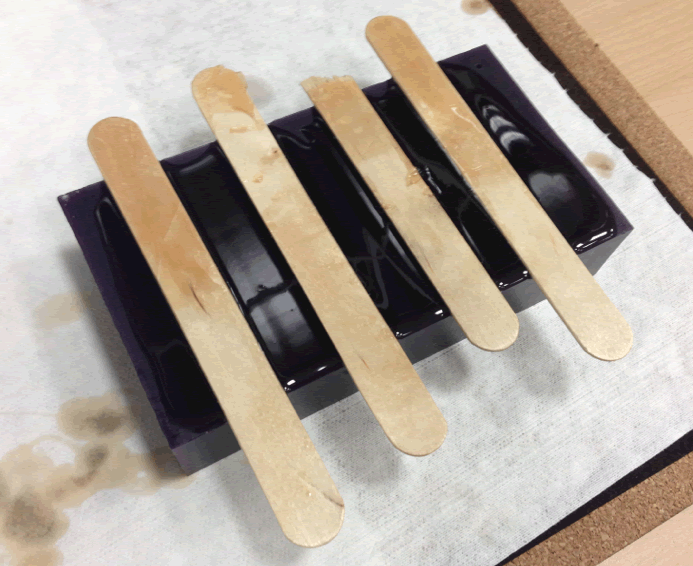
- In order to ease demoulding process, I used wooden sticks, as shown in the picture.
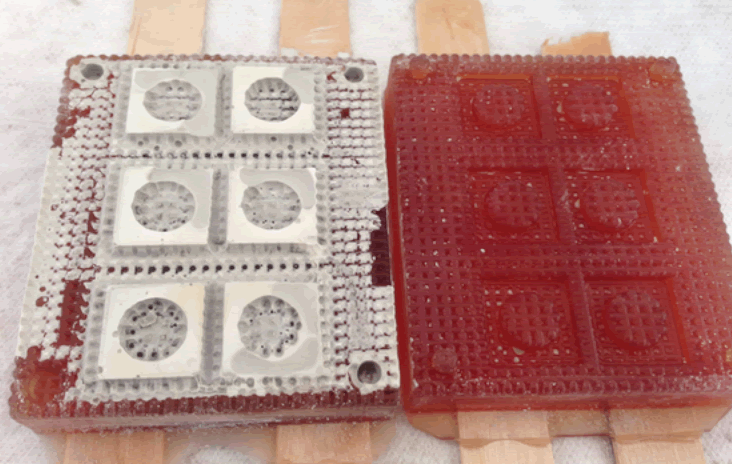
- It should be let to settle for 5 hours, so the liquid rubber may be demouldedIt was not hard to demould; as you can see, wax and liquid rubber work easily together.


 |
 |
 |
 |
 |
 |
 |
Cast Final Object
Materials:
- Gloves
- Goggles
- Wooden trowels
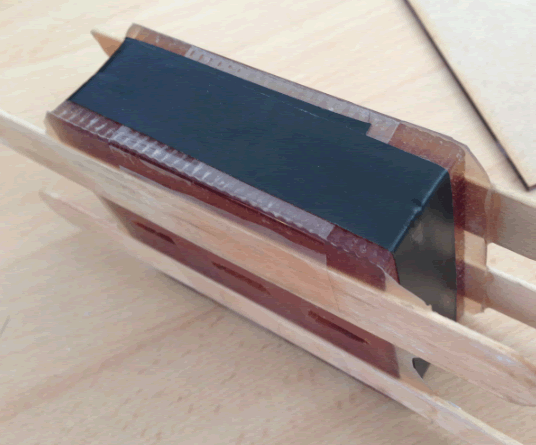
- Adhesive strips
- Cutter
- Recipient for mixing
- Water
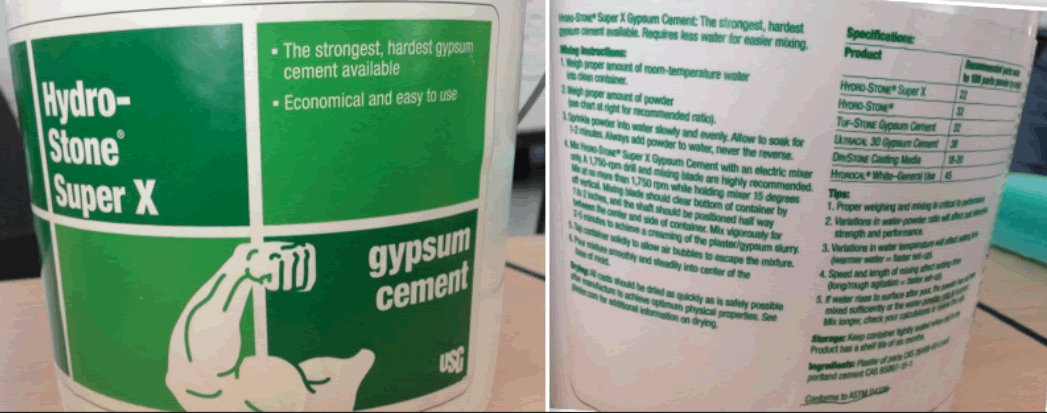
- Hydro-Stone Super X hardens in 30 minutes and activates with 1 part water to 5 parts HydroStone.
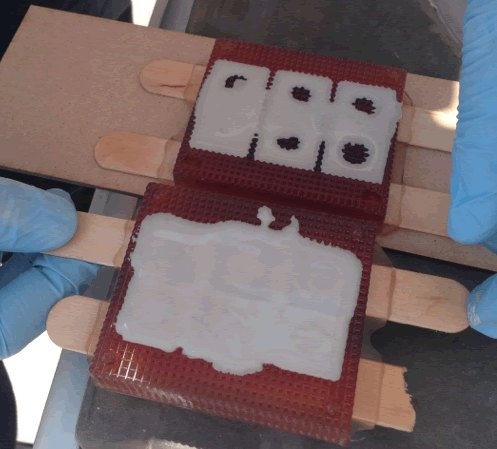
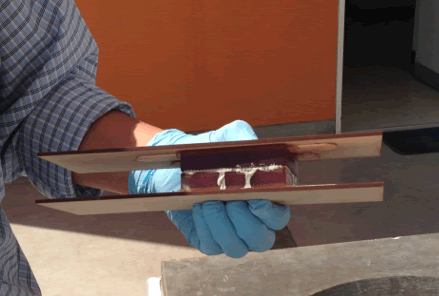
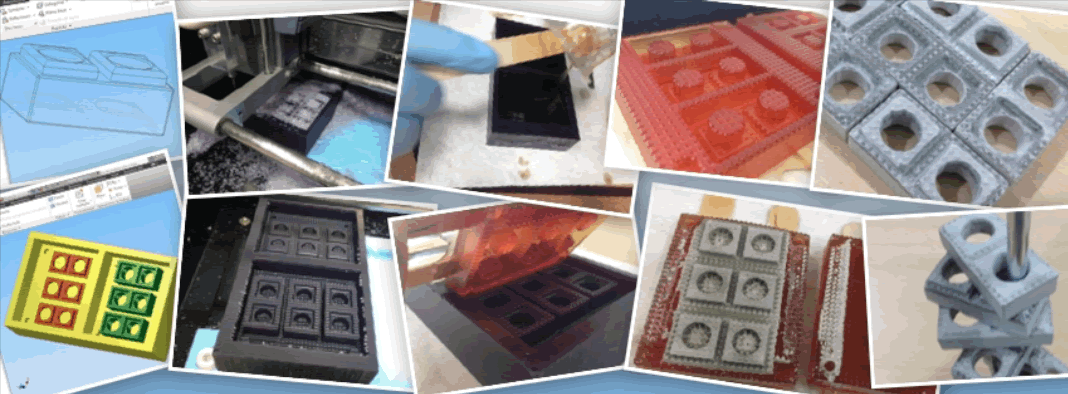
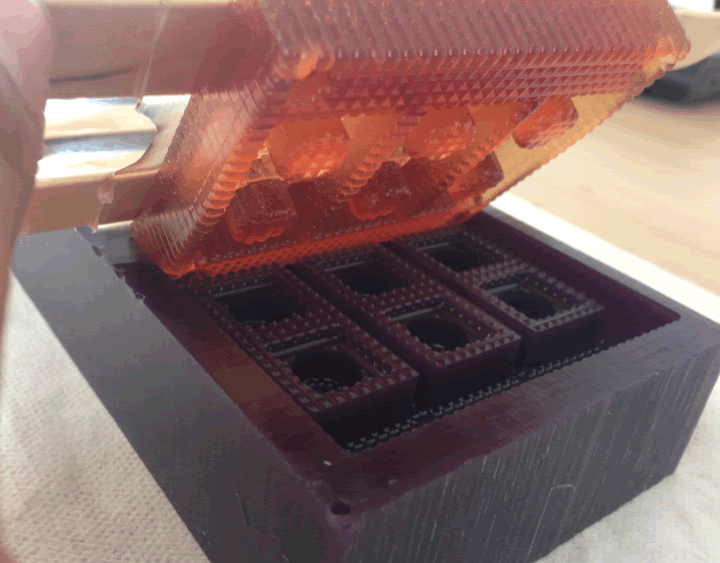
I made two experimental procedures; the first one consisted in doing the casting with the moulds opened and then joining them after some minutes. The result was not satisfactory. The second consisted of assembling the mould and making some holes to "inject" the material and fill the mould. This result was much better. Images of the processes appear below:
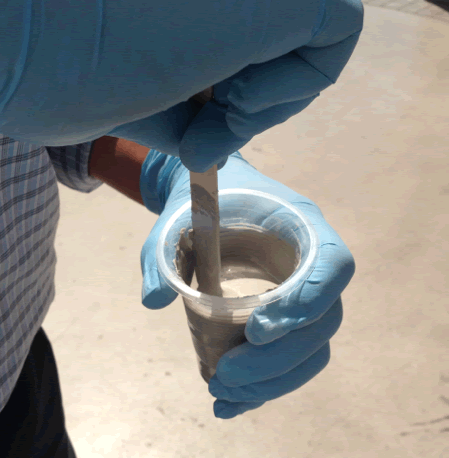
Dilute Hydro-Stone with water, in a 5 parts to 1 part rate. Add the powder to the water.
Homogenize the mix
Pour it on the mould
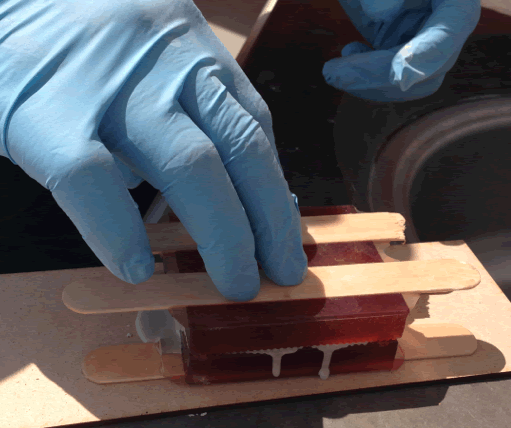
Settle it for some minutes and put the two parts together.
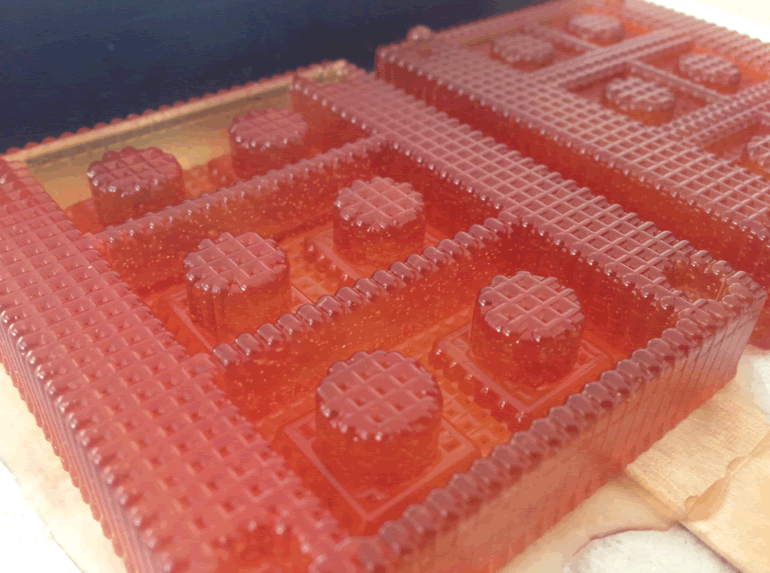
One hour later, the mould may be carefully removed. As you can see, with this bubbles appeared, due to the lost of material at the moment of placing the two parts together.
Then, I assembled the mould and then I made a hole for each piece, I followed the same procedure to prepare HydroStone and, as you can see in the image, the result was better than the previous procedure.
Finally, the functionality of the prototype was tested.