This week’s assignment was to familiarize
ourselves with some computer-aided design programs and to begin the
initial process of designing our final project.
We have been told by our instructor and invited professors that “everything is easier” and that “everything is different ”in Linux and as I have no experience with the process I find myself learning this new operating system (for me).
I use AutoCAD mostly for 2D, and Inventor for quick 3D modelling, I find it simple.
.
The designs we see are to work with 7 years old children, I decided to use this work to learn to use 2D Autocad.
Now let's talk about the "Wind Tunnel" project :
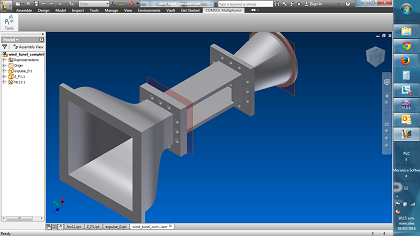
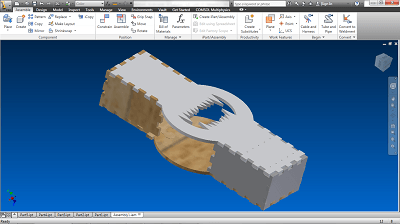
If you remenber, the wind tunnel will be made of 3 parts, the Nozzle, test zone and the expension Zone. The first sketch corresponds to the
concentration wind. The mechanical piece is the "Nozzle", it was made
with Rhinoceros 5 (thanks to Ricardo Torres to help me).
The first sketch corresponds to the
concentration wind. The mechanical piece is the "Nozzle", it was made
with Rhinoceros 5 (thanks to Ricardo Torres to help me).
To get the right shape I had to read parts of several books and articles (1609608607 - Nova - WIND TUNNELS AERODYNAMICS, Wind Tunnel designs and their diverse engineering applications - edited by N.A. Ahmed).
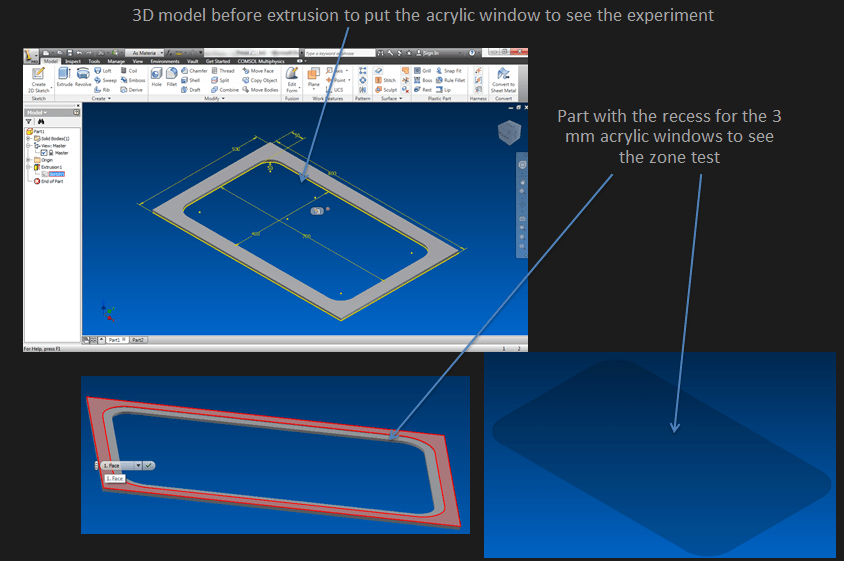
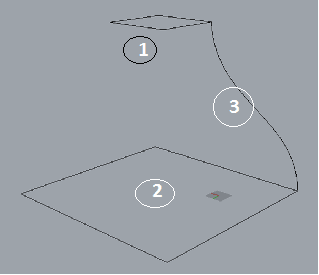
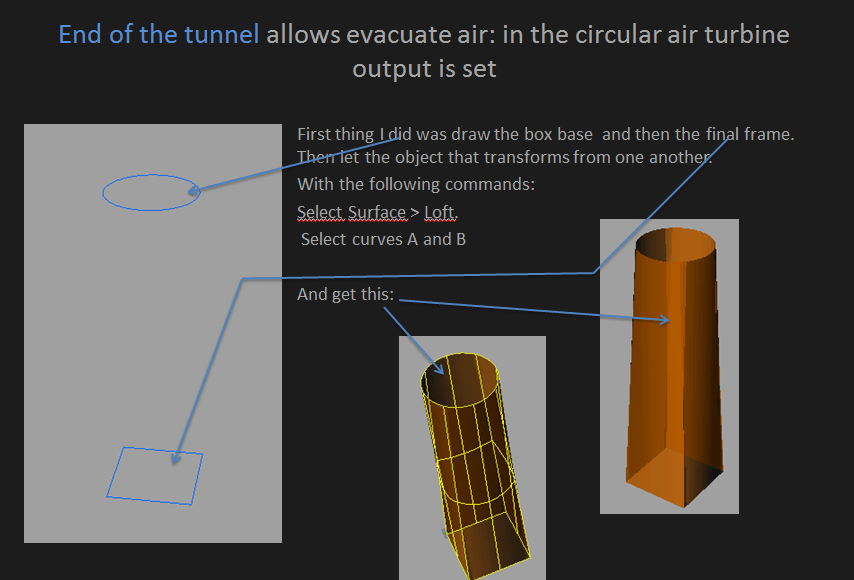
First thing I did was to draw the box base (1) and then the final frame (2). After that, the path I wanted to follow form (3).

We have been told by our instructor and invited professors that “everything is easier” and that “everything is different ”in Linux and as I have no experience with the process I find myself learning this new operating system (for me).
I use AutoCAD mostly for 2D, and Inventor for quick 3D modelling, I find it simple.
The designs we see are to work with 7 years old children, I decided to use this work to learn to use 2D Autocad.
Now let's talk about the "Wind Tunnel" project :
If you remenber, the wind tunnel will be made of 3 parts, the Nozzle, test zone and the expension Zone.
The first sketch corresponds to the
concentration wind. The mechanical piece is the "Nozzle", it was made
with Rhinoceros 5 (thanks to Ricardo Torres to help me).To get the right shape I had to read parts of several books and articles (1609608607 - Nova - WIND TUNNELS AERODYNAMICS, Wind Tunnel designs and their diverse engineering applications - edited by N.A. Ahmed).
First thing I did was to draw the box base (1) and then the final frame (2). After that, the path I wanted to follow form (3).
-
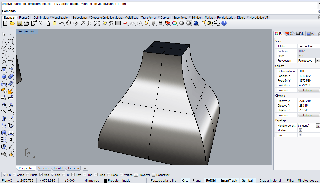
The approximate dimensions this zone are 50cm x 50cm x 90cm . Gray area
in the previous drawing lets add a window prevents air creates
turbulence in the test area.
 For me, the hardest part of this work was the
use of Rhino I had to learn to handle.
For me, the hardest part of this work was the
use of Rhino I had to learn to handle.after that I decided to use inventor to finish all design with them and assemble all piece to obtain my wind tunnel.