
This week our goal is to use the laser to cut a series of shapes out of cardboard that can be used to create larger structures.
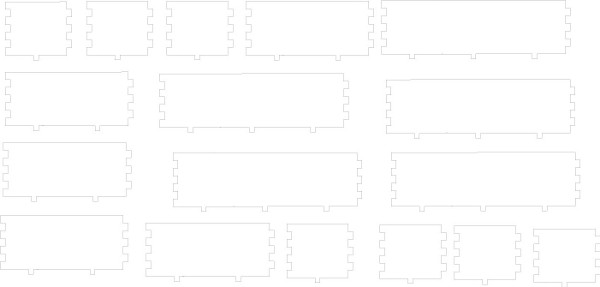
I decided to create a series of walls that could be used to make a custom 3D dungeon or castle for role-playing games like Dungeons and Dragons. The pieces need to be modular and stand on their own as the dungeon will get added piece by piece as the group explores the previously hidden map. I decided to make various walls in inch increments (the standard scale for games of this sort). I also decided to create a peg-board like floor so that the pieces could stand on their own. This will require that the pieces fit very snugly or they will not stand up in the slots, but not too tight or they might snap off when attaching them to the board.
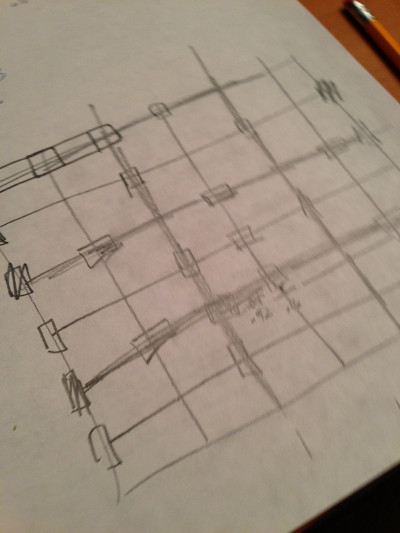
I first drew on paper the basic ideas of what I wanted the project to look like. I often have trouble visualizing objects without a sketch to work from. Note: this did not prevent me from making the wrong number and type of holes. More on that below.
I designed the walls in Inventor and exported them to Illustrator. I could have used many different programs for this, but as I had just finished working with Inventor for my last week's assignment, it was fresh in my mind and I wanted to be sure that I could use the parametric parts of it.
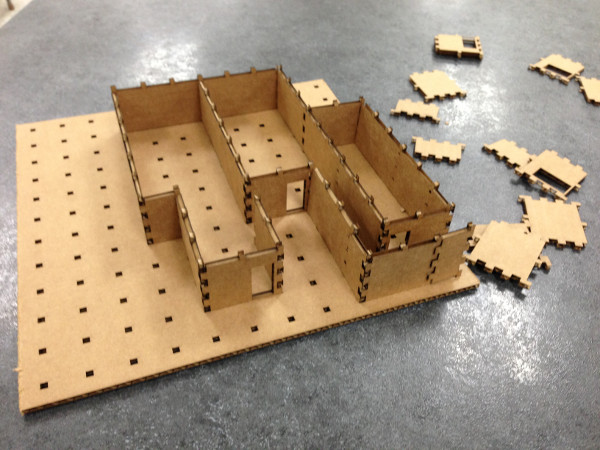
My first plans worked - everything fit perfectly. However, the walls could not meet using the pegboard. I needed more holes and pegs! With my design as created, the walls could not possibly meet. Argh.

Back to the drawing board, or rather back to my CAD program. I doubled the number of holes and pegs. Now not only are they guarenteed to line up, they have more stability. Since the pieces fit together the first time, I did not need to change those measurements. The new versions worked fine.
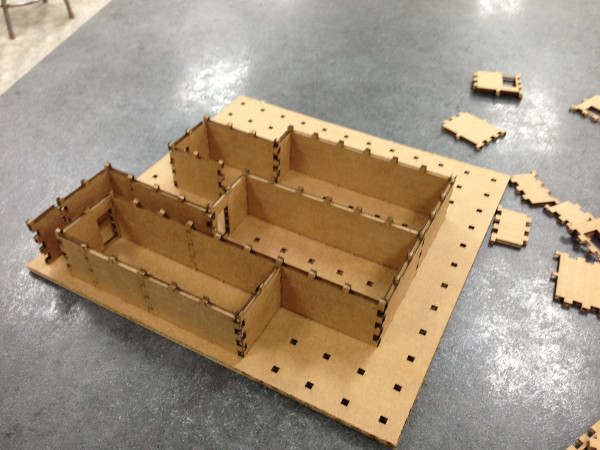
At this point, if I cut a double thickness board, I could use the same pieces to construct multi-story buildings and castles. Fun!
Download my Illustrator file (.ai)