
This week our goal is to make a machine with our labmates.
After some discussion and many ideas discarded, we decided to try to make a version of a drawbot using as many lab materials as we could.
In order to make this machine we need the rigging for the system which includes a 3D printed carriage for the writing instrument, the overall board to be used and the line that connects the carriage to the motors. Then we need an arduino to run the machine and a motor control board to manage the 2 stepper motors.
Brad started to work on the rigging and carriage, Fran began planning the motor contol board and I started working on an arduino clone that could be made in the lab. Once we had the parts, we will work together to put the machine together and debug it.
I decided to try making the Barduino as most of the parts we already had in the lab and those that we did not were relatively easy to procure. I decided to make 2 boards as it gave me a bit of room for error if one did not work and also in case one of them met an unfortunate end. At the end of the first week, I had my two boards.
Next--the smoke test. I attached the boards to the FTDI cable and the programmer. The nice looking board did nothing. However, the LED on the worse looking board of the two lit up like a champ. I tried to burn the bootloader, but I got an error that led me to believe that I had a soldering problem. I went off to use the microscope to try to find my problem.
Under magnification, it was clear that when I placed the chip on the board, I had the chip misaligned. It was exactly one step too far to the side. Each of the pins was off by one trace and the end pin was attached to nothing! I held the chip with a tweezers and used the heat gun to desolder the part. I carefully reattached it and hoped for the best. I raced to the programmer only to be confronted with a new problem. The so called "Expected Signature" problem.
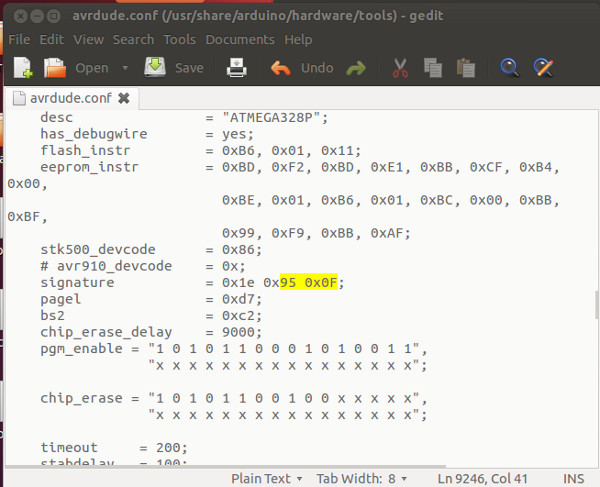
Apparently I used the ATmega328 from the inventory but the Arduino programmer expects an ATmega328P. Looking online, I found the solution. You need to edit the file avrdude.conf located in the arduino/hardware/tools/avr/etc folder. Search for the "0x1e 0x95 0x0F" signature used for the ATmega328P and change it to "0x1e 0x95 0x14" to burn the bootloader to the ATmega328. Then after burning the bootloader change it back.
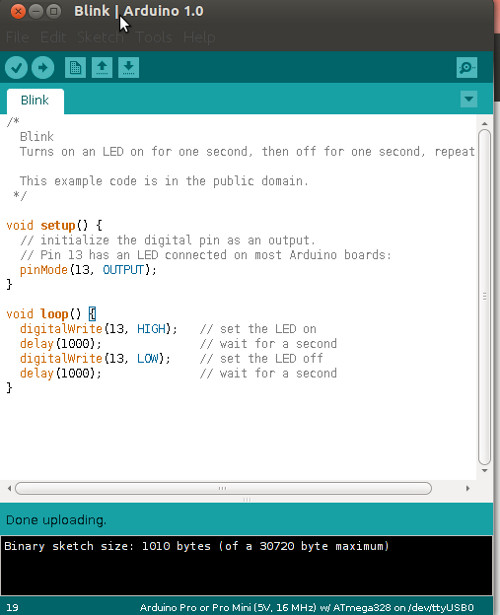
After this, I loaded the blink sketch. Success!
We managed to get the Drawbot working - after much debugging - but only for the purchased motor shield. We fabricated the rest of the project, but we would have liked to have fabricated as much of the machine as possible.
