| The project
              centers around the needs of  2 bored cats that need a
              place to play.  Using 5 pieces that interlock it will
              be possible to create a series of boxes that stack on each
              other in a variety of configurations.  The pieces
              include an end, a side, a top/bottom, a securing "peg" and
              a cover.  The cover will fit into slots that are cut
              on each side of the exit/entrance holes thereby making
              reconfigurable paths.  The top and bottom will have
              holes that can be covered.  "Pegs" will be inserted
              into slots to hold the box together. 
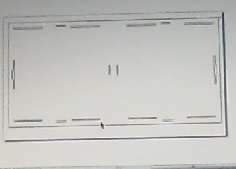
Vinyl signage will be cut to indicate either Kat Kondo or Cat House with the "o"s being turned into profiles of mice. | |
|  | The ends and sides
              of the project are rendered in Inventor for the purposes
              of concept discussion.  The final project will be
              rendered in Inkscape. | 
|  | This is the first
              attempt at creating a drawing for the "Kitty Kondo" in
              Inkscape.  I tried using the cloning tool but when
              the drawing was transferred to the laser engraver it
              became very apparent that something went wrong. | 
|  | As per Neil's
              suggestion the project is completed in steps.  This
              is an example of a trial piece of cardboard set for
              cutting on the laser cutter.  The laser came close,
              but did not cut all of the way through the sample. 
              Laser settings will need to be adjusted for the final
              project. | 
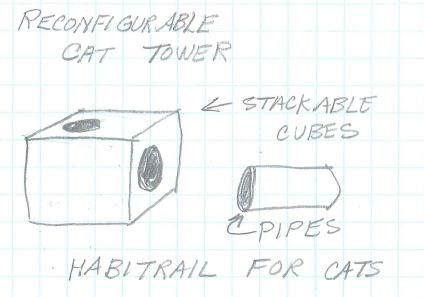
|  | After having tried a number of different drawing tools I have decided to revert to Inventor. I am able to do parametric modeling in the program. I still intend to explore other programs but will do this after I get the laser cutting process and tolerance issues mastered. | 
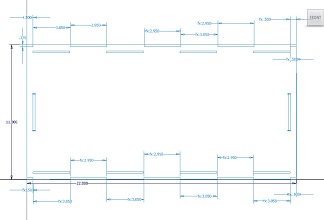
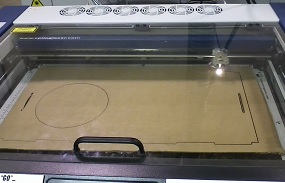
|  | At last I have a usable drawing suitable for the laser engraver. It took some time to figure out that I needed to draw a 3D model in Inventor, turn to a front view and export a 2D view. I ended up setting the background color in Inventor to white and choosing a solid black model. When the object is turned to view the front only the resulting image can be exported in a file format that the laser cutter will read. This is particularly important since the laser cutter is one of the busiest pieces of equipment in the lab. I will need to be off and on the laser cutter in a timely manner to be courteous of others. | 
|  | Now that the
              process for exporting an Inventor drawing to the Laser
              engraver is figured out I am able to complete the drawing
              of the modules needed to construct the "Kitty Kondo"
              modular system. | 
| There are several
              pieces that make up the system.  End pieces can be
              cut with or without holes.  Top/bottom pieces can be
              made with or without holes.  It is a matter of
              cutting enough pieces to make a structure the size and
              complexity of choice.  It uses cardboard which is
              cheap but may not be as durable as other materials. 
              For the cats it will do just fine.  I will be able to
              refine and remake parts over time. | |
|   | As per class
              instructions I ran test pieces to make sure my pieces fit
              well.  This proved to be worth the effort. 
              Cardboard slated for the project had been used so I needed
              to redraw some of the openings to correspond with
              cardboard I set aside for my project.  I was also
              able to test the clearances needed for a snug fit. 
              The extra step saved time in the long run. | 
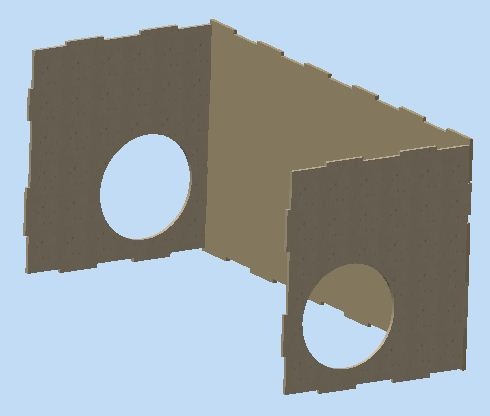
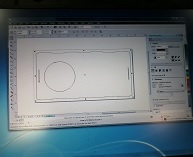
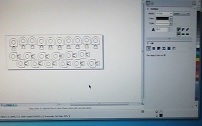
| I was able to import my drawings into CorelDraw and create the 
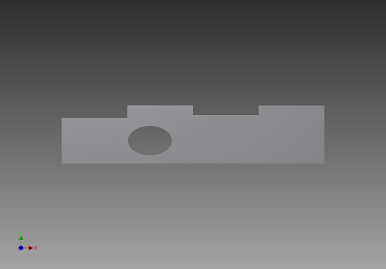
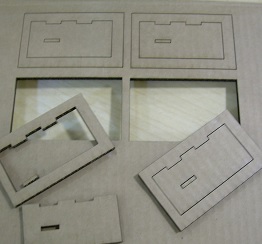
necessary paths for laser cutting top/bottom, side, and end parts with and without holes. I cut enough parts for four "kondo" units. |      | 
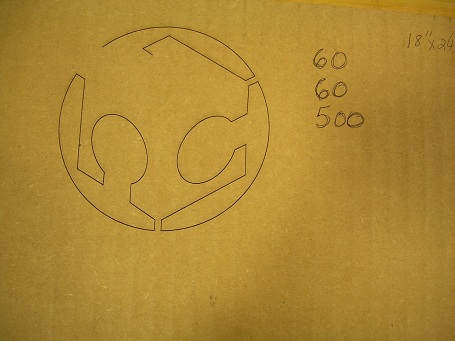
| I experimented with the settings to get a cut that went through the cardboard without leaving too big of a kerf. More experimentation with materials over time will help me get a feel for viable settings. I used 35, 90, 500 on these cuts. I think the earlier settings of 60, 60, 500 may have been better. |       | 
|  | I used Inkscape to draw the vinyl cut logo to be used on the modules. It gave me experience using a different program and may work well with the fab modules. | 
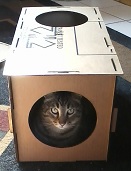
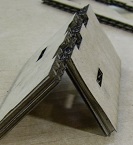
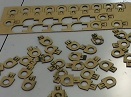
|  | The first completed unit is a success! The module was tested immediately after assembly. | 
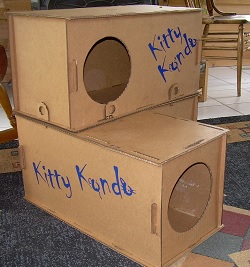
|  | The final setup is a 3-unit "Kitty Kondo". Note that the unit is held together with press fit cardboard locking tabs. I milled some of these with the grain of the cardboard and some of them perpendicular to the grain of the cardboard. Each orientation has it advantages and disadvantages. The tabs cut with the grain of the cardboard are bent easier into a locking position but also bend easier on insertion. The tabs cut perpendicular to the grain insert easier but it is harder to get the cardboard tab to bend. In the end I used the tabs that were cut perpendicular to the grain of the cardboard. In addition to meeting requirements for vinyl cutting, the Kitty Kondo logo ads a bit of spice to otherwise boring cardboard. |