Composites
This week's assignment was to experiment with making composite materials, that is embedding fibrous material in a liquid matrix that then sets to form a composite material that is better in tension, bending and compression than either material alone.
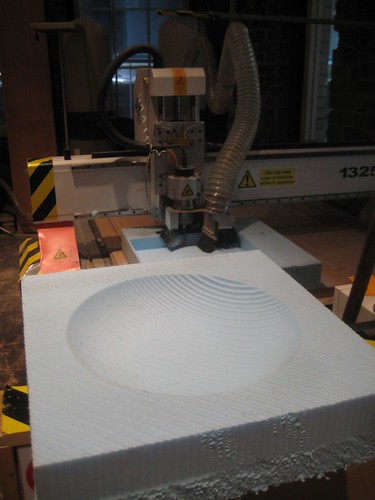
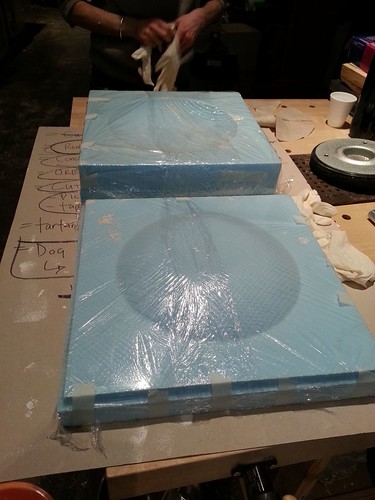
Here we are milling both parts from blue foam on the big CNC router:
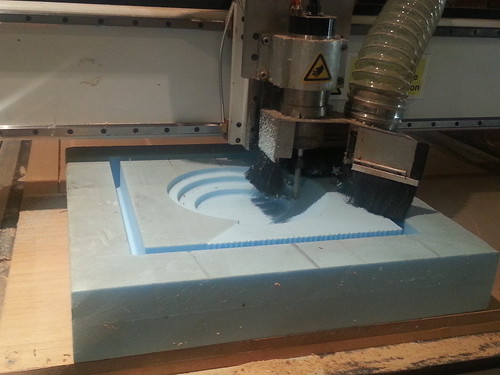
This was actually the first time I have used that router, and it was surprisingly easy - having learnt to mill in the 3D on the smaller milling machine, that experience really did transfer across quite easily, with just the control software of the router to learn. Again I used Vectric's Cut3D to generate toolpaths and exported them as a Gcode mm .tap file for the big router. Peculiarly I found that though I had instructed Cut3D not to profile on the roughing cut, somehow it put this in anyway. We managed a feedrate of +120mm/s using a 1/2 inch ballnose cutter - very satisfying to watch! On the lower part of the mould I forgot to check the box to mill finishing cuts at 90 degrees to each other, so we ended up with a stripey texture which we decided was quite interesting. On the top half we put in the 90 degree finishing cut leaving us with a reverse dimpled texture. We milled a square around the mould so that we could accurately line up the two halves.
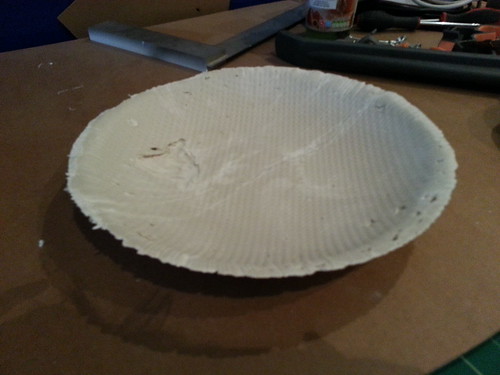
On a second attempt we used more plaster (4 cups of plaster to 2.25 cups of water) and did not pre-soak the linen, but laid it in first and poured the plaster over the top. We also used only one ply of linen this time. The results were a lot better, with the mould filled more fully, though still some dodgy areas. The whole thing looked lot tidier, but you can clearly see the linen on the bottom surface. I think a method in between the two for laying up the linen would be best, with a thin layer of plaster first, followed by the linen placed in dry but then stippling plaster into it.
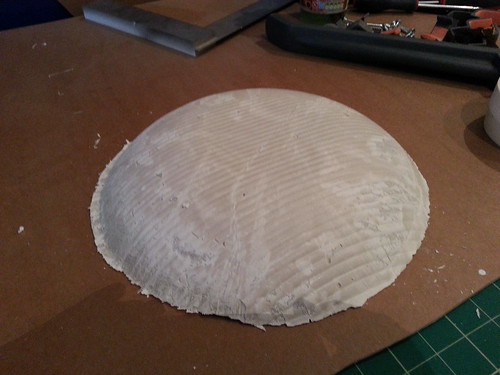
On the second attempt we made up slightly less mixture (3 cups of both parts). This would still turn out to be way too much. It is a very hard thing to predict. Paranoid about the mixture going off before we had time to clamp it, I sped ahead and pushed the top down onto the mould only to find a whole lot of excess resin pouring out all over my shoe and thus the floor. Despite this stress, the resulting bowl was better again, fully filled, with the spaghetti well enclosed in resin and a light, tough bowl. The resin even released itself from the floor. However we still had the problem of cling film getting trapped in the composite, so reckon we could do without the clingfilm in the future when using polurethane.
I also made up a laser cutting layout for the linen, and tried out laser cutting it in case anyone would like to make the same bowl. Here is the .dxf for the linen.
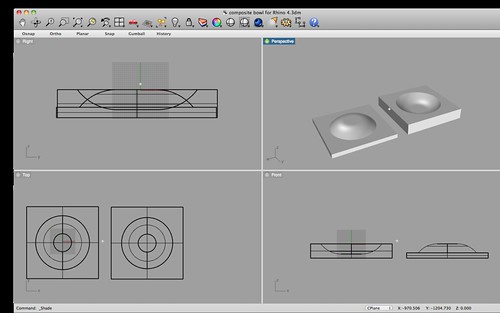
Milling the moulds
Tom and I decided to work together on a shallow bowl shape, 6mm thick. The .stls for both parts of the mould are here: top and bottom.Here we are milling both parts from blue foam on the big CNC router:
This was actually the first time I have used that router, and it was surprisingly easy - having learnt to mill in the 3D on the smaller milling machine, that experience really did transfer across quite easily, with just the control software of the router to learn. Again I used Vectric's Cut3D to generate toolpaths and exported them as a Gcode mm .tap file for the big router. Peculiarly I found that though I had instructed Cut3D not to profile on the roughing cut, somehow it put this in anyway. We managed a feedrate of +120mm/s using a 1/2 inch ballnose cutter - very satisfying to watch! On the lower part of the mould I forgot to check the box to mill finishing cuts at 90 degrees to each other, so we ended up with a stripey texture which we decided was quite interesting. On the top half we put in the 90 degree finishing cut leaving us with a reverse dimpled texture. We milled a square around the mould so that we could accurately line up the two halves.
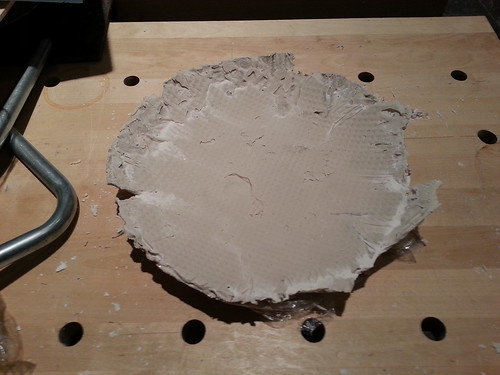
Herculite and Linen
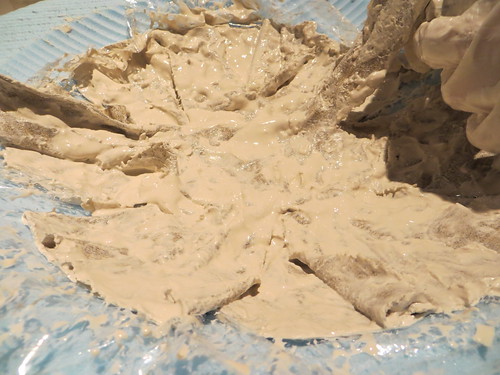
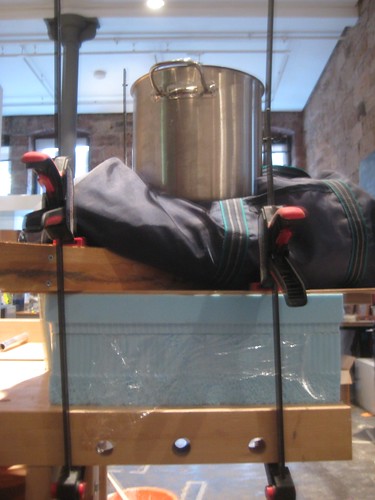
We decided to try using Herculite LX (plaster) and linen as our materials first. On the first attempt we did not mix up quite enough plaster to cover the mould, and we first saturated the linen with plaster, which proved quite hard to handle, along with the fact that we were using clingfilm as a release, which kept snarling up. We placed the top half of the mould on top and clamped the whole thing to the bench with a bag of rocks, a speaker driver and a big potful of water on top weighing things down. The results can be seen below, quite a mess, with cling film trapped in the composite.On a second attempt we used more plaster (4 cups of plaster to 2.25 cups of water) and did not pre-soak the linen, but laid it in first and poured the plaster over the top. We also used only one ply of linen this time. The results were a lot better, with the mould filled more fully, though still some dodgy areas. The whole thing looked lot tidier, but you can clearly see the linen on the bottom surface. I think a method in between the two for laying up the linen would be best, with a thin layer of plaster first, followed by the linen placed in dry but then stippling plaster into it.
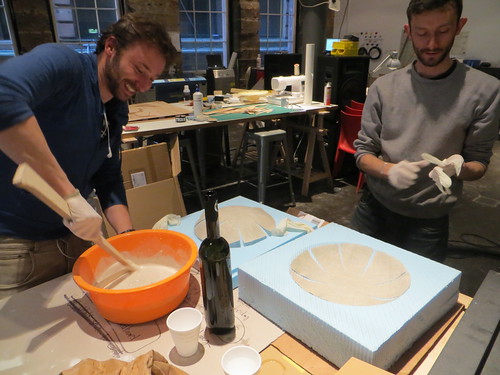
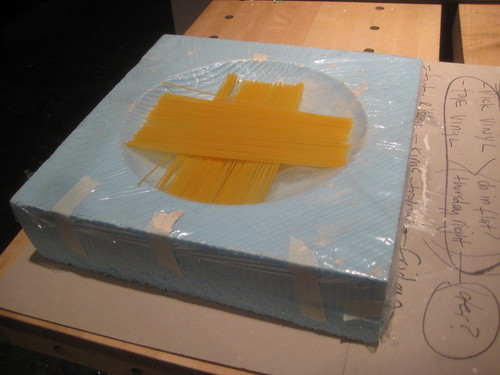
Polyurethane and Spaghetti
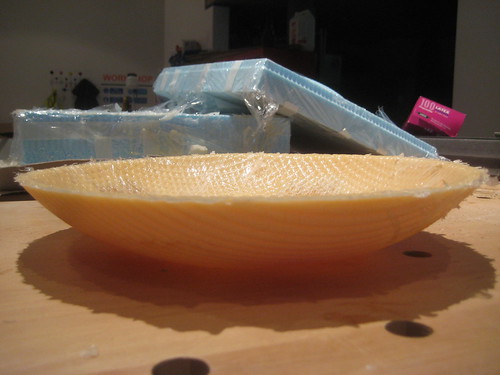
Our second experiment was using polyurethane resin as a matrix and spaghetti as a fibre. The first attempt at this was disastrous. We waited too long, not knowing that the polyurethane goes of INCREDIBLY QUICKLY in the mixing bowl. We frantically tried to get it in the mould but it was already setting, to the point that this is the flattest we could get it with all that clamping ( second from the front):On the second attempt we made up slightly less mixture (3 cups of both parts). This would still turn out to be way too much. It is a very hard thing to predict. Paranoid about the mixture going off before we had time to clamp it, I sped ahead and pushed the top down onto the mould only to find a whole lot of excess resin pouring out all over my shoe and thus the floor. Despite this stress, the resulting bowl was better again, fully filled, with the spaghetti well enclosed in resin and a light, tough bowl. The resin even released itself from the floor. However we still had the problem of cling film getting trapped in the composite, so reckon we could do without the clingfilm in the future when using polurethane.
Conclusion
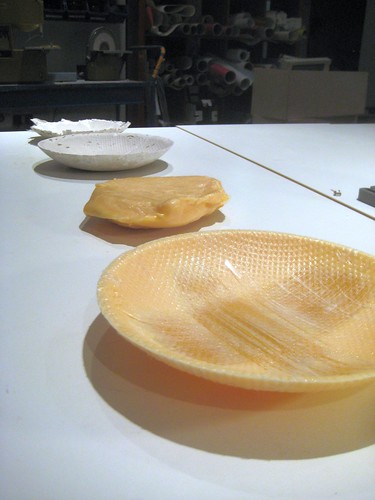
Here are all out attempts laid out:I also made up a laser cutting layout for the linen, and tried out laser cutting it in case anyone would like to make the same bowl. Here is the .dxf for the linen.
