Fab Academy 2013 · Michael Hviid Nielsen
Waag Society's Fablab in Amsterdam
· Lecture 11: Composites
Lecture 11: April 3, 2013
Assignment: Design and make a 3D Mold. Layout a composite in
the mold.
Lecture Notes:
What I did:
This turned out to be mostly a collaborative effort. Our Fablab didn't have the tooling and materials for making composites, so we had to make our own. We tried to make shure that everyone worked on a bit of every step of the entire process.
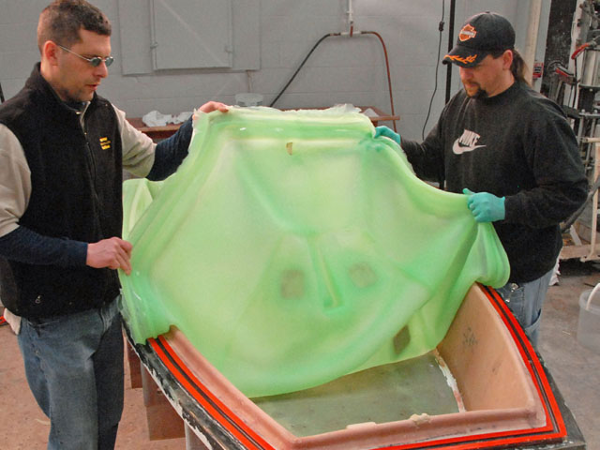
Image from Smooth-On website
We chose to make a brush-on reusable vacuum-bag ("EZ-Brush"
from Smooth-On) and using a vacuum pump. So first we had to
source the materials which proved a bit difficult due to the
time-constraints. In order not to get caught up with all the
materials in the mail come wednessday - we went to a plumming
store and bought the necessary fittings to connect the pump
with the bag, a manometer, a release valve and the vacuum port
valve. These where then assembled with teflon tape to ensure
an air-tight fit.
We also couldn't source vacuum ports (suction knobs) in time -
so we had to make our own. We did that by casting "Oomoo"
(from Smooth-On) in a stainless steel funnel, using a concave
polyurethane plug on top. The fitting for hose-connection was
cast in the Oomoo. I made the setup of the funnel to cast in.
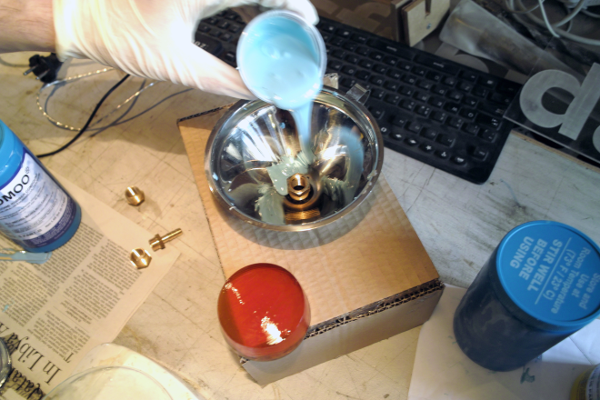
Fablabbed suction cup, cast in "Oomoo"
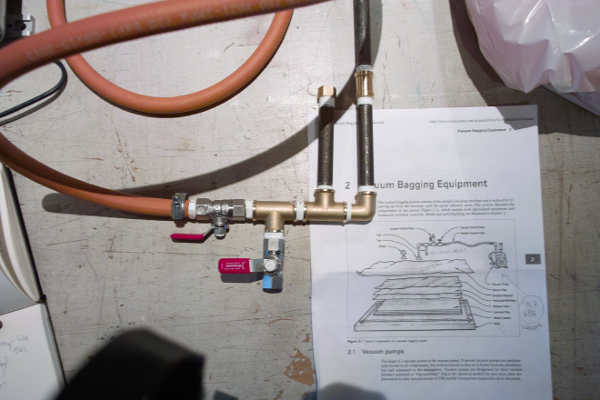
Pipefittings with vacuum port, resin trap and release valve
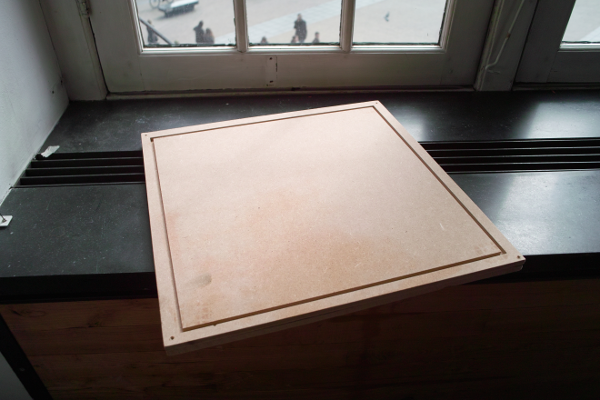
We milled a bottom plate for the vacuum bag by milling 9 mm
mdf on the Shopbot. This then produced a groove which act as a
gasket when painting over with silicone. We then shaped a dome
out of foam which we cut with hacksaws, knifes and surfaced
with a "rasp" and sanding paper. I did one of the rasping
passes. To make the surface smoother we gesso'ed it three
times, with sanding inbetween. I did one of the gesso- and on
of the sanding passes.
Baseplate with milled air-trap/gasket-trace
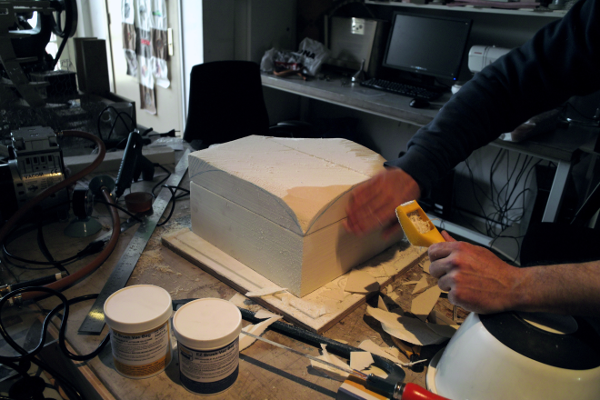
Former in foam for the vacuum bag
We then made the brush-on reusable vacuumbag with "Brush-on Vacuum Bag" from Smooth-On. This took 3 layers with a lot of drying time; 1 hour between layers and 3.5 hours after last layer.
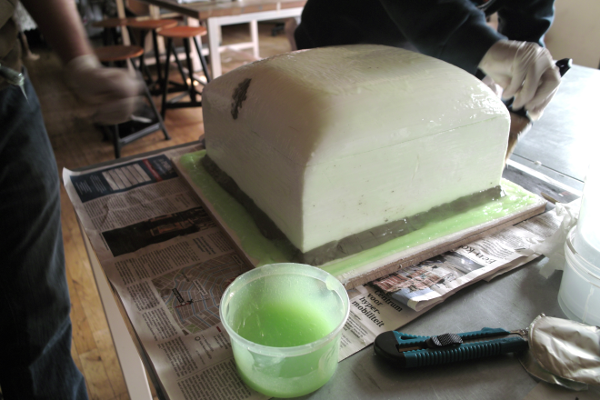
Smooth-On "EZ-Brush"
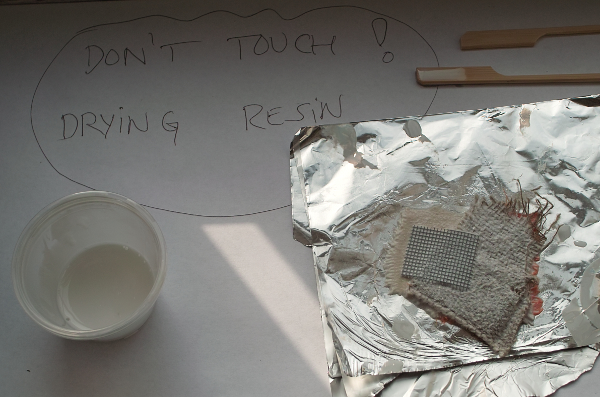
Fabric release test with "Smooth-Cast 325" from Smooth-On
We bought fabrics in a local clothes-store (fly-screen, polyester and linen cloth). I then made a releasetest with the different types of cloth, the resin we had and vaseline as a release agent (which is a release agent of the "general contamination type"). By pulling this fabric apart we concluded that the flyscreen had to be our release fabric since it was the only one not solidly bond in the composite.
The resulting setup is ready to be used - but sadly not be me
since I have to finish the composites when I return to
Copenhagen. The "Copenhagen Composite Iteration" is described
in detail below "Things to fix".
Things which went wrong:
Except time constraints nothing vent wrong. We could have made the suction cups with deeper recessions and maybe a smoother edge that wouldn't have needed manual trimming. But due to the time constraint - we didn't really have time to make composites. We finished the setup tuesday evening. Tuesdays and Thursdays are "open access" days here at the Waag so time at the machines are limited and depends mostly on luck.
Things to fix:
Basically we now all know how to make a complete vacuum-bagging setup. Which is nice. But we have to catch up with doing our actual composites. However, here are a picture of my first composite plans. Its backing-plates for seacocks on an old boat which really needs all of the existing ones changed - they are close to failure by electrolytic corrosion and are really not sea-worthy anymore. The seacocks will be exchanged with composite ones from Forespar Marine. The backingplates are to be glassed to the inside of the hull thus providing a level surface for the seal between seacock and hull.

Forespar Marine OEM type 93 seacock backing plates
Its a shame that we didn't have time to actually make our
composites - but we have at least made it easy for the other
fabbers following us since the equipment is now here and
works. Life is easy to plan - Its less easy to force life to
stick to those plans.
Making of composite backing plates
The mold shapes where drawn in Autodesk 3DS Max - could have
been done in almost any software since I ended up exporting
B-splines to Adobe Illustrator and exporting Adobe PDF files
for an Epilog Helix lasercutter. Thus it ended up being a
mostly 2D job which could have as easily been done in
Inkscape. The designfiles supplied below are in PDF format.
The sad reason for deciding to make a 3D mold by layering
laser cut mdf contrary to 3D milling one is that neither the
Shopbot or the Roland MDX-20 is functional in Copenhagen
Fablab at the moment (which is where I am doing the final
preparations for graduation).
I drew the outlines for cutting with a line thickness of 0.01
mm and RGB "black" i.e. 0:0:0 since the Epilog driver
determines what to be cut and what to be engraved by the
thickness of the stroke. Everything thicker than 0.025 mm gets
engraved - everything thinner gets cut. To ensure that the
thickness is interpreted correctly by the driver - its
important to make the DPI of the PDF file the same as the
setting in the roland driver - otherwise the line thickness
gets scaled fatter or slimmer than intended.
The cloth was cut with speed, power and frequency settings of
40%, 40% and 40%. After cleaning the optics of the 40 Watt
laser, the speed was upped to 50%.
The chamfer on the bottom of the mold was engraved with the 3D
setting and speed, power and frequency of 40%, 100% and 500
Hz.
The upper parts of the mold where vectorcut with 10% speed,
100% power and 500 Hz frequency.
In order to make a small chamfer on the top of the backing
plate - the lowest layer of the three 4 mm mdf sheets where
engraved with the 3D setting in the driver. The other 2 layers
where vector cut. The three layers of each mold where glued
with wood glue and set in a large vintage bookbinders press.
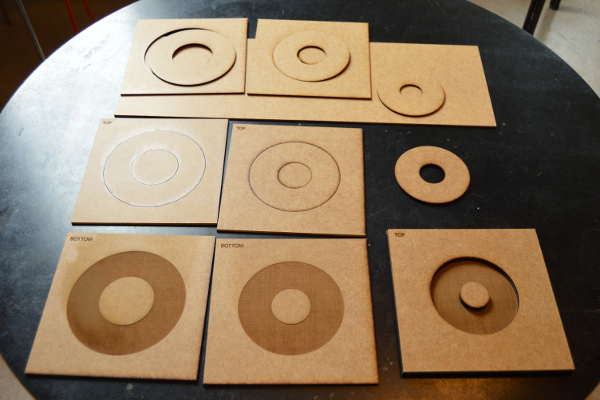
Lasercut mold layers
I also made a file for cutting the cotton cloth (cheap kitchen towels). Polyurethane glue (comparable to "Guerilla glue" in the US) was chosen as matrix binder since its water resistant and epoxy couldn't be sourced.
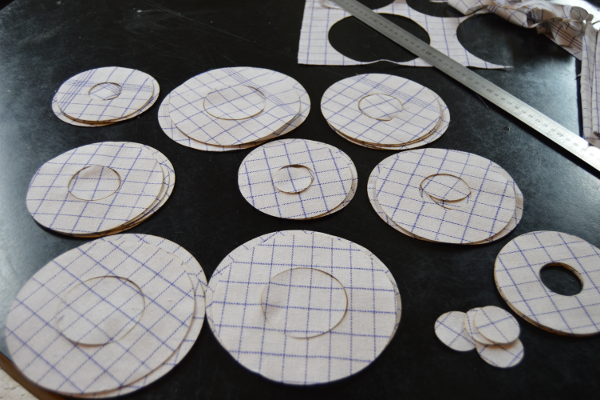
Lasercut cotten cloth
The lasercut cloth where filled with glue with a brush and
layered in the mold shape piece by piece. I tried to vacuum
bag the stack but the glue actually expands with a force much
greater than the vacuum is possible to provide - so I had to
remove the stack and place it in the large bookbinders press
instead.

Final composit in the press
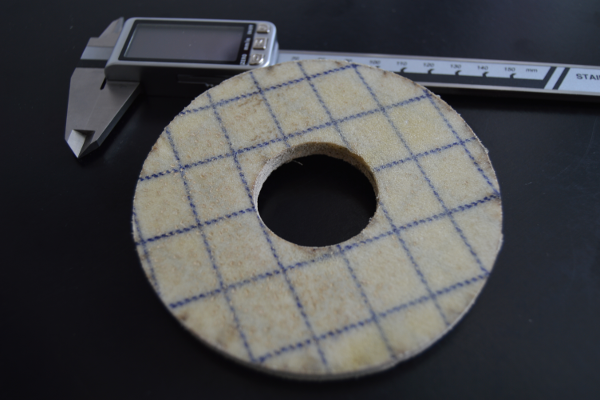
Final composit of cotton cloth and PU glue
Design files
Laser shapes for cutting the cotton
Laser shapes for cutting the mold shapes
The final composite material is slightly flexible - probably due to the slight foaming of the polyurethane glue but I cant destruct it without using tools and a vice