Fab Academy 2013 · Michael Hviid Nielsen
Waag Society's Fablab in Amsterdam
· Lecture 07: Molding and Casting
Lecture 07: Mar 6, 2013
Assignment: Design a model, Make a mold, Cast a part.
Lecture Notes:
Mold terminology; The Sprue; Is the "funnel" in which to pour the molding material, The Runner; is the path leading from the Sprue - through the Gate; which is the "door" to the Cavity; Which is where the mold shape is. When pouring the molding material, it pushes out air from the cavity through the Vent. The "Parting line" is on the final part where the two mold halves fitted together; "Flashing" is superfluous material (like thin flanges) left at for instance the parting line if two halves of a mold did not fit together entirely;
When one wishes to cast metal - an easy/cheap way is to use RoHS-complient solder (which is a tin-copper-alloy) in bar-form (Eg. "SAC305 TRI BAR SOLDER - 1LB BARS" from Digikey. One lb (454 g) is about $60. Its composition is: Sn96.5Ag3.0Cu0.5). The melting point (217-219 degrees Celcius in the case of SAC305) is low enough that a slilicone mold will hold up to a couple of casts (not Mold Max 30 from Shooth On though - which has a max T of 205 degrees C - but Mold Max 60 from same manufaturer would do fine up to 294 degrees Celcius). The Solderbar may be fine for jewelry prototypes - I wouldn't attempt at sales though because the material MSDS says:
"Prolonged or repeated skin contact may cause irritation, skin sensitization and argyria (a non-toxic, cosmetic blue-gray discoloration of the skin and mucous membranes that is irreversible). Skin contact: Prolonged and/or repeated skin contact may result in mild irritation or redness. May cause sensitization by skin contact. This product may discolor the skin".
When buing or making machinable wax the softness can be checked by verifying that the flûte has left a very fine mark in the surface. If it hasn't - the wax is too soft.
Oomoo from Smooth-On is a soft, safe silicone for flexible molds.
Recommandations for asignment; make a wax mold - cast an Oomoo flexible mold - cast Hydrostone or Drystone parts in the mold.
Tips for avoiding air: Mix by shearing - not scooping or whipping when mixing. Mix completely - no striation left. When pouring; tilt the mold and pour slowly to prevent trapping air. When casting silicone or Polyurethane - cure at elevated temperature. When using Drystone or Hydrostone - The consistency should be like heavy cream or runny youghurt.
When milling - fix the mold with double sided tape, or use hot glue to stick the part to the sacrifice surface.
Start with a 1/8th inch end mill for Rough Cut (2 flûte) in machinable wax - the shank diameter is equal to the flûte diameter.
For surfacing use 4 flûte mills.
The bandsaw can cut machinable wax . cut very slowly and backout often to prevent the blade from getting hot and melting the wax.
Beware when finding the correct collet for the Shopbot; the 1/8th inch mill is very close to the 3 mm metric collet. The 3mm collet will be too loose! The 1/8th collet holds the 1/8 mills with a "Slide fit".
What I did:
Inspiration for this weeks assignment comes from the near past of the Netherlands:
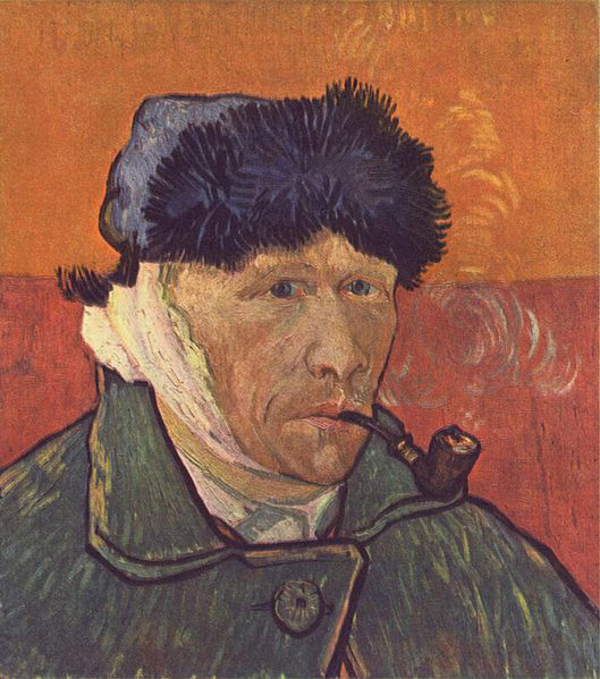
![]()
I want to make an artificial ear and attaching it to a homegrown binaural recording rig. Electret microphone capsules will be modified to fit inside the earcanal. The other ear will be missing its external parts - consisting only of an earcanal with microphone. The rig will make it possible to record the 360 degree soundscape the way which Vincent Van Gogh might have heard it after having his ear cut off (by Gaugin?)
For this assignment I am making his lost ear though. So I went ahead and found a model of an ear free of charge on the internet. The problem with an ear-shape is that it is not really possible to mill on a 3 axis machine (as the Modela or the Shopbot - in their default configuration). So in order to simplify the model I generated two z-depth maps (one from the top and one from the bottom). These then represent each half of a positive mold. The problem could also have been solved with a cloth simulation - which would have the benefit of control over the "chamfer" of the edges by controlling the physical properties of the "cloth" used in the simulation. After adding a box, a sprue, a runner and a vent and making a boolean - the shape was exported as a STL-file for importing into Shopbot Partworks. Here the parameters for the cutting and the placement in the sourcematerial was made and a toolpath genrated which was then loaded at the Shopbot.
This is the ear-model from the internet in 3ds Max with some simple shapes to check the size:
![]()
This is the z-depth map generated from 3ds Max:
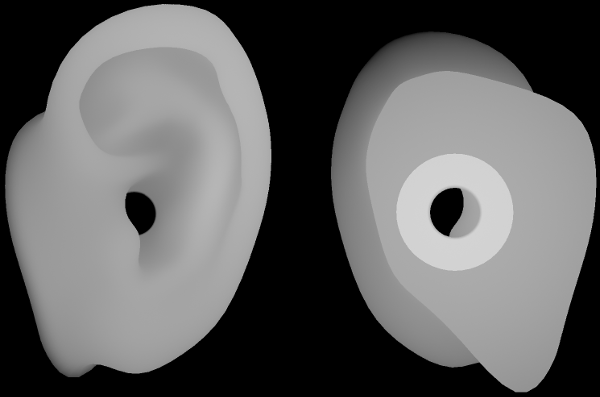
This is a plane with the displacement map:
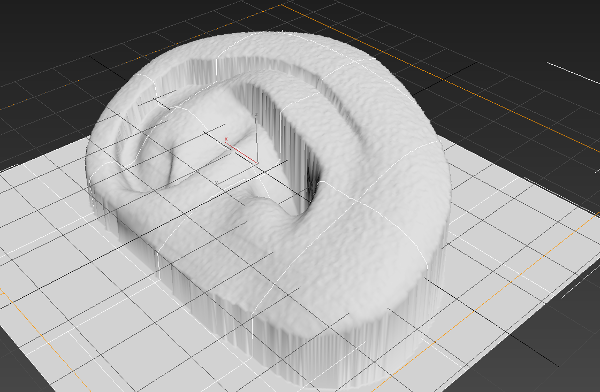
This is a check of clearence needed for the cutting tool in order to mill the shape:
![]()
So with all that double-checking going on, surely everyhting will turn out just fine...
..or not.
I misread the manual for the Partworks 3D software. The part where is says:
Cut Plane Position in Model
"The Cut Plane is the surface onto which all toolpaths are calculated. This plane can be positioned using the vertical slider bar or by entering a specific Z depth. The default position for the cut plane is the middle of the 3D model."
I read this as to say that the toolpath was calculated with reference to this datum and thought that the reason for this might be to accomodate for errors in rounding which would cancel each other out.
This is not the case though. The cutplane is the depth below which the milling wont go. So my positive moldshape did not get milled all the way through and thus will not be able to produce a correct shape. Since the available time at the Shopbot is limited I choose to go ahead and make a mold anyway. This was done using Oomoo 25 which has a potlife at 3 mins and a curing-time of 75 minutes. When I designed the part I didn't know that the Oomoo required a minimum pouring height above the top of the part of 13 millimeters. So I had to raise the sides of the mold with wooden sticks glues on with hotglue.
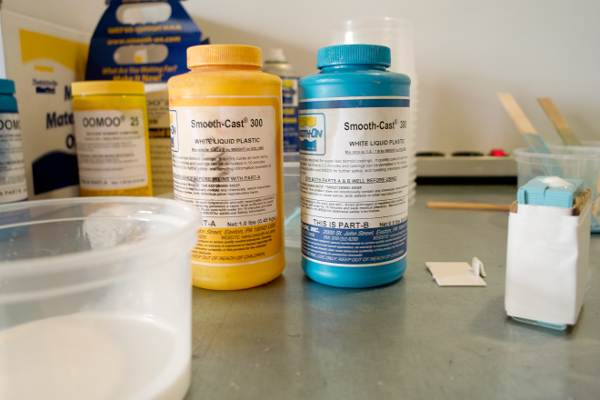
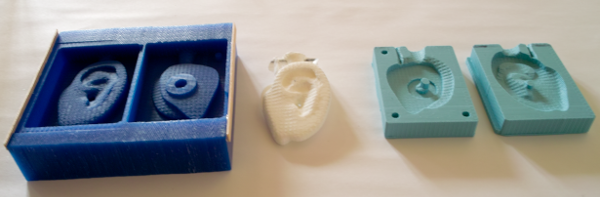
This is the final positive mold in machinable wax, the negative part in Oomoo 25 and the final part cast in Smoothcast 300:
Things which went wrong:
Missing allowance for height of poured Oomoo above part: Should have been at least 1.3 centimeters
Misunderstanding of the position of the "Cut plane"
Things to fix:
I need to fix the design of the moldshape a bit in order to facilitate attaching the ear to a polystyrenehead
I need to remill the mold without using the option of saving a combined toolpath from Partworks - because this didn't work on the Shopbot. It only did the roughcut, eventhough both the rough and the final appeared in the preview animation of the toolpath.
I also need to find out exactly which ear Vincent had cut off - this is apparently the source of some discussion (did he paint the selfportrait in front of a mirror? So its the Left Ear gone - Right?)