Week 9 Assignments
Table of Contents
Week 11 - Composites
This week's assignment involves creating a composite material. In my case, it will be a composite of line fibers and epoxy resins. Because of their creation process they are lightweight and very strong materials.
I've decided I'll create a lamp for my local Makespace Madrid using the distintive M from the logo. This lamp will have some LED inside to offer a nice ambient into our Maker nights.
Composite creation process
Creating the base
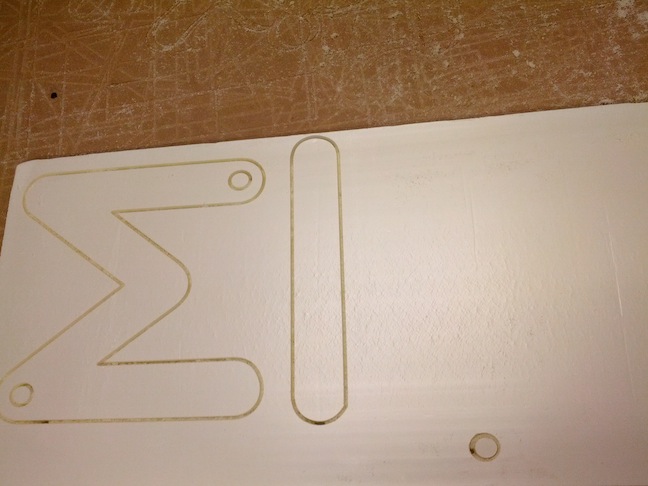
To create a composite, first you must create the shape that would support the whole structure while epoxy resin curates. I selected a foam base and extracted some parts of our logo in Adobe Illustrator format using Rhino. Once I got the resulting letter, I rotated it and repeated the same steps as in the 9th week. In this ocasion, as foam is much softer that DM, I chose different parameters: 24000 rpm and 1200 mm of speed, with a down rate of 700.
As the drill is expected to cut softer materials you must substract 0.1 or 0.2 mm from foam total height (38mm-0.2mm = 37.8mm). In this way we prevent it from contacting the wood board below and a quite sure drill breakage.
Here is the final result:

Cutting the textile fibers
Next step involves covering the base with cloth that resembles as much as possible the original shape. I discovered in this stage that pointy shapes and holes are not very well suited to this tipes of creation processes.
Applying epoxy resin
Epoxy resin comes into a two compound mix format. One component is used to define the curation time, varying from 30 to 180 minutes. I chose the 30 minutes curation time one and it was a bit stressfull to cover all the fibers with the mix in under 30 minutes. My logo was quite big! Fortunatelly some of my colleagues helped my in the resin assault and it was successfull.
Creating (and maintaning) vacuum
To gain its uncanny strength, epoxy resin must curate under preasure. To make sure the composite would stick to the surface as mush as possible, I used a perforated blue plastic near to the body, then I covered it will some kind of white wool cloth to allow air to escape from inside. I introduced it all inside a pink bag, pierced the top with a manometer and closed both sides using a ductile doh. Manometer rested on the center of the top area to allow better air flow. This photo is prior to activating the compressor:
Presure soud stay constant under 18 ATM during curation process. There were some problems with small air intakes that broke vacuum several times, but we were able to manage to get it working stable. This photo show the piece under vacuum conditions:
Extracting the final composite
After 24 hours, epoxy resin is curated and object can be taken outside of the improvised vacuum chamber. It was a bit tough to get it clean in some places, mainly around the corners and hole, but the result was good enough.
Cut any leftovers but make sure to wear hard gloves and glasses as the composite can be very sharp!
Here is a video showing the final apparience