machinedevelopment
Table of Contents
1 Additional tasks to get Rostock 3D printer ready
1.1 Motor setup
Once we got our belts, we could get our pulleys moving the carriage along the three axis but the printer didn't move as expected. We double checked the connections and motors were not assigned in the proper order. We swapped them to fix this issue. Our next step was to regulate the motor driver current to prevent overheating. In this video, I describe the process, that involves connecting an amperimeter in series with the board power supply and turn a screw on top until it measures about 200 ma plus the base value 80 ma. For Z, you should aim for 350-400 ma and 300 for the extruder motor as it has to overcome much more resistance. As we prepared motor drivers, printer stoped doing cracky noises and began to move smoothly.
1.2 Firmware and software configuration
I researched about firmware options and repetier firmware seemed to have the best support for delta printers built in, coupled with preview support in their repetier host application. This firmware is quite similar to Marlin with additional features. Our final configuration files are these.
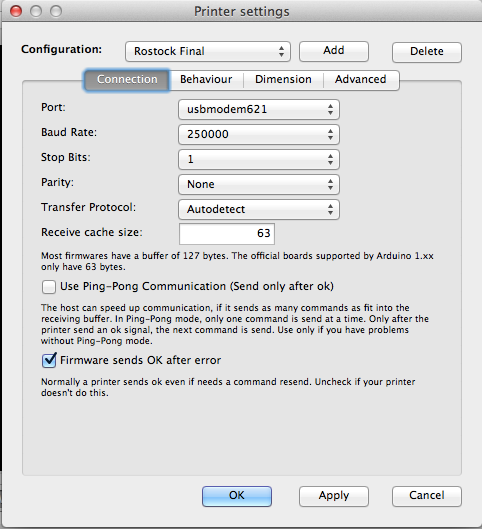
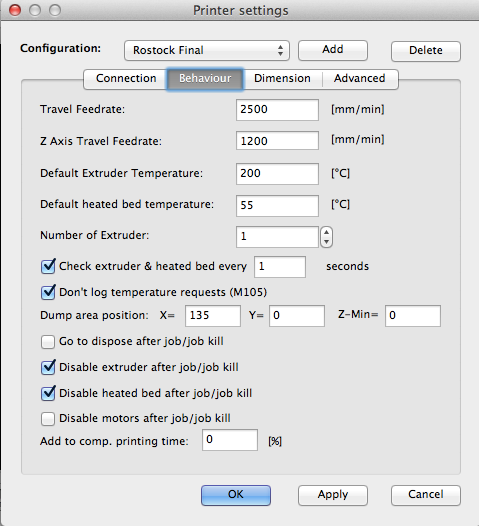
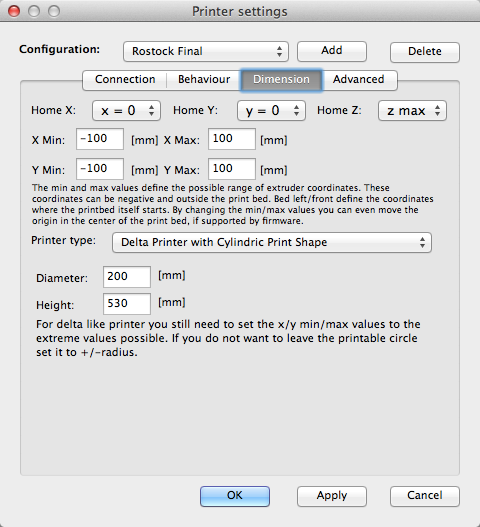
After firmware was uploaded, we began configuring the repetier host software under "Printer settings". These are our parameters for rostock 3D printer. It's crucial to acknowledge that starting position is x=0, y=0, z=max inside a circle. Otherwise extruder carriage will move randomly, or report errors about moving out of safety zone frecuently.


Compared to the traditional prusa printers, rostock moves following it's own logic, converting cartersian moves sent from the control panel to its delta system. If you move along the x axis, you'd get two motors moving to create a straight movement instead of a single one in the prusa counterparts.
1.3 Calibration
Before installing the hotend, we followed best practices and calibrated our 3D printer using a pen holder and a round tip sharpie. In this video you can see the printer homming up and descending down to paint a pattern. This pattern was taken from the Essential calibration set, available at Thingiverse. Height was configured under printer settings configuration to match the bed to tip experimentally until it wrote without problems.
As you can see, image is painted fully showing that bed is properly leveled (at least around central area).