Week 7: Moulding and Casting
I wanted to use the moulding and casting excercise to explore the possibility of producing bespoke moulded chocolate bars.
Design
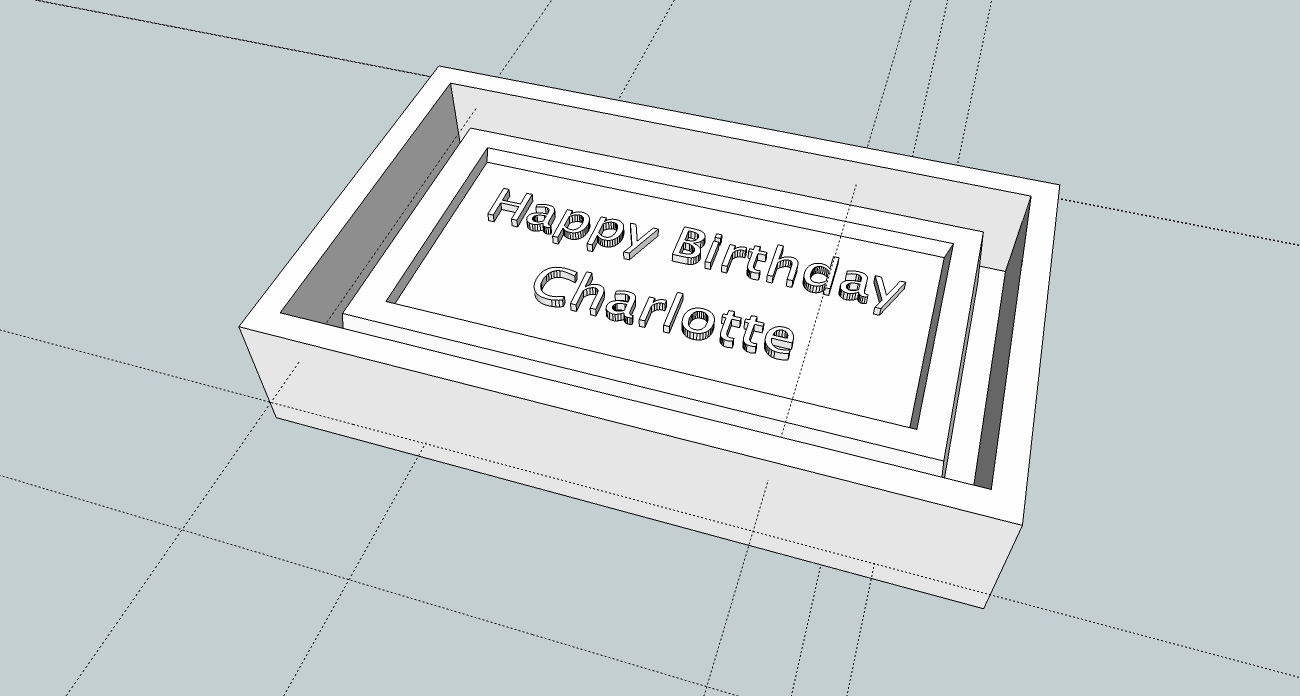
I designed a couple of simple chocolate bars in SketchUp. I included draft angles on all the vertical surfaces as I wanted to explore the option of moulding the chocolate directly in the machineable wax as well as using the wax to cast silicone rubber moulds. If moulding into wax can be perfected it reduces the number of production steps needed and avoids the need for expensive food safe silicon material. Compared to the industry standard material for chocolate moulds, polycarbonate, wax moulds should offer an advantage of speed of machining combined with the ability to re-use the mould material when finished with. Mass produced chocolate moulds are made to be durable for continued re-use. Chocolate will release from any solid mould when set if re-tempered correctly as it contracts slightly when setting.

Milling and mould production
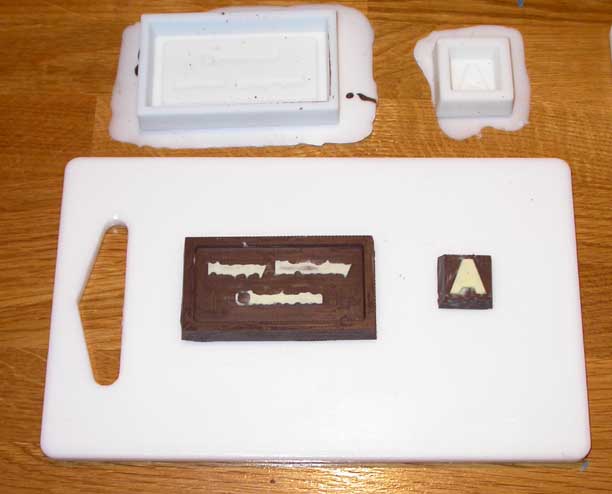
Two bars were designed, one with the letter "A" and the other had the script “Happy Birthday Charlotte” on the face. The choice of font needs to be carefully thought through to match machining resolution and moulding considerations. In this case, the "Happy Birthday" bar design was shrunk to suit the available billet of wax and so the lettering was too small to be properly machined. The moulds were machined on the modella in two passes. The silicone rubber was mixed and poured and allowed to cure.

Casting
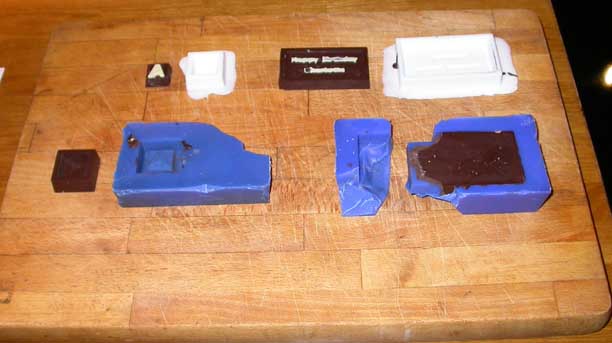
The chocolate was cast in two stages using both white and dark chocolate. The chocolate was tempered by separating the chocolate to be used into two portions 2/3 and 1/3 by weight. The larger portion was melted and raised to 48C (dark); 45C(white). The remaining 1/3 was added to seed crystallisation and the temperature reduced to 29C (dark and white). The chocolate mass temperature was then raised to 32C (dark); 30C(white). The chocolate was poured into the moulds and then they were put in the freezer for 10 minutes to set. The silicon cast chocolate demoulded at this stage.
I had limited success with the direct moulding in wax. I attempted to mould the chocolate directly in to the wax moulds used to produce the silicone moulds due to time considerations. Obviously this produced "inverse" bars. The inverse letter A moulded directly in wax required a further 10 minutes chilling and demoulded well.
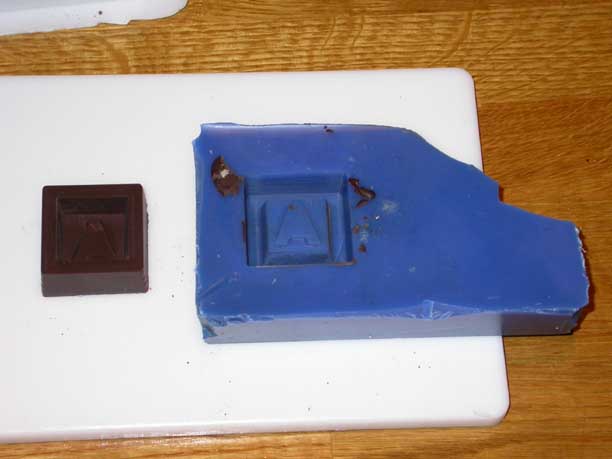
The larger inverse bar did not demould successfully. Demoulding is dependant on tempering the chocolate well to ensure separation from the mould. The dull surface of the all of the finished chocolate tells me that the tempering process was not completely successful - the chocolate should be glossy. The machining of the larger bar mould (due to the finishing machining being executed at 0.5 overlap for speed) left a rougher surface texture and the large surface compared to volume also contributed to problems demoulding. Nevertheless I believe this process can be made to be successful as is demonstrated by the letter A block.