Build a wired &/or wireless network with at least two nodes.
Use this corrected c file as Neil's produces as error
Milled and Stuffed
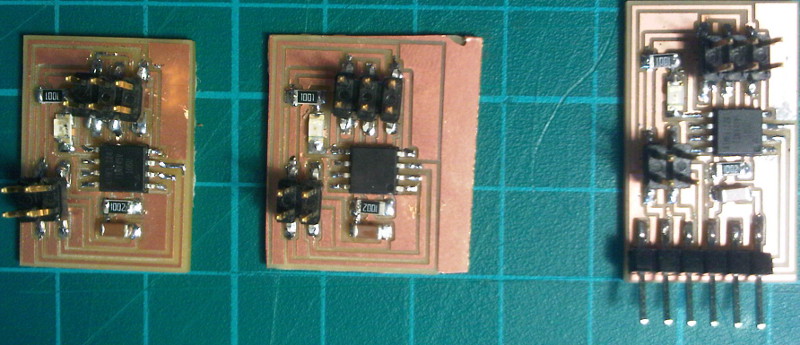
Each of the components in the bus act as a node - including the bridge - and need to be programmed with a different id. This is done on line 41 of the c file.
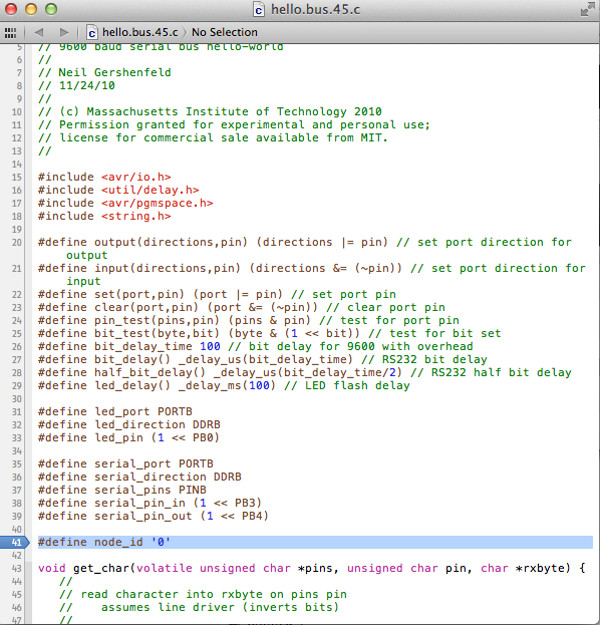
I assigned the bridge as node 0 by saving the c file with that in the i.d. line
Connect the FTDI to the bridge, connect the programmer, open terminal and navigate to the location of the file then program the board using the line:
make -f hello.bus.45.make program-avrisp2 (or fabisp)

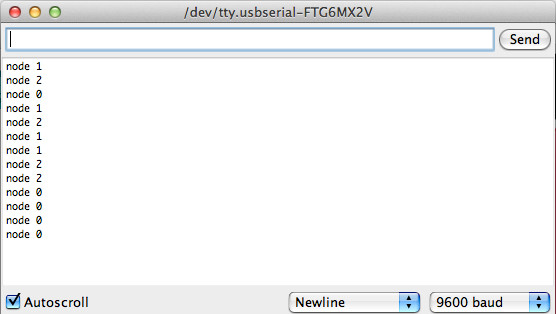
node #0 done:

Connect the other boards to the power supply of the bridge board
Now open and modify the c code to node i.d 1 and save the file.
Program node 1 and repeat the steps for node 2
In action
Following completion of the standard bus programming protocol, it is possible to program these boards to output to different elements
The above video shows the hello bus boards outputting a signal to 1. a DC motor 2. A speaker and 3. The standard LED.
This was acomplished using the PB1 pin (MISO) of the programming header and GND combined with some simple modifications to the .c file