Electronics Production
This assigment has 3 parts --Milling
--Soldering
--Programming
Progress Description:
Milling
Milling was done with "Rolland Modella" with the next file:

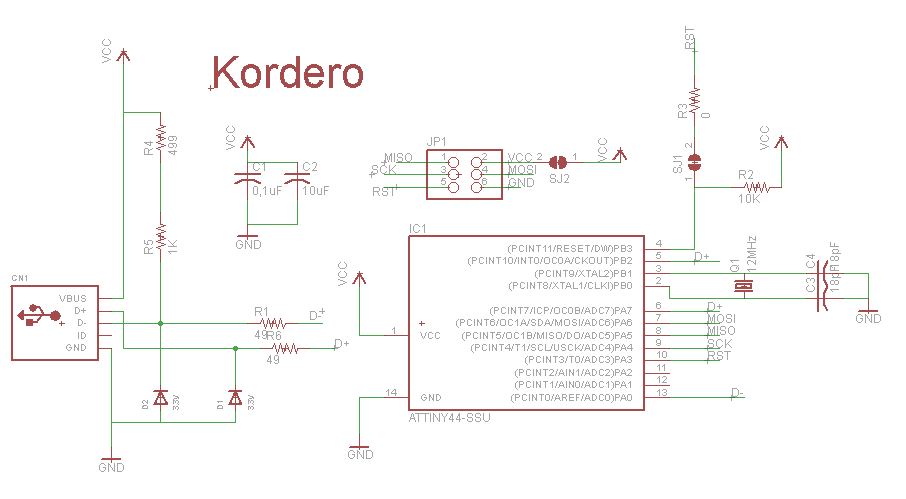
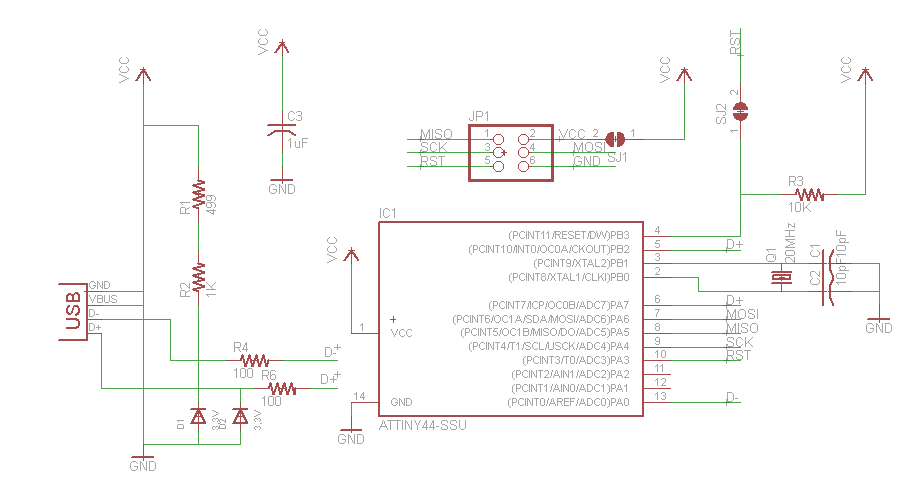
This "PNG", shows the board, tracing area and cutting area, tracing area is the path that the mill will go by in the plaque, were the components will be soldered. < But as a preparatory exercise I developed the file desarrollé el archivo "schematic" in "Eagle V5.9.0" free version using GNU/Linux in Ubuntu 10.04, installed from Ubuntu Software Center. I chose this tutorial David in which are contained the schematic and the board. Downloaded, is open with Eagle and using the command "information" we click over each component to obtain data from the "package" "lybraries" and "devices", I did not have all the libraries, so some installation was required:
--FabHello Download
--Sparkfun Download
Installed these libraries this results are reached:
Then for FABB-ISP, we download it from the image
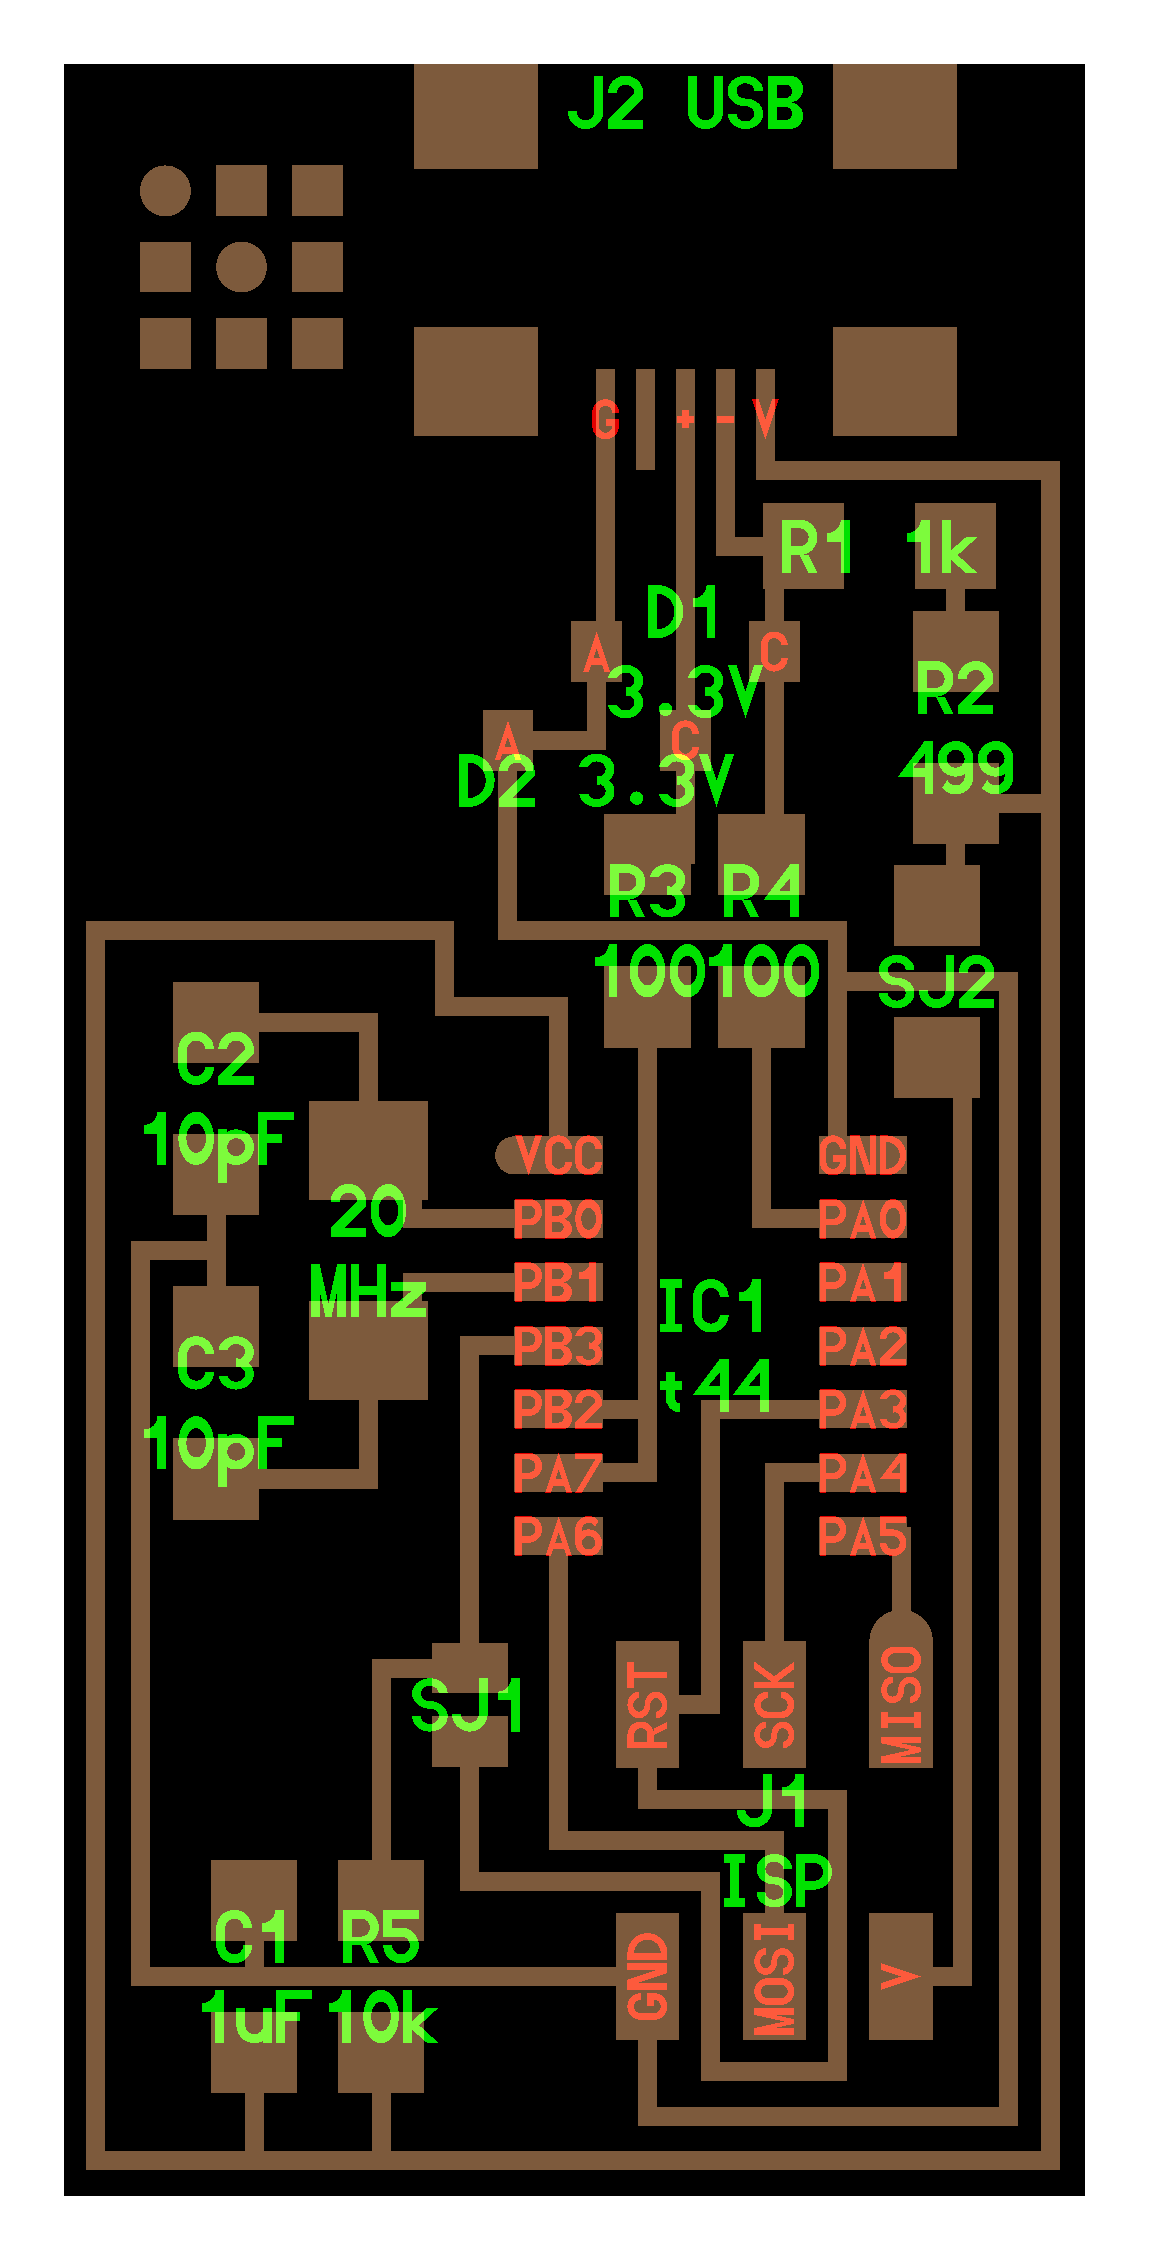
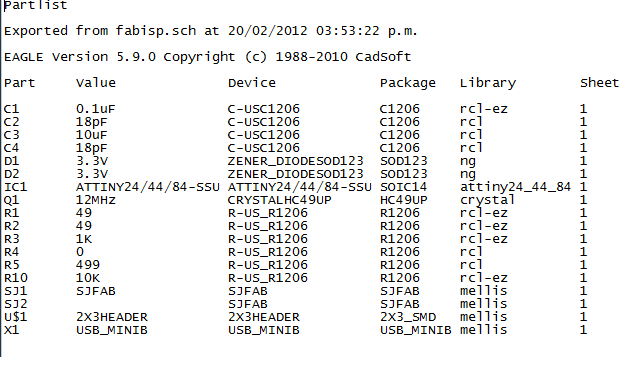
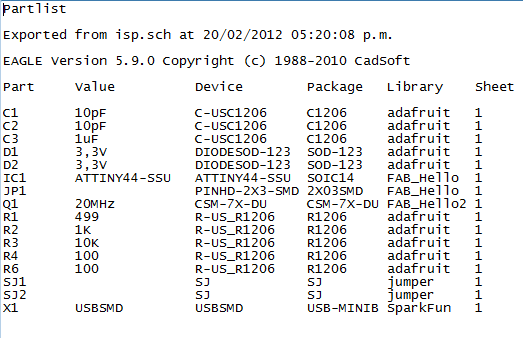
From this image we determine the components, do the schematic and export the materials list (Eagle Archive Download 1 Download 2 )
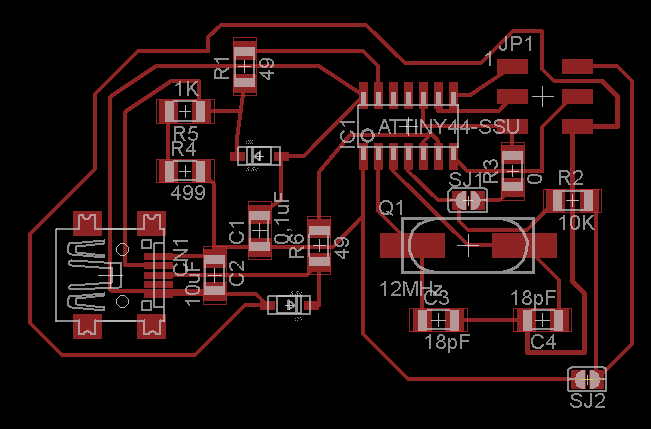
We do the "milling" in the "Rolland Modella"
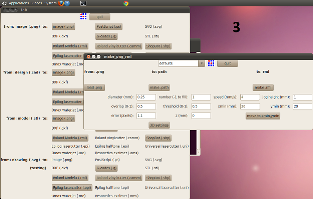
For this process we use the "Fab-tools". Calibration is done by framing the X and Y axes using the software in the image 4, Z axe is set with the "up" and "down" butons, very carefully until the mill touches the plaque and adjust. Set up the machine, we describe the next steps for manipulation:
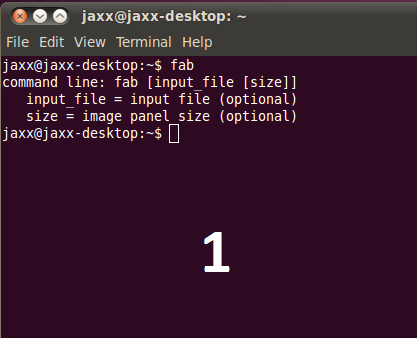

--Step 1: Open a console and type "fablab"
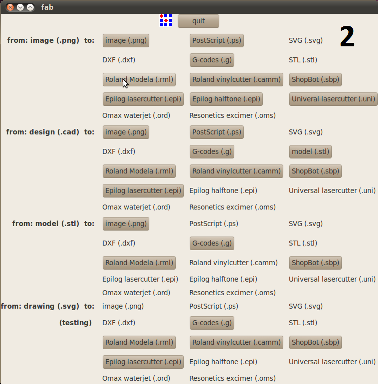
--Step 2: Choose add the file with "from image (.png) to"
--Step3: Choose the correct mill and the path( mill traces (1/64)), number of times (number (-1 to fill), I chose 4 times
--Step 4: Depth in Z, the cooper plaque 0.75mm, so -0.1mm of depth
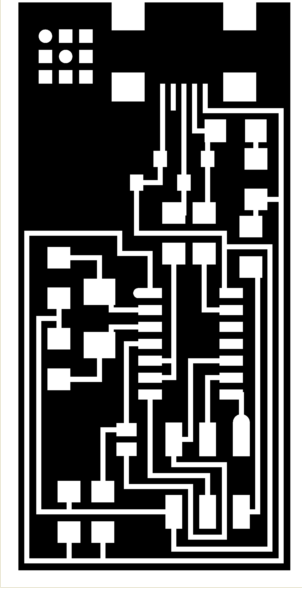
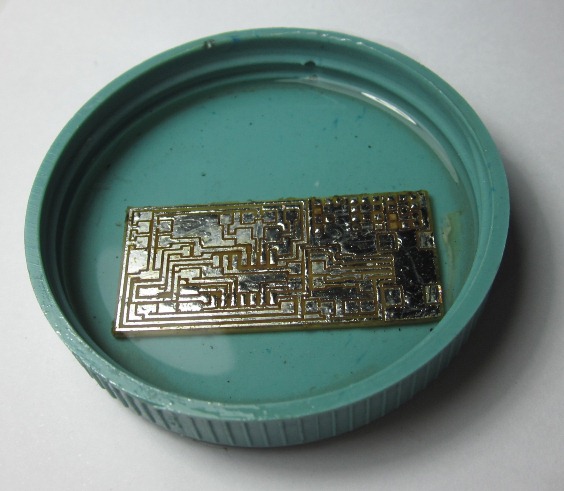
Finally the "milling" result:
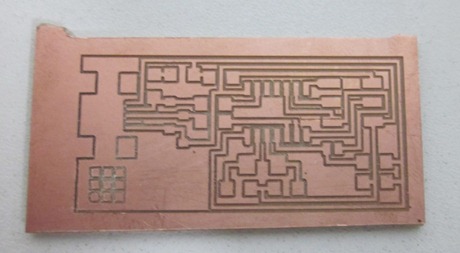
Be very careful with the set up.
Soldering
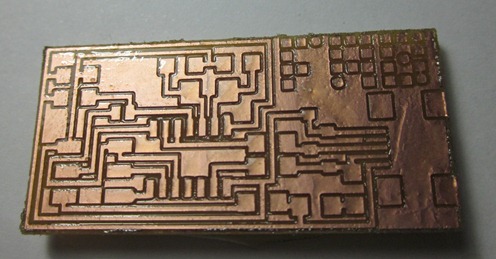
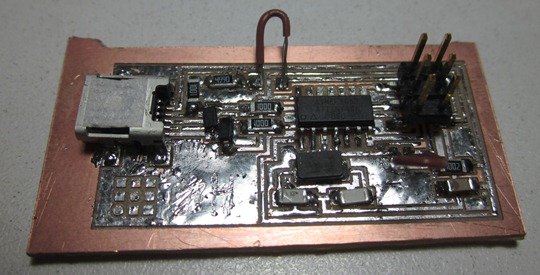
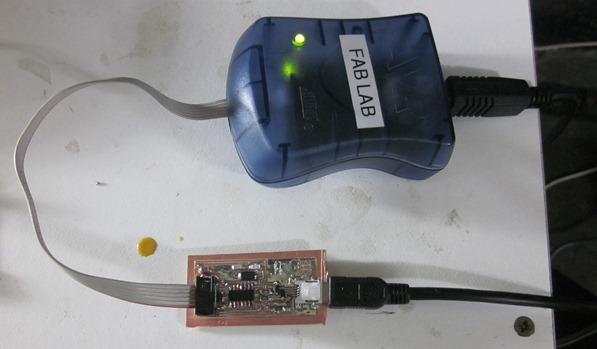
This process requires high accuracy becuse the components and their joints are too little, so a tin coat is done in every joint aplying an extra coat with flux and this result is reached (image 2), Then the plaque is inmersed in alcohol to remove al the flux(image 3), this is noticed whes a yellow tone appears, carefull with the orientation of the diodes (anode and cathode), check the joint of the source from Attiny marked with a circle in the corner. The last step is to chek if the FABISP works, with the AVR programmer, if the led is green all is right.

Programming
theory for programming here, use the commands:
Install Install the Necessary Software for AVR Programming
sudo apt-get install flex byacc bison gcc libusb-dev avrdude
sudo apt-get install gcc-avr
sudo apt-get install avr-libc
sudo apt-get install libc6-dev
Download and Unzip the Firmware
cd ~/Desktop
wget http://academy.cba.mit.edu/classes/embedded_programming/firmware.zip
unzip firmware.zip
Program the Fab ISP (Ubuntu and Mac):
make clean
make hex
sudo make fuse
sudo make program
To Verify That Your ISP is working correctly:
lsusb
If your Fab ISP has been successfully programmed, you should see a list of the USB devices plugged into your computer. The Fab ISP will be listed in a line like the following:
Bus 002 Device 004: ID 1781:0c9f Multiple Vendors USBtiny