This weeks assignment is to use the CNC mill to fabricate a mold out of wax. Create a negative of the mold with a flexible rubber and then use the flexible mold to cast a final part.
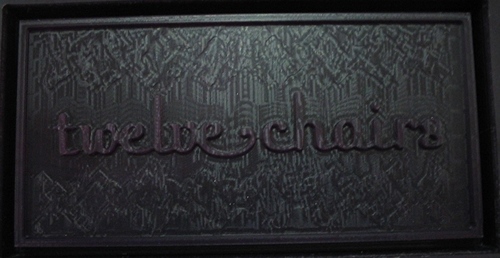
I decided to make a mold for a chocolate bar based on the design I already used for my " Make Something Big " project. The mold will incorporate the rope border design I had created and also have the "Twelve Chairs" logo in the center of the bar. I did a two dimensional design in Inkscape and used a greyscale to create the third dimension. Since the Modella interprets greyscale as elevation this was a simple way to go. The lightest shade becomes the highest layer and the darkest shade is the lowest. When setting up to mill you set the depth of the darkest shade and the software interprets the percent of grey as a percent of that depth. My finished design looked like this.

Once I finished the design in inkscape I exported it as a .png file. I placed a blank machinable wax block on the Modella and fixed it in place with hot glue. I then imported my file and ran the rough cut using an 1/8" end mill. The milling process was quite lengthy due to the size and complexity of my design. During the milling process I occasionally removed the wax chips so I could see how things were progresing and keep the bit from becoming plugged. After the rough cut was finished I started to run the finishing cut. I ended up stopping the machine and killing the job part way through the finishing cut because it was almost 2AM and I needed to get some sleep. Because I killed the job the detail of the border was not what I had originally designed. However it did have an interesting texture to it and I thought it looked pretty cool. All in all I was quite satisfied with the end result.
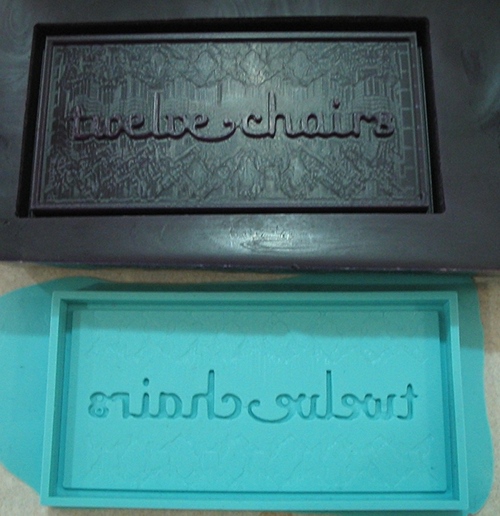
With the milling process finshed it was time to make my flexible mold. I had planned on using a food grade silicone for the mold but the material had not come in yet. In the interest of time used a regular 2 part silicone. I mixed the part "A" and part "B" together in a small plastic cup being carefull not to mix in any air bubbles. Then I slowly poured the material over my wax positive and let it cure.
Once the surface of the silicone was tack free I removed it from the wax.
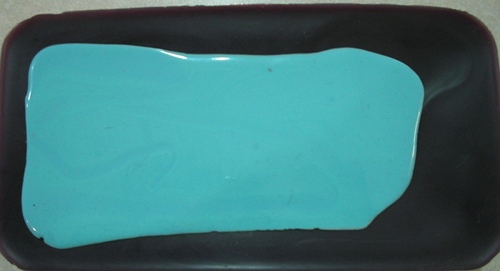
I then mixed up a two part urethane and cast it into the silcone mold. The urethane starts clear and cures white.
When the urethane turned completely white I removed it from the mold and had my finished product.
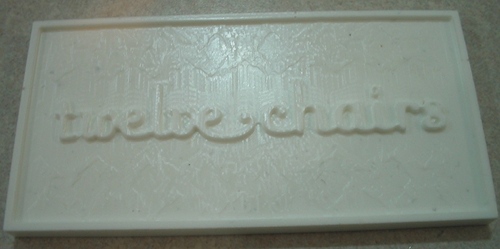
I have to say I was quite impressed with the level of detail I was able to create with this molding process. There was no visible loss of detail going from one step to the next.