1 / Hello_board_FABISP :
The FABISP is a programmer. This is a board you use to program other boards (like burning the bootloader of a FABDUINO). My first FABISP worked inconstantly (showing up and disappearing from the USB Device Tree). I reviewed every connections and every soldering without finding what was wrong. Maybe a bad component. I made another one and it stills working very well.
2 / FABISP components list :
1 blank phenolic paper board (compressed paper with a layer of copper on the top of it. It looks like plastic)
3 capacitors (10 pF x 2, 1 uF x 1)
6 resistors (499k x 1, 100k x 2, 1k x 1, 10k x 1, 0 ohm x 1)
1 mini USB header
1 microcontroller (attiny44a)
2 diodes (DIODE ZENER 3.3V 500MW SOD-123). Diodes have a polarity. The cathode (C) has a line. You solder the line side on the C plot of the board.
1 crystal (CRYSTAL 20.000000 MHZ 8PF SMD)
1 pin header block (3 x 2)
1 mini USB to USB cable you can connect to your computer.
You need a solder Iron and a milling-machine like the Roland Modella (see the video below).
3 / How to make a FABISP PCB ?
On the pictures below you have everything you need to make a FABISP PCB (printed circuit board) on the ROLAND MODELLA (digital milling-machine). From left to right, you have :
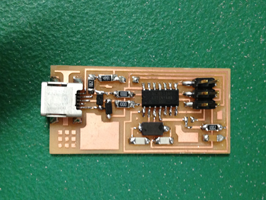
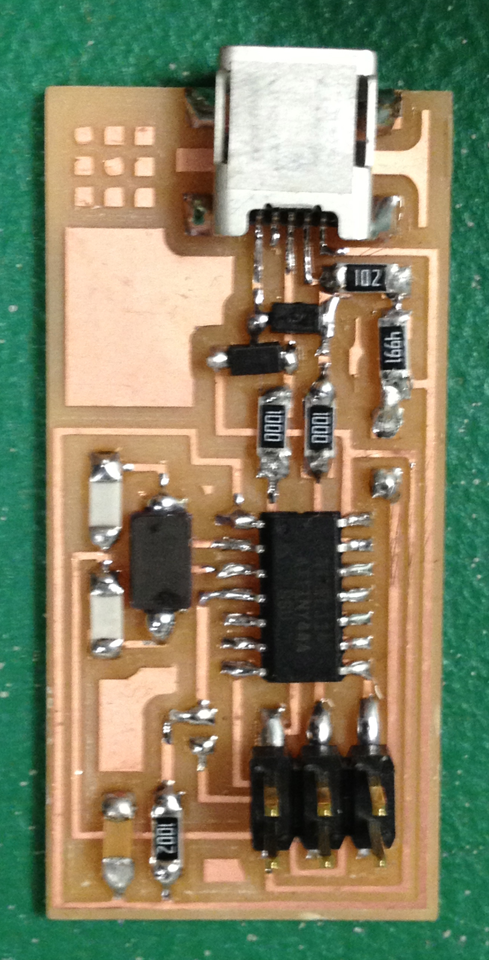
1 - The board with the components on it. You will refer to it to check if you are going well with the dispaching of the components on the board.
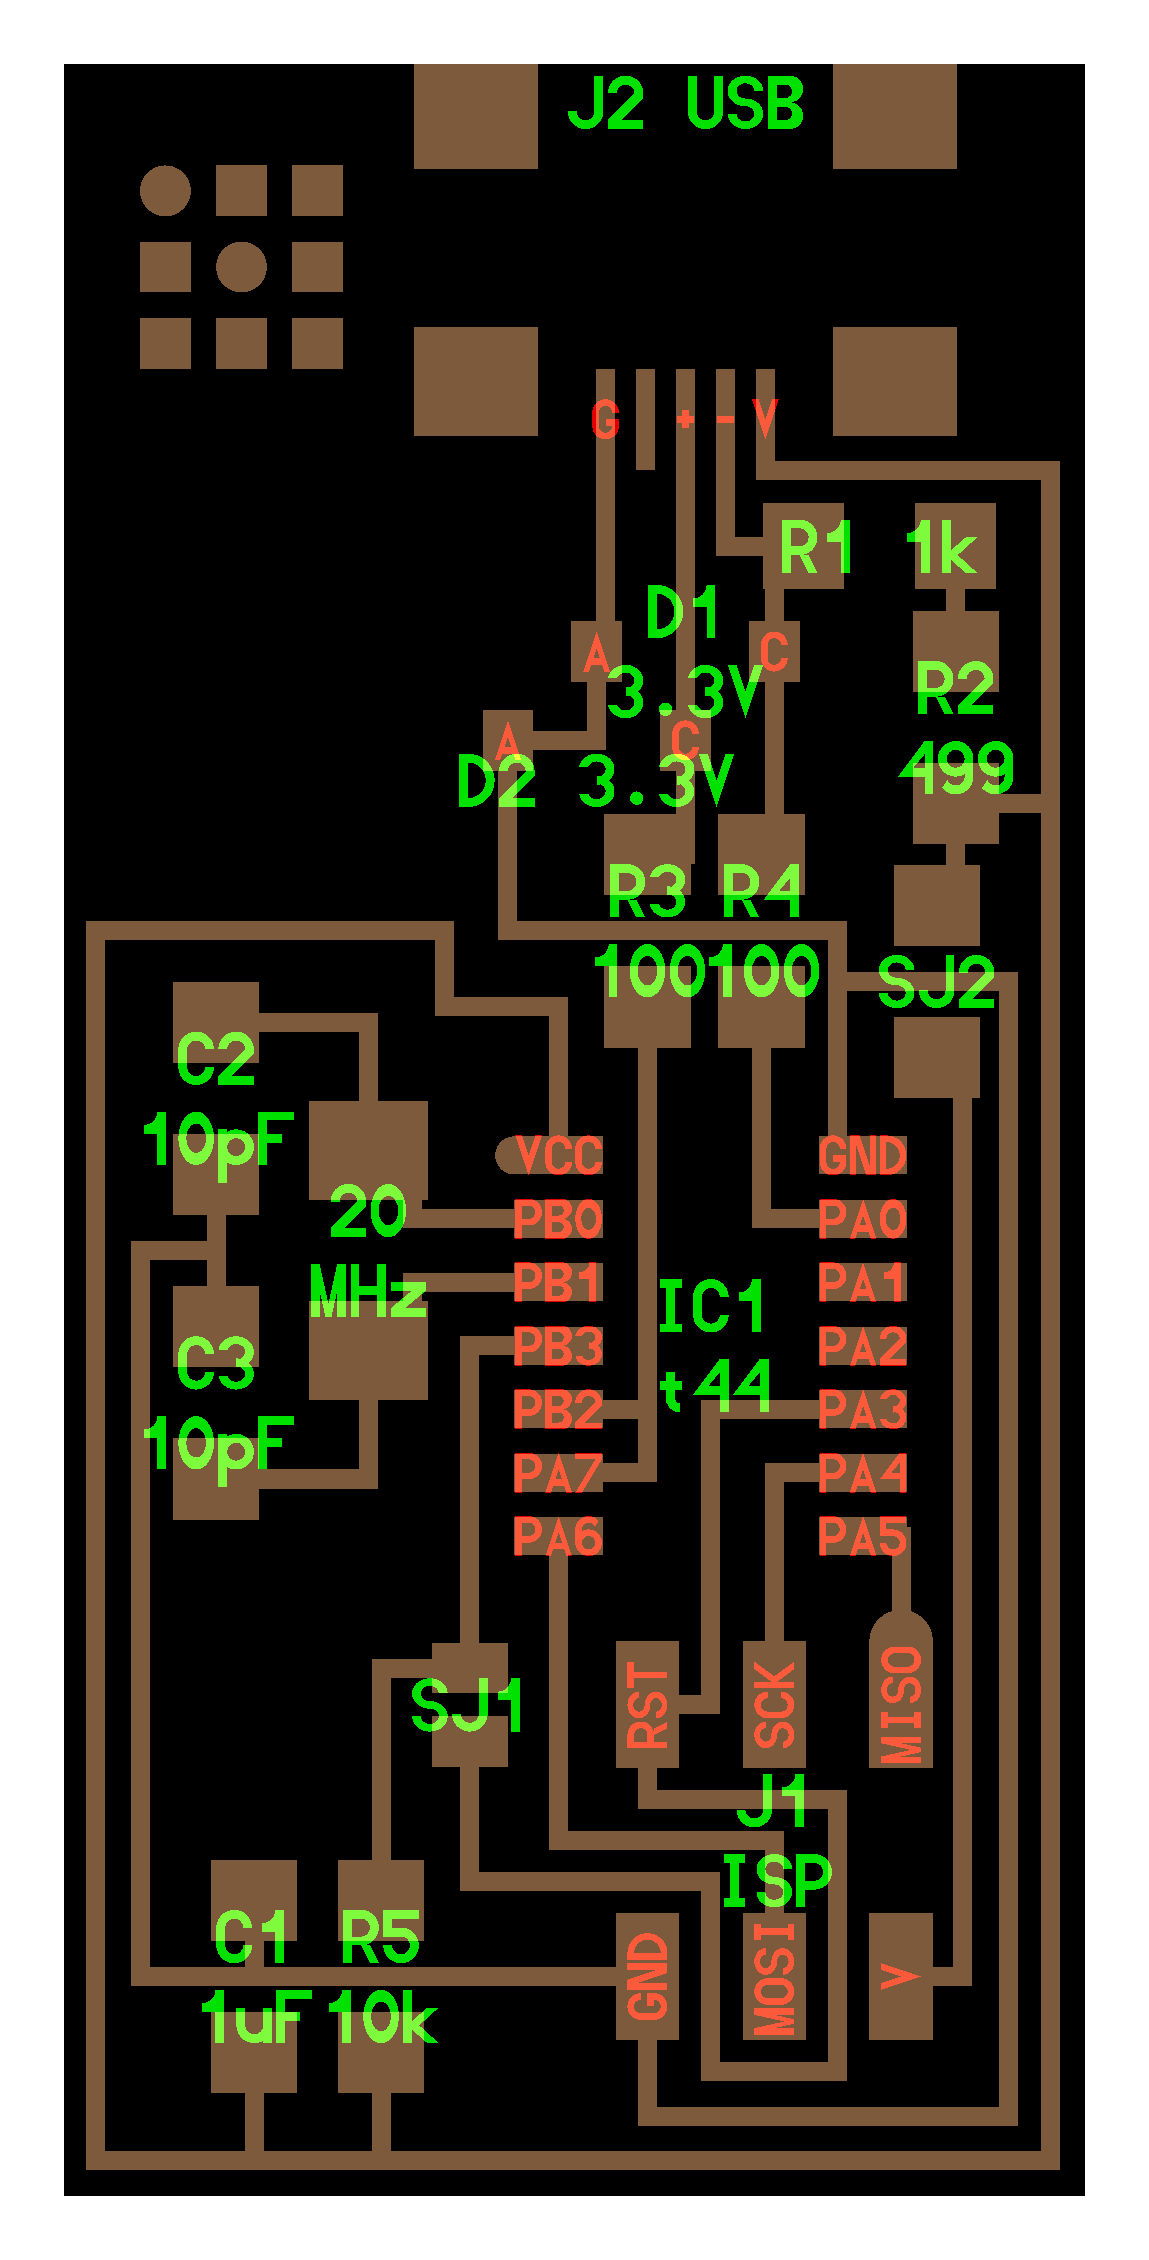
2 - The board with each component's localisation. Check it everytime you are about to add a component to the board. SJ2 is where the 0 Ohm resistor goes. SJ1 is where you make a bridge with solder. You will remove SJ1 and SJ2 after the programming
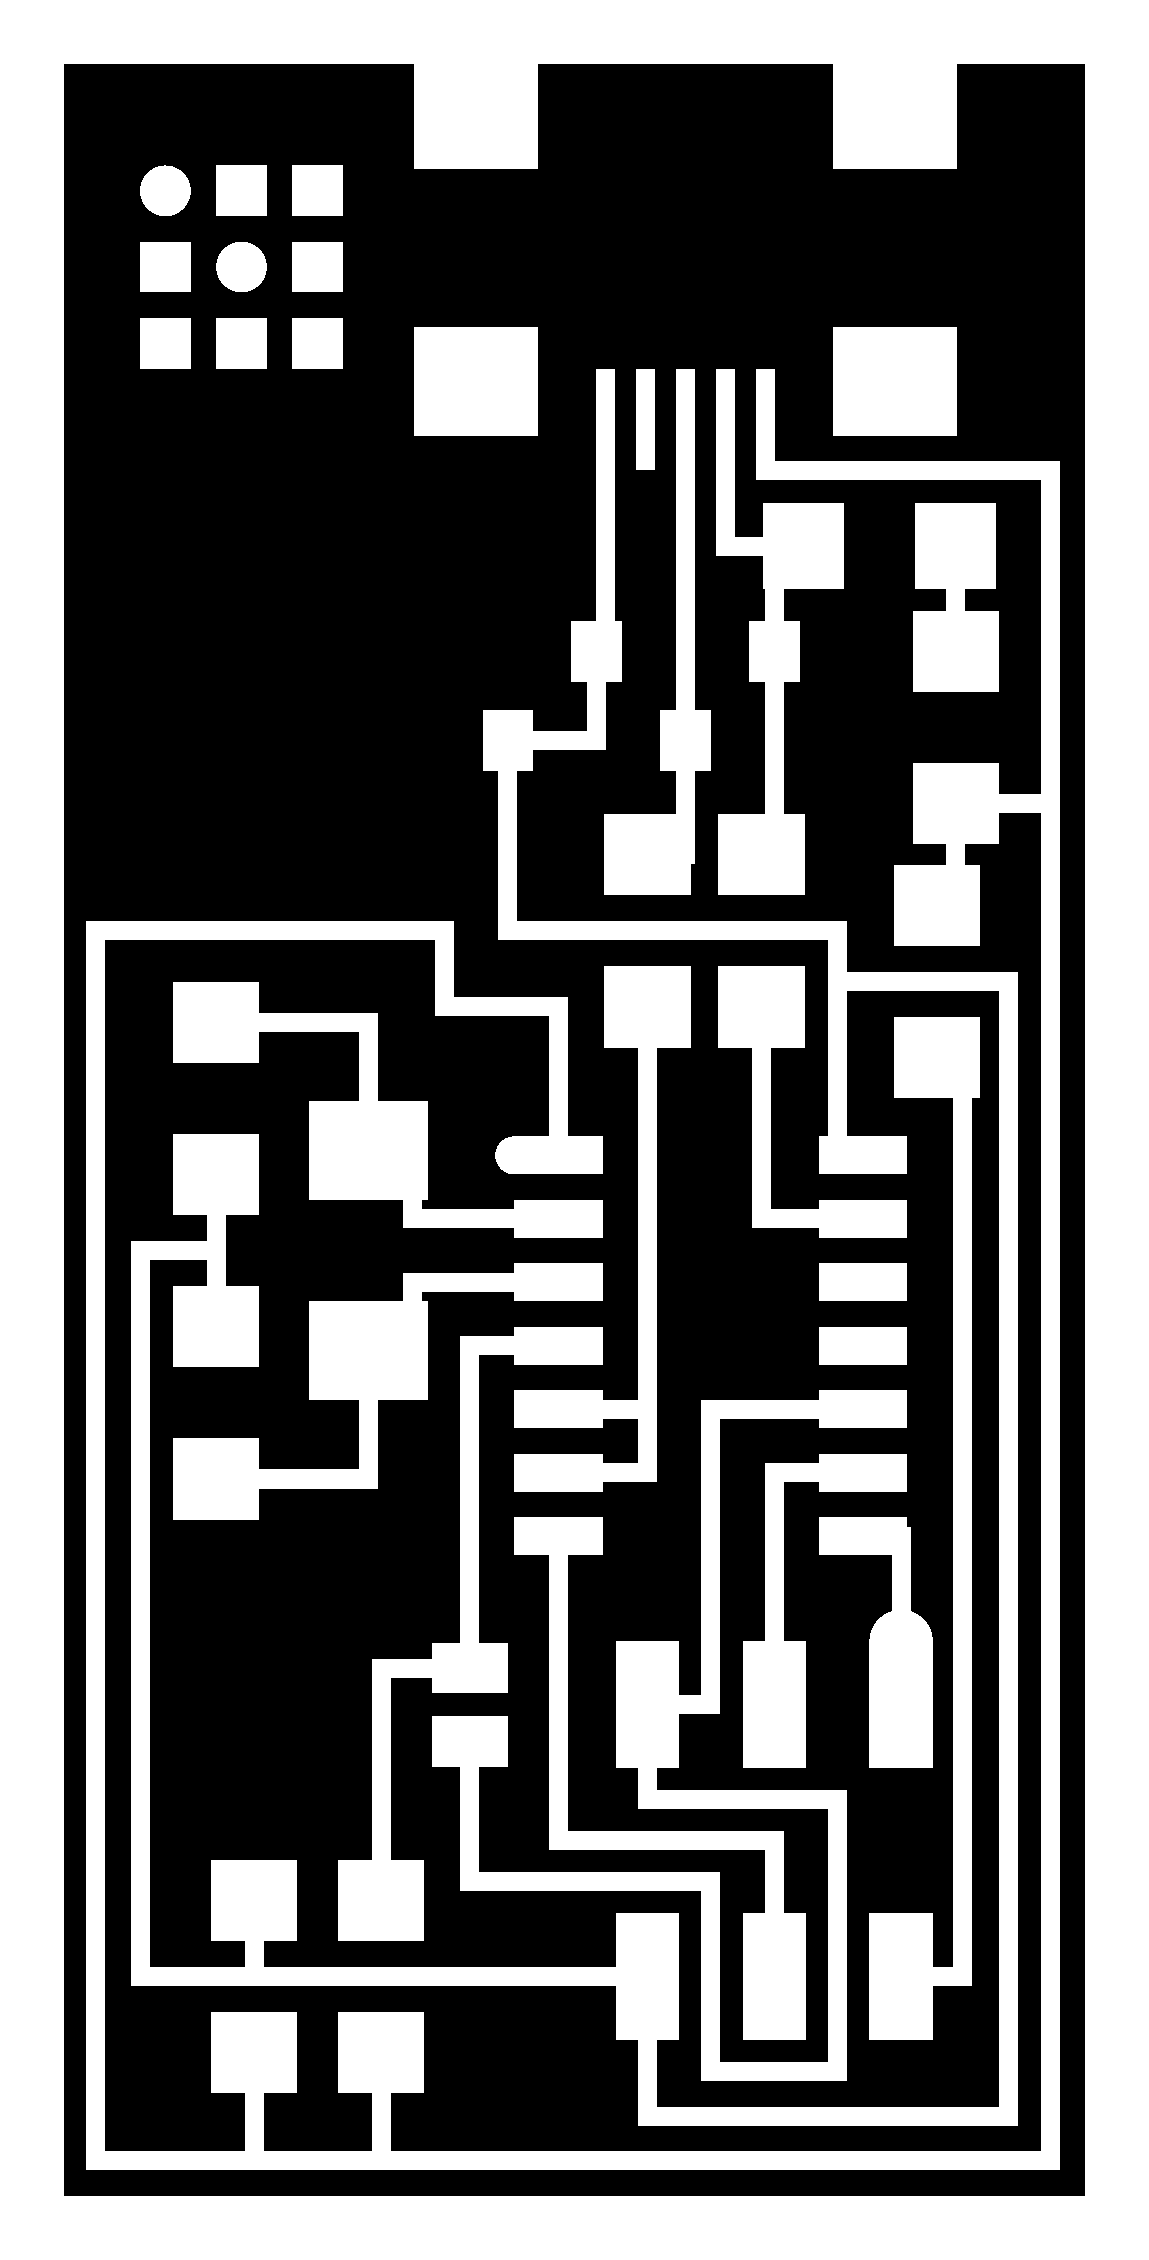
3 and 4 - The files you can use to mill the board on the Modella (milling-machine) from a blank phenolic paper board. Very important : You make 3 before 4. Step 3 requires a 1/64 bit. Step 4 requires a 1/32 bit. It means that you have to change the bit between the 2 cuts. FYI, the milling of step 3 takes 10 min.

4 / How to program the FABISP ?
You need XCODE and AVR (software) for the programming of the FABISP. You need to download them and to install them. Make sure you download the right versions for your computer, especially if your computer is new. I have been experimenting troubles with finding AVR for my new MacBook Pro.
You also download the FABISP firmware from the button above. You scroll down the Center for Bits and Atom's (CBA) page untill the end and you click on the firmware.zip. Then you open the file on your desktop. And copy the files and paste them on your desktop.
Like I said before, the board is physically different before the programming and after the programming. Before the prog, you added a 0 Ohm component and you also made a bridge between to connections with solder (SJ1 and SJ2). When the FABISP will be programmed, you will unsolder the 0 Ohm component and you will also warm the bridge to break it (don't remove them yet).
For now, you have a board. You need to test it to see if your board is "alive". You plug it to your computer with the mini USB cable. You go to the apple > about this mac > more infos > system report > material > USB. You might see the fABiSP showing up in the list of devices. If you don't see your FabISP in the list, try to unplug and replug the mini USB or the FTDI or both. Use another USB port. Close the System report window and open it again.
Now you have XCODE, AVR and the firmware files on your desktop (out of the folder). You open Terminal (mac). Now, we are going to program the board from Terminal.
5 / FABISP programing process :
I am running out of time to finish this page. I will add the programming process in september. Until then, please refer to Anna Kaziunas France's page HERE