WEEK_4_fab_academy_computer_controlled_cutting_feb_8.

index_access


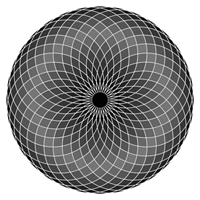
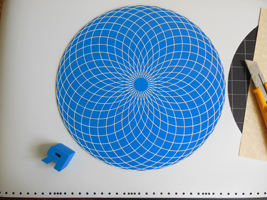
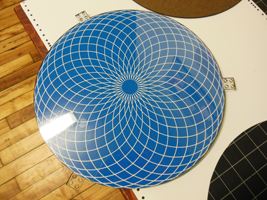
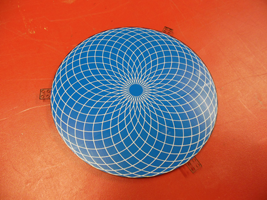
1 / Designing a rosace to vinyl-cut :

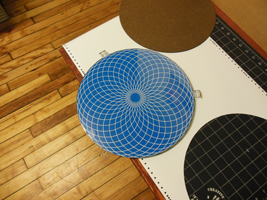
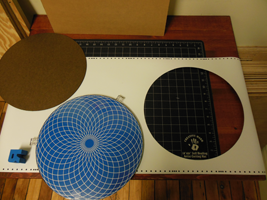
This rosace is the first artwork I make here. I'll keep adding versions of it all along the program. This is a pretty satisfactory design to vinyl-cut. It was a beat complicated at the beginning because I drew it on Photoshop CS5 and it was containing a lot of bitmat.

I didn't know how to remove bitmaps from a file in Illustrator, neither in Inkscape as I wasn't very familiar with vectors. Tough, the real challenge behing controlling the vinyl cutter (and eaven the laser cutter) was getting good at drawing with vectors.

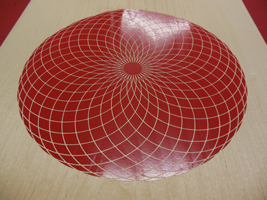
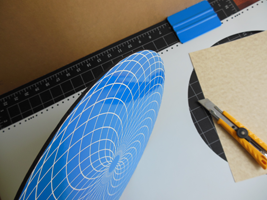
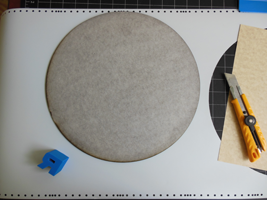
The settings to obtain a good cut for an artwork from the vinyl cutter are : Pressure = 70, Speed 1 cm/sec. You don't want it too fast because it's going to ripe the design.

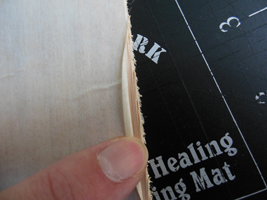
After the cut, you have to be very carefull with such a precise object. I used a wide blank tape to cover the surface of the design. I pressed the paper on the surface so as to get a flat surface (chase air bubbles unnderneath the surface). After that, I removed the back paper of the sticker very slowly. Each operation takes around 2-3 hours to get a perfect result.

We use Inkscape to program the cut. You need to supress every fill to get only vector lines. You make this operation in Inkscape directly.


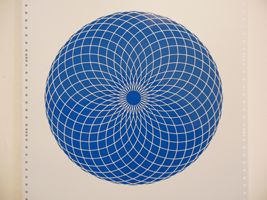
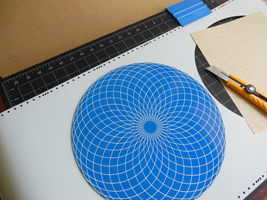
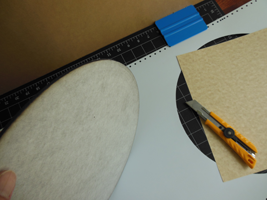
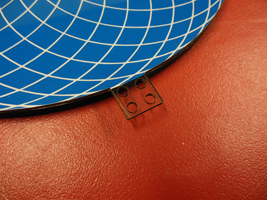
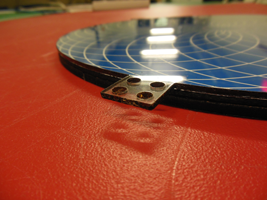
2 / Designing a rosace to laser-cut :

Before the vinyl-cut, I laser-cut this rosace. Indeed the pictures below shows a raster. We use Corel Draw to control the laser-cutter. You must remove the fill from the file, and the stroke setting is "hairline". You also need your file to be an RGB.


3 / Designing a press-fit box and cutting it on the the laser-cutter :

Of course I also made a press-fit object on the laser-cutter. Those are small simple acrylic boxes I designed. I tried to make them on inkscape, but this software wasn't precise enough. So I used Illustrator CS5 once again and it worked on the first try.


4 / Improving a design :

There are a few projects I designed in the past years that I haven't produced yet. Among them there is an Environmental Crime Scene barrier tape. I wanted to improve the letters's size, so I laser-cut the sentence (a shorter version) on masonite. Masonite is hard to cut through and I had to finish the cut manually, even if I cheated with the laser's bed height. I ended with a group of stencils (board + letters).


4 / Improving a design :

At the very beginning of the Fab Academy, I used the vinyl cutter to cut the sentence "Environmental Crime Scene" on a kraft gum paper roll. It's a 7.5 cm wide blank tape, pretty thick and resistant. You just have to wet it with water to stick it wherever you want. The cut worked, but the tape wasn't staying on the rail. Maybe with a smaller font, it would work better because you'd be able to fully position the wheels on the blank tape.


5 / designing a guide :

I drew a very simple guide to keep the ribbon on the axis of the blade. But my press-fit was too loose and I needed more time to figure out how to fix the guide on the vinyl-cutter. I didn't want to spend to much time on it because cutting the sentence wasn't the solution I was looking for.


index_access