1 / Introduction :
For this Final (Art) Project I wanted to make an artwork with a display controled by an arduino board. Nothing fancy, but this project seemed to fit my professional needs. I first believed I found a way to make it. But it appeared later that this project never worked well with a FABDUINO (75 % working). The display shows the sketch I send to the Arduino but partially. Some parts of the display are just not showing the sketch, they remain blind.
Generally, when I conceive an artwork, the process is more important than the results or as much important as the results. Bearly said, I want to produce as less objects as possible, and I want those very few objects to be of the highest quality. I know this sound like a paradox for a fablaber, but this is my path. I want to decrease the production of goods and I am expecting to see what happens with the fablab movement on the topic of programmed obsolescence. I am also very interested in the socio-political impact of the fablab movement.
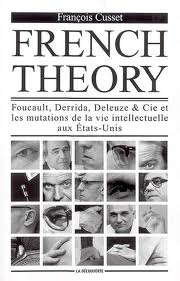
Obviously, this book cover is not on this webpage because I am french. It's here because I came to the US to be a part of the Fab Academy program, and this book describes among other things how Jean Baudrillard influenced american artists, inviting them to produce as many artworks as they could to defy the Capitalism. This period is over now. And I am here to participate to this digital fabrication non-revolution (dixit N.G) as well as to observe how it is working to help developping the fablab concept in France and to increase my art company's skills to collaborate to art/science/environmental projects.
2 / Fab (Art) Project 1 :
For this final project 1 I wanted to display 8-bit video-bitmaps on a GLCD with a FABDUINO 328 (3.3V, 8Mhz). Someone managed to display a video hosted on youtube, in streaming, on a GLCD (CHIBIMO) and I thought that I could maybe connect an arduino directly to a GLCD to play videos. But I was wrong. I'll probably keep working on this project by myself, reducing my expectations, with a commercial arduino and an LCD shield.
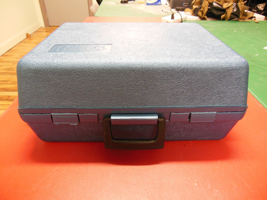
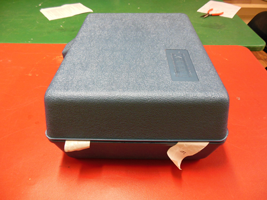
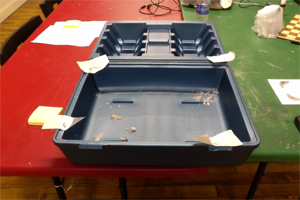
The display will be inserted into an old TELEX case. I choose it because of its 70's color and style to make it correspond to the 70's-80's aesthetic. I initially designed a chess game to set it inside the case, but I wasn't satisfied by the semiotic it was transmitting (see pictures below). As this projects no longer corresponds to the Fab Academy assignement (we have to build our final project's parts as much as possible), I finally choose to keep the case closed with a coin acceptor and a display shield coming out from it. Besides that, you can see what I completed during the class on the pictures below.
Here is a list of the questions the preparation of this assigment should answer to :
Plan and document a final project that integrates the range of units covered :
1 - what will it do ?
This is an artwork hosted into a case. It will display videos of the french theory authors on a
screen every time someone will stand around the case.
2 - who's done what beforehand ?
Someone used a graphic LCD as a video display controled by Arduino. See this page chibimo or this video.
3 - what materials and components will be required ?
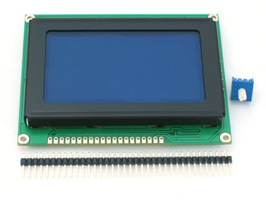
A Fabduino board, an INFRARED sensor, and a graphic KS0108 LCD 128x64 + extra … or eventually a
vacuum fluo display.
4 - where will they come from ?
I will use the Fabduino I made in class. The other components will come from adafruit and
parallax websites.
5 - how much will it cost ?
35$. The use of a vfd would put the price up to 129 $.
6 - what parts and systems will be made ?
The Arduino will be made. A chess game will be laser-cut from blue mirror acrylic.
7 - what processes will be used ?
Board-milling on Modella. Board soldering. Arduino programation. Laser-cutting on Epilog.
Wax casting for the chess game. Video formatting with AE CS5 or Streamclip for the video contents.
8 - what tasks need to be completed ?
I need to make a new Hello_Arduino_board. I need to connect the motion sensor to it, as an input.
I need to connect the display as an output. Then I need to program the arduino to make it start
playing videos when someone comes around the case. Then I need to cut a hole into the case to
insert the display. I also need to cut en raster the chess game on the laser cutter and to make it
fit into the case.
9 - what questions need to be answered ?
I need to know if the Arduino clock is fast enough to run my video. I need to make it from a mac
whereas the examples were made from a Windows PC. I also need infos to go further. I want to play
sound into 8 headphones. I also want to add a power button to the case as well as a beacon.
10 - what is the schedule ?
I'll work on this project since I have the components, that is to say from today (may 16th, 2012)
until may 25th.
11 - how will it be evaluated ?
The project will be evaluated on the basis that the french theory's videos are displayed when
someone approaches the artwork. Also on the quality of the chess-game.
This is all about aesthetics and function.
Projects can be separate or joint, but need to show individual mastery of all of the skills where
possible, you should make rather than buy the parts of your project
Here are the pictures of the case I will use to make it.
This is a TELEX case with 8 fully operational headphones in it. I kind of really like its 70's/80's design and the idea of using it as an artwork container motivates me a lot because putting new/low tech things into this old case should create a dialogue between now and the past. This is a part of the concept of this project.
The display will play the rare videos of the french theory authors. A chess game will also symbolise the strategy of spreading ideas through time.

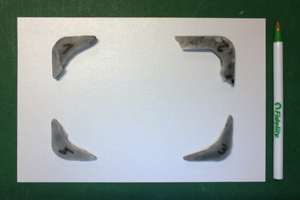
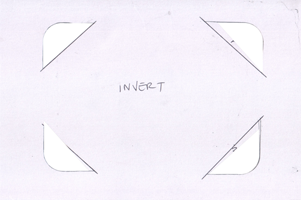
These are wax molds I made to draw the chess game board's corner :
The corner of the chess-game have to fit the corner of the case perfectly. Before starting to laser-cut the chess-game sheet, I had to make a mold of the case's corners as they are not exactly the same because the plastic of the case became a bit loose with the time.
I used tape to stop the liquid wax. Then I put the wax corners on a sheet of paper, made the traces with a pencil, and scanned the paper. After that, I refined the file on Illustrator CS5.
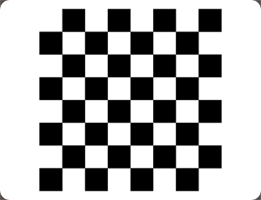
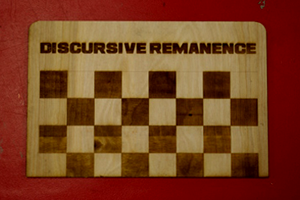
Here is the first test for the chess game on plywood. :
The chess game test I made on plywood looks like this. I made the shapes on Photoshop CS5, cleaned it of any bitmap on Illustrator CS5 and cut it on the Epilog laser-cutter. The font I used is ASH. I like it because it looks like some kind of marquetry. Nevertheless, I abandoned this option.
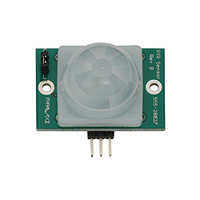
These are the electronic parts I'll need to complete my artwork :
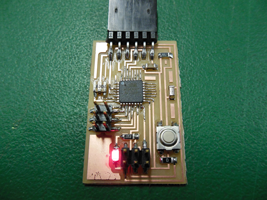
I need a MOTION SENSOR, a GRAPHIC KS0108 LCD 128x64 + extras - white on blue, and an HELLO_ARDUINO board.
Testing my final project's wiring :
I finally managed to run something on the GLCD with a fablab-made Arduino. You can see a game named ROCKET displayed on the screen. It's been very very tricky to find a way to make this run. Here is a video of the object.
In first place, I had to make 3 different Arduino boards because I needed more pins. I ended with 26 pins. This is enough to connect the 20 pins of the display and to add the motion sensor after.
2 / Final (Art) Project 2 :
I had to abandon my Final Project 1 and had to figure out another project. I must admit that it took me a while to find something interesting/reachable before I leave the US. This Final Project 2 is about electronic production only, and it's working. There is PIR sensor which starts a dc motor when it detects motion. Before leaving Providence, I had time to make some extra tests for this project's non-electonic parts too. See the project on weeks 19 and 20.