
This week assigment is to make a FabISP in-circuit programmer, for this we will have to mill the board, using Roland MDX-20 Milling Machine, then assemble the SMD components, test for shorts or open circuits and then test and program the FabISP.
From the Academy class, electronic production, I downloaded the files, for milling cutting and assembling the board. Then we setup the MDX-20,
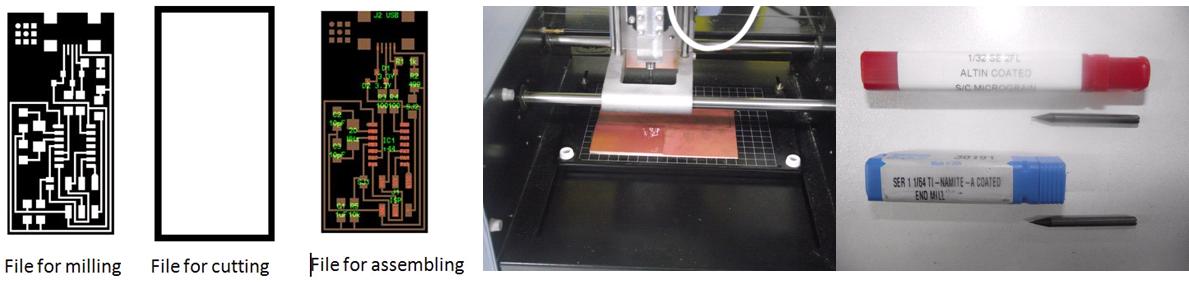
installing the board on the milling table and also the milling tool (1/32" for cutting and 1/64" for milling). Next I loaded traces file and send it to milling. Finishing with the traces i load the cutting file and place the cutting tool. This ends the board milling

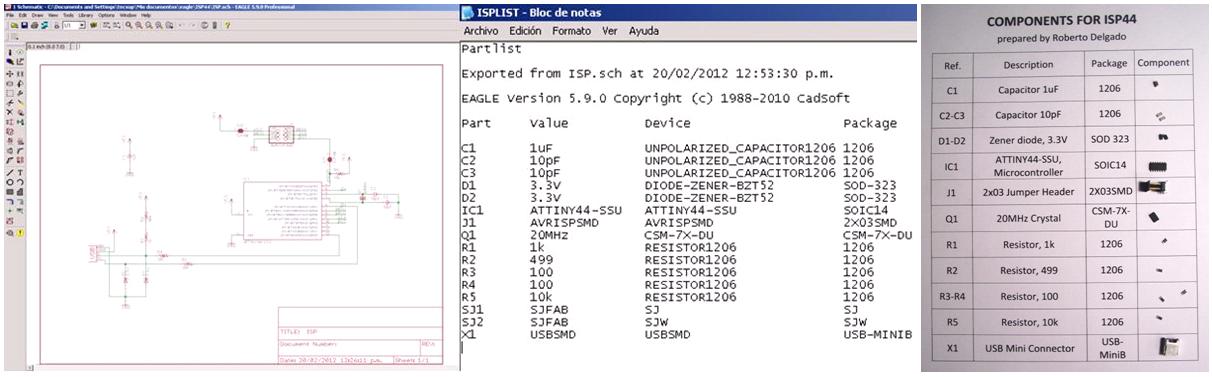
From the assembly drawing, I made the schematic in Eagle and generate the part list
Then following images show the the assemble of the board in several stages.

The assembled card was tested first with the AVR programmer, after a couple of tries we obtained the green light. Then following the tutorial I installed the AVR programming software and downloaded the firmware.zip file for programming the FabISP.

This has been a litlle board but really a hardwork, especially with milling and assembling. We had to calibrate the table of the milling machine, because some paths were milled and others not, for this we set a deep for the tool and established a closed path. When connected the ATTiny to the programmer, first we got a red light, so with the multimeter we measured the voltage supply of the ATTiny and found a short circuit, wich was fixed.