SUMMARY
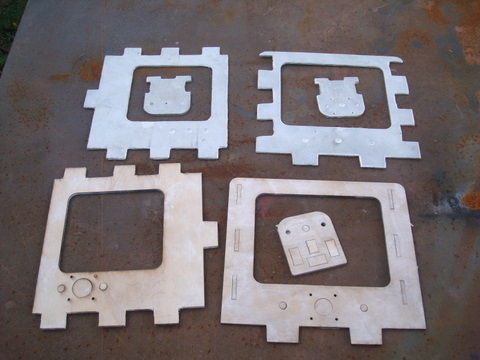
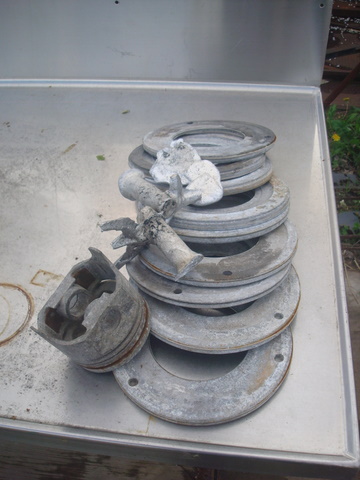
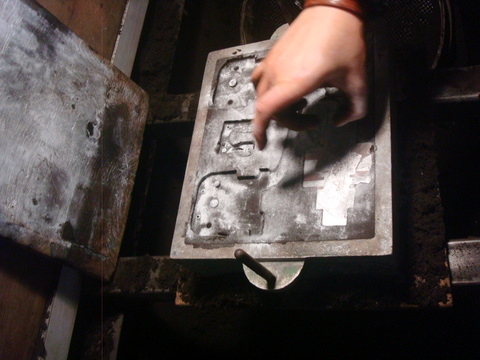
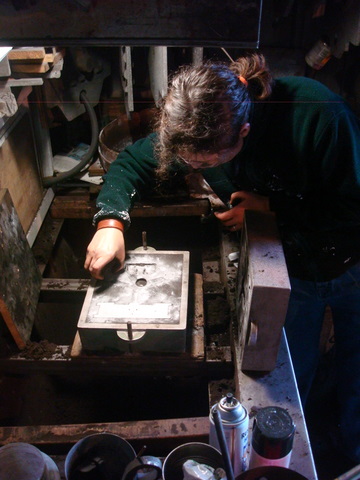
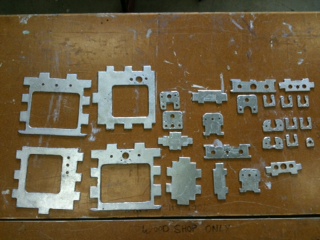
After importing into Inkscape, I was able to scale the drawing up 348% to give me the 31 mm spacing for the mount holes for the stepper motor. The parts were then cut out of 1/4 inch plywood, and cast in sand. We were able to cast all the parts in Nine flasks in one pour. We recycled some old pistons, clutch plates and scrap to fill a a No. 16 crucible with about 14 pounds of aluminium, which in about an hour was brought to 1450 degrees Farenheit.
We will assemble the components this week, and hopefully get a working machine!
July Update - Shop bot MTM Snap assembled and programmable with grbl shield
The exercise in fabricating the mini mill utilizing wooden templates and a sand cast aluminium frame met with mixed results. Registration of the sliding elements was the major obstacle. Fortunately, we were able to locate a shop bot in the area, and mill out the patterns from the MIT supplied DXF files in HDPE, and assemble as directed on the MTM website.
Getting the software and hardware to interface to the MTM Snap took some time. A working logbook of my efforts, including both success and failures, is posted in the tutorials section of the fab academy archive (grbl2arduinoUnoF.html). Persistence finally paid off, and we now have a working unit, ready for our next step of actually programming it to mill out circuit boards with the aid of the fab modules.
We dedicated a desktop computer to the operation of the MTM SNAP, here is a listing of the programs and environments loaded onto a clean disk:
We chose the Ubuntu development environment, and in this instance, version 10.4 LTS with precompiled EMC2 software (Enhanced Machine Control). We burned a CD, and loaded onto the hard disk. Another couple of hundred megabytes of updates completed the base installation.
The next step is to proceed to Nadya's great installation script , copy and run in the terminal to load up many needed software programs. You should preface this with "sudo".
Now load the fab modules from the kokompe website. The easiest way to accomplish this is to save the file in your Downloads directory as fab.zip. You also need to download a number of programs to make the fab modules work, which is most easily done on the command line:
sudo apt-get install python python-wxgtk2.8 gcc libpng12-dev make bash
Once these programs are installed, copy the fab.zip file into usr/local and unzip as sudo:
/usr/local$ sudo cp ~/Downloads/fab.zip fab.zip
sudo unzip fab.zip
The files will extract into user/local/bin
You should now be able to type fab into the terminal, which pulls up a GUI which will allow the user to output a variety of file types to machines in the fab lab inventory, including the MTM SNAP using g-code.
Next download the arduino IDE in a directory of your choice (I placed it in the Desktop). It will not run until you follow the directions given here, and while in Synaptic, adding openjdk-6-jre, gcc-avr, and avr-libc. Once these are loaded, the arduino IDE should run fine.
Next install processing . Once it is installed, you will need to replace a couple of files by copying FROM the arduino IDE and replacing in the processing IDE file directories. At the time of this writing (arduino-0022 and processing-1.5.1), the files are:
arduino-0022/lib/librxtxSerial.so
arduino-0022/lib/RXTXcomm.jar
And they are placed in:
processing-1.5.1/modes/java/libraries/serial/library
Which is basically what is recommended at the MIT site.
Finally, you need to flash grbl onto your arduino. We used the Uno, and dowloaded the code here . A description of the mechanics of flashing your arduino is given here . A modified processing sketch, agctrl.pde is in the archive. It has been modified to work with the arduino Uno, other boards will require specific commands sensitive to their architecture.