SUMMARY
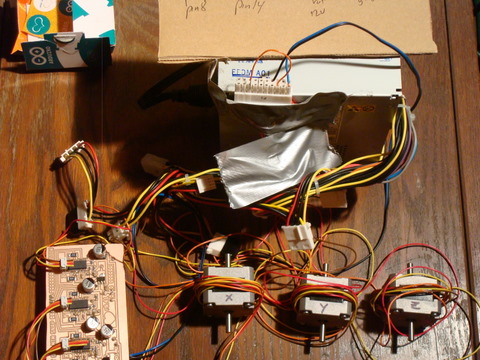
We were able to complete the construction of a stepper motor shield as described for the MTM Snap, which is driven with an arduino Uno connected to a laptop running Processing 1.2.1 in Ubuntu 10.4. We flashed the microprocessor with Grbl, which facilitates the control of 3 stepper motors with cursor keys, as well as with G code files generated in the fab modules. We used a 12 Volt power supply scavanged from a spare computer to drive the stepper motors. I will use this same assemblage to control a tool head for my final project, the Computer Controlled Turning Machine (CCTM).
Getting the electronics to work took more time then originally envisioned. A tutorial (grbl2arduinoUno) has been created which describes the paths taken. More work will need to be done to create a robust interface, such that repeated loading of the sketch is minimized, prior to successfull launching of the program controller interface.
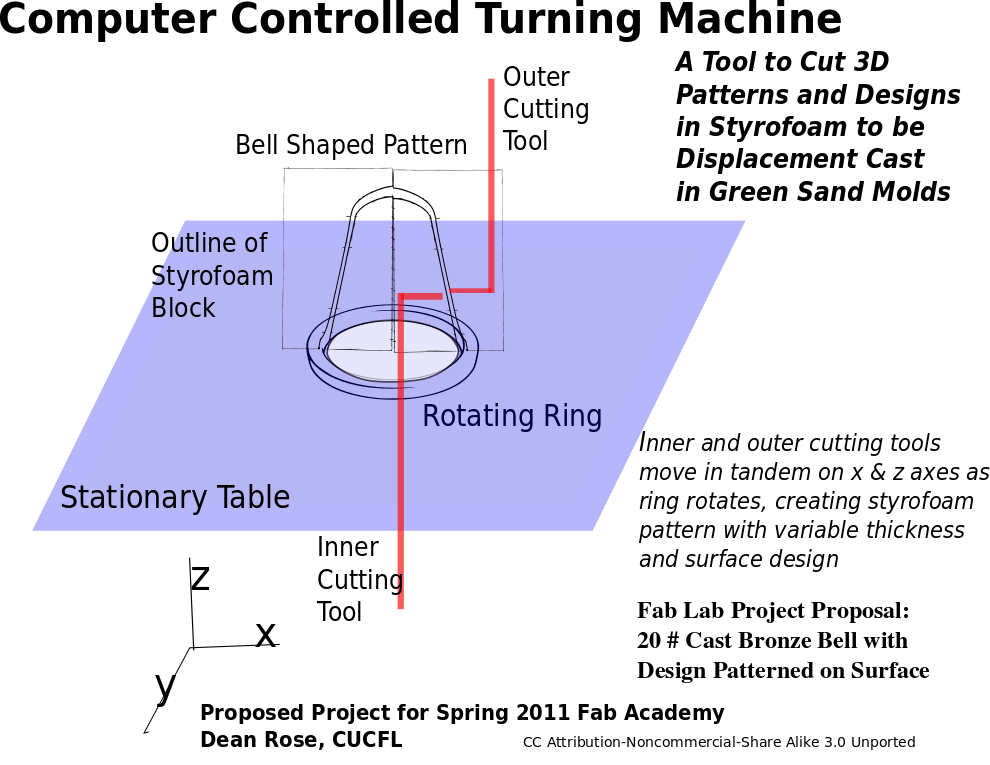
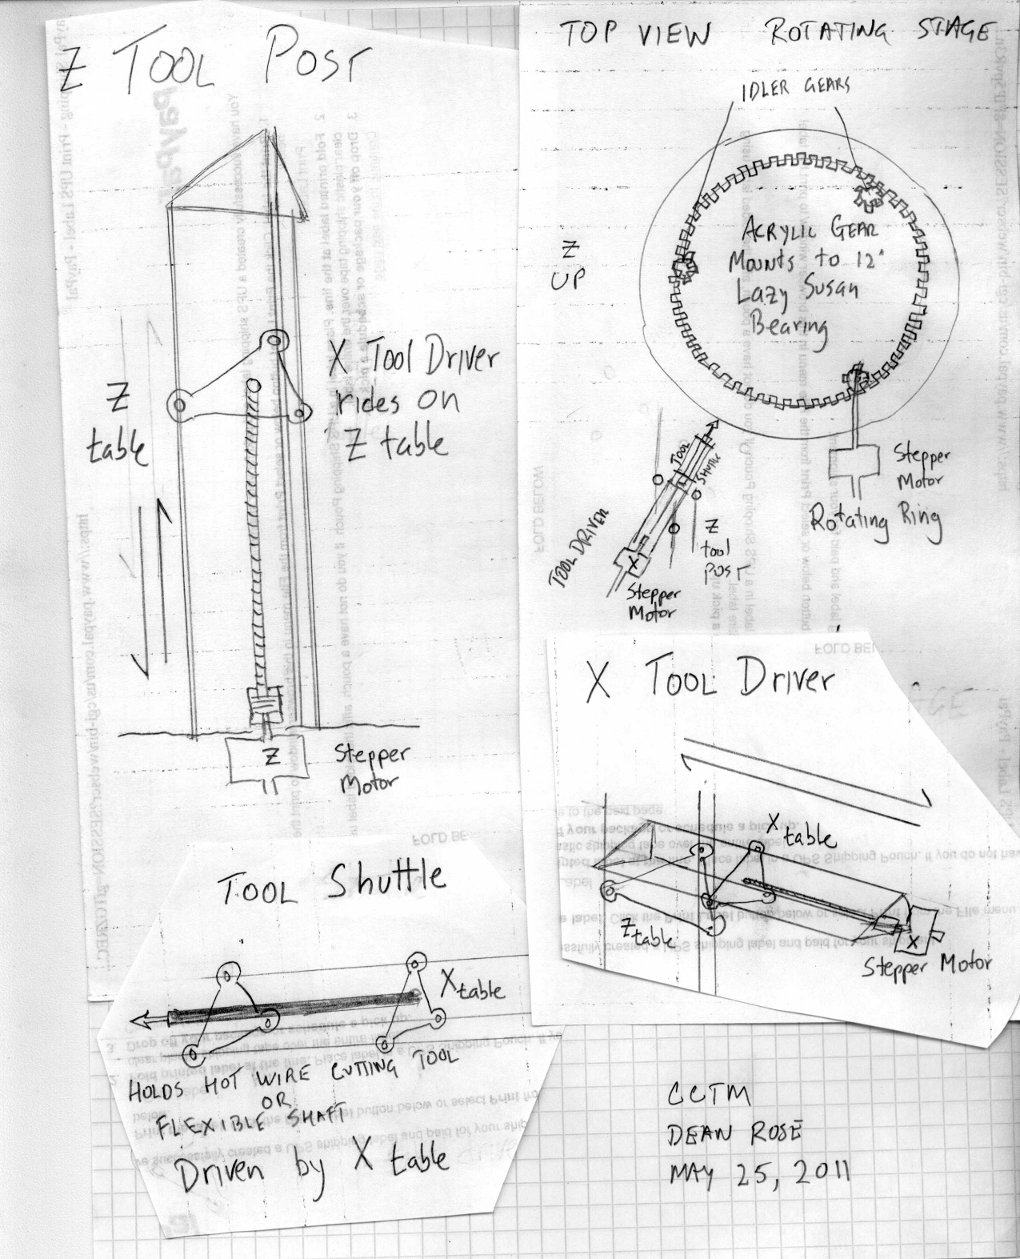
I have decided to use a 12" lazy susan bearing for the rotating stage. An acrylic gear will mount to this bearing, with a 12" OD and a 10" ID. A gear profile will be cut on the inner diameter of the ring, and driven by one of the stepper motors. A couple of idler gears at 120 degree phasing will keep the rotation of the stage in the xy plane true.
A Z tool post will be constructed using three pieces of 1/2" stainless steel rod arranged vertically in a triangular pattern. A table will ride up and down the z axis, guided by the three rods, and driven up and down by a stepper motor. This Z table will in turn hold a horizontal tool driver, which will drive a tool shuttle on the X table which carries the cutting tool.
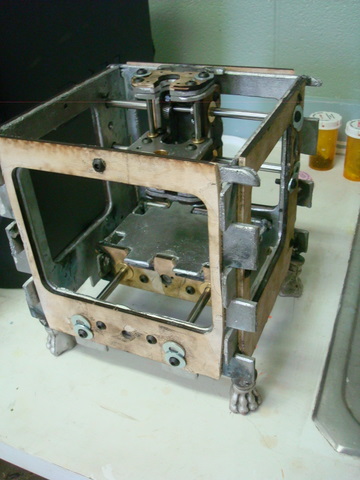
We are reusing much of what we made and learned when we put together the MTM Snap, without a ShobBot. A group project of the CUCFL, we call it the CUBB, a reference to the cast lion leg feet (with nail polish applied by Betty), or perhaps the Champaign Urbana Bit Bangers.
August Update
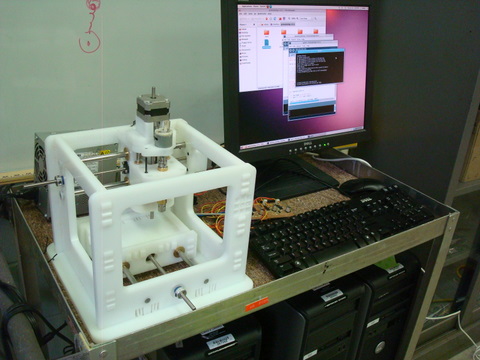
We finally got the MTM SNAP cut in HDPE using a locally available shopbot, and were able to run it with the GRBL shield using either an Arduino Uno or Deumilanove. Here are a couple of pictures of the setup as it currently exists in the CUCFL:
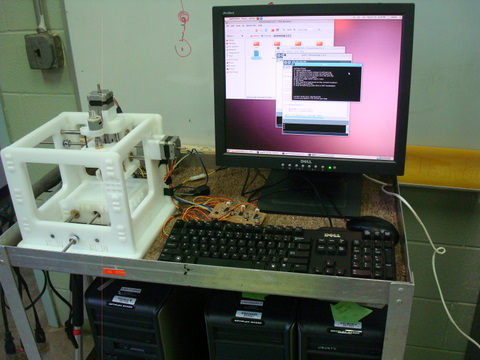
We seemingly had no end of problems getting the damn thing to work. However, we learned a lot about checking for errors and grounds of various kinds, and were sometimes rewarded with a machine interface which actually ran the SNAP.
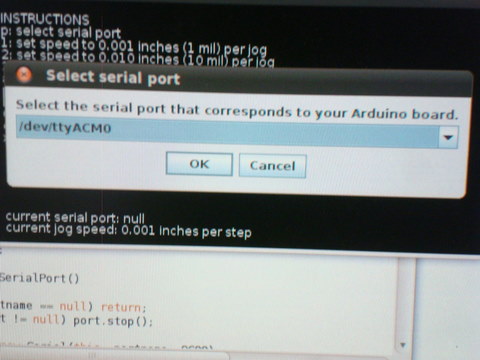
The main problem was getting the serial port properly configured with the Arduino board and GRBL shield. If one ran the processing sketch and attempted to select the serial port from the drop down menu, there was a 1 in 10 chance that it might actually work. This proved to be very frustrating.
One way around this is to directly insert the port address directly into the processing sketch and the GRBL makefile, and bypass the menu prompt completely. This usually worked 9 out of 10 times, and in those instances when it did not work, could be made to work by 1) rebooting, then 2) reflashing the arduino with GRBL, and 3) running the processing sketch with the correct port specified (shown below in bold) in the program, as follows:
//select and modify the appropriate line for your operating system
//leave as null to use interactive port (press 'p' in the program)
//String portname = null;
//String portname = Serial.list()[0]; // Mac OS X
String portname = "/dev/ttyUSB0"; // Linux
//String portname = "COM6"; // Windows
the above is for the Deumilanove. The port for the Arduino Uno is /dev/ttyACM0
Then it ran fine without the need of fooling around with how long or how hard one pressed the "p" key.
It was also easy to have issues with a bad ground between the GRBL shield and the Arduino board, which required additional vigilance. Much of what we learned also appears at the following link: