Week 17: Wildcard Week
I used an embroidery machine for this week.
Design
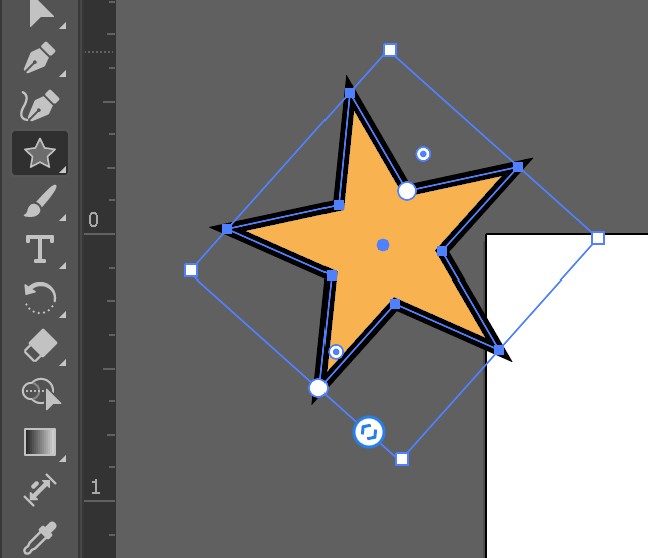
Star Tool

The Design
I made the design in Adobe Illustrator. This moon design is similar to the one I made in week 3 as it has the same face. I used the pen tool to make the moon’s outline. I used the start tool to make the 3 stars. I rounded the corners of the stars to match the vibe of the moon. I was told to use minimal colors so I just had the outlines a different color than the main shapes. I then exported my design as a png with a transparent background.
Embroidery
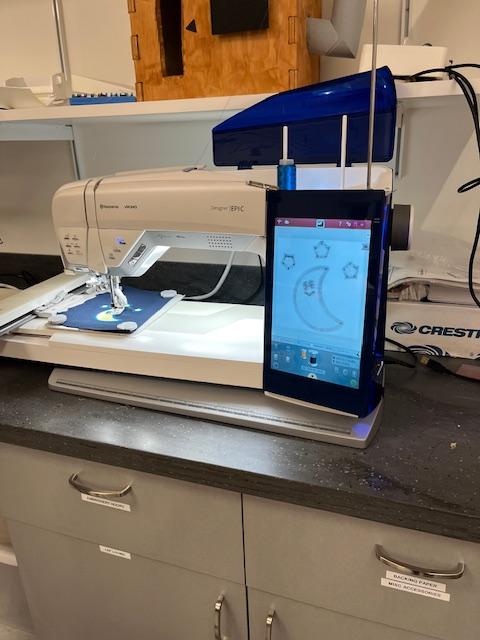
Wheaton Fab Lab has a Husqvarna Viking Designer Epic digital embroidery machine. We used mySewnet Embroidery software to prepare the design for the machine.
Software
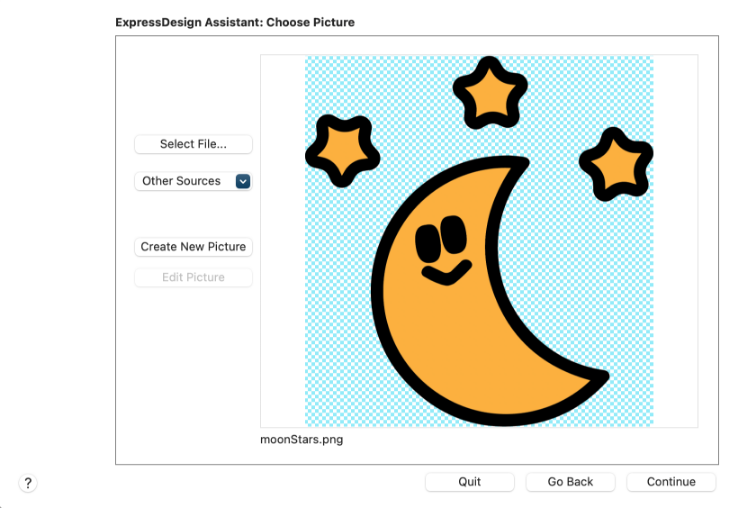
Import File

Select Thread Colors
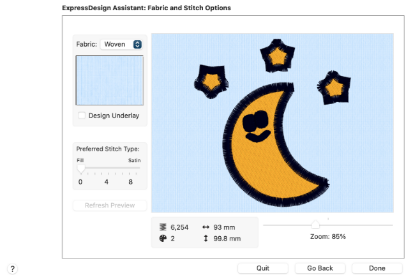
Select Fabric
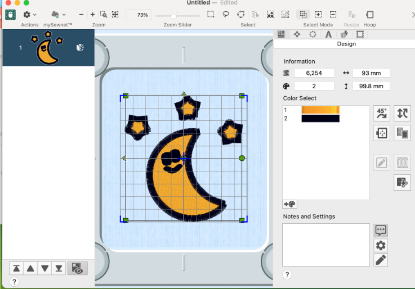
Preview of Design
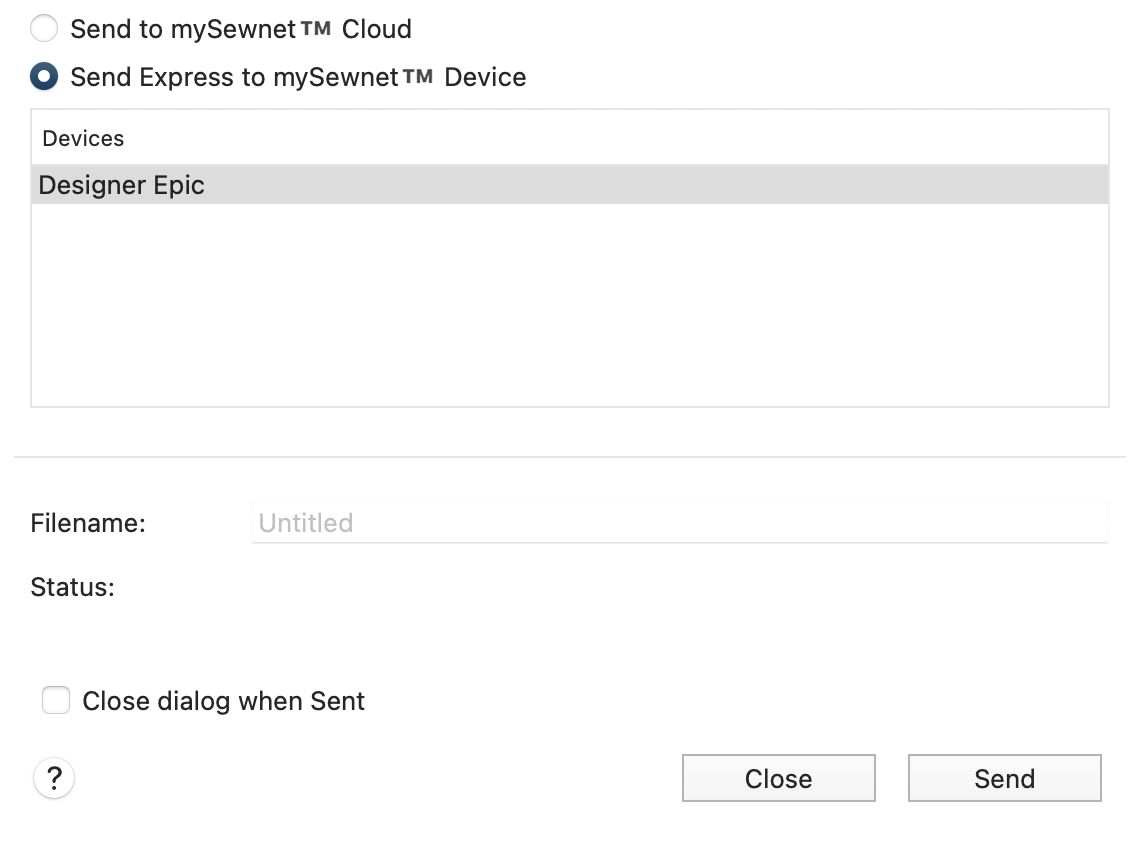
Send to Embroidery Machine
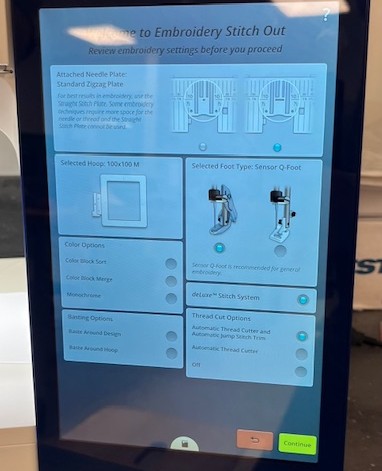
Set Settings on the Embroidery Machine
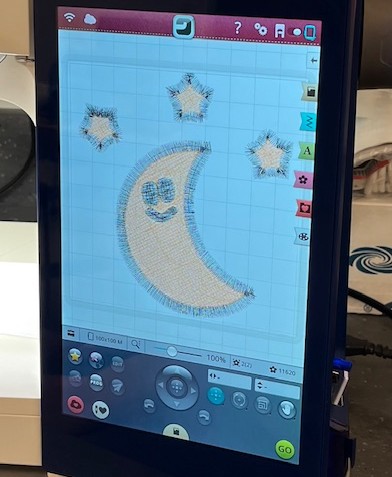
We started by creating a new express design. I then uploaded my design as a png. Next, it had me choose the number of thread colors and what color thread they were. I set it to 2 colors but the color of the thread didn’t matter because we had to change it manually anyway. After continuing, I set the fabric type to woven. It then showed a preview of the design in the embroidery hoop. On this screen, I set the embroidery hoop to a 12”x12” magnet hoop. You can also rotate your design if you want it oriented a certain way on your item. Finally, I sent the design to the machine by choosing the “Send Express to mySewnet Device” option and selecting the machine in the menu. On the embroidery machine, select New Project and choose the settings that correspond to the parts you are using.
Prepping for Embroidery
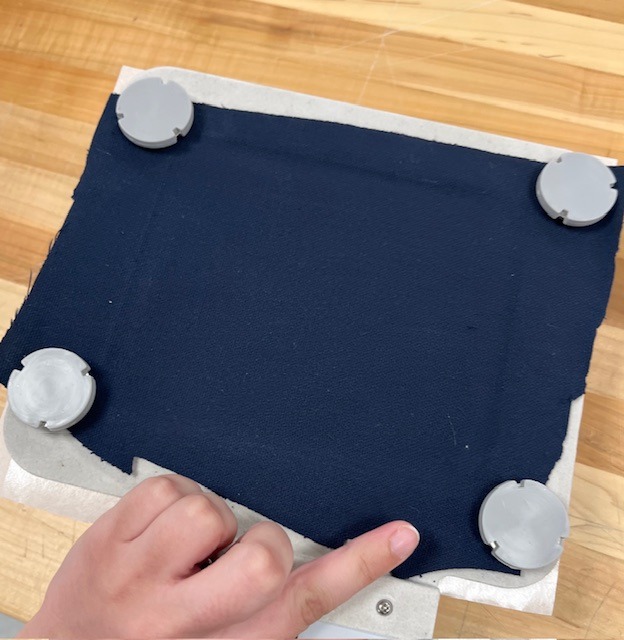
Attach Fabric
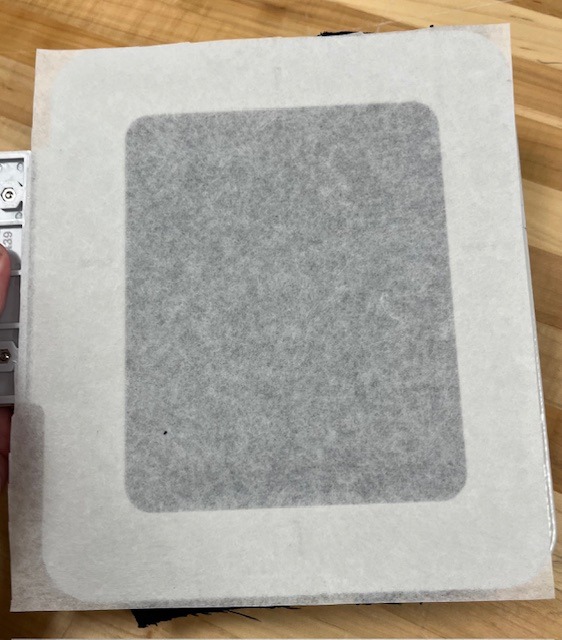
Backing Paper
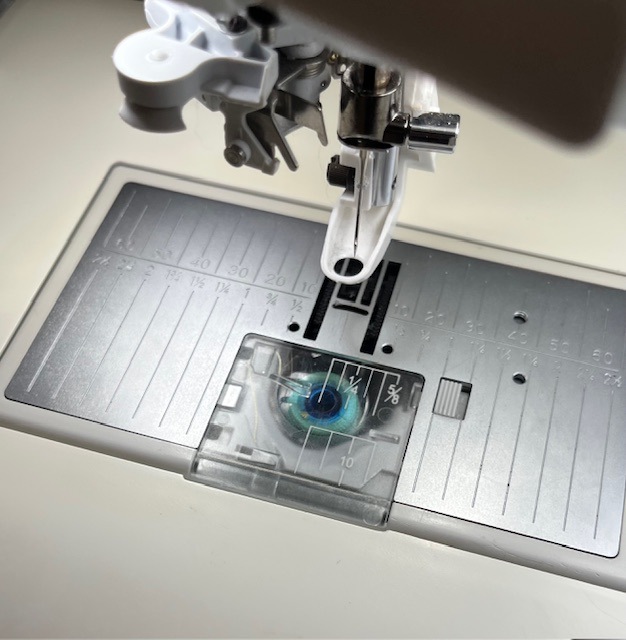
The next step is to put the fabric in the hoop. I used a piece of scrap fabric so I’m not entirely sure what kind of fabric it is. I cut a piece that would fit over the center of the hoop. I then secured the fabric to the hoop using the associated magnets on each corner while keeping the fabric as tight as possible. Next, I used a backing paper on the back of the hoop by cutting a piece to size and then attaching it to the edges of the hoop. On the front of the hoop, I then pushed the fabric down so it stuck to the backing paper. The hoop was now ready to go in the machine.
Threaded Bobbin
Threaded Spool of Thread
Design Preview on the Machine
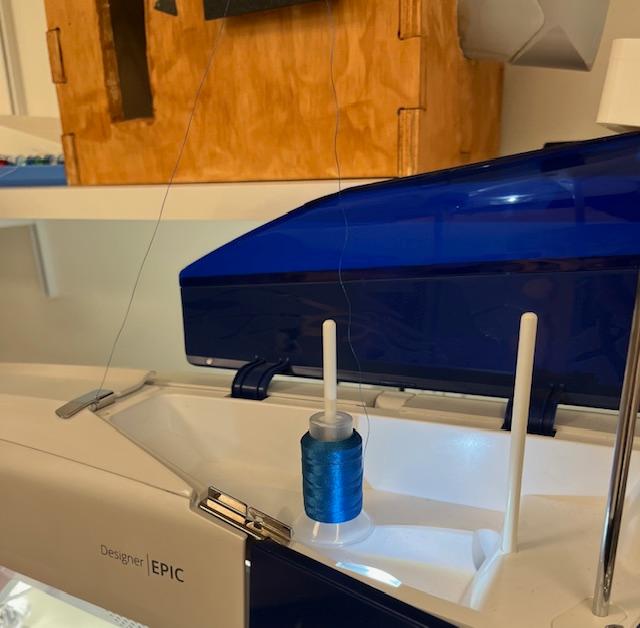
I then threaded the machine. The preview of the design showed that the yellow was going to be done first so I knew which color to load. I picked out a yellow thread and luckily we already had a bobbin with the same thread. I put the bobbin in the bottom of the machine underneath the sewing needle and thread it around a couple hooks. I could then insert the clear piece on top of the bobbin cavity. I could then click the hoop into place underneath the needle. I then placed the spool of thread on top of the machine and threaded it around various hooks as instructed. I could then hit the auto thread button on the left side of the machine to thread the needle. After confirming I was ready on the screen, I could hit the Start/Stop button to start.
Embroidering
Embroidering Inside of the Moon
Message to Redo Upper Thread
Embroidering the Outlines

Remove Hoop From the Machine
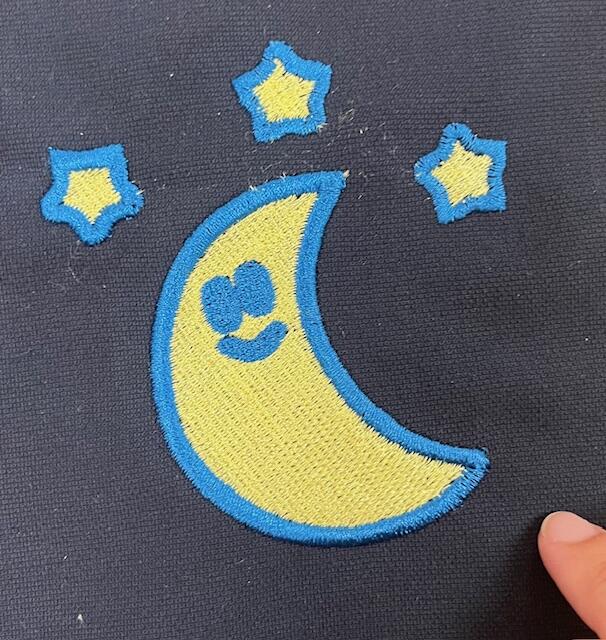
Finished Embroidery
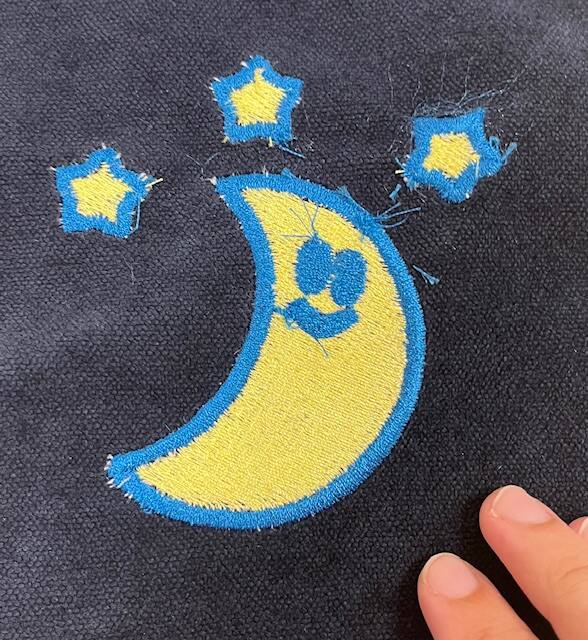
Back of Embroidery
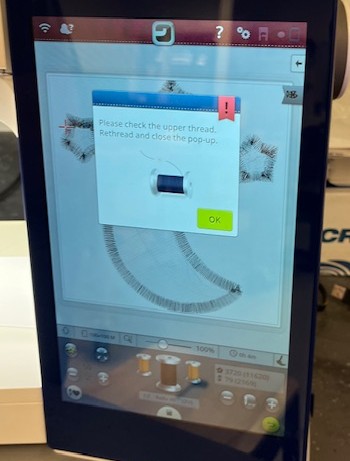
After waiting for the embroidery machine to finish the yellow, I rethreaded the machine with blue thread for the outlines. After starting, the machine stopped and asked us to check the upper thread. We took out the top thread and re-threaded it. We had to do this a couple times before the machine was satisfied and embroidered the outlines. Once it had finished the outlines, I removed the hoop from the machine. I cut the threads in between the moon and stars that were leftover from the machine switching locations. I could then remove the fabric from the hoop by peeling it off the backing paper. It was easy to remove any remaining scraps of paper stuck to the fabric. I had successfully embroidered my design!
Attaching to the Hat
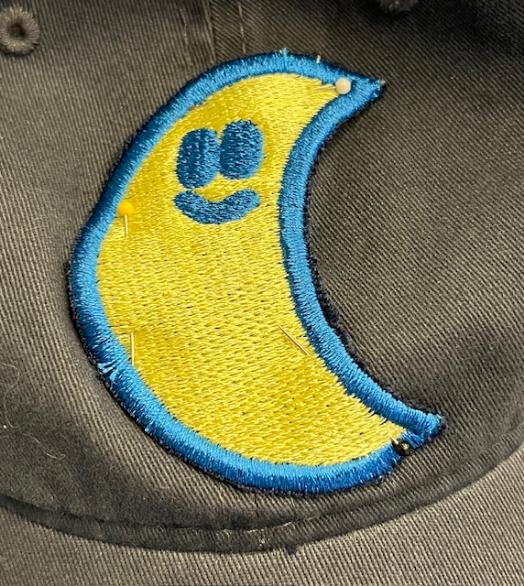
Moon Pinned to Hat
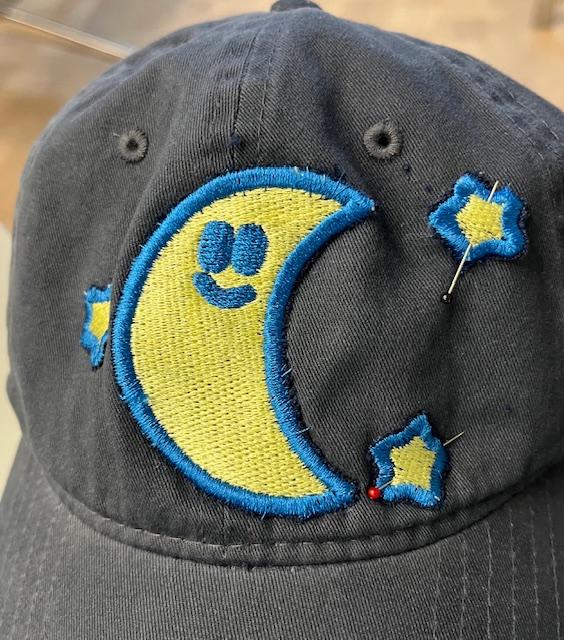
Stars Pinned to Hat
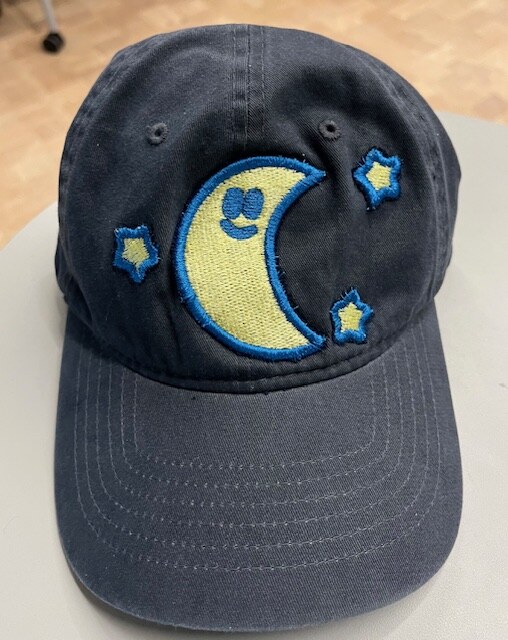
Completed Hat
I decided to attach my embroidery to a baseball cap. To start, I cut out the moon and stars so they were individual patches. I started by pinning the moon in the middle of the hat. I then threaded a needle using the same thread as the outlines. After tying a knot on one end of the thread, I was good to go. I stitched it by pushing the needle up through just the cap next to the patch and then going over the border of the patch and back down on the edge of the yellow part of the patch. I would recommend wearing a thimble if you are not a skilled sewer because I accidentally stabbed my finger a couple times when pushing the needle through the embroidery. I went all the way around the edge to secure it the best I could. I then pinned the stars to the hat and attached them in the same manner. When I ran out of thread or was at the end of a shape, I just knotted it near the cap a couple times and cut the excess. After a couple hours, I had successfully attached my embroidery to a hat!