Week 15: System Integration
System Integration – Checklist
- ✅ Sensing the Dirt and Heat – Sensor Integration
- ✅ The Brain – ESP32S3 Controller
- ✅ From Betrayal to Brilliance – PCB Design
- ✅ Talking to Humans – Web Interface
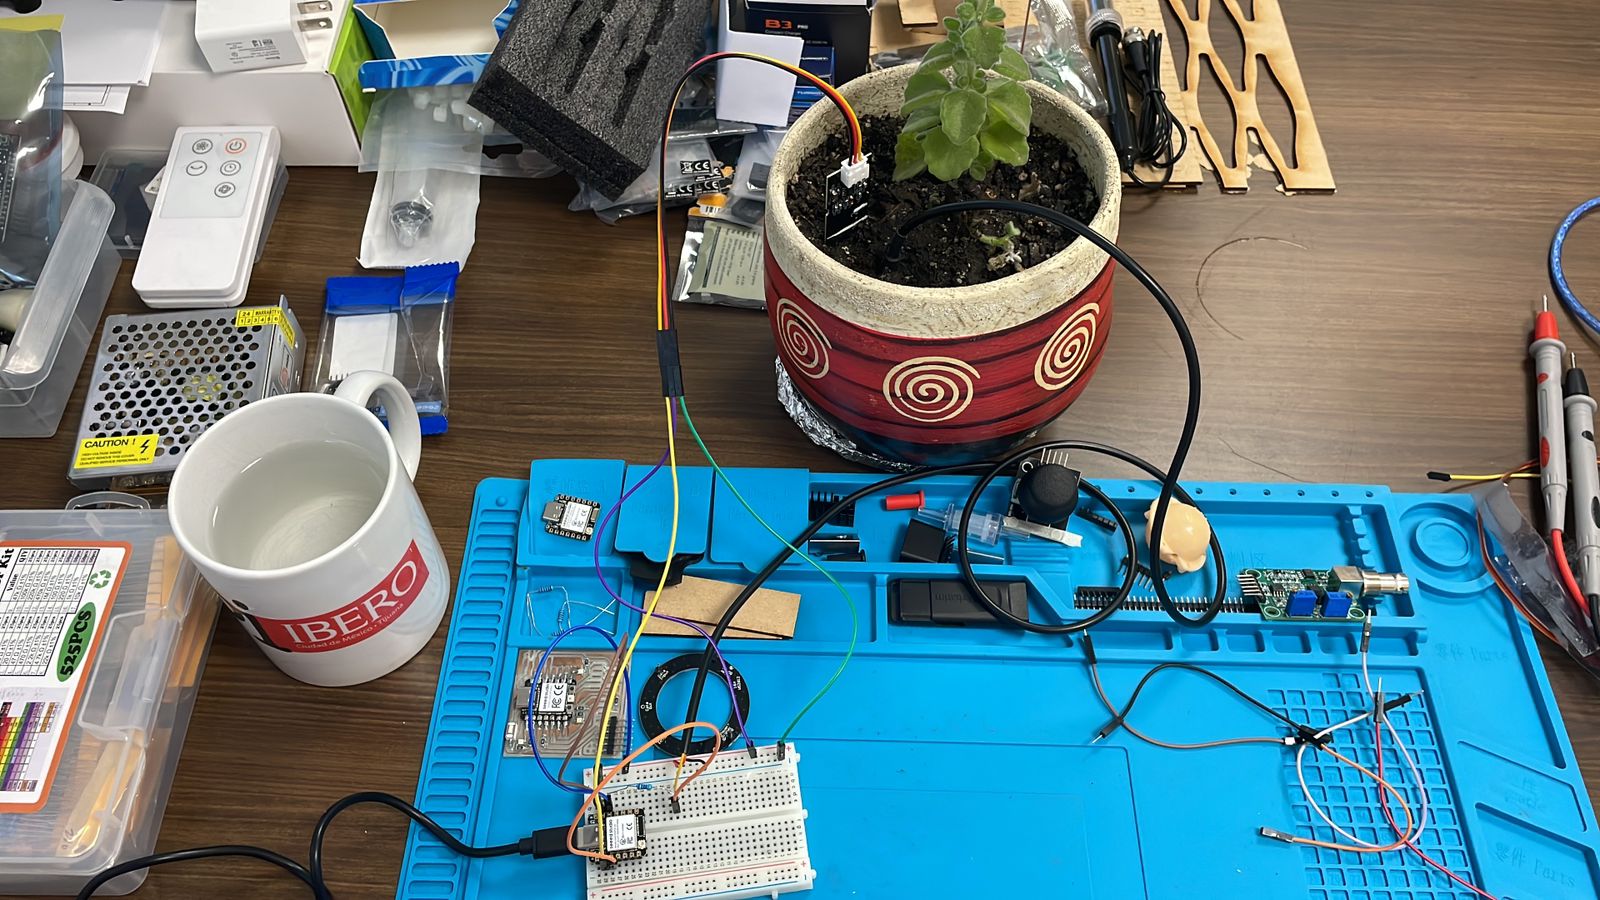
- ✅ Wiring, Power & Data – It All Comes Together
- ✅ Enclosure & Aesthetic Bravado
- ✅ UX – Plant Interaction for Mortals
- ✅ A Note on Human-AI Partnership
System Integration: From Dirt to Dashboard
We had a system. We had dirt. We had code. And somehow, with a mildly stable mental state and an unhealthy dependence on caffeine and ChatGPT, we pulled it off.
Packaging – Because Even Dirt Deserves a House
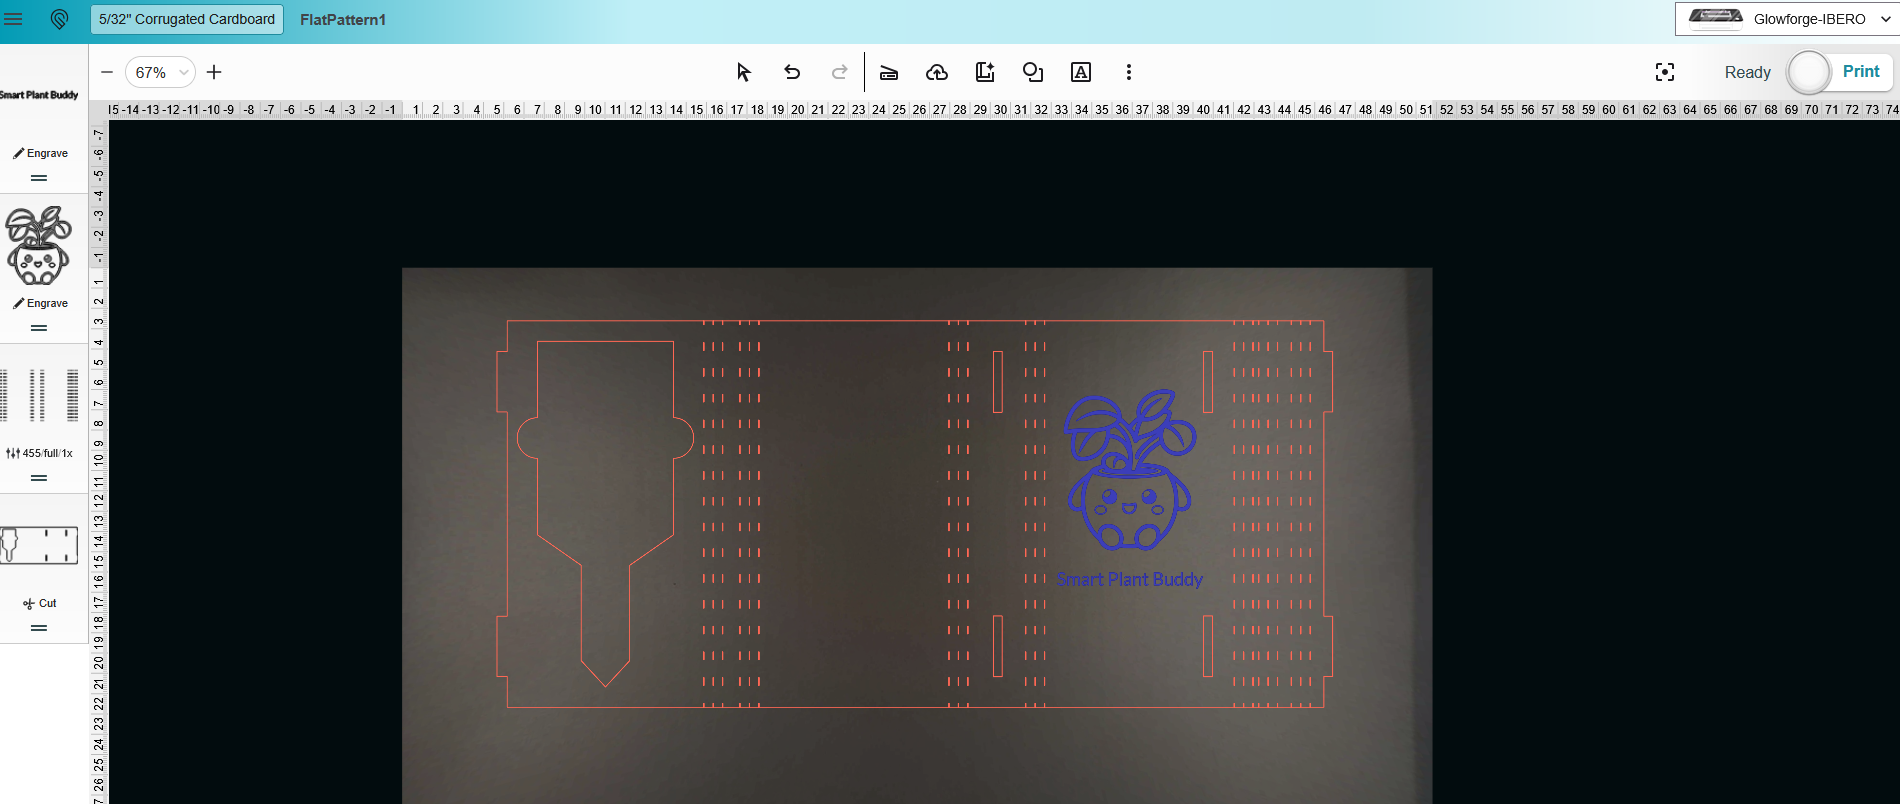
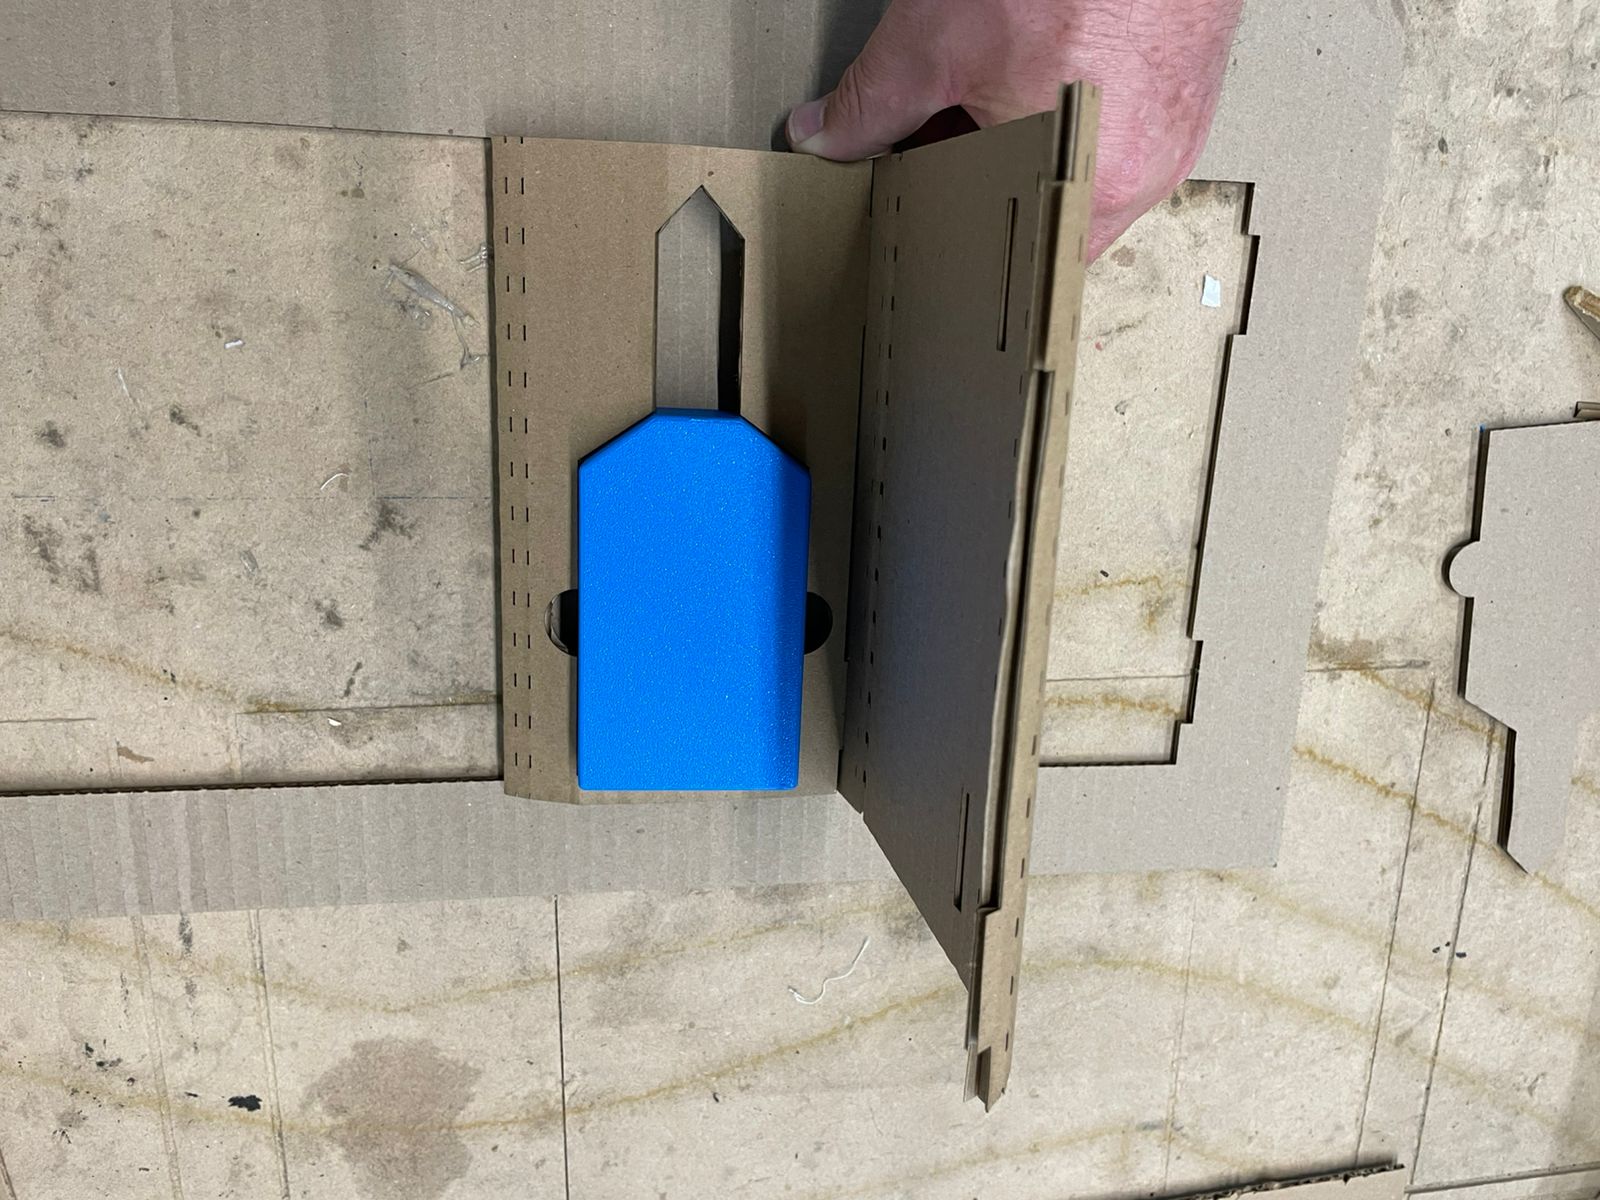
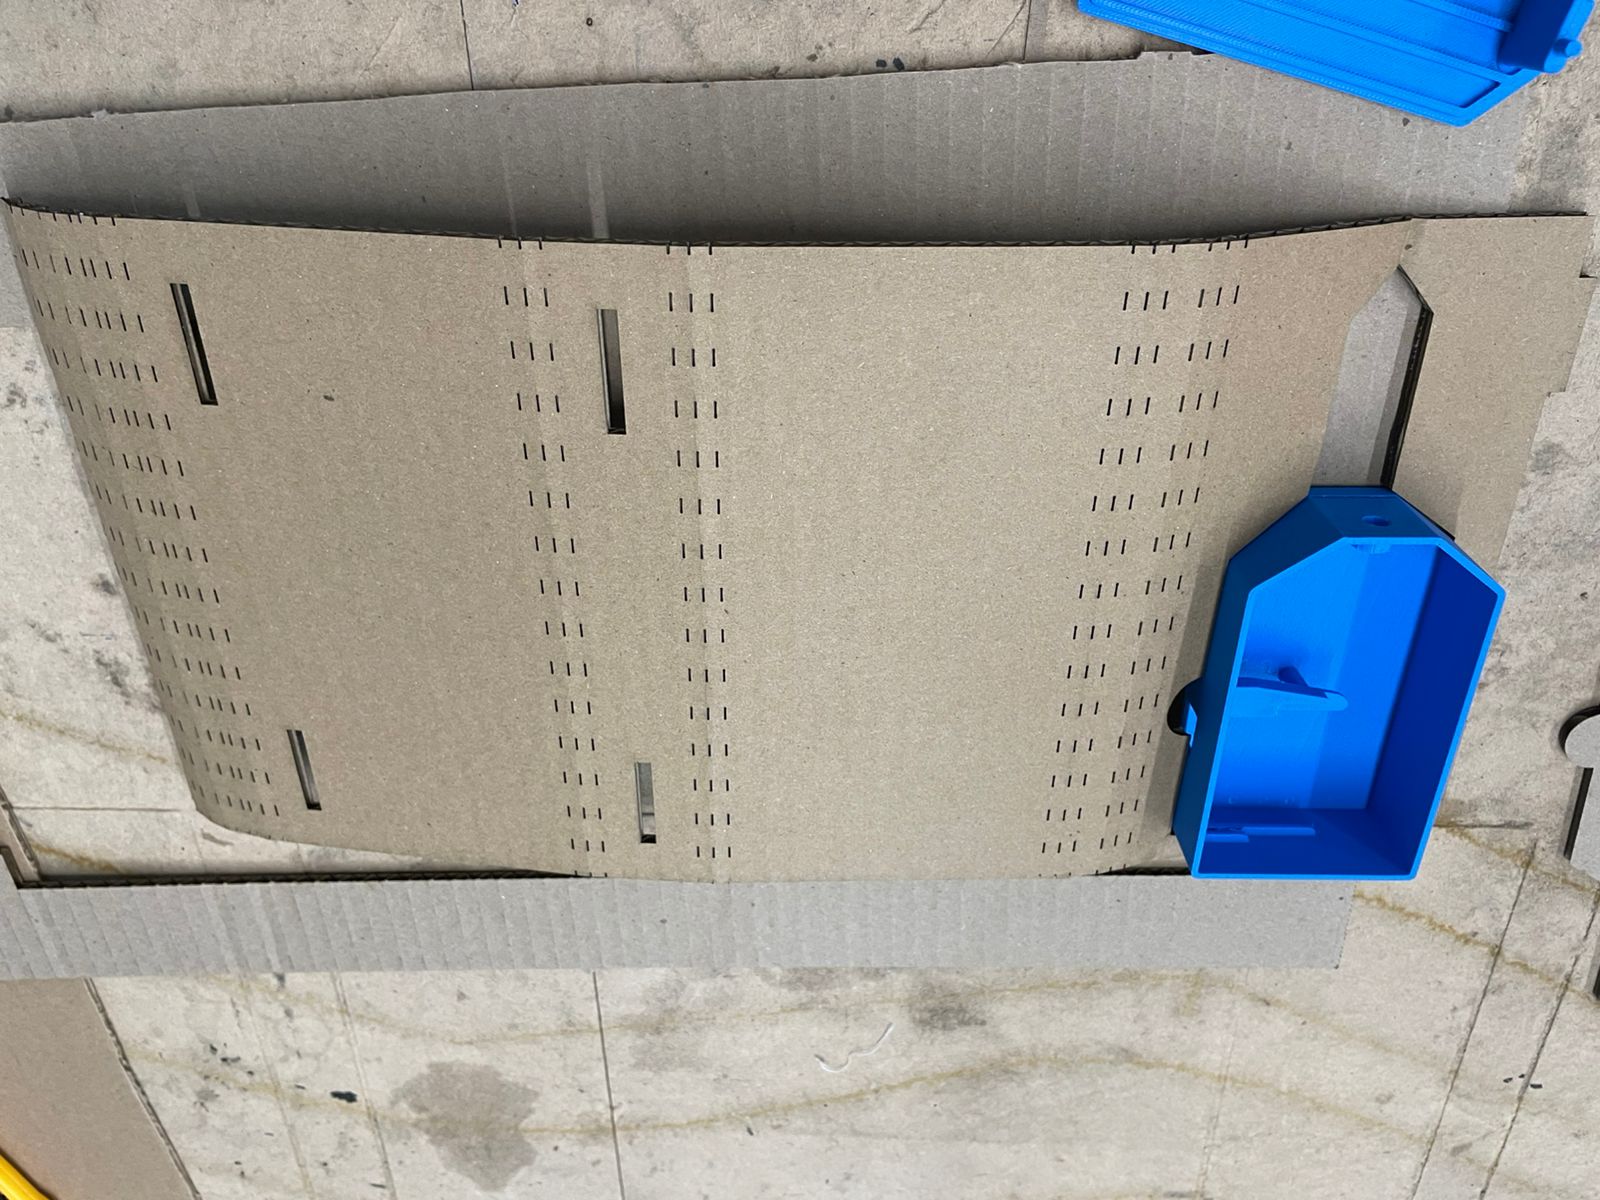
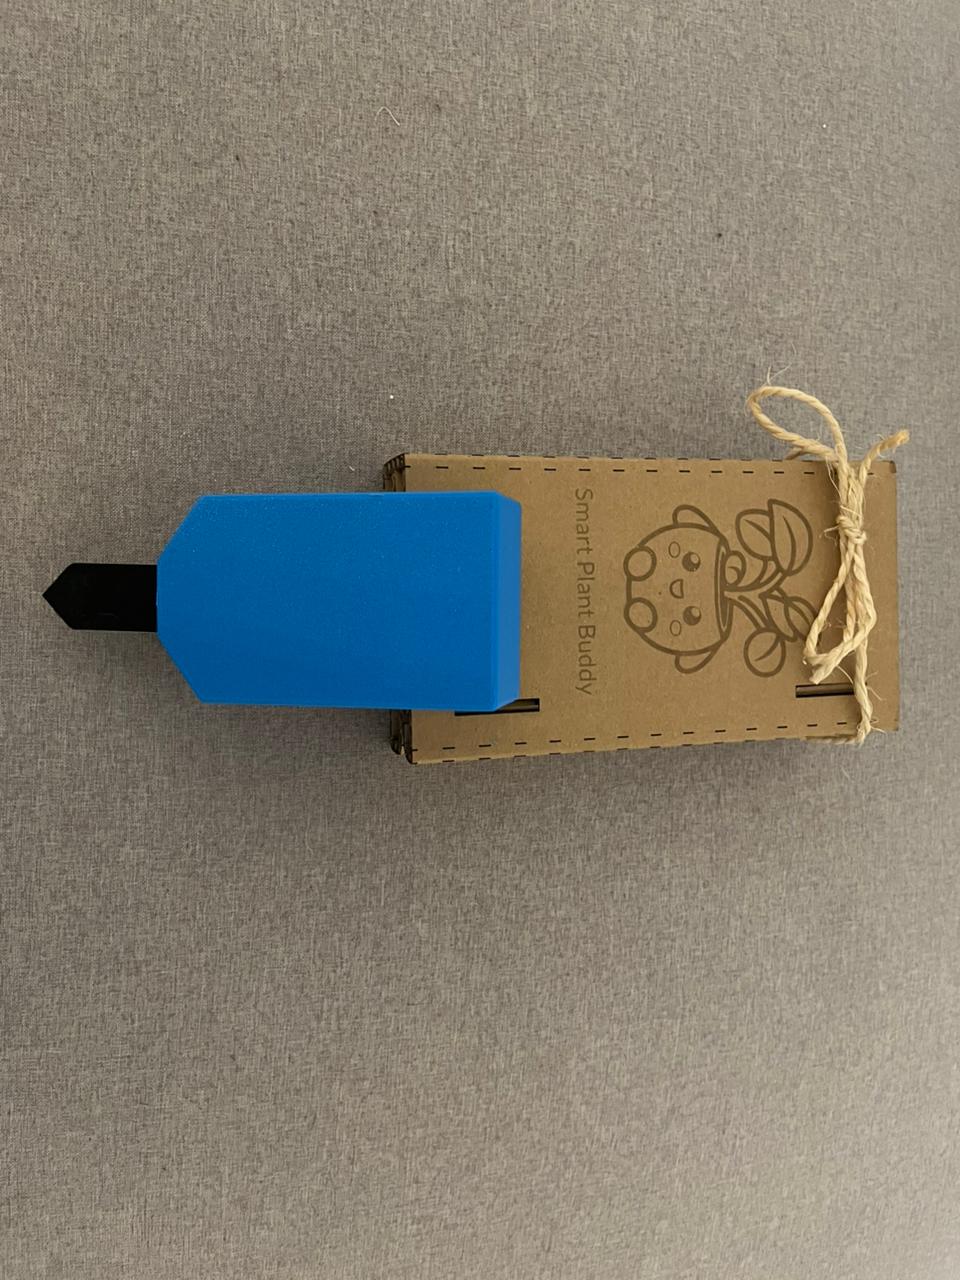
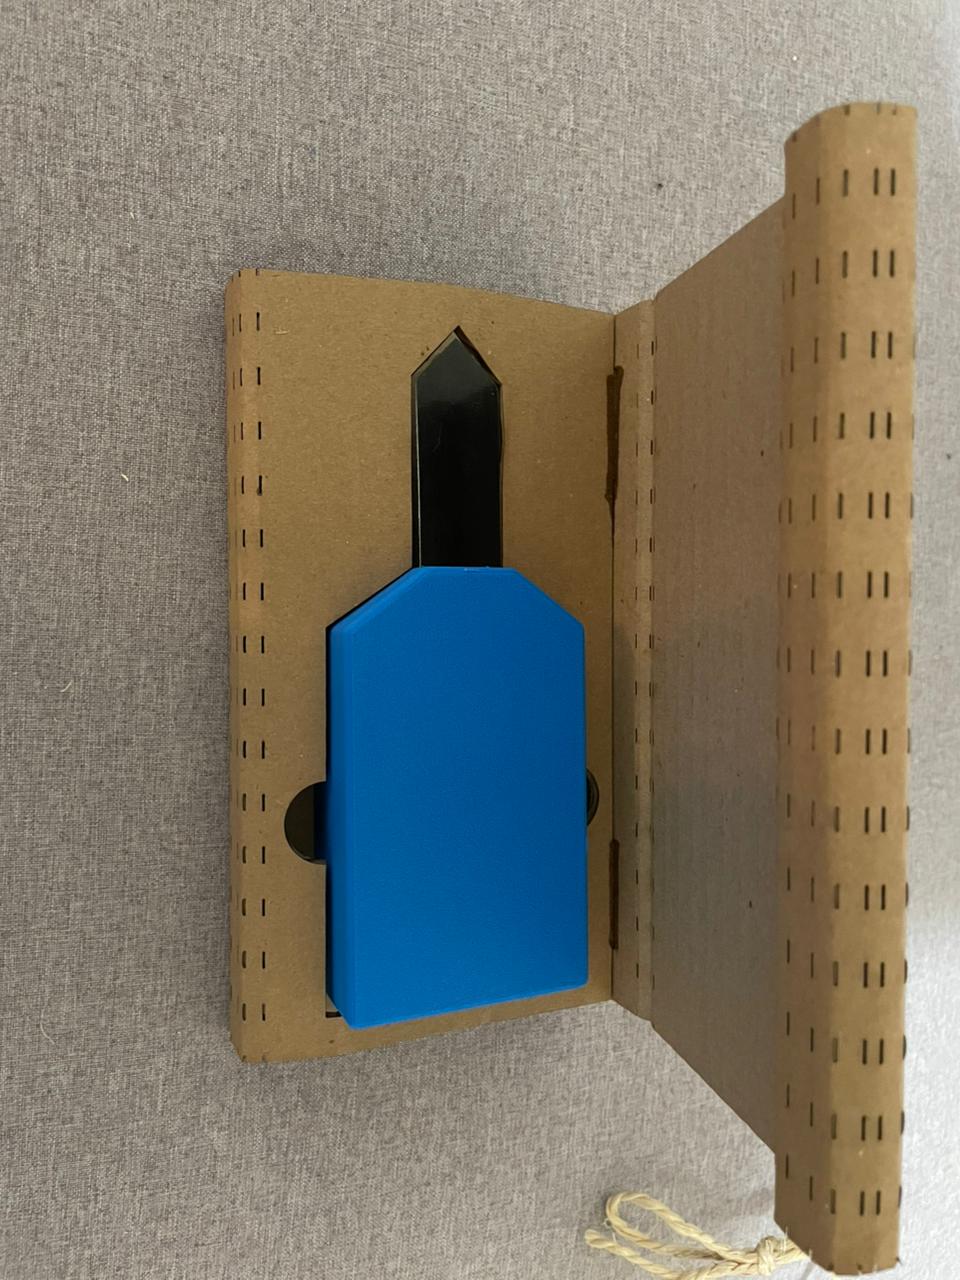
You thought I was going to let this plant buddy roam free like some wild Arduino in the compost heap? Hell no. It got a custom enclosure. Not 3D-printed, not injection-molded — **cardboard**. Sustainable. Cheap. Recyclable. And way more forgiving when you mess up a notch.
Designed by yours truly in Fusion 360 — entirely parametric, baby. Thickness? Variable. Curves? Calculated. Tabs? Snappy. The whole thing was laser-cut on a Glowforge because I like my cardboard like I like my jokes: precise, a little burnt, and preferably vectorized.
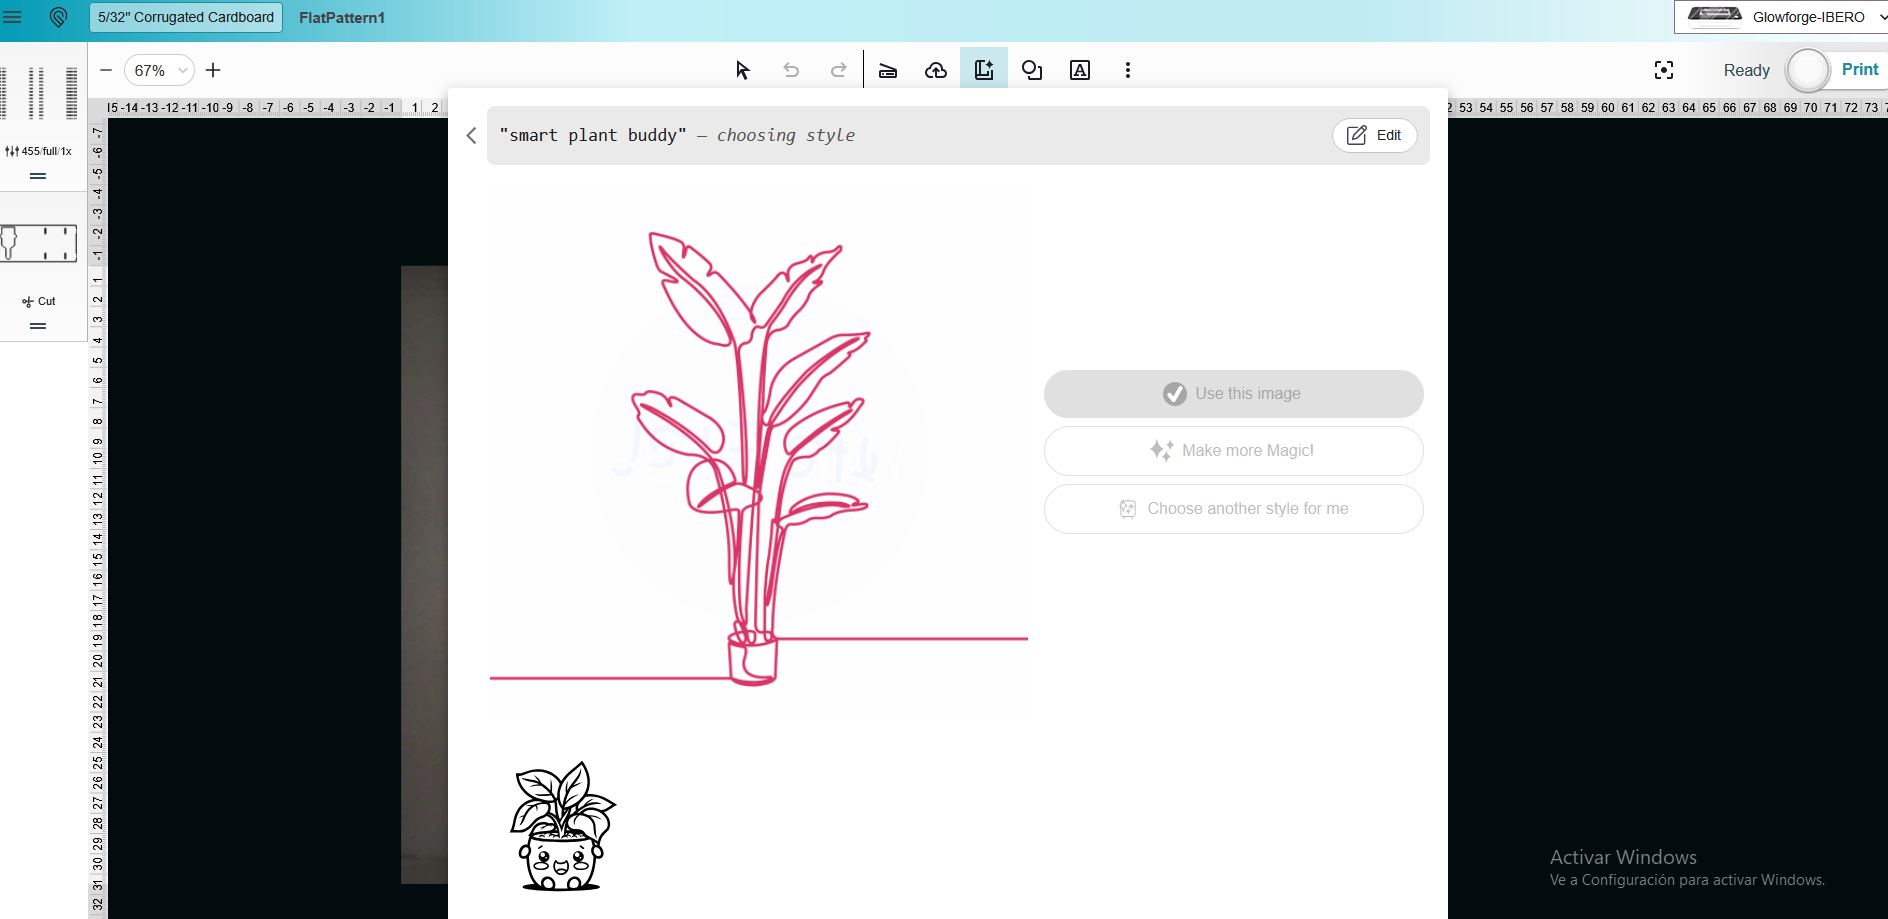
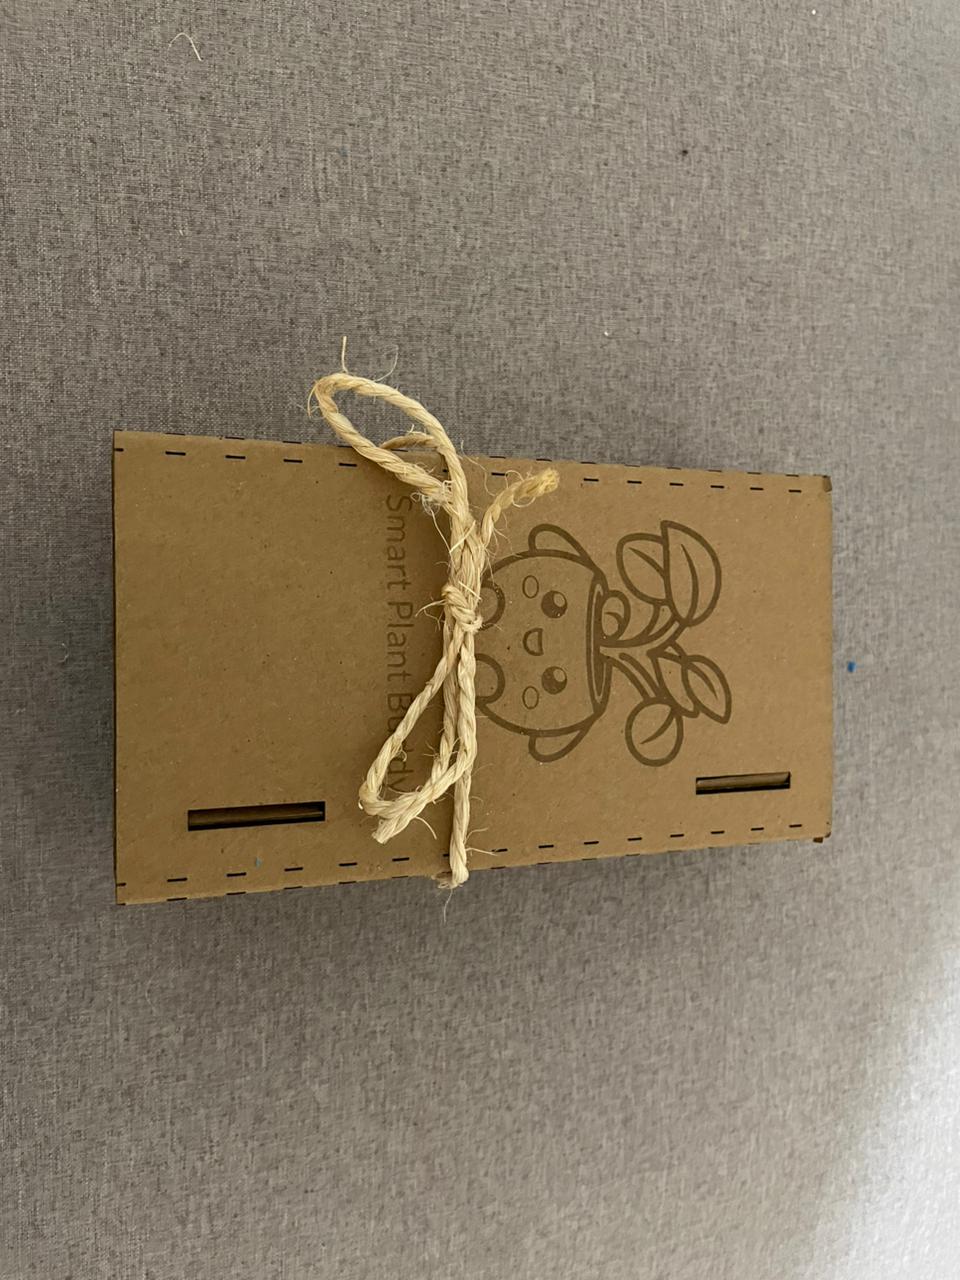
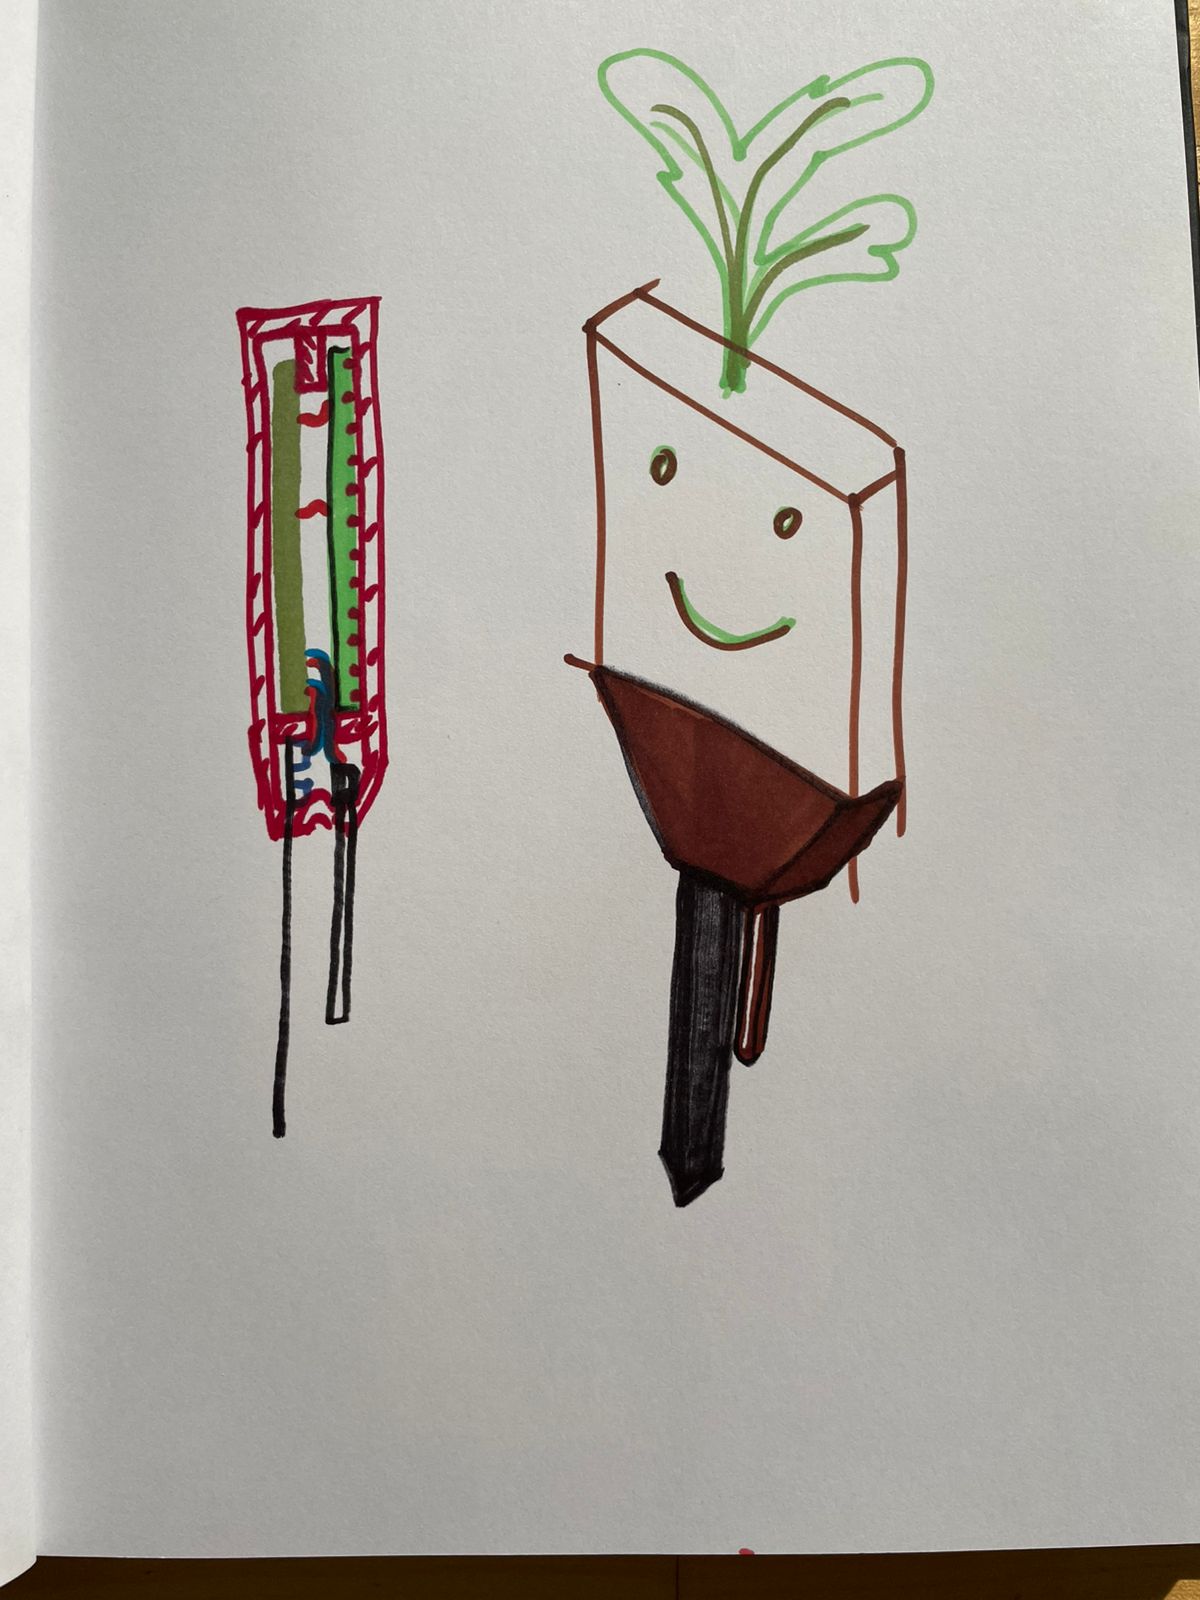
AI’s only job here was making the engraved logo — I typed “smart plant buddy” and out came a quirky plant mascot that didn’t look like it was trying to murder me. That’s a win. Everything else? 100% human-engineered chaos.


Prompt:
“Design a parametric folding cardboard enclosure in Fusion 360 to fit my electronics... Also, add an engraved logo that says Smart Plant Buddy.”
AI Response:
“Here’s a flower drawing, and I’m going to call that success.”
Me: “Fair enough. I’ll do the hard part manually.”
Final Product Look
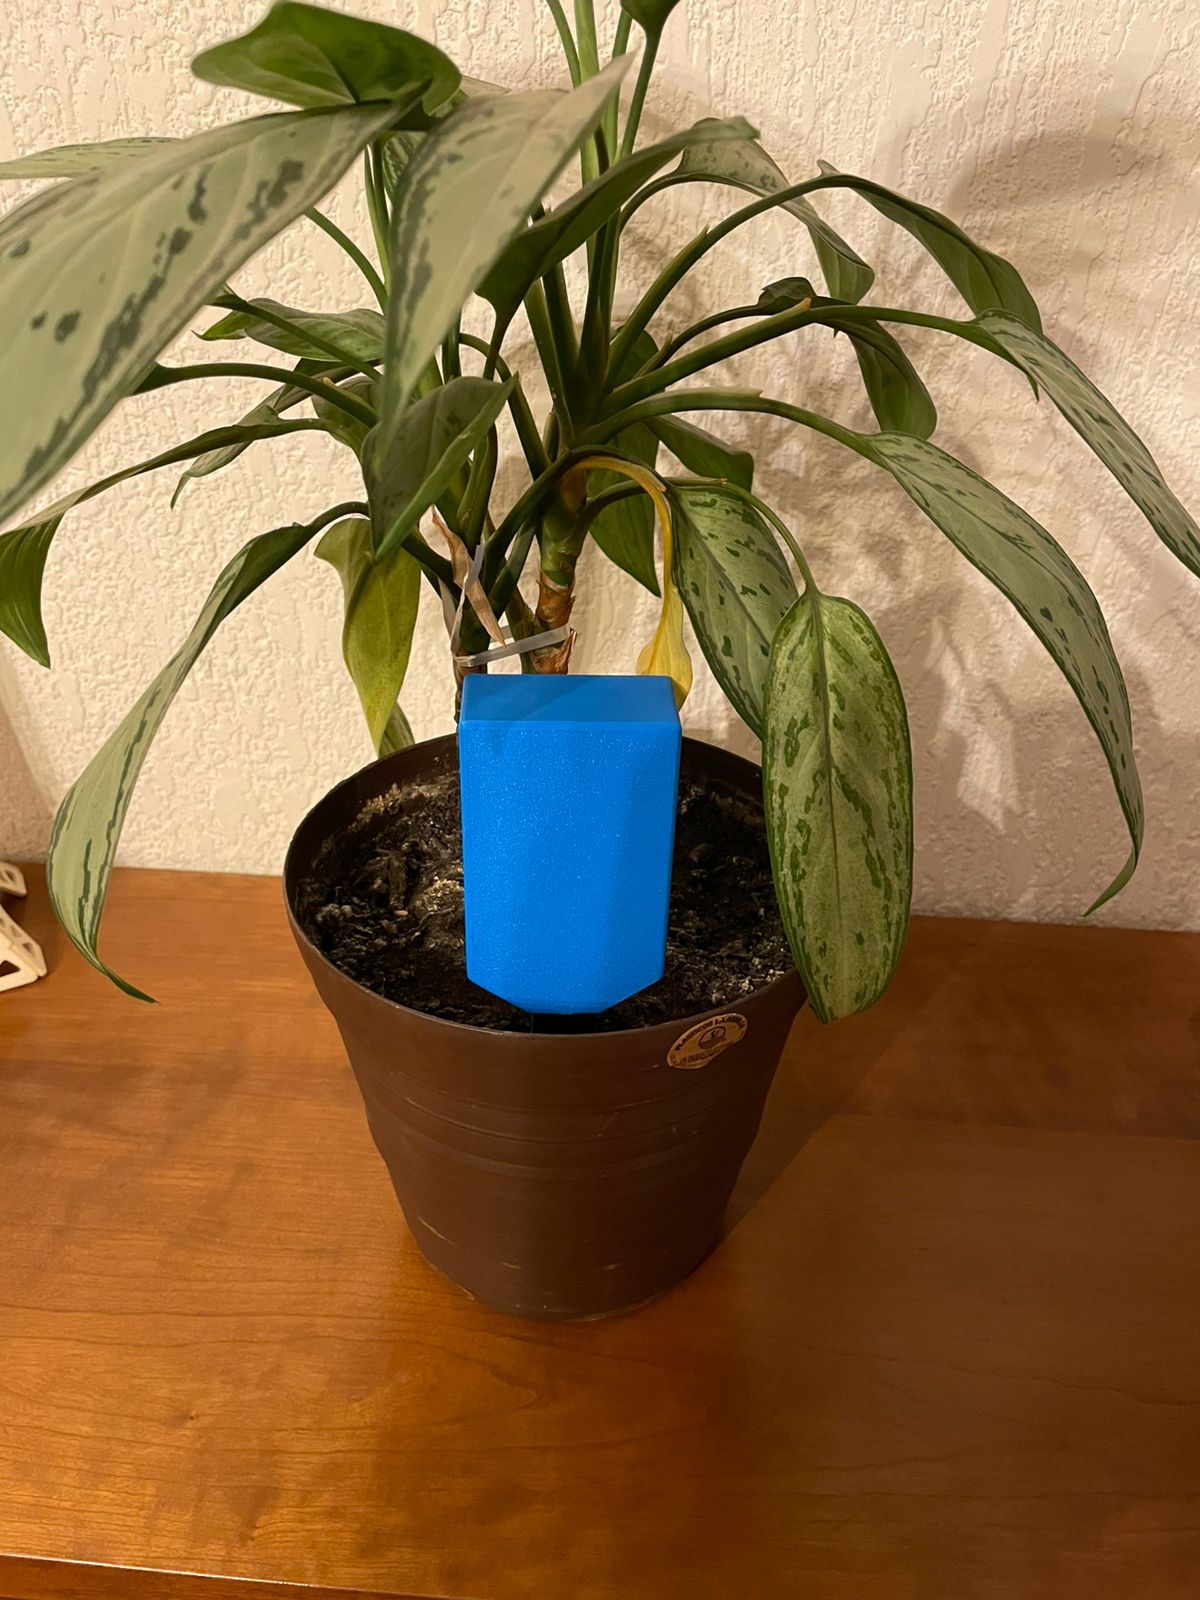
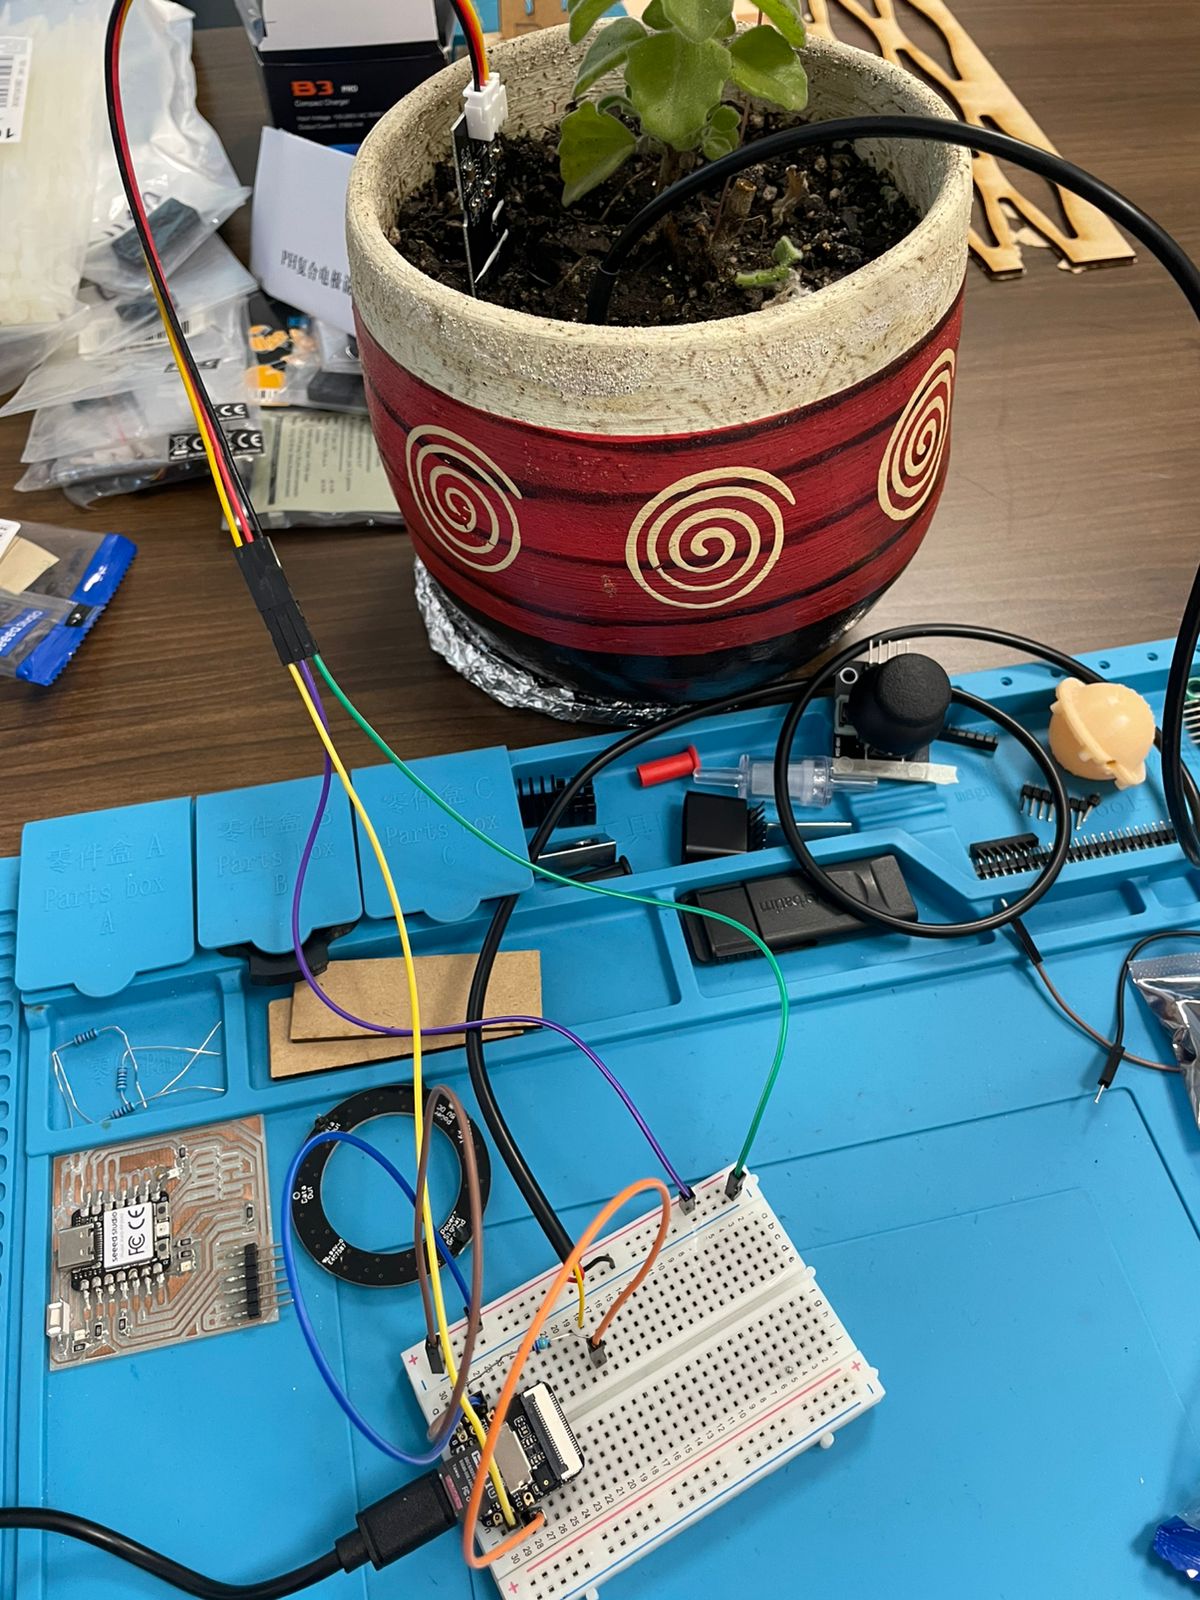
Here it is — Smart Plant Buddy in its natural habitat: a houseplant that may or may not be dying, depending on your watering skills. It’s clean, bright, and unapologetically blue. It actually looks like a real product — the kind you'd find on Kickstarter, except it actually exists.
The enclosure is sleek, the sensors are tucked in tight, and yes, the thing fits perfectly into the cardboard packaging I designed like a proud parent with Fusion 360. I didn’t get around to embedding a tiny voice assistant that yells at you for neglecting your plants... maybe for version 2.0.
For now? Take it out, stab it into soil, and bask in the joy of knowing your plant’s secrets.
Sensors – Sensing Dirt and Doubt
Ah yes, the "easy" part. I originally wanted the full sensor buffet: humidity, light, pH, NPK, maybe even vibes. But guess what? Half of them didn’t work, the others hated my ESP32, and I don’t have time to debug a BH1750 with commitment issues.
So I did what any desperate maker does: simplify. I settled on two tried-and-tested, emotionally stable sensors:
- DS18B20 for temperature — because plants like cozy roots and I like reliable readings (when not -127).
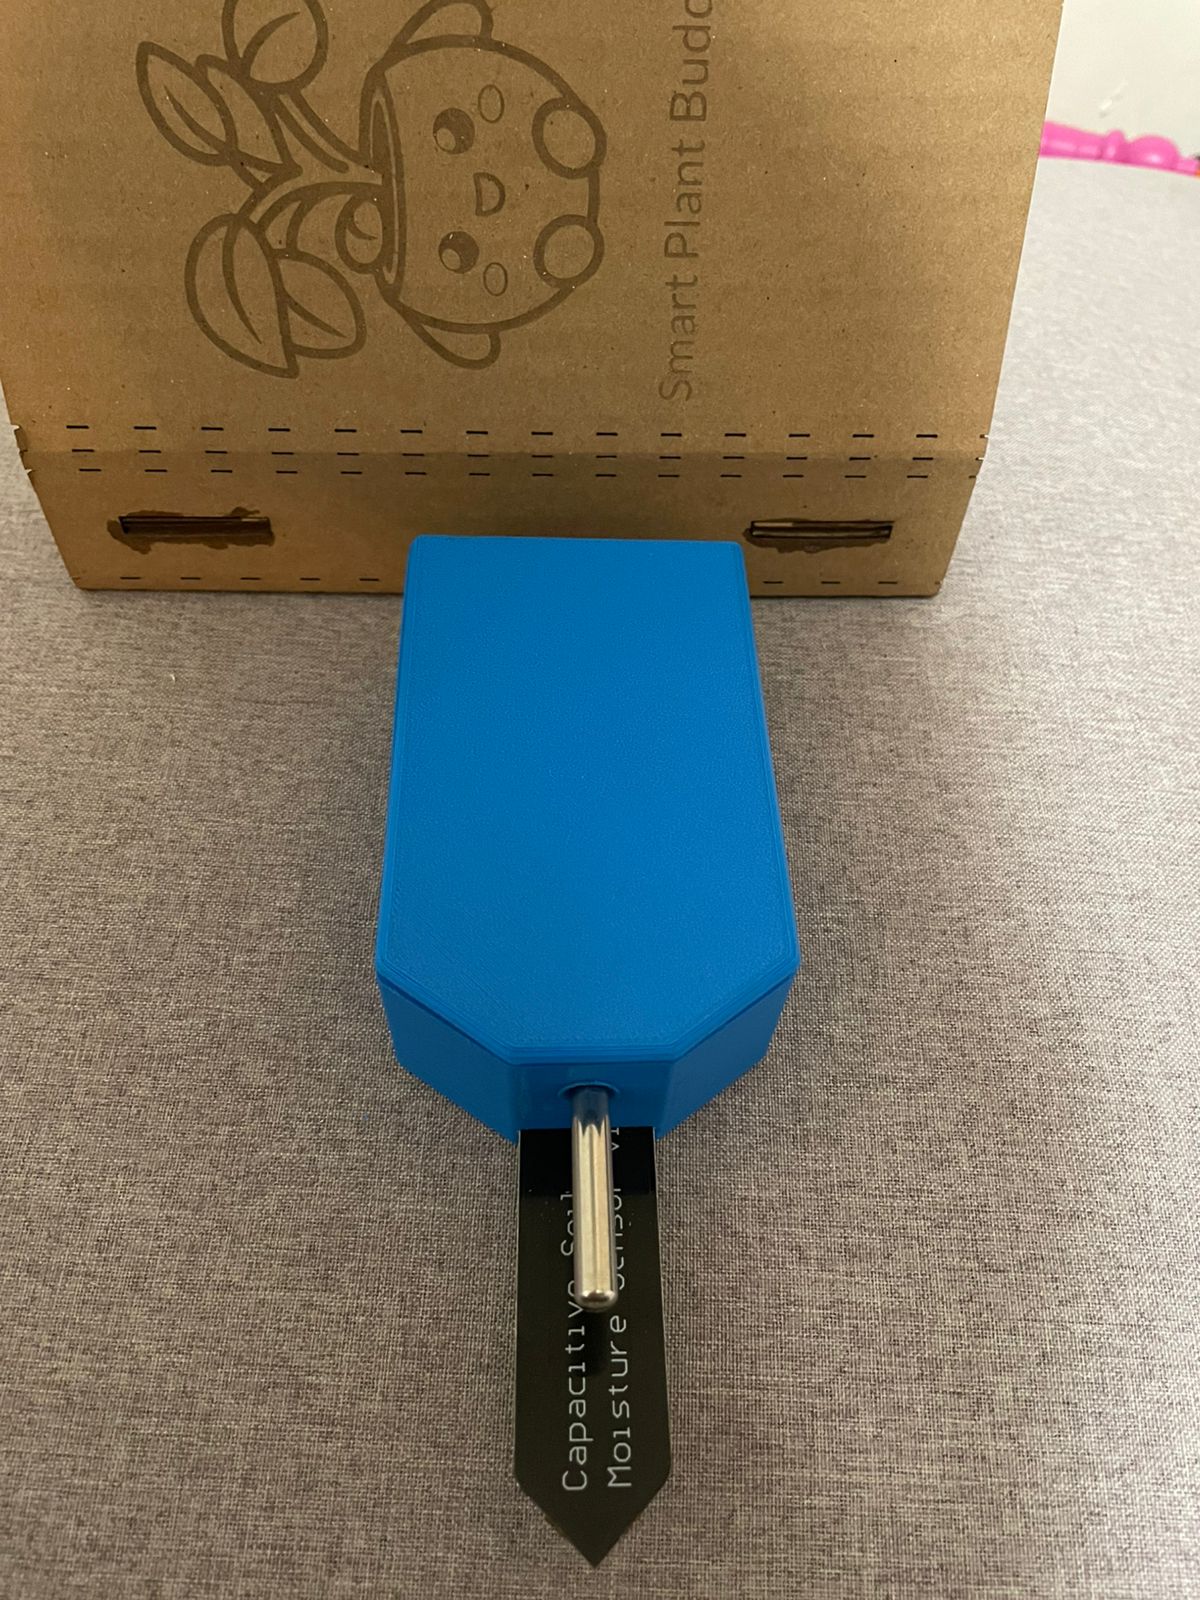
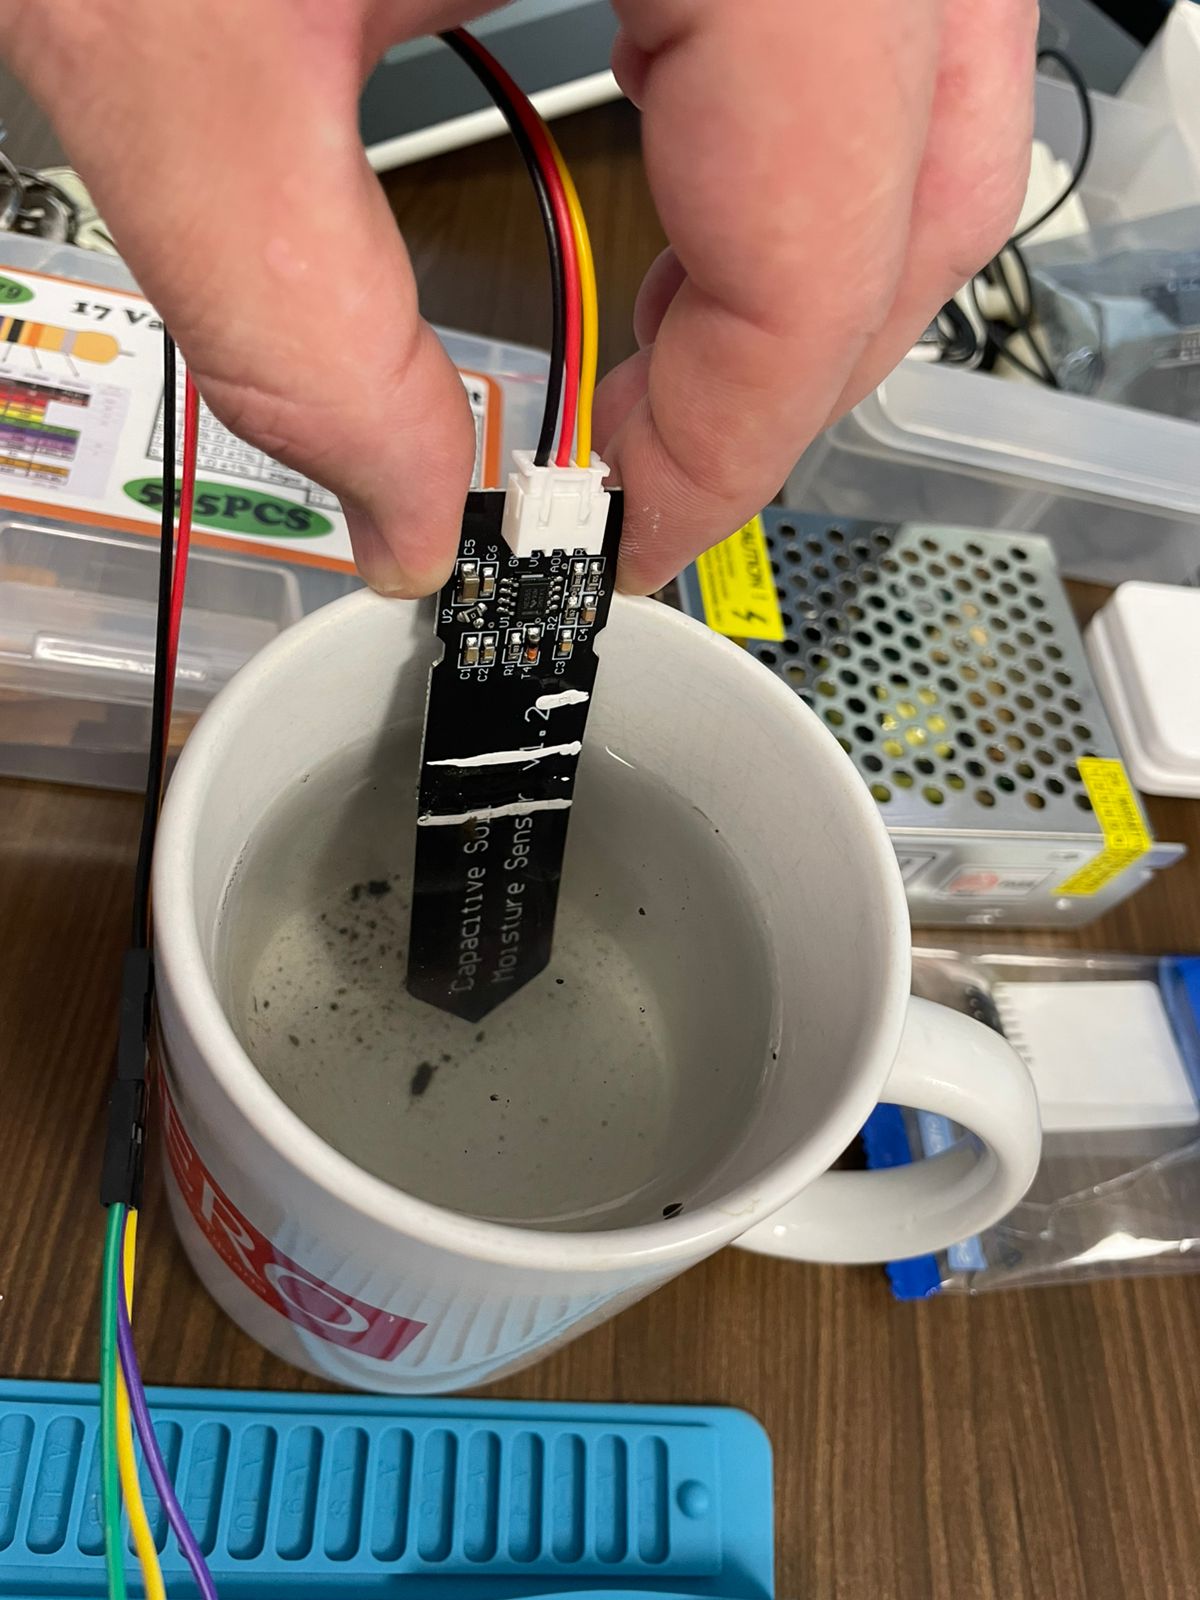
- Capacitive soil moisture sensor — not perfect, but good enough to know if your plant is drowning or dying.
And yes, I fought with the wiring, cursed at breadboards, and assumed the sensor was dead until I realized I had plugged it into the wrong GPIO. Classic.
These two are the MVPs. They give me the data I actually care about, using analog and 1-Wire protocols that don’t require I2C exorcisms.
Prompt that got us here:
Me:
“What’s the minimal set of sensors to monitor a plant environment while staying low-power and 3.3V compatible?”
AI (not yelling, but definitely smug):
“BH1750 (light), BME280 (air conditions), capacitive soil moisture (analog), DS18B20 (soil temp). All 3.3V safe. No boost needed.”
Me again, after reality hit:
“OK, light sensor is dead, humidity sensor flaky. Just soil moisture and temperature for now. Deal with it.”
AI: “That’ll still be useful, Daniel. Just log it and make the dashboard shine.”
Controller – The Brain (After the First One Failed)
We started with a bold dream — and a XIAO ESP32C6. Looked good on paper, right? Brand new, shiny RISC-V chip, low power, Wi-Fi 6, BLE... what could go wrong? Everything. Libraries barely worked, SD card support was a mess, and let’s not even talk about the I2C errors that made me question my will to live.
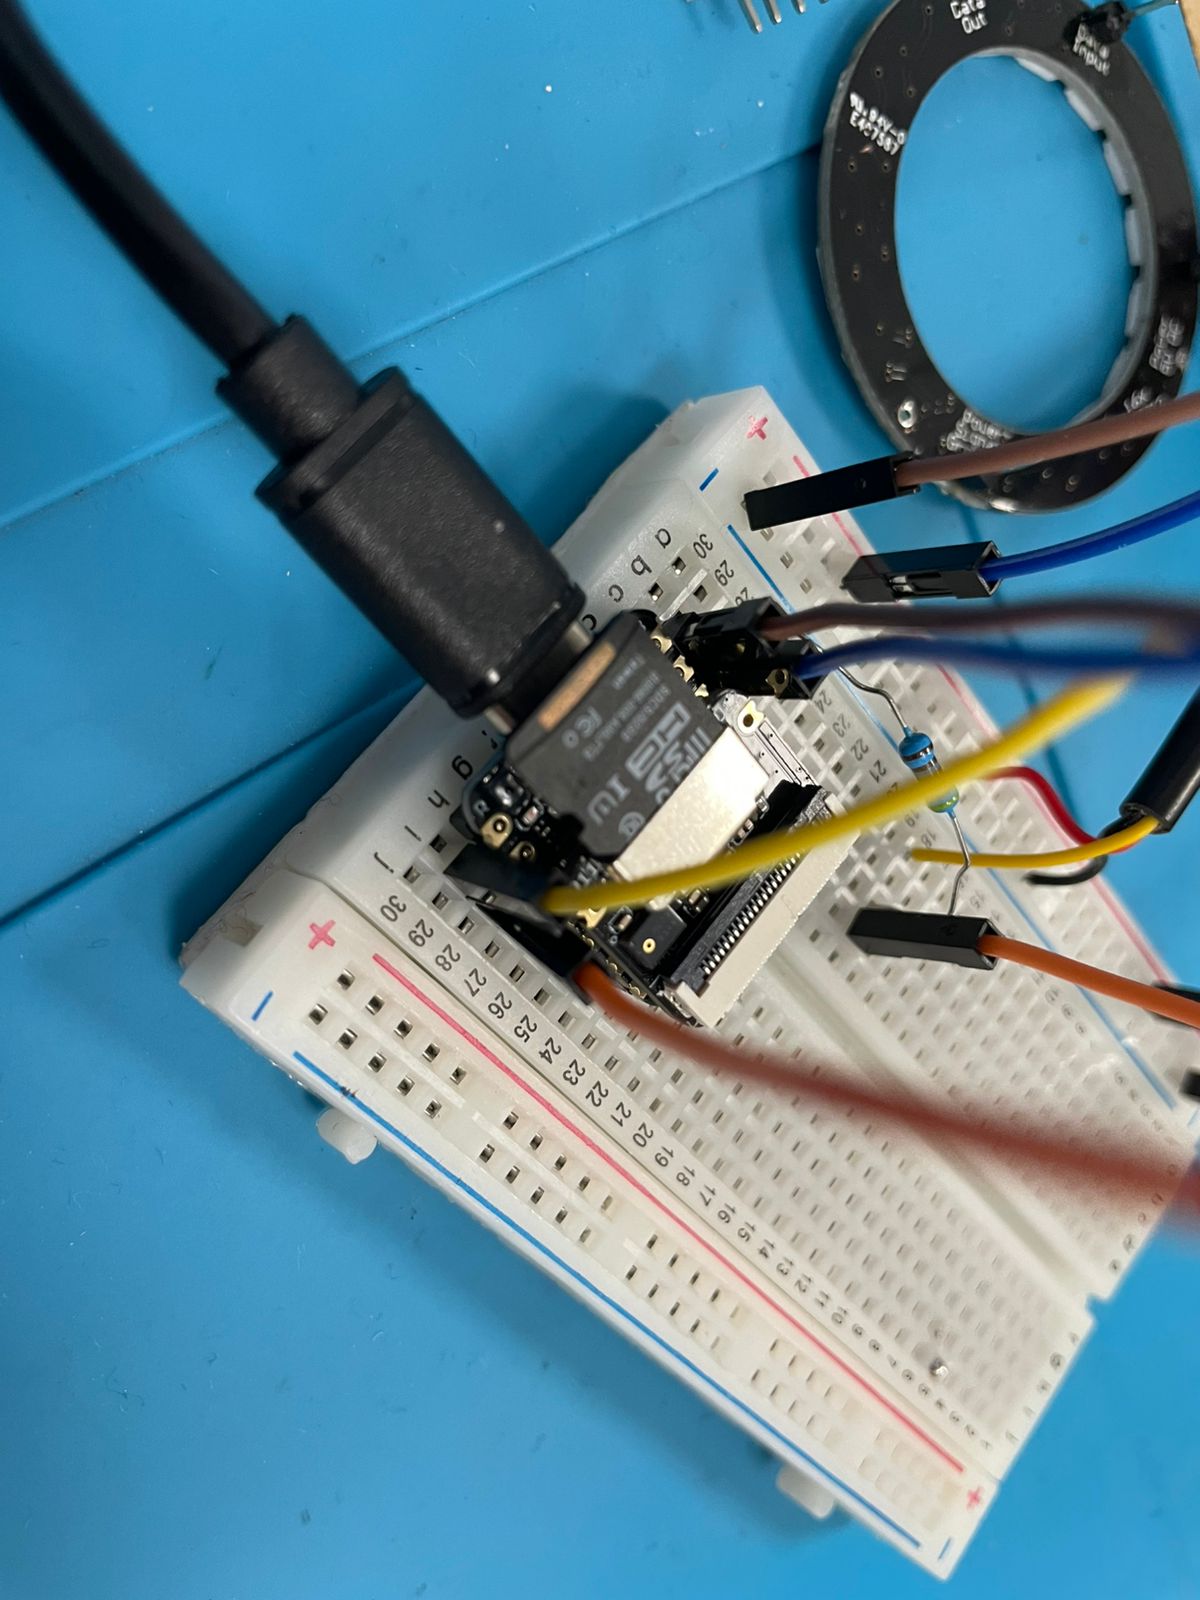
Enter the XIAO ESP32S3. Not as new, but actually usable. Stable libraries. Built-in USB. Actual documentation that doesn’t look like it was written by an alien. And best of all: it let me mount and read from an SD card without blood sacrifices. Yeah, we went full boomer chip and it worked.
This little beast:
- Reads sensors like a champ (DS18B20 and analog soil moisture).
- Logs to an SD card. Like, reliably.
- Hosts a whole local web dashboard.
- Runs off a 3.7V battery without complaining.
Prompt that sparked the switch:
Me:
“Can a Xiao ESP32C6 handle all these sensors and run off a 3.7V battery with a TP4056 charger?”
AI:
“Yes. As long as the sensors are all 3.3V-compatible (which they are), and you don’t exceed GPIO capacity, it’s a clean fit.”
Me a week later:
“Nope. The SD library sucks, and I’m not writing my own FAT parser. Let’s try the S3.”
AI:
“The ESP32S3 has more mature library support. It should work out of the box.”
Me: “Finally. Something that does.”
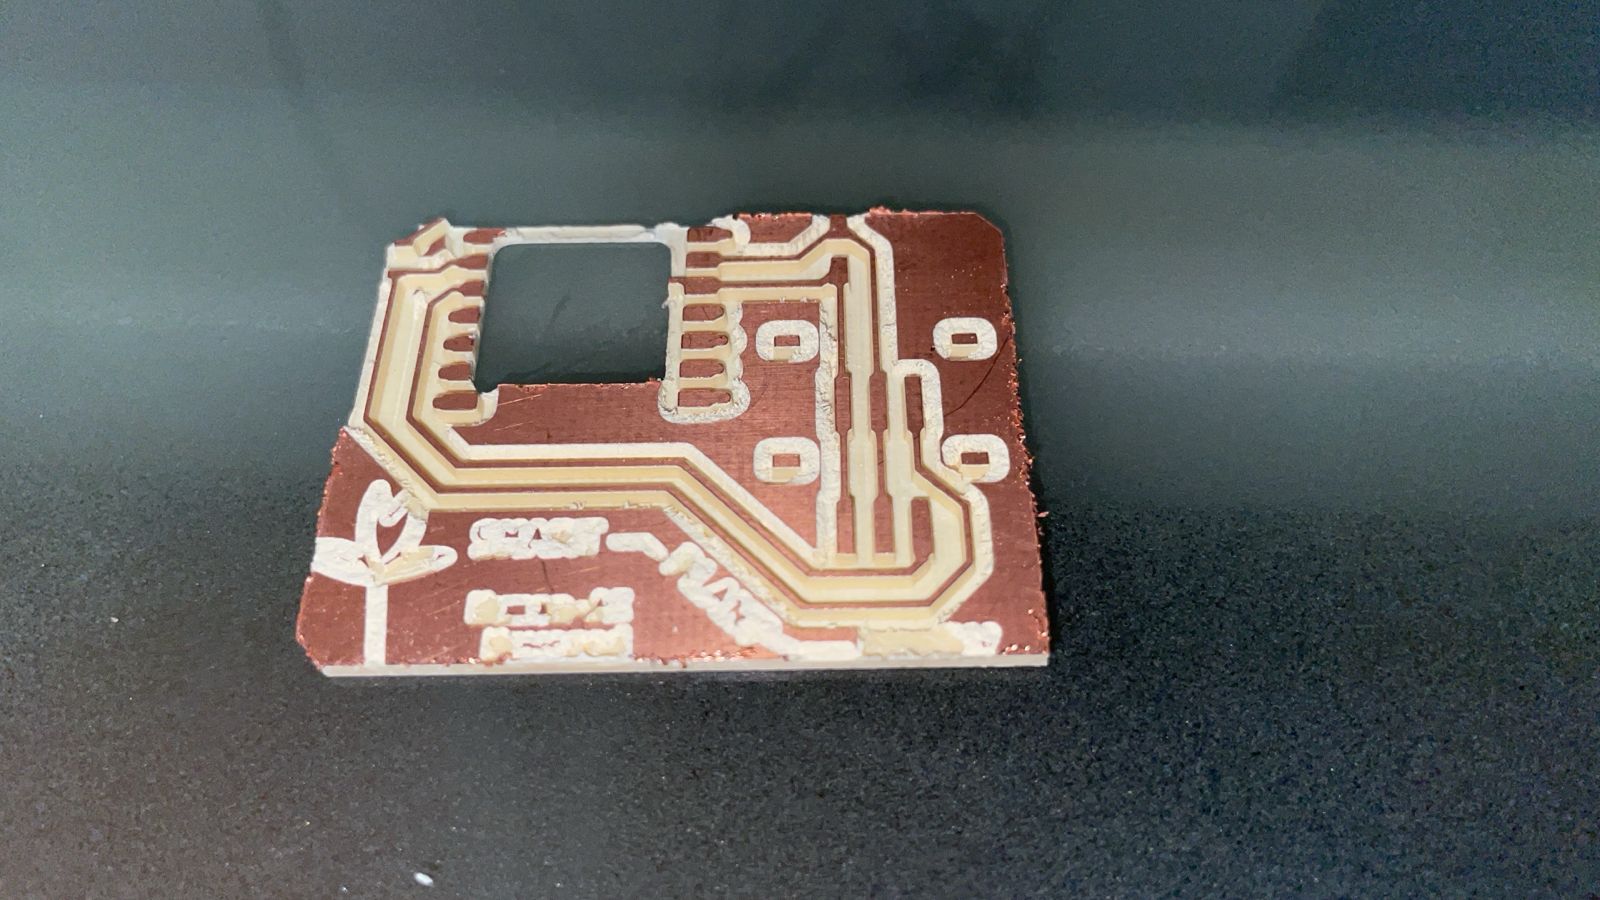
PCB – From Betrayal to Brilliance
Let’s be honest. Breadboards are fine... until they’re not. After watching my temperature readings bounce like a caffeinated squirrel and debugging phantom soil signals, I said enough. Breadboards? Dead to me.
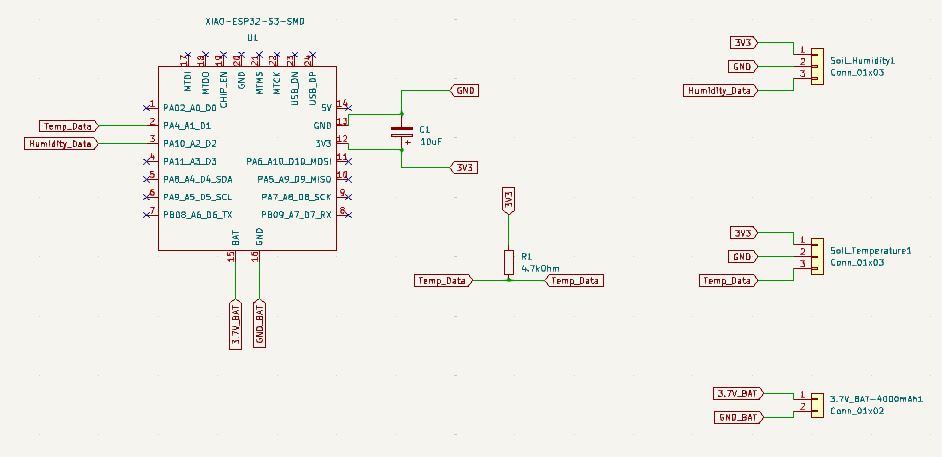
So I fired up KiCad. And by “fired up,” I mean: stared at it for hours wondering how anyone uses this thing voluntarily. But AI held my trembling hand. We defined buses for 3.3V and GND, added JST connectors for sensors, and even debated whether or not to include bypass capacitors (spoiler: yes, because noise is evil).
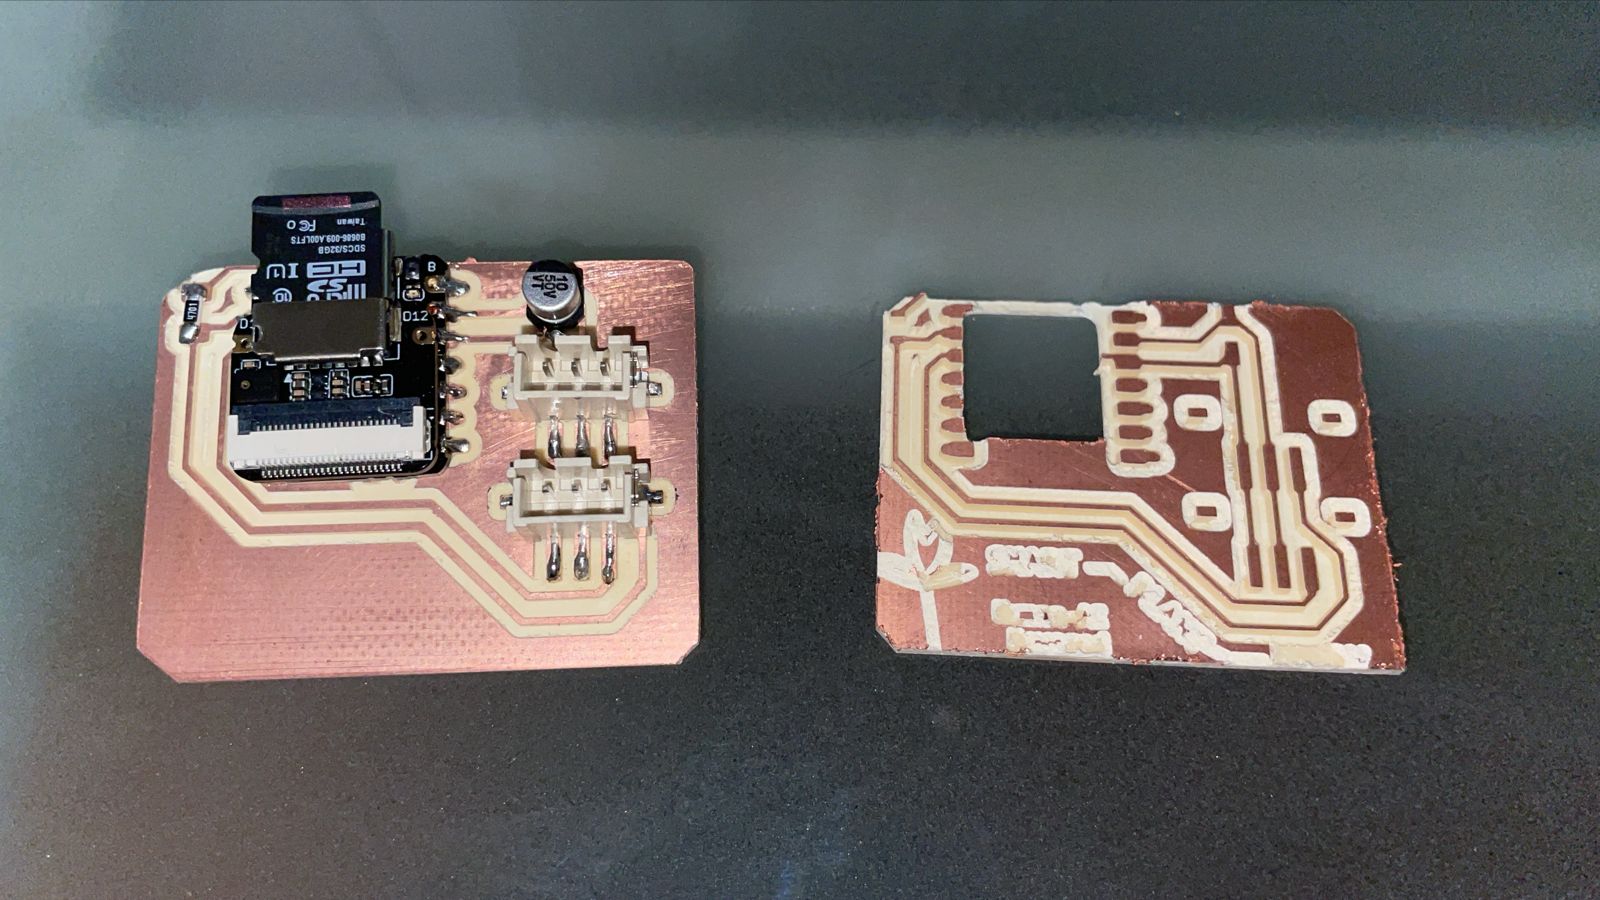
We used:
- JST XH 2.54mm connectors for soil and temp sensors (because screw soldering headers).
- 470Ω resistor for the DS18B20 data line (not optional unless you like -127°C readings).
- 100µF electrolytic cap between 3.3V and GND. SMD. Fancy. Totally there on purpose.
Then came routing. Track width? 0.6mm — bold enough to not evaporate, thin enough to avoid crying when the copper lifts. Labels? Hell yeah. Big, chunky text on User.Drawings so Roland could carve it like a digital tattoo. I cut in layers: first copper, then text, then outline. Perfection.
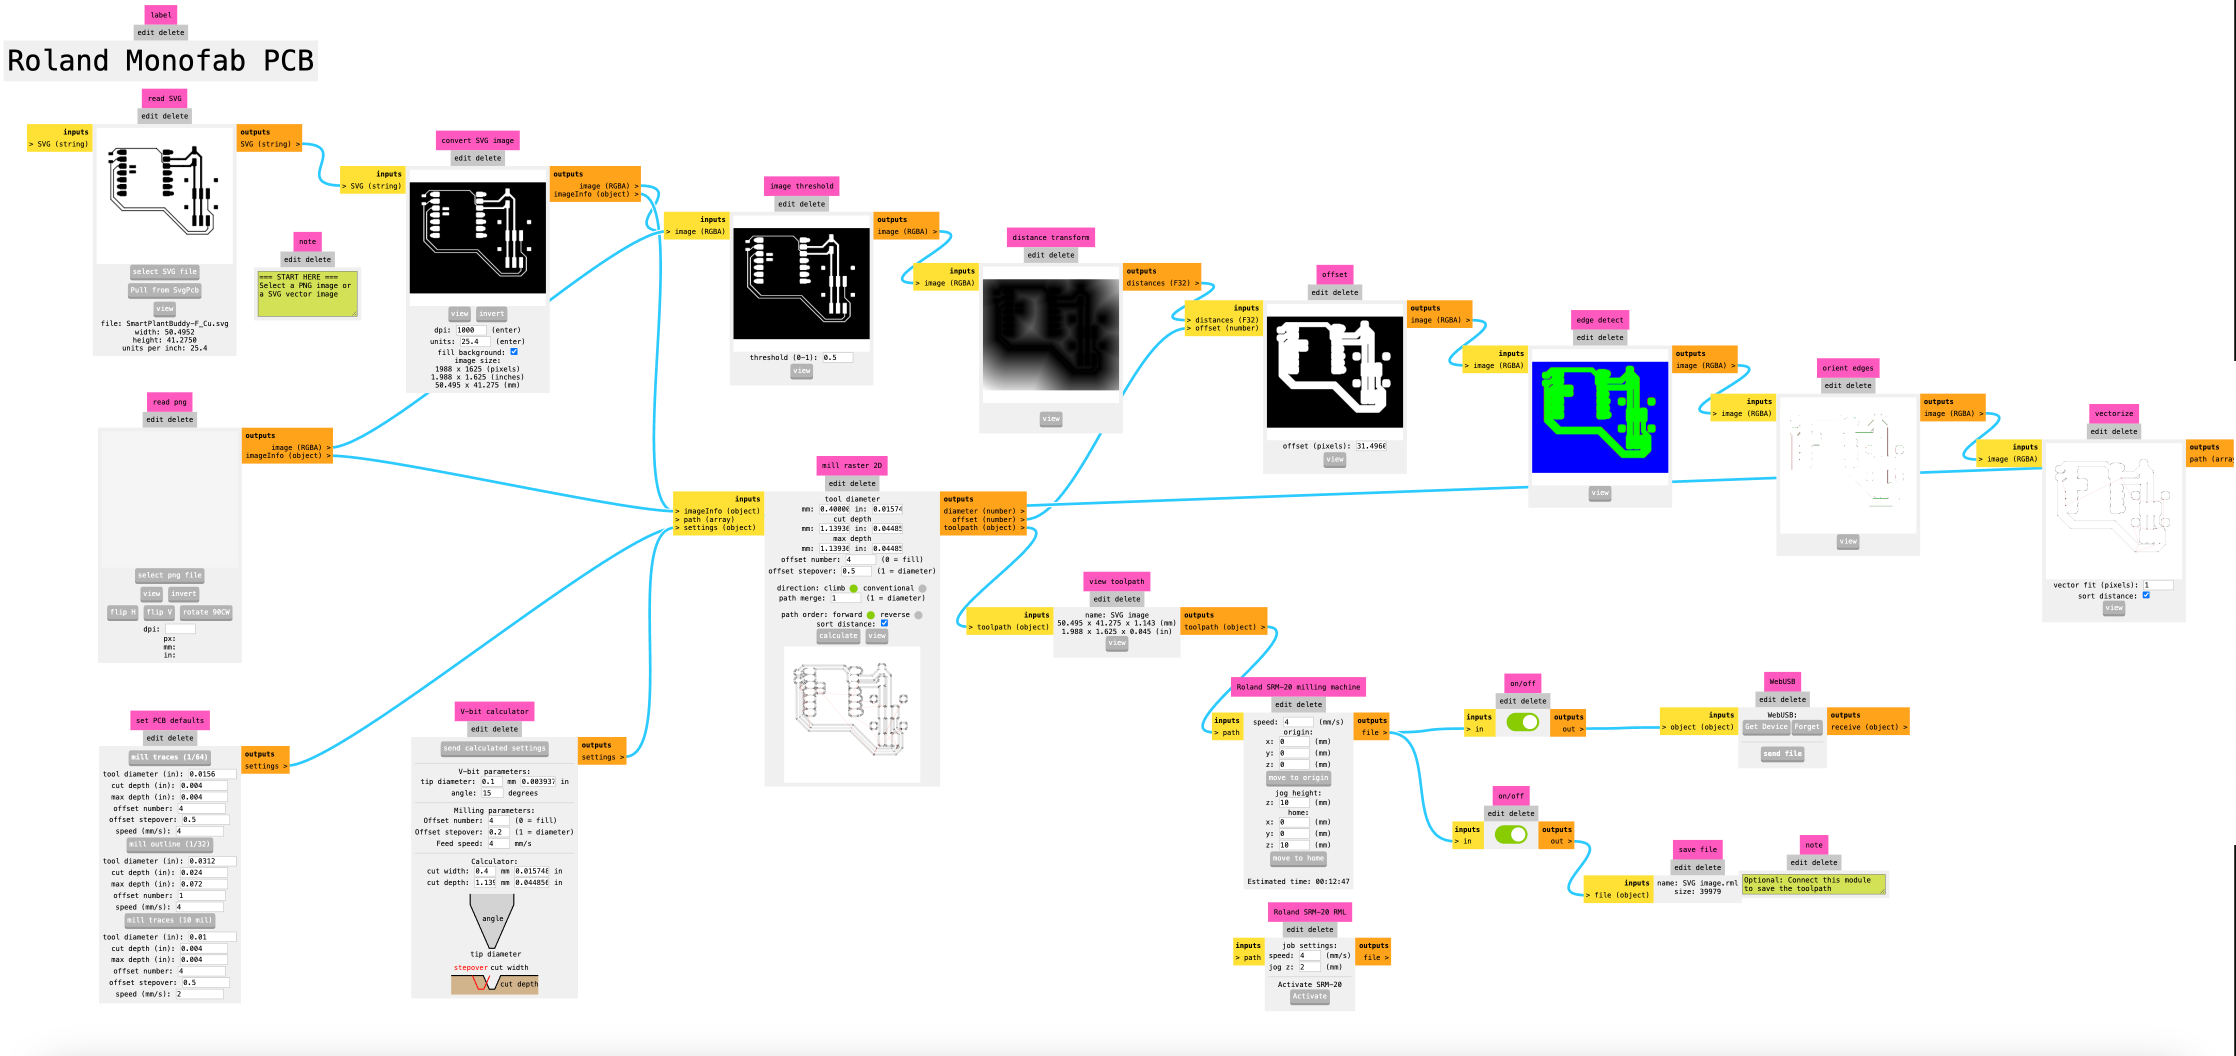
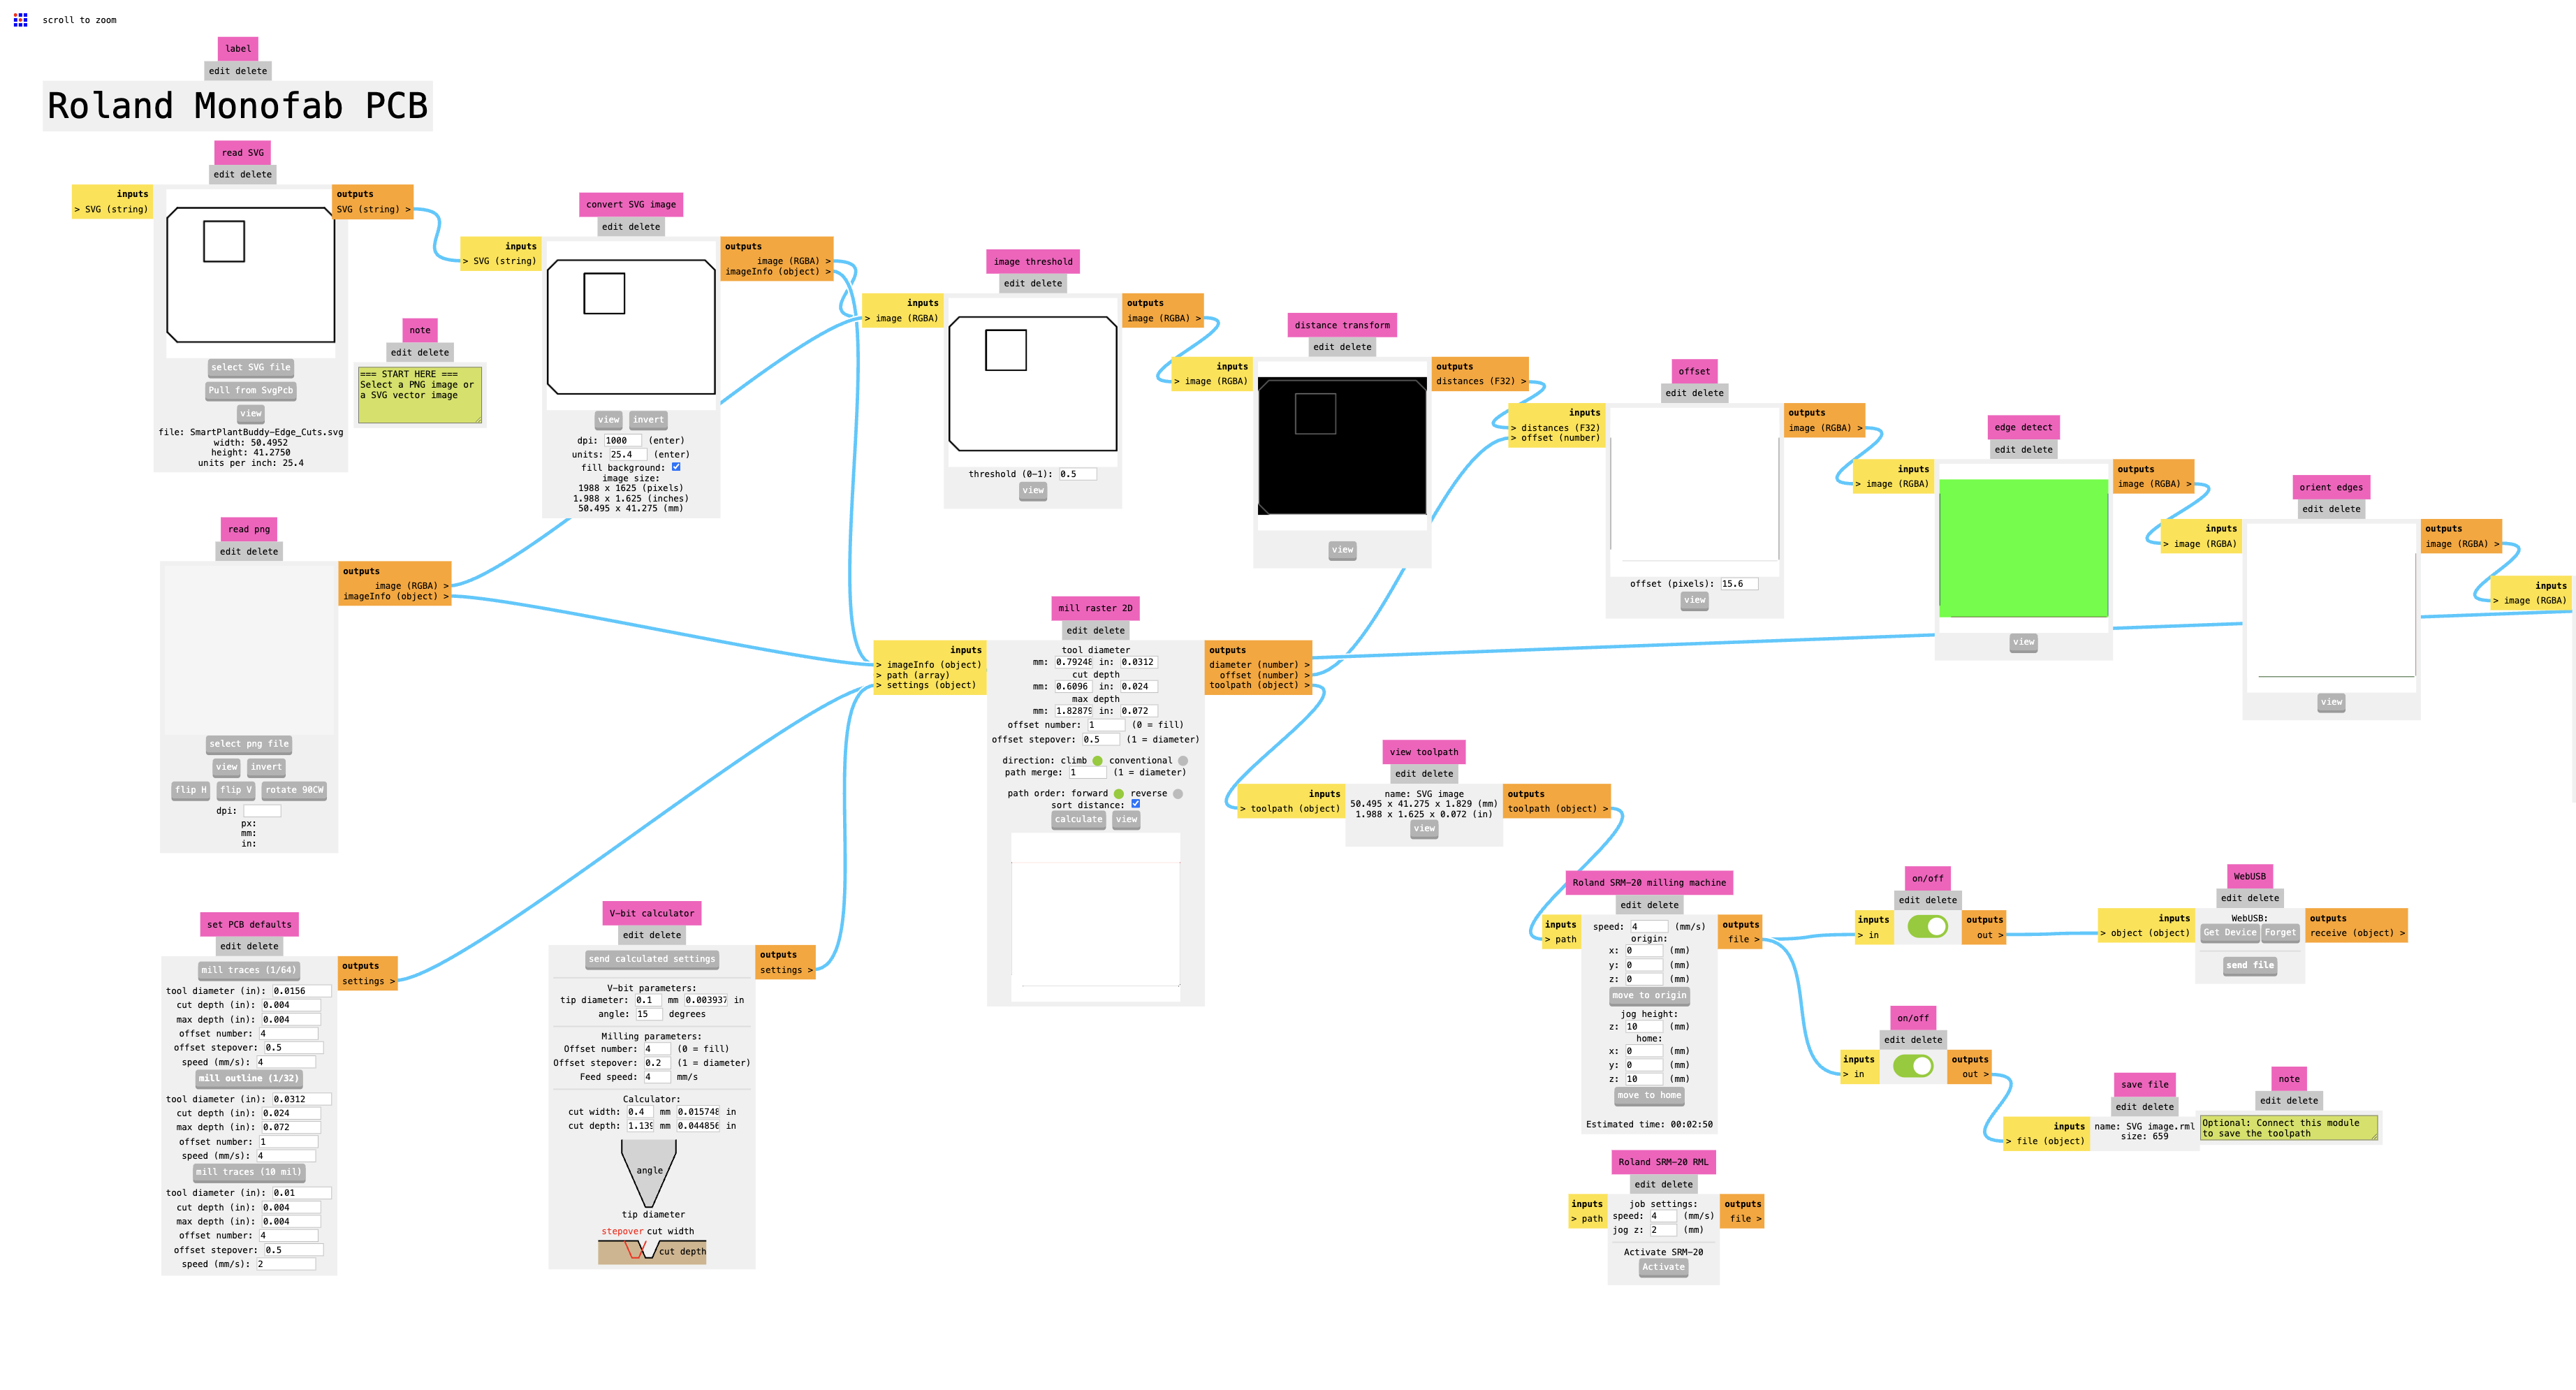
Mods – The RGB Maze of Doom
MODS was its usual trippy self — rainbow UI, hidden scrollbars, surprise DPI errors, and that one moment where your toolpath disappears into the void. I used the classic SVG-to-3D toolpath pipeline, edited DPI to 1000, offset distance to 0.2mm, and tip diameter math via the V-bit calculator. Yes, that calculator. You know the one.
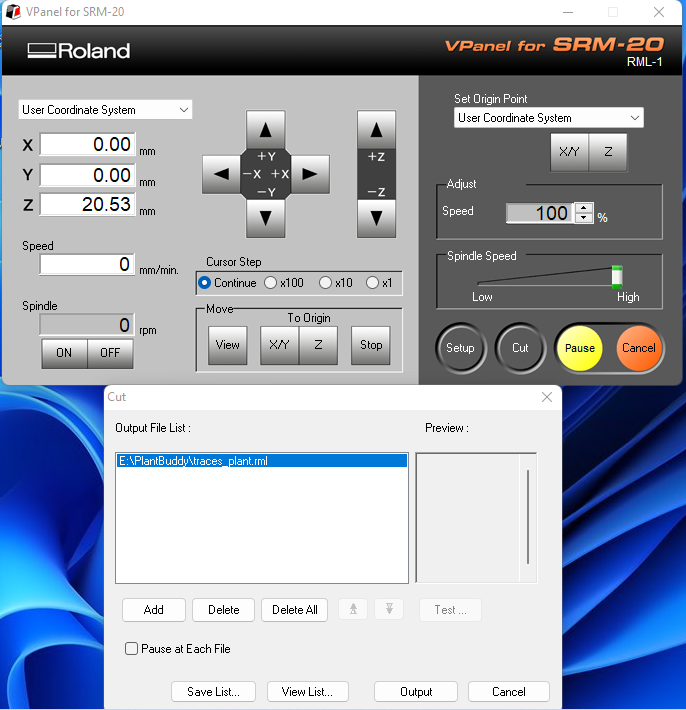
Roland VPanel – Push Buttons and Pray
I exported the RML files from MODS and dropped them into the Roland VPanel software. Z-zeroing was... emotionally taxing. Tip broke once. Spindle went rogue. The usual. But once it started, that SRM-20 was an absolute beast. Loud, steady, and surprisingly satisfying.
Prompt that drove this madness:
Me:
“Breadboard sucks. Let’s make a KiCad PCB with two JSTs, a 470 ohm, and one fat cap. Also add pads for 3.3V, GND, and D1/D2.”
AI:
“Sure. Route power and ground as a star topology. Place the cap close to the power entry. Add silkscreen labels. Make it sexy.”
Me: “Got it. Time to mill.”


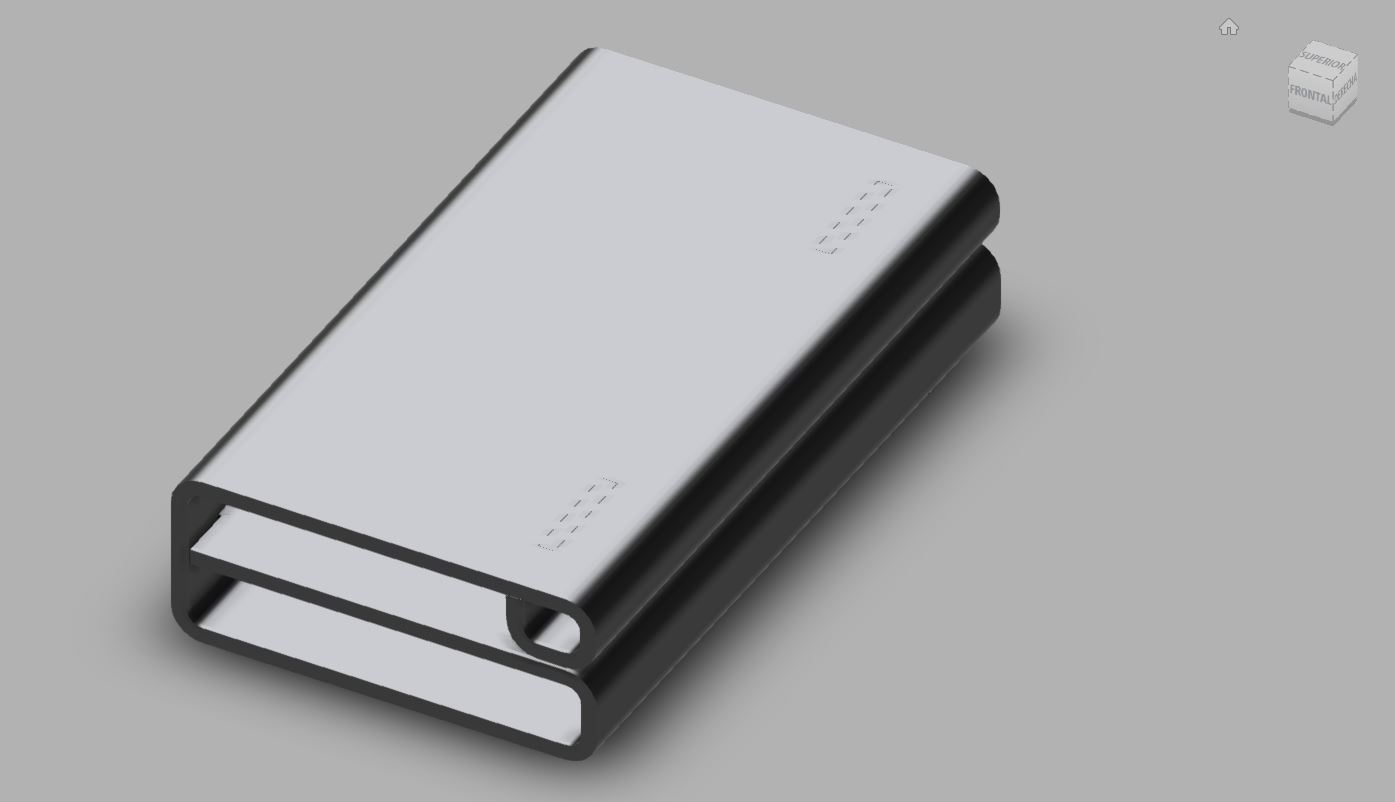
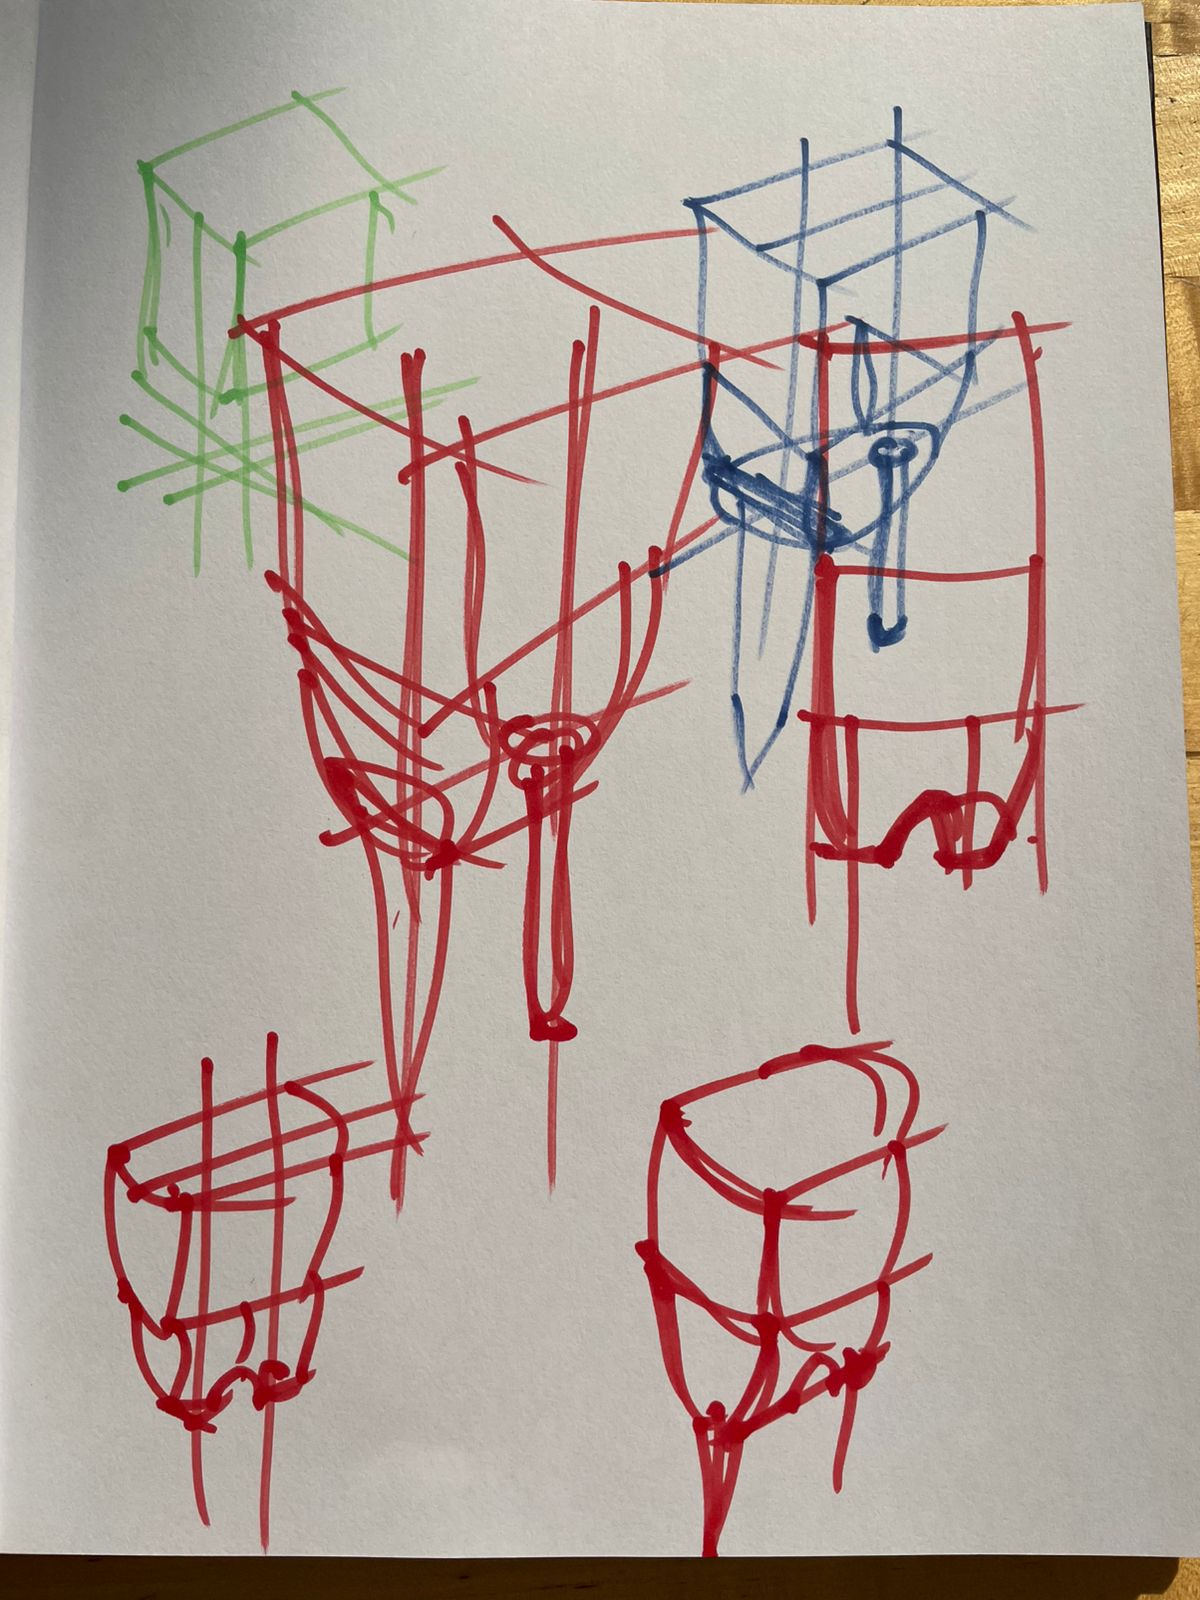
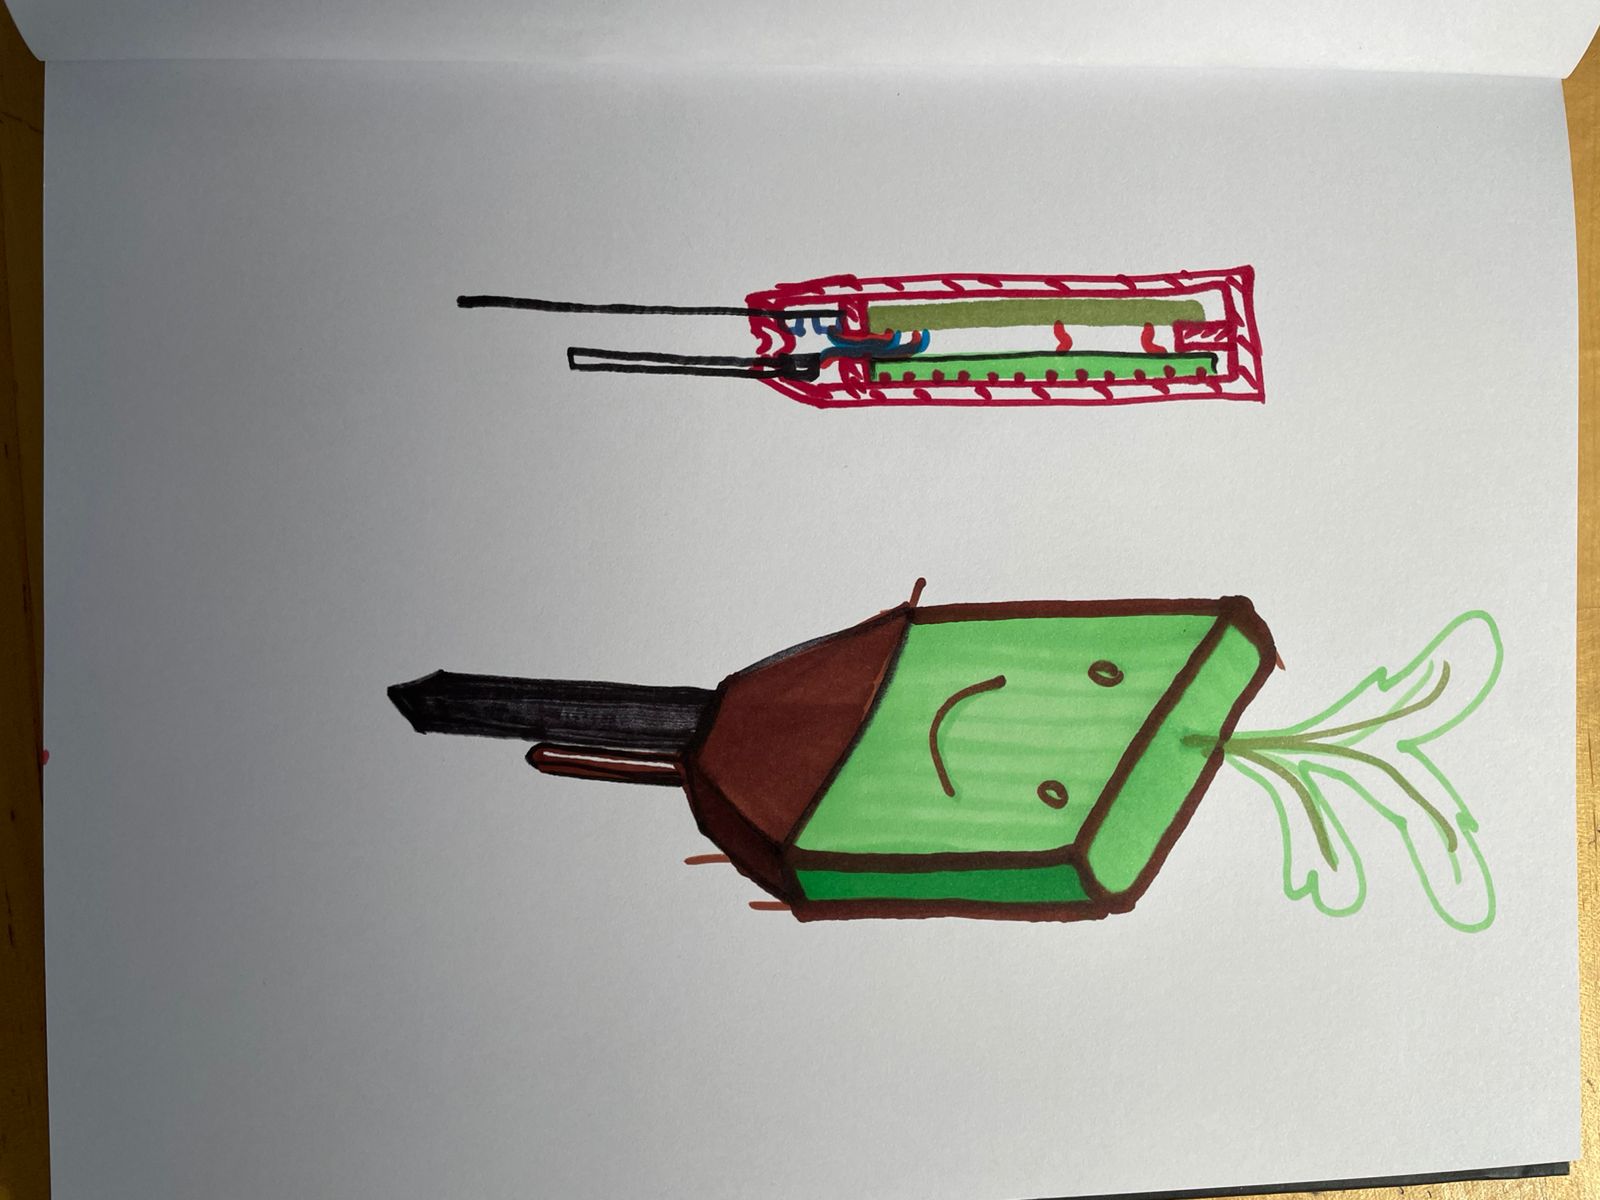
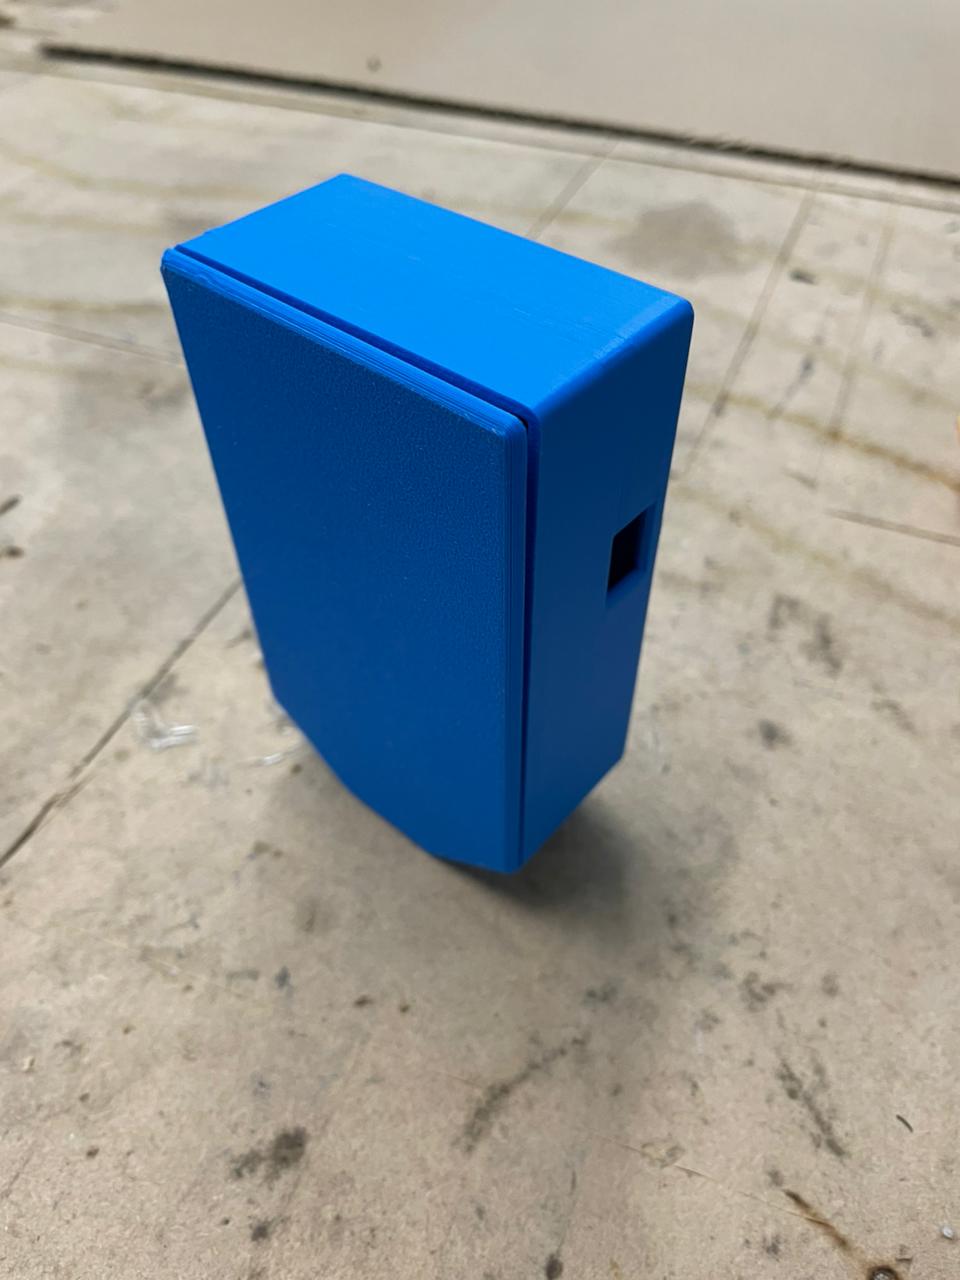
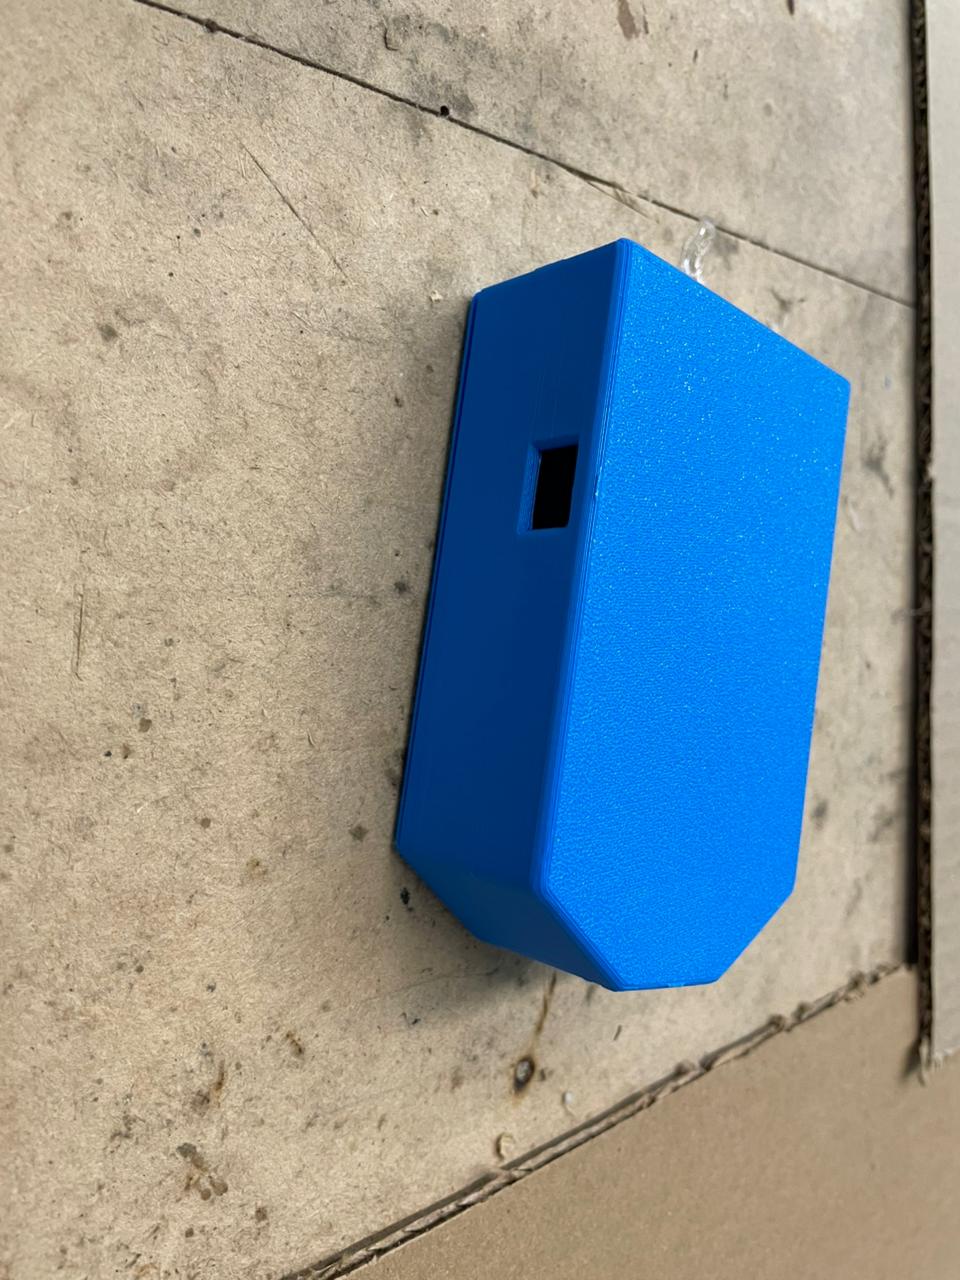
3D Printed Enclosure – From Sketch to Blue Plastic Majesty
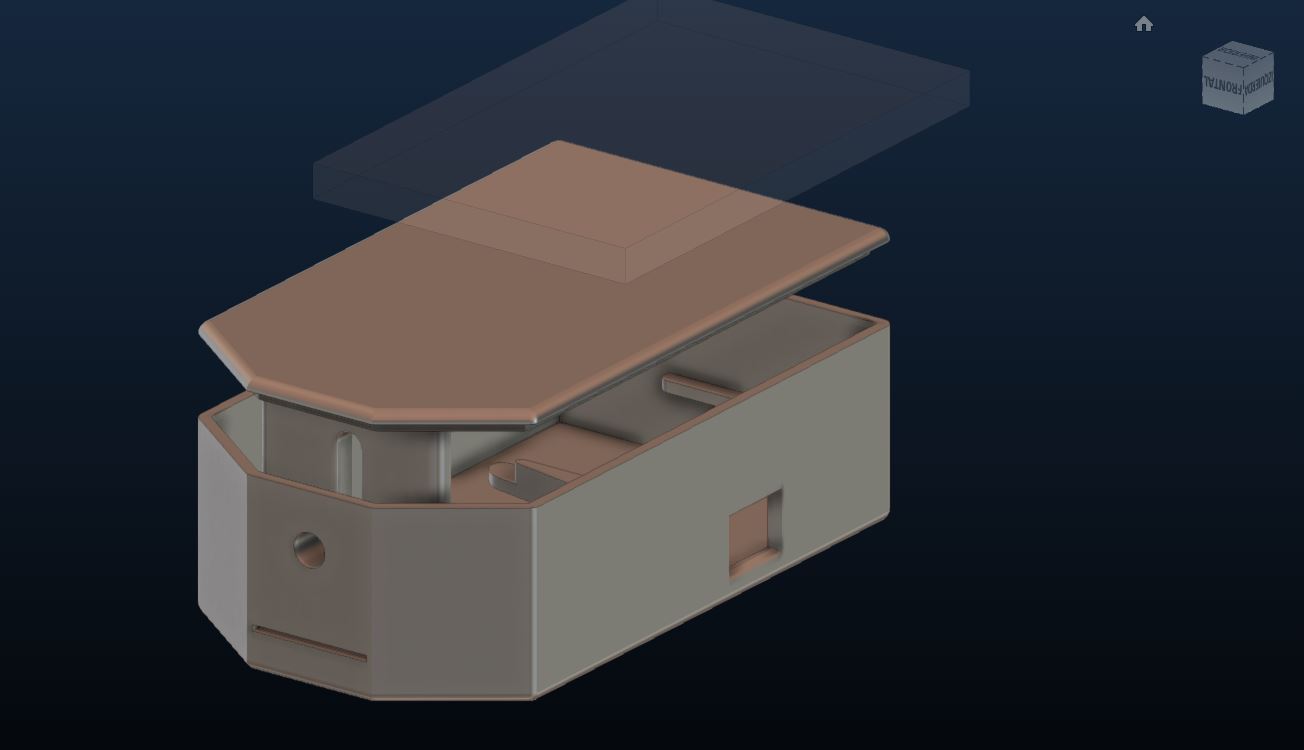
This is one of the few parts of the project I did without AI holding my shaky hand. It started with chaotic sketches that look like a drunk robot tried to diagram a potato — but they worked. Fusion 360 turned those ideas into real geometry, with parametric controls to fit the PCB like a glove. Or like a slightly too-tight sock. You know the vibe.
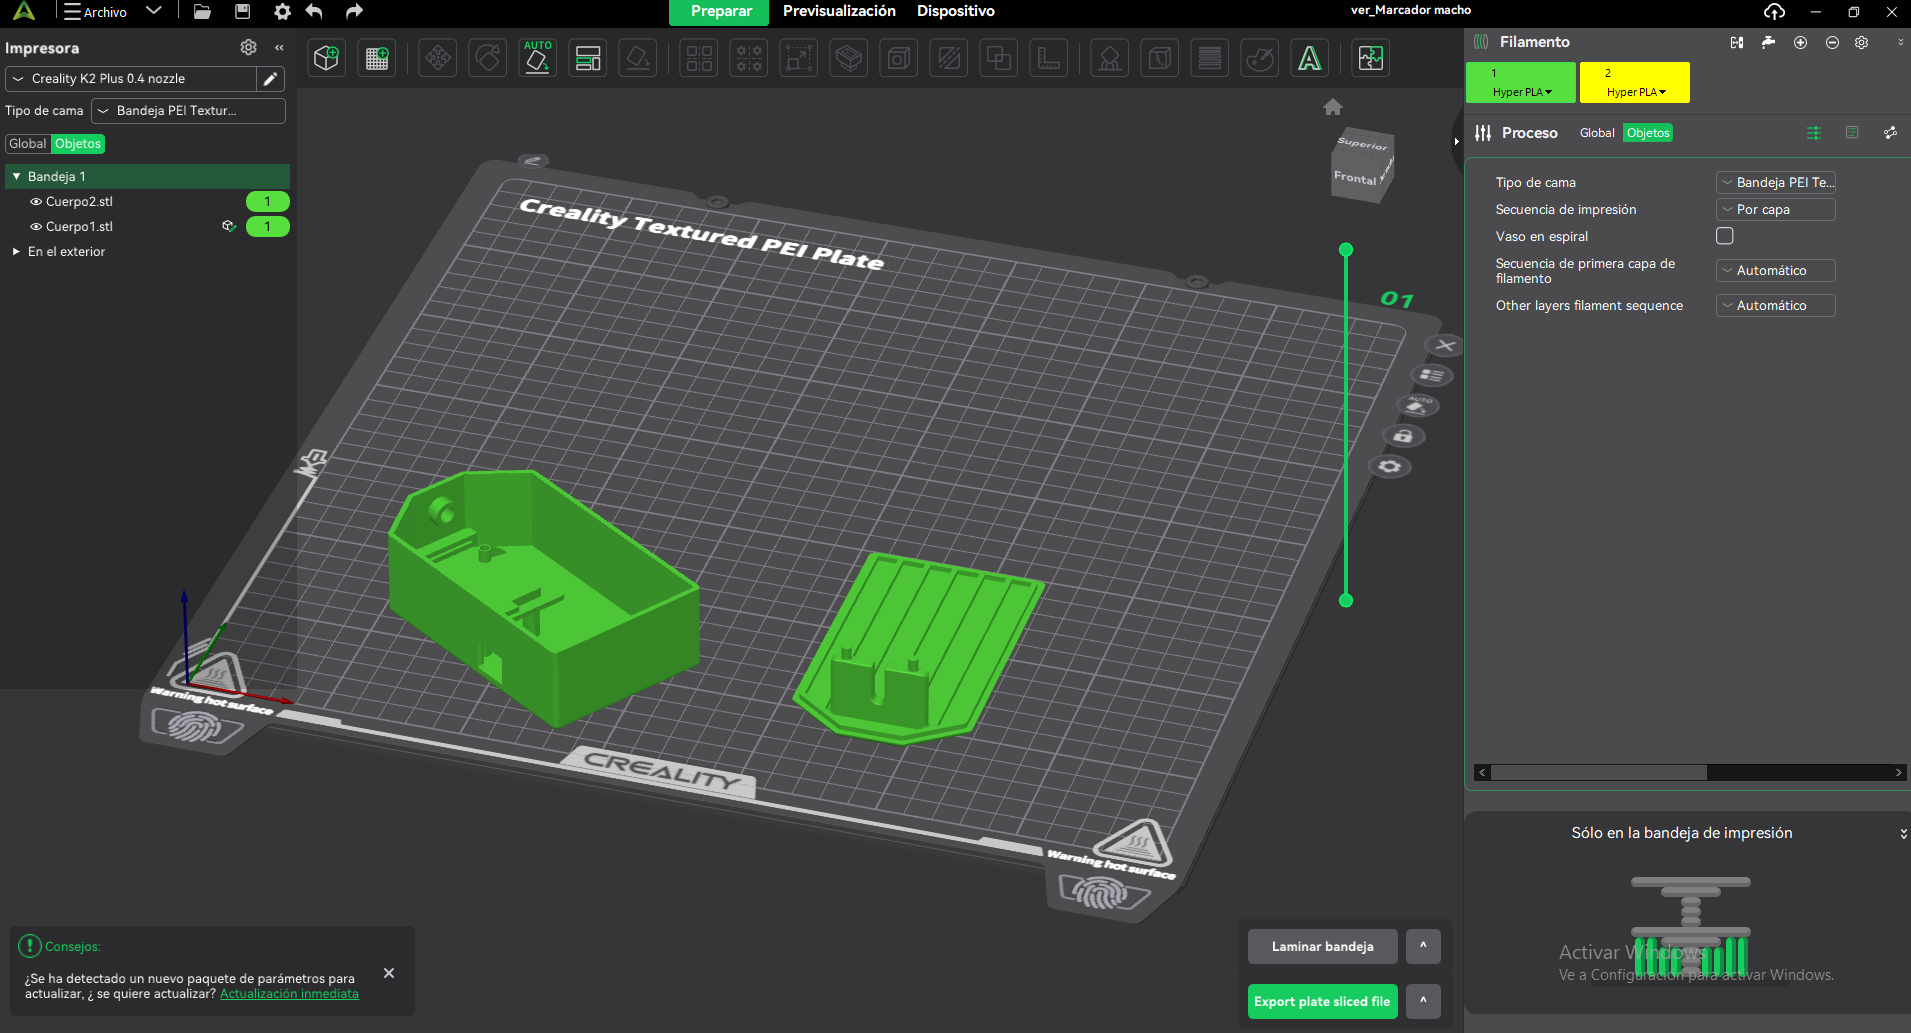
In CAD, the trickiest part was tolerances for the lid and JST holes. I had to fight the urge to over-engineer. Eventually, I ended up with a neat split design: bottom housing with screw holes (that I never used), and a lid that slides in with just enough friction to feel professional. Printed in PLA on a Creality K2 — because when it works, it works.
The slicing? Done with Creality Print, which is shockingly decent. 0.2mm layers, 15% infill, no supports needed because I believe in designing for manufacturability (and laziness). Print took about 82 minutes and used 61 grams of filament. Not bad for something this chunky.

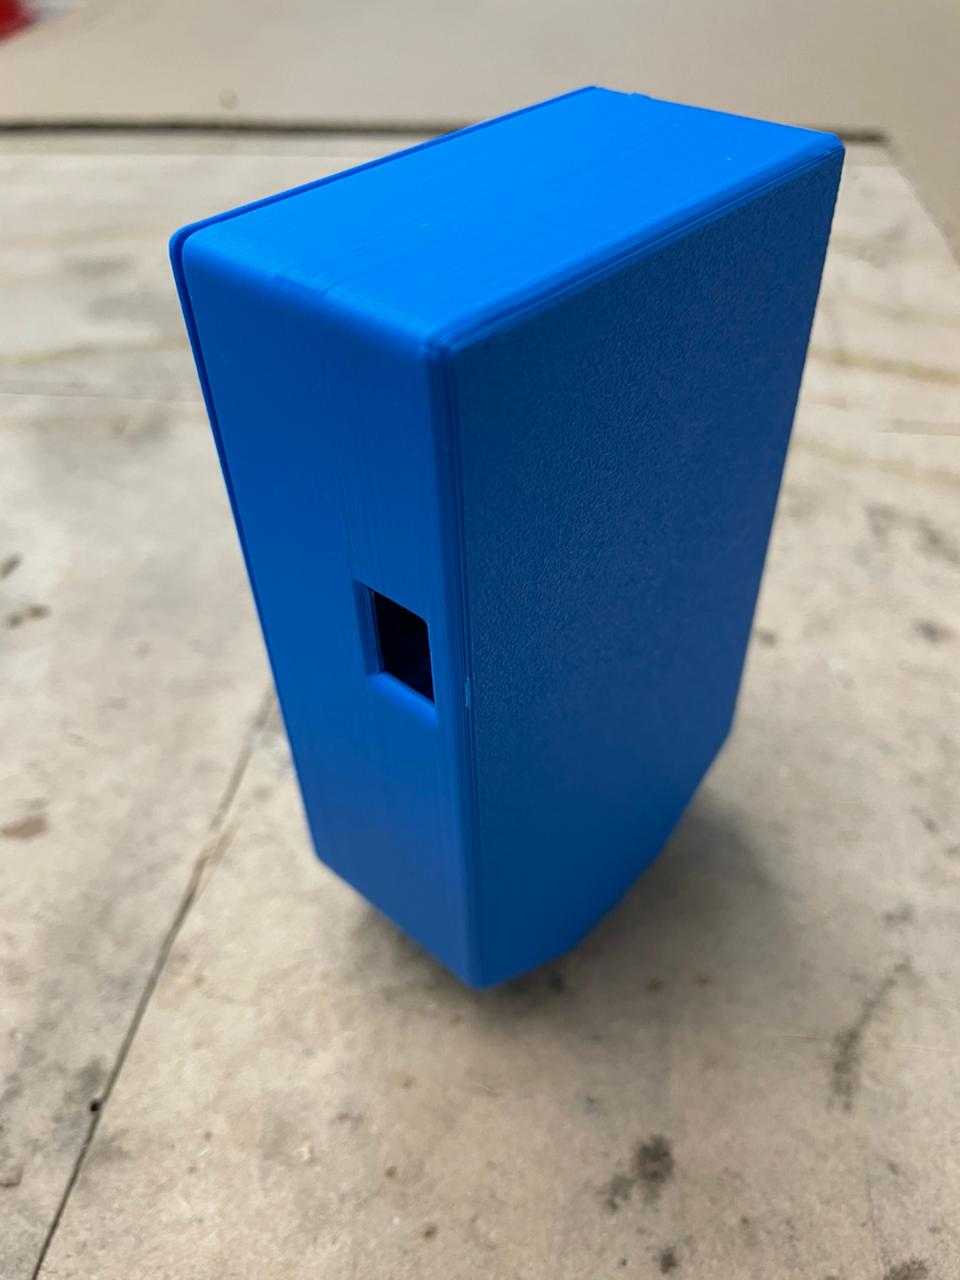
Final results? Glorious. Blue. Boxy. And it fit perfectly inside the laser-cut cardboard packaging. It protects the PCB, makes the sensors stick out just enough, and — most importantly — makes the whole thing feel like a product, not a science fair project.
Prompt I almost asked but didn’t need to:
Me:
“Should I make it curvy and elegant?”
Also Me:
“Nah. Make it blocky. Strong. Chunky. Just like the data logs.”
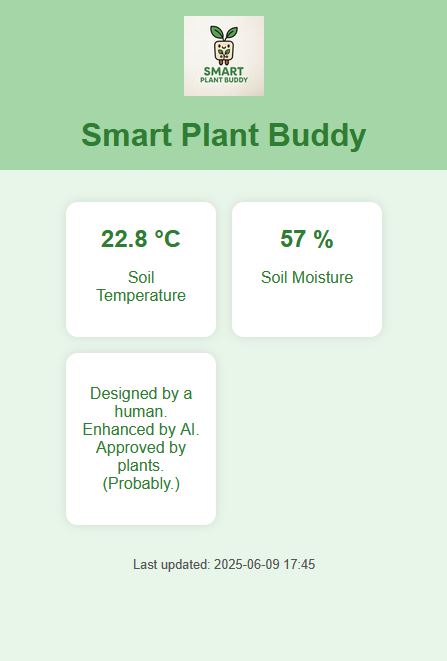
User Interface – Dirt Data, Fancy HTML
Here's where things get unnecessarily elegant for a device shoved into literal soil. I wanted a dashboard. Not just any dashboard — a clean, self-contained, mobile-friendly interface that could run from an SD card on the ESP32S3. No cloud. No Firebase. No unnecessary JavaScript frameworks named after kitchen utensils. Just plain ol’ HTML/CSS/JS, served locally via WebServer.h.
The dashboard shows:
- Real-time soil moisture and temperature (because that’s literally all the sensors I managed to keep working)
- A cute quote that changes every page refresh (for plant morale)
- A “Download log” button to get the juicy
/log.txtfrom the SD card
The interface is dead simple — intentionally so. No loading spinners, no progress bars, no weird UI libraries that break the moment your ESP coughs. I edited the HTML directly from my Mac, tested with the ESP32's IP on a phone, and stored all files locally on the SD card under /index.html, /style.css, and /data.json. Browser hits ESP, ESP serves files, done.
Prompt that built the web:
Me:
“Give me a minimalist HTML dashboard with soil and temp readings, served from SD. No bloat, no nonsense.”
AI:
“Here’s your HTML. Also here’s a JS snippet to fetch real-time data and a button to download the log file. You’re welcome.”
Me: “Perfect. Deploying now… on dirt.”
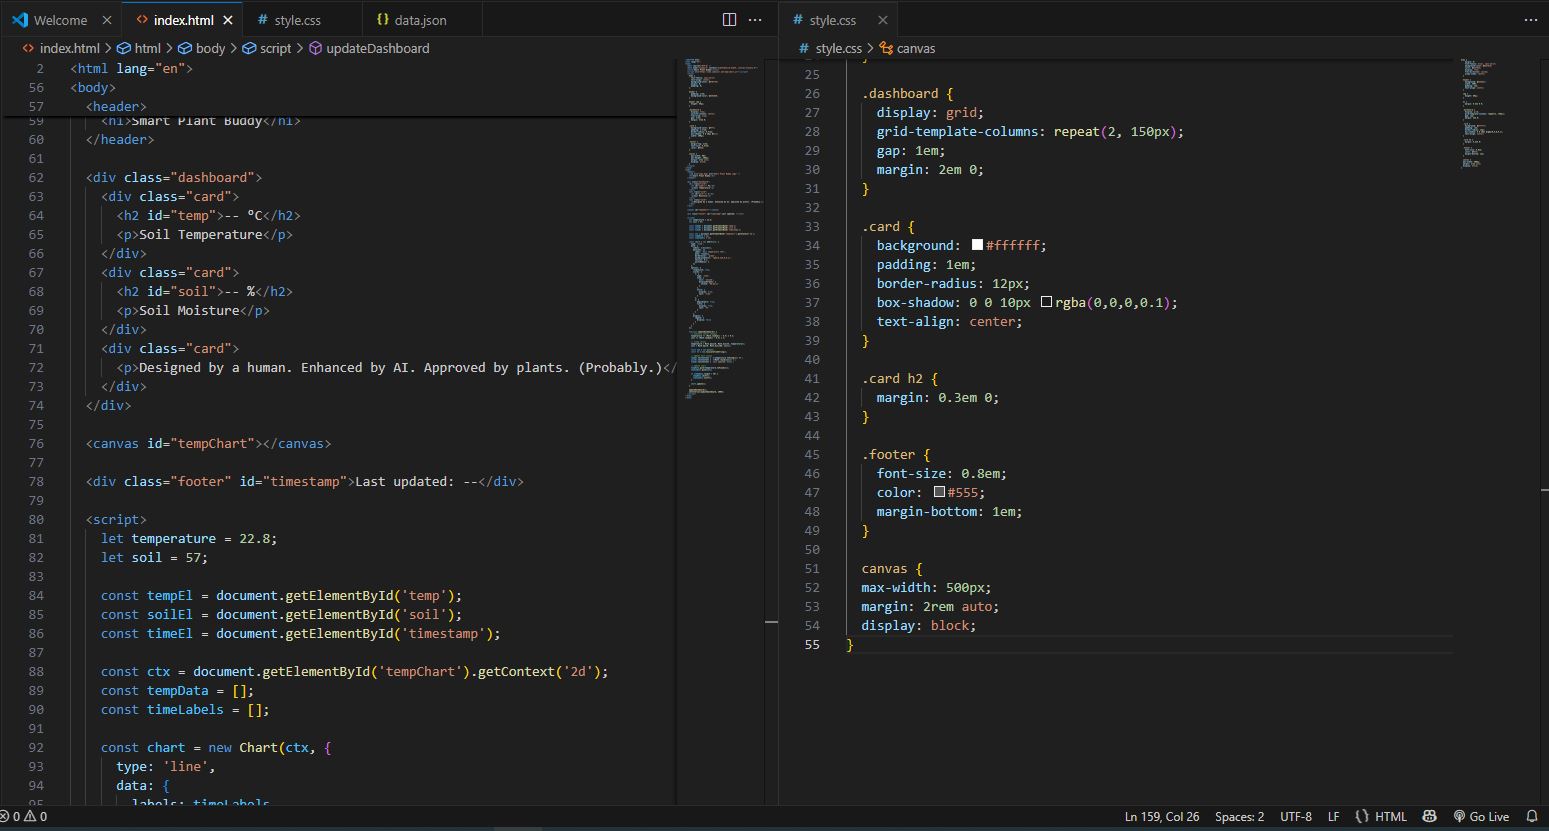
HTML Code – index.html
<!DOCTYPE html>
<html lang="en">
<head>
  <meta charset="UTF-8">
  <meta name="viewport" content="width=device-width, initial-scale=1.0">
  <title>Smart Plant Buddy</title>
  <link rel="stylesheet" href="/style.css">
</head>
<body>
  <div class="container">
    <img src="/logo.png" alt="Smart Plant Buddy Logo" class="logo">
    <h1>Smart Plant Buddy</h1>

    <div class="cards">
      <div class="card">
        <h2>🌱 Soil Moisture</h2>
        <p id="moisture">-- %</p>
      </div>
      <div class="card">
        <h2>🌡️ Temperature</h2>
        <p id="temperature">-- °C</p>
      </div>
    </div>

    <button onclick="downloadLog()">📥 Download Log</button>

    <p class="quote" id="quote"></p>
  </div>

  <script>
    async function fetchData() {
      try {
        const res = await fetch('/data.json');
        const data = await res.json();
        document.getElementById('moisture').innerText = `${data.moisture} %`;
        document.getElementById('temperature').innerText = `${data.temperature.toFixed(1)} °C`;
      } catch (e) {
        console.error("Error fetching data.json", e);
      }
    }

    function downloadLog() {
      window.open('/log.txt', '_blank');
    }

    const quotes = [
      "I'm not dying, you're just overwatering me.",
      "Sunlight is my coffee. Where is it?",
      "You talk to your plants? I read JSON.",
      "Moisture is temporary. Logs are forever.",
      "The dirt has spoken. Literally."
    ];

    document.getElementById('quote').innerText = quotes[Math.floor(Math.random() * quotes.length)];

    setInterval(fetchData, 5000);
    fetchData();
  </script>
</body>
</html>
CSS Code – style.css
body {
  font-family: 'Segoe UI', Tahoma, Geneva, Verdana, sans-serif;
  background-color: #f3f3f3;
  margin: 0;
  padding: 0;
  text-align: center;
}

.container {
  padding: 2rem;
  max-width: 600px;
  margin: auto;
}

.logo {
  width: 100px;
  margin-bottom: 1rem;
}

h1 {
  color: #3a3a3a;
  margin-bottom: 2rem;
}

.cards {
  display: flex;
  justify-content: center;
  gap: 1rem;
  margin-bottom: 2rem;
}

.card {
  background-color: #ffffff;
  border-radius: 12px;
  box-shadow: 0 2px 6px rgba(0,0,0,0.1);
  padding: 1rem;
  width: 40%;
}

.card h2 {
  margin-bottom: 0.5rem;
  color: #5c5c5c;
}

.card p {
  font-size: 2rem;
  color: #333;
}

button {
  background-color: #4CAF50;
  color: white;
  border: none;
  padding: 1rem 2rem;
  font-size: 1rem;
  border-radius: 8px;
  cursor: pointer;
}

button:hover {
  background-color: #45a049;
}

.quote {
  margin-top: 2rem;
  font-style: italic;
  color: #666;
}
Sample JSON Data – data.json
{
  "temperature": 22.8,
  "moisture": 61
}
NFC Interaction – Because Buttons Are for Boomers
Look, buttons are fine. But do they whisper *“tap me gently and I’ll show you your soil stats”*? No, they don’t. That’s why the Smart Plant Buddy includes NFC tag interaction — so your phone can talk to your plant monitor with a simple handshake. Literally.
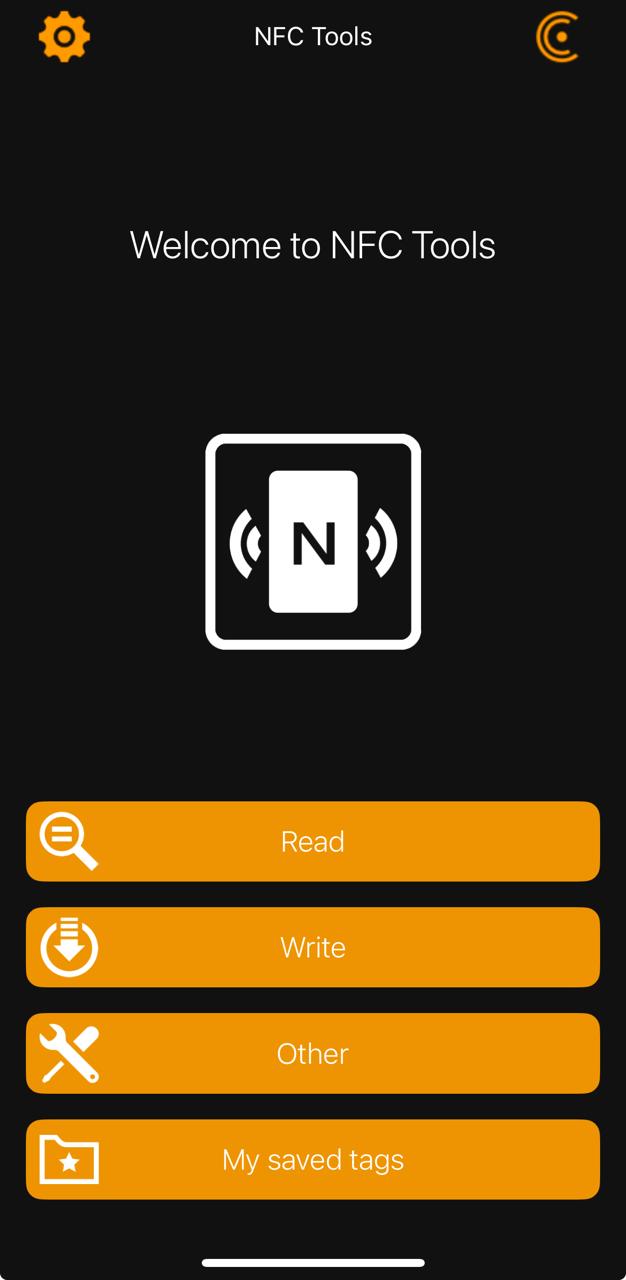
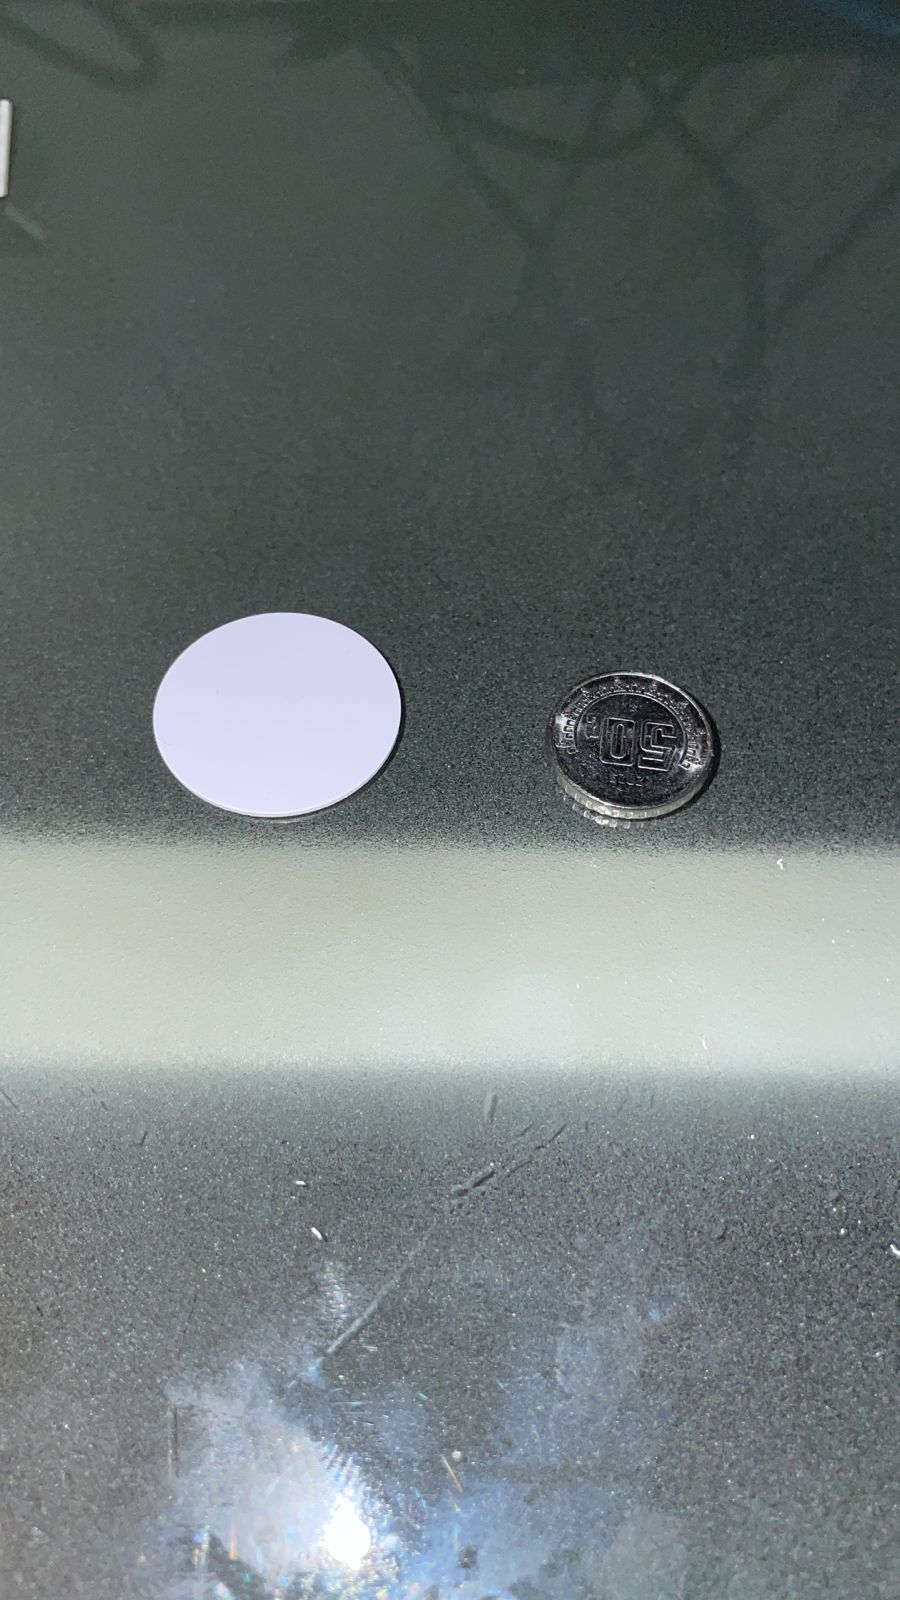
Here’s how I turned a cheap NTAG215 sticker into a sleek access point for my plant’s feelings:
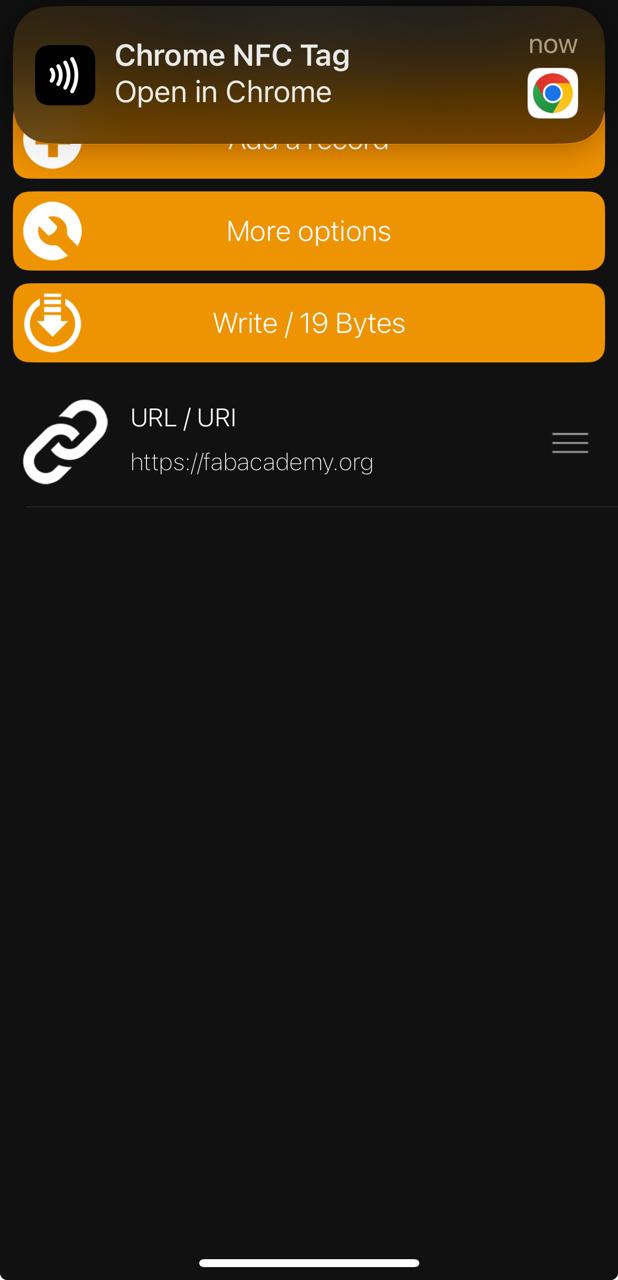
- I downloaded the free app NFC Tools. You’ll want this exact app or something similar.
- Pressed Write.
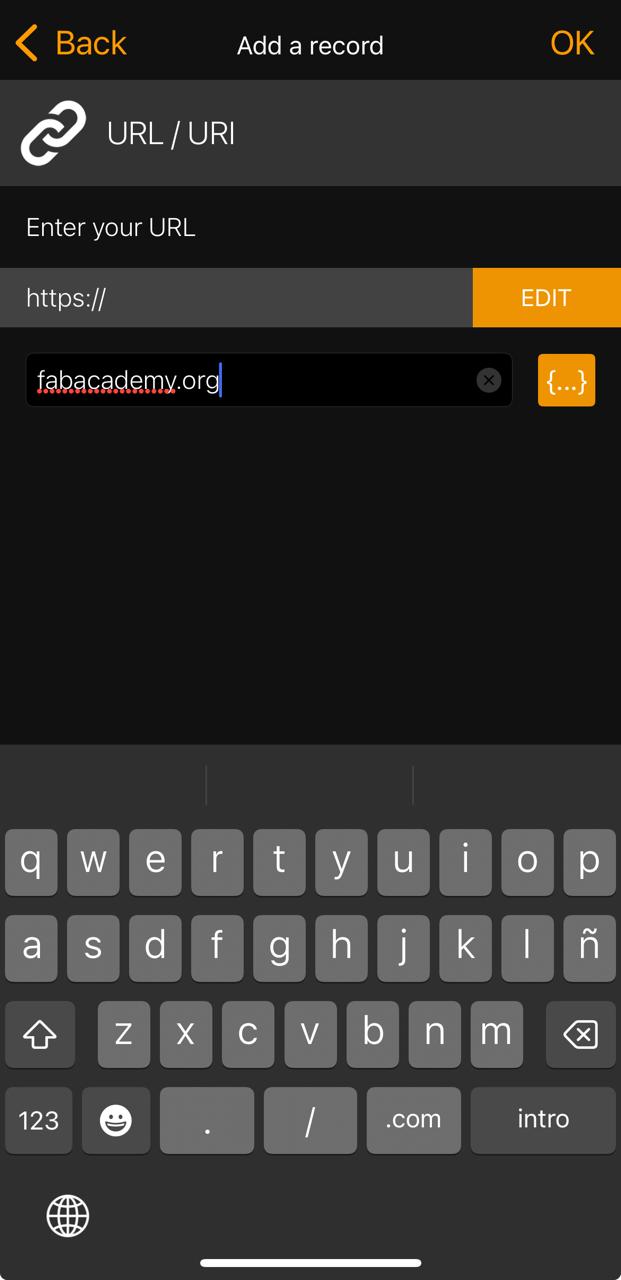
- Tapped Add a record and chose URL/URI.
- Entered my target URL — for testing I used
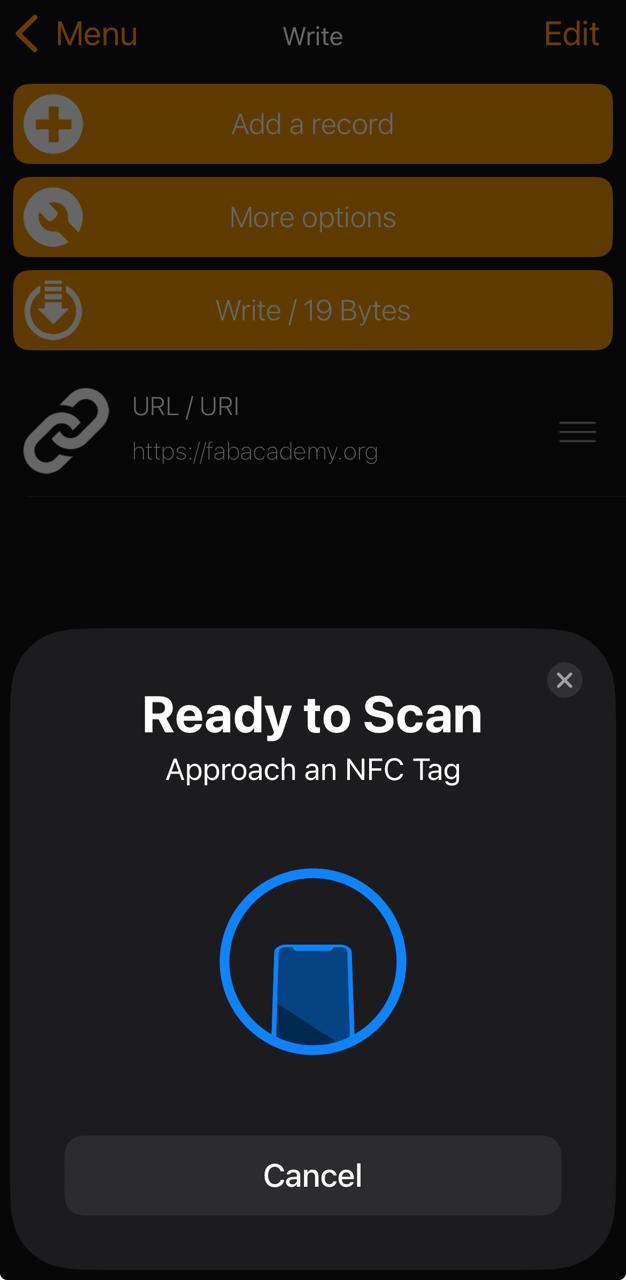
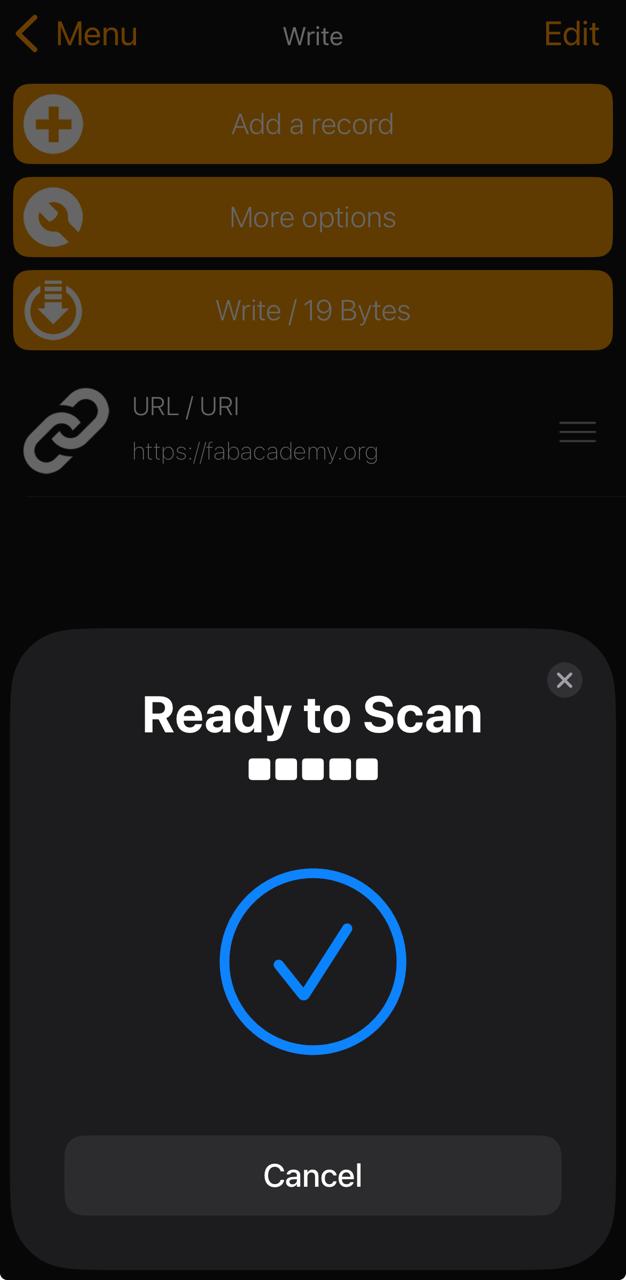
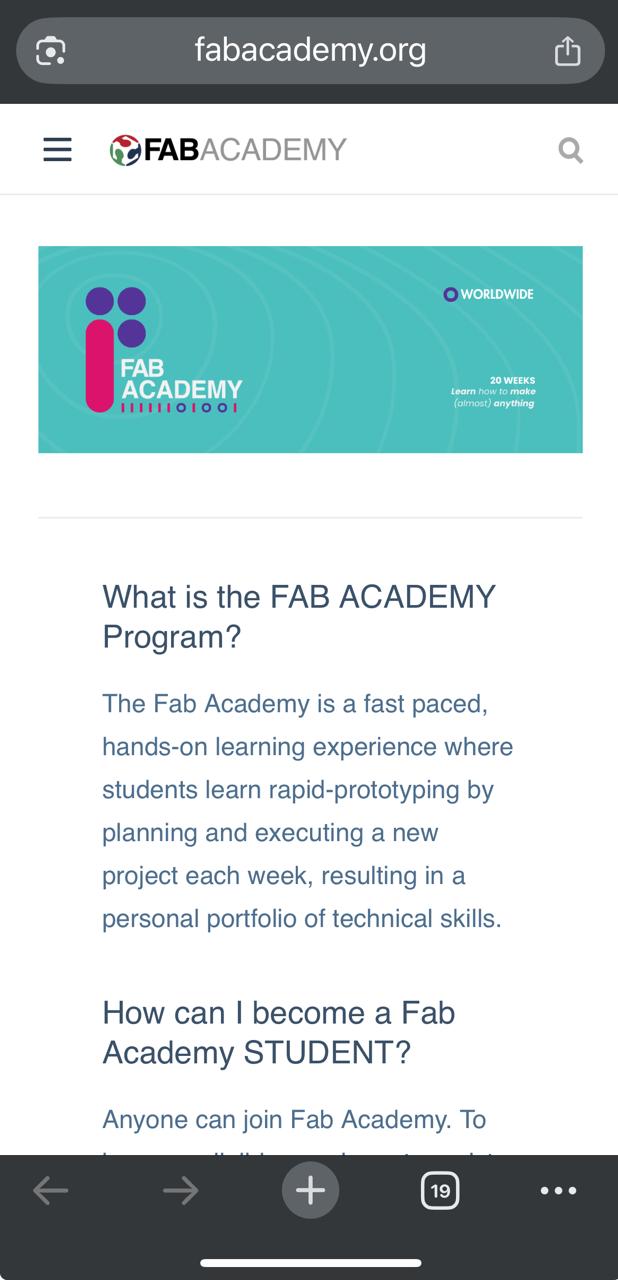
https://fabacademy.org, but obviously this should be your ESP32 local address (e.g.,http://192.168.1.42) - Pressed Write and approached the NFC tag like a wizard casting a spell.
- BOOM — my phone picked up the tag, Chrome offered to open it, and just like that: dirt data in my hand.

Is this overkill for a plant? Absolutely. Is it awesome? Hell yeah. Add one of these tags near your pot and anyone with a phone becomes an honorary plant whisperer.
User Experience – Literally Plug and Plant
This is the moment. The final step. The glorious, dirt-stabbing ritual that brings it all together. Take the device out of the cardboard coffin (which, by the way, is compostable), stick it into your plant’s pot like you're planting the future, and tap your phone on it like a wizard from 2025.
You get real-time temperature and moisture data. No cloud. No app store. No 800MB updates. Just a tap, and you're in — reading live data hosted by the ESP32S3’s humble internal web server. All from an SD card. On a board. In the dirt.
Add a solar panel and you’ve got a fully self-contained, self-righteous, possibly smug Smart Plant Buddy that knows more about your ficus than you do. And yes, that’s the whole point.
Disclaimer
This project is the unholy offspring of human stubbornness and machine patience. Every design decision, sensor tantrum, PCB short, and web UI whim has been filtered through a continuous, chaotic, caffeine-fueled exchange between me (Daniel) and my AI sidekick (ChatGPT-4).
But this wasn’t just copy-paste-from-the-bot territory — no. I actively *trained* this AI (within one chat thread, obviously) to adopt my tone: sarcastic, funny, brutally honest, and occasionally one typo away from swearing. The result? A co-creator that doesn’t flinch when I ask, “Why is everything broken again?”
So if you’re thinking of copying this work — go ahead, but give credit where credit is due. That means me *and* my very emotionally stable, cloud-hosted friend. We built this thing together.