2. Computer Aided design
This week I worked on using 2D and 3D modeling software.
Research
I chose to use OnShape for my 3D modeling. It’s a collaborative, cloud-based CAD software that simplifies the 3D modeling process, making it accessible for both beginners and experienced designers. The key is to start with simple shapes and gradually build up to more complex objects as you gain experience. Here's a simplified guide tailored for creating simple 3D objects in OnShape:
- Conceptualization: Begin with a clear idea of the simple object you want to create in 3D. It helps to start out by sketching your ideas on paper
- Start OnShape: Log in to your OnShape account and create a new document.
- Basic Shapes: Begin by using the available tools in OnShape to create basic geometric shapes like cubes, cylinders, or spheres. These shapes will form the foundation of your 3D object.
- Modeling Tools: Use OnShape's modeling tools to modify and shape your basic forms into the desired simple object. These tools often include extrusion, filleting, and sketching.
- Adding Details: Add details or features to your object as needed. You can sketch directly on the 3D model and then extrude or cut to create these features.
- Material and Appearance: Assign materials and appearances to your model for realistic textures and colors.
- Assembly (if necessary): If your project involves multiple parts or components, use OnShape's assembly features to put them together.
- Testing and Iteration: Check your model for accuracy and make adjustments as necessary. OnShape allows real-time collaboration and version control for easy iteration.
- Sharing and Export: Share your 3D model with others or export it in various formats suitable for 3D printing, CAD, or further use.
- Documentation: If needed, create 2D drawings and documentation for manufacturing or reference.
My Process
I created a model of a section of the house I am renovating. I will use this to plan the installation of countertops, appliances, furniture, amount of material needed for drywall, paint, flooring, location of electrical outlets and can lights etc.
Intial Planning and 2D Design
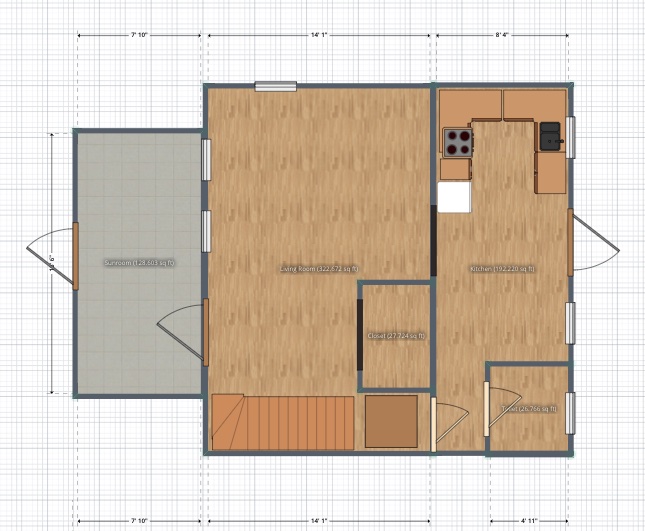
I first took dozens of measurements in the home on a sheet of paper. I had limited time in the home to get the measurements so I got as many as I could and then did my best to infer the missing measurements based on what I had. Rather than base my model off of my handwritten sketches and notes, I wanted to digitize the 2D model using a floorplanner that had pre-loaded items such as windows, doors, appliances etc so that I would be able to accurately measure the items I didn't have time to capture in the walk-through. I then found a website called Planner 5D to start mapping out the floor plan before creating the CAD model.
Choice of Planner 5D:
The initial phase involved utilizing Planner 5D, a web-based design tool. The decision to use Planner 5D was driven by its user-friendly interface and its ability to quickly generate a 2D floor plan. This platform allowed me to visualize and experiment with different spatial arrangements before transitioning to more intricate 3D modeling, especially since I did not have every measurement that I needed.
Reflecting on Planner 5D::
Planner 5D operates on a drag-and-drop mechanism, enabling intuitive floor plan creation. It facilitated the preliminary design process, helping me to conceptualize the layout especially with it's preloaded applicances and windows and doors. However, Planner 5D has limitations, especially because the items cannot be customized. There are limited options in the free version, and you cannot modify certain elements. For example, the width of the door frames cannot be modified. While it provides a solid starting point, transitioning to more robust software for three-dimensional modeling became imperative for a comprehensive representation of the renovation project.
Transition from 2D to 3D Model
The transition from 2D to 3D modeling was a crucial step in refining the project. I printed the Planner 5D floor plans and brought them back to the house when I had more time to capture more precise measurements. I have used AutoCAD and SolidWorks beofre, but opted for OnShape, as I like that it can be accessed from any device and I think it's the most user-friendly. Onshape allowed me to translate the 2D floor plan into a detailed 3D model which could be print and brought onsite to use as a reference during the demo and building processes.
3D Modeling Process
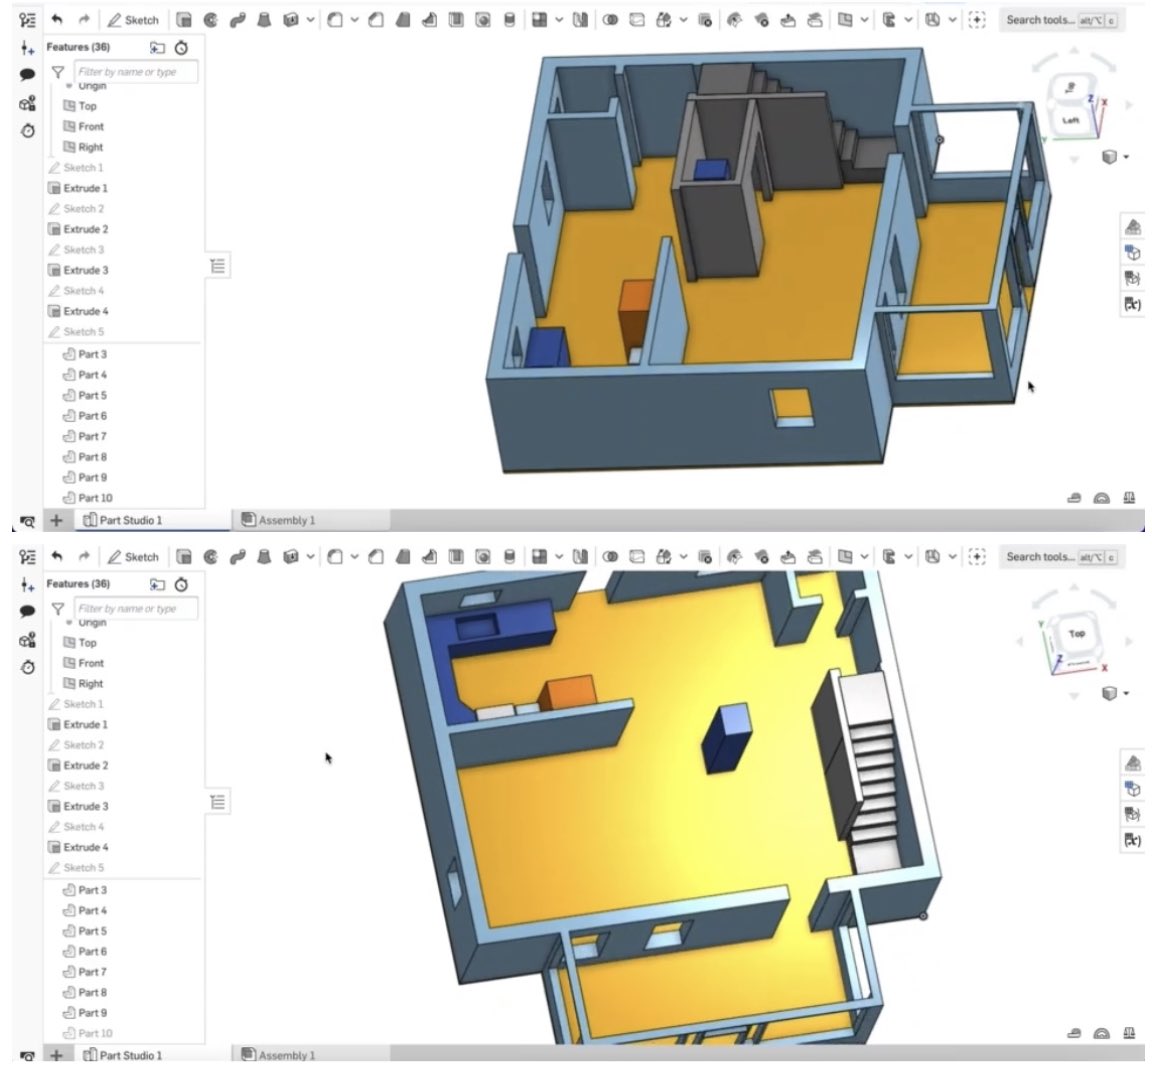
Starting with the printed floor plan generated in Planner 5D with updated dimensions, I imported key dimensions and layout details into OnShape in my 2D sketch. I created certain walls and closets as a separate sketch so they were not connected, anticipating the possibility of removing or altering these elements during the renovation. OnShape offers more robust features such as parametric design, version control, and the ability to create copies and modify or adjust components allowed for precise adjustments and a more in-depth exploration of design possibilities.
Here are some photos of the model I made in OnShape:
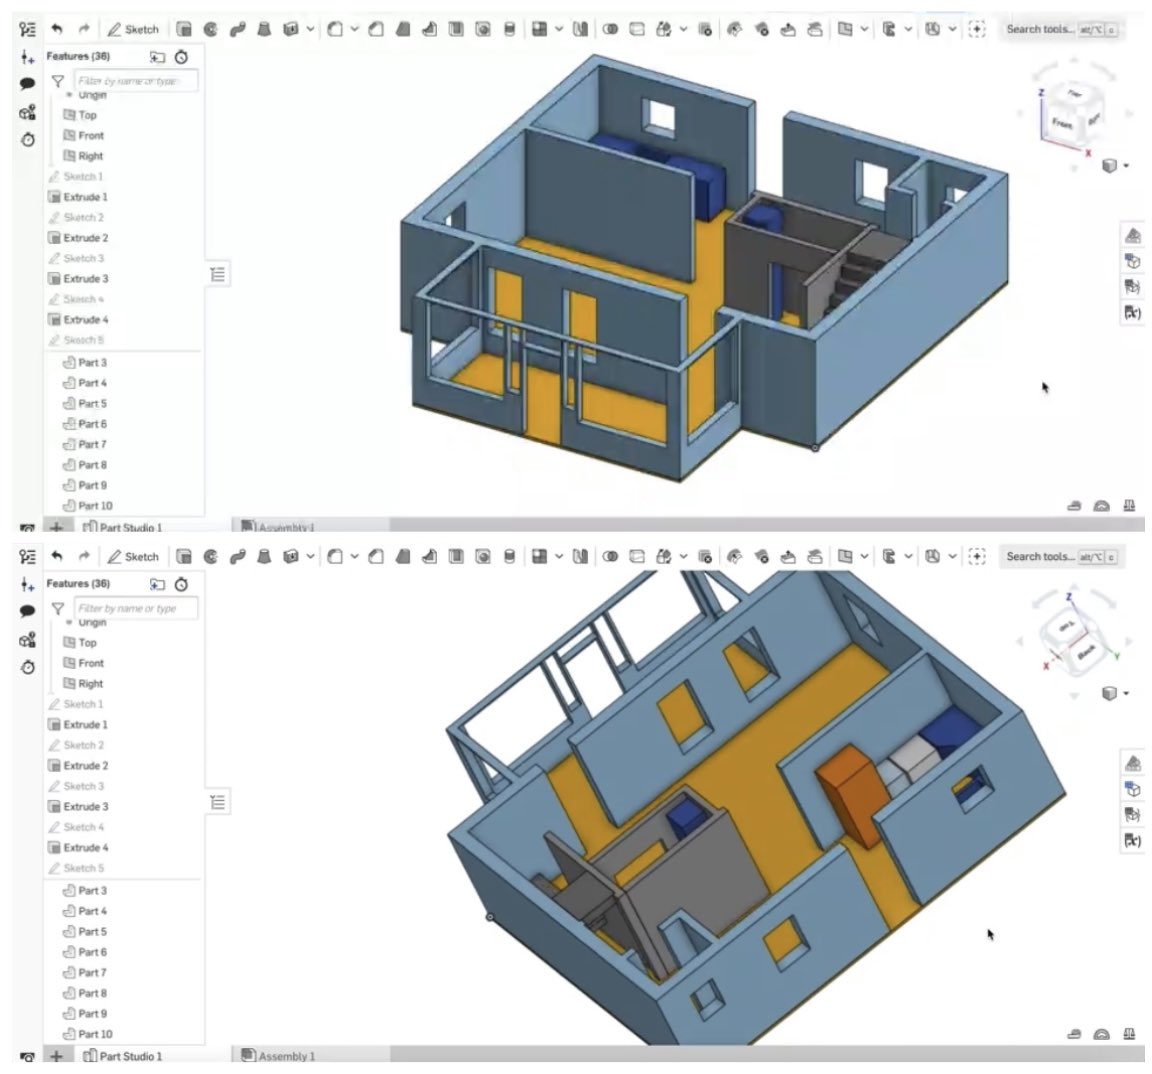
I chose to make some of the walls as separate parts because I am thinking about taking a wall/closet out.
Files
Here is the STL File of the model: