PROJECT MANAGEMENT
For the first week I learned how to use git and created a website.
Setting Up With GitLab
For Fab Academy, I will need to document my progress on each of the weekly assignments and my final project. To keep track of all my work, I am making a website. This will be useful for looking back on completed projects and for getting me to monitor my progress while taking the class. To help me make get started, Fab Academy provided me with a GitLab account and a website template written in Markdown.
Because I want to be able edit the website from my desktop, I needed to clone my repository into a local directory. To do this, I opened up Terminal which gives me access to the command line on my macOS computer. Why do I want to do this? Because this way I can interact with my console directly by typing in specific commands. The alternative to using command line interface (CLI) is a graphical user interface (GUI) which is what we have on our desktops, with visual displays that users can navigate through by clicking icons. Terminal is a faster and more direct way of controlling the operating system.
I typed in these commands:
$ git config –-global user.name “my.username”
$ git config -–global user.email “my@email.com”
Here I am telling my computer my username and password so that it recognizes me later on when I have to make changes to my website. This is a type of git command. Git is a version control software that keeps track of changes that I make to my source code. In addition, GitLab is a web-based version control software that lets people collaborate on projects by storing and sharing repositories in one place.
Next, I needed to make a SSH key. An SSH key is a passkey that allows information to be passed back and forth, between my computer and the GitLab, securely.
First, I checked to see if I had an SSH key, which I didn't:
$ cat ~/.ssh/id_rsa.pub
...: No such file or directory
Then, I created the key and saved it to my computer without a passphrase. I had an issue where I tried to create a new file for my SSH key to be stored into, but when that didn't go through, I just pressed enter and it saved to a default location.
$ ssh-keygen -t rsa -C "$whitneyoreardon@gmail.com"
Generating public/private rsa key pair.
Enter file in which to save the key (/Users/whitneyscomputer/.ssh/id_rsa):
Created directory '/Users/whitneyscomputer/.ssh'.
Enter passphrase (empty for no passphrase):
Enter same passphrase again:
Your identification has been saved in /Users/whitneyscomputer/.ssh/id_rsa.
Your public key has been saved in /Users/whitneyscomputer/.ssh/id_rsa.pub.
After that, I used these commands to view my public key and copy it.
$ cat ~/.ssh/id_rsa.pub
$ pbcopy < ~/.ssh/id_rsa.pub
Then, I shared my public key with GitLab by pasting it into the SSH Key section, under User Settings.
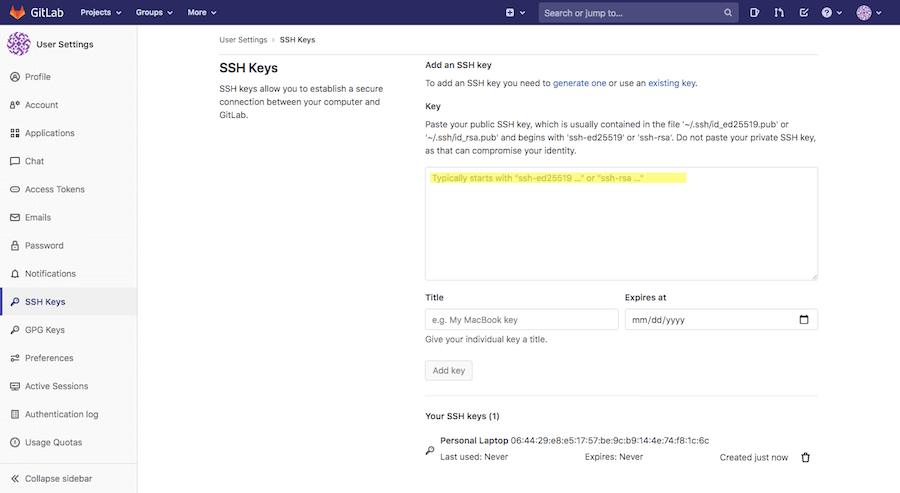
By referencing this page from the GitLab Fab Cloud, I was able to make sure the SSH key was added correctly.
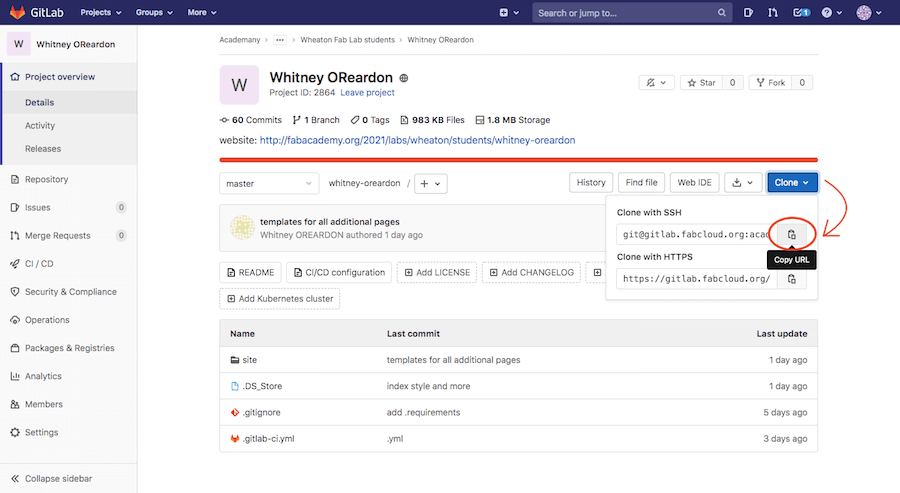
Now, I wanted to clone my website's repository, from GitLab, onto a local directory. I used Terminal to navigate to the place where I wanted to put my repo and created a new folder there. In my GitLab account I copied the URL from the button that said, "Clone with SSH". Back in Terminal I pasted this URL into a 'git clone' command.
$ cd Desktop
$ mkdir Fab_Academy
$ cd Fab_Academy
$ git clone git@gitlab.fabcloud.org...
Using Brackets
Now that I have my repository on my desktop, I want to test it by making some changes and pushing that to GitLab. So, I open up my project files on the desktop. For my text editor, I chose Brackets. I've used this text editor before and I find it user friendly, and I like how it has a built-in live preview feature. Here, I deleted the Markdown files and added an index.html file. These are some git commands I used.
$ touch index.html
$ git add index.html
$ git commit -m "add index file"
$ git push
As a note,
- Git commit = collects information (username, email, changes to website since the last commit, commit message) and compiles it into a numerical id
- Git push = compresses that information from git commit and sends it to the server, GitLab
However, I already had an extension called "Brackets Git" installed, so I am also able to commit and push changes through the Brackets software.
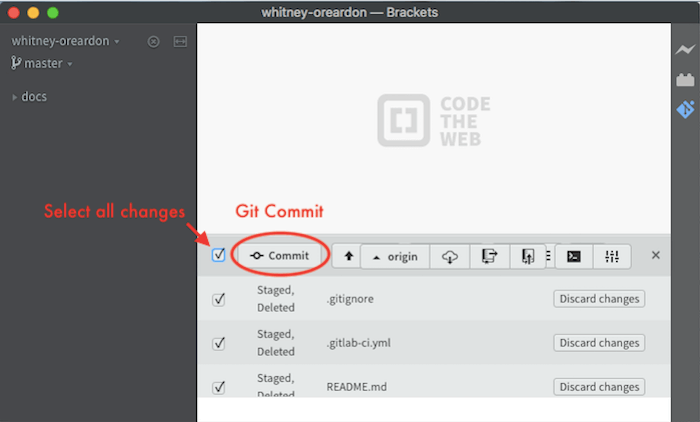
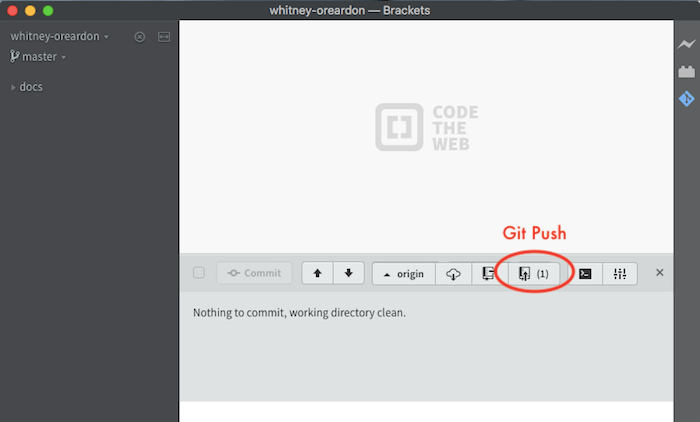
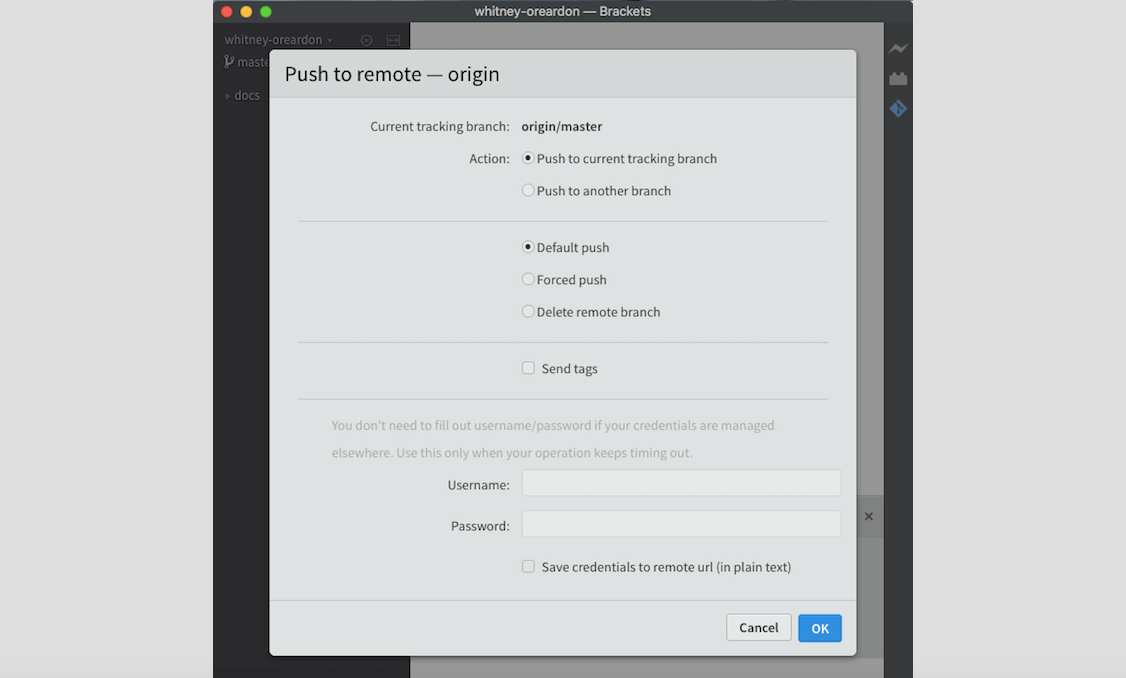
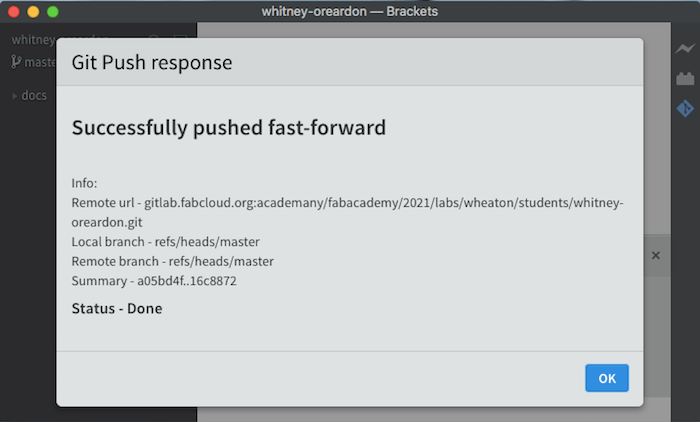
Notice how the "Push to remote - origin" message asks for a username and password. I don’t need to enter this information because of the SSH key, which is linked it to my GitLab account. These are the steps I will do each time I wish to make changes to my web site.
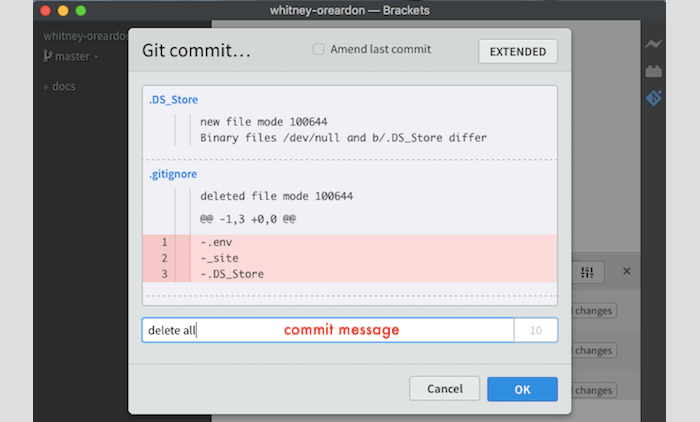
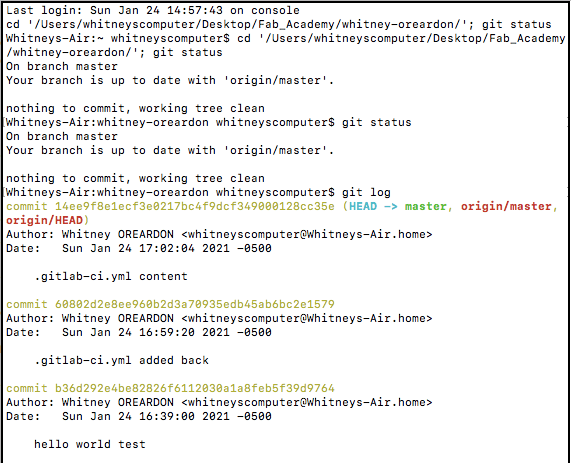
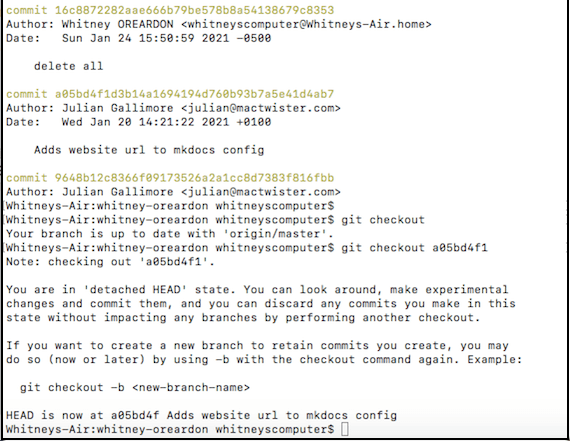
EXCEPT! There was a problem. I accidentally deleted some important files that helped to link my website to GitLab. Because of this, my latest push didn't show when I visited my website. To fix this, I used a series of git commands to revert back to and earlier commit.
$ git status
$ git log
$ git checkout a05bd4f1
'Git status' showed me that my branch was up to date, 'git log' gave me a list of previous commits, and 'git checkout' let me revisit the commit number that began with 'a05bd4f1'. Here is what my actual Terminal looked like.
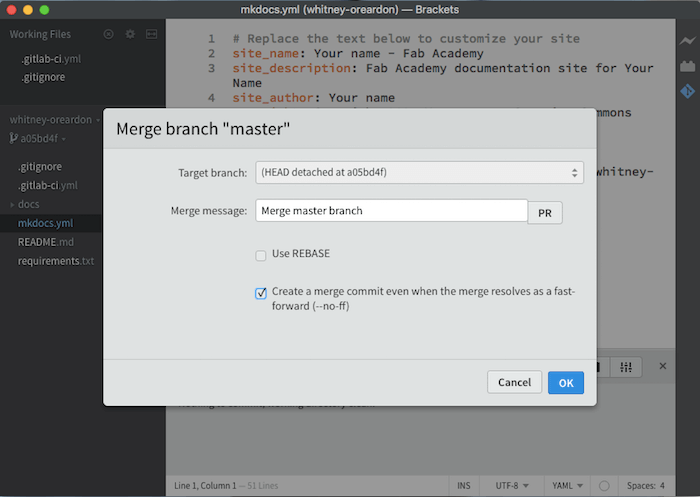
After 'git checkout', I was able to view the earlier commit, and merge it with the master branch.
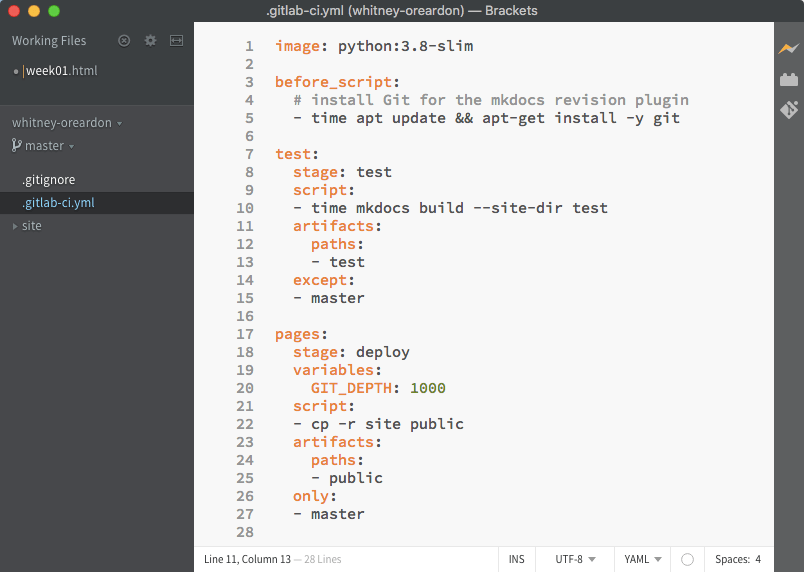
This time, I deleted the Markdown files but kept the .gitignore and .gitlab-ci.yml files. Also, since I wasn't using the Markdown files anymore, I had to edit the .gitlab-ci.yml file using the code below.
Designing My Website
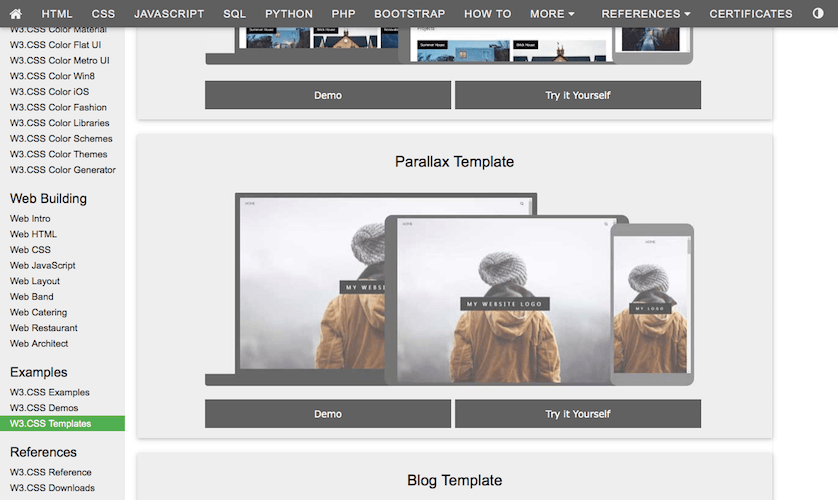
Finally, I was ready to start making the content of my website. W3Schools was a great resource I used for learning HTML and CSS. After checking out their W3.CSS templates, I chose the one called Parallax.
Once I copied and pasted the template's source code into my index.html file, I was able to edit it directly to add in my own content. This gave me a basic structure that I could use for each of my webpages. I went through and tweaked the layout, while referencing W3Schools whenever I needed to learn how to make a specific feature, such as a slideshow or fading text. I also made sure to optimize my images before committing them, which will help reduce the overall data size of my website.
Resources
- Git Simple Cheat Sheet
- Mac OS X Command Line
- Everything you ever wanted to know about Git
- GitLab and SSH keys
- w3schools.com : HTML, CSS, w3.CSS, Web templates, & more
- Aalto Fab Web Basics
- TinyJPG Jimdo Image Optimization
- Coolors Web Color Generator
Updated: February 2, 2021