Group assignment (Link)
We spent some time to familiarize ourselves with the lab's safety measure and review the safety data sheets for each of your molding and casting materials.
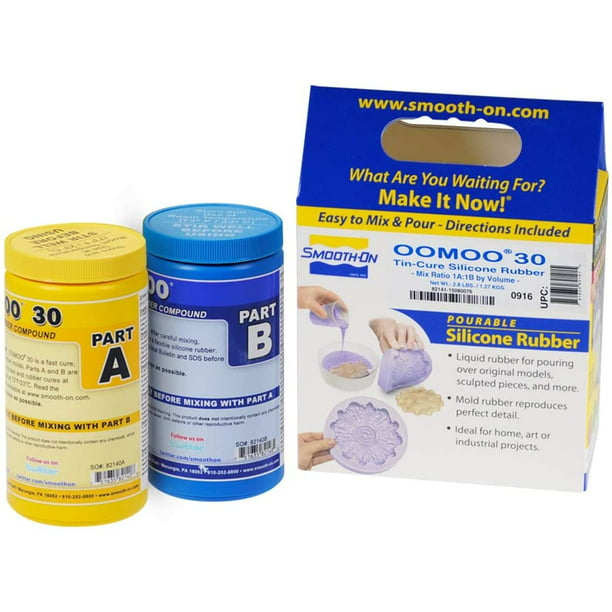
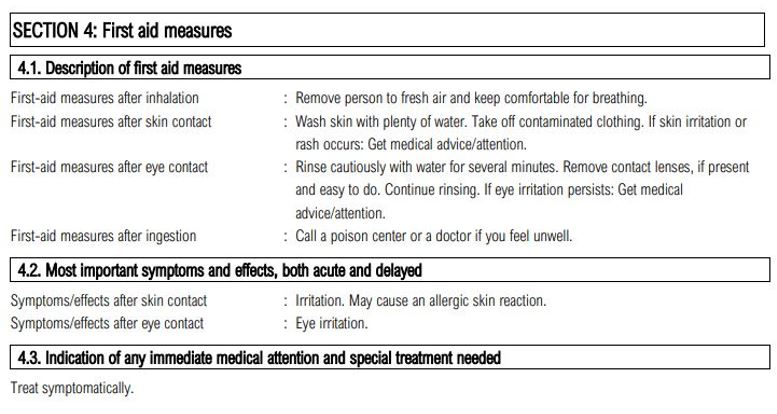
Molding: SMOOTH ON SILICONE DRAGON SKIN ®
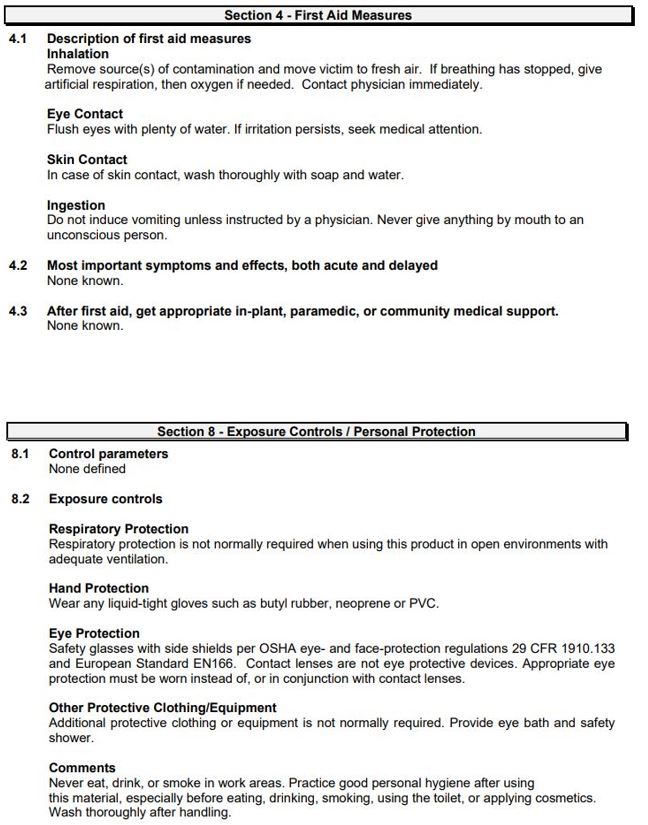
We read the Safety Data Sheet before using the material, especially the first aid measures as shown below to know what to do if you get exposure to the material and the best measure to follow to protect yourself.
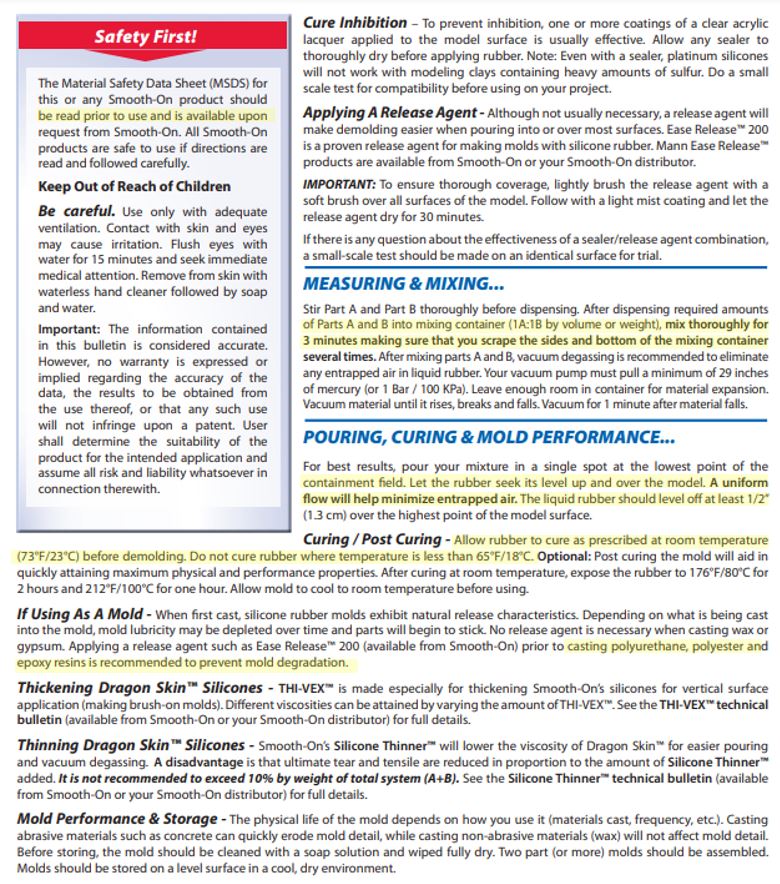
the technical data sheet summarize in the follow TD PDF that give the user a clear steps to use the material, I highlighted the important points in yellow.
Casting: ART RESIN®

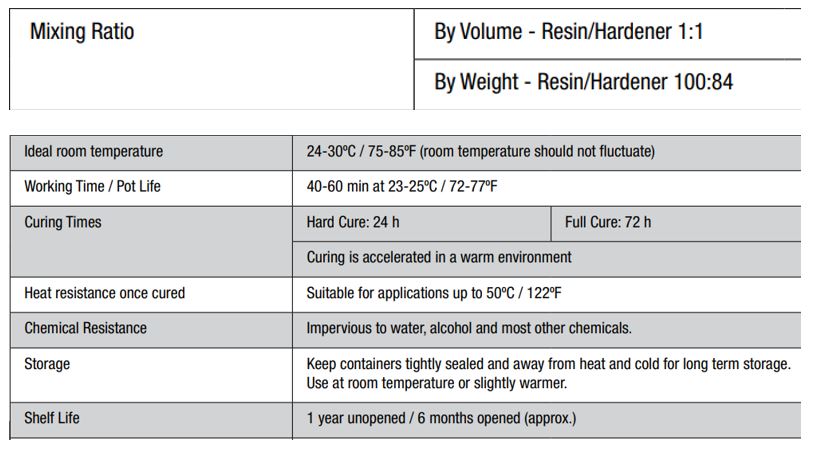
Before doing the casting by using ARTRESIN® we have to read the Safety Data Sheet to familiarize ourselves with the first aid measures after exposure to the material.
Also we have to go through the Technical Data Sheet to know the mixing ratio 1:1 & other important information about the material to have smooth casting.
Individual assignment
This week I learned how to do molding & casting from scratch:
1.DESIGNING
2.MILLING
3.MOLDING
4.CASTING
1.DESIGNING
Starting with designing a positive mold, I wanted to make a cute angel wing so I draw the design in Fusion 360.
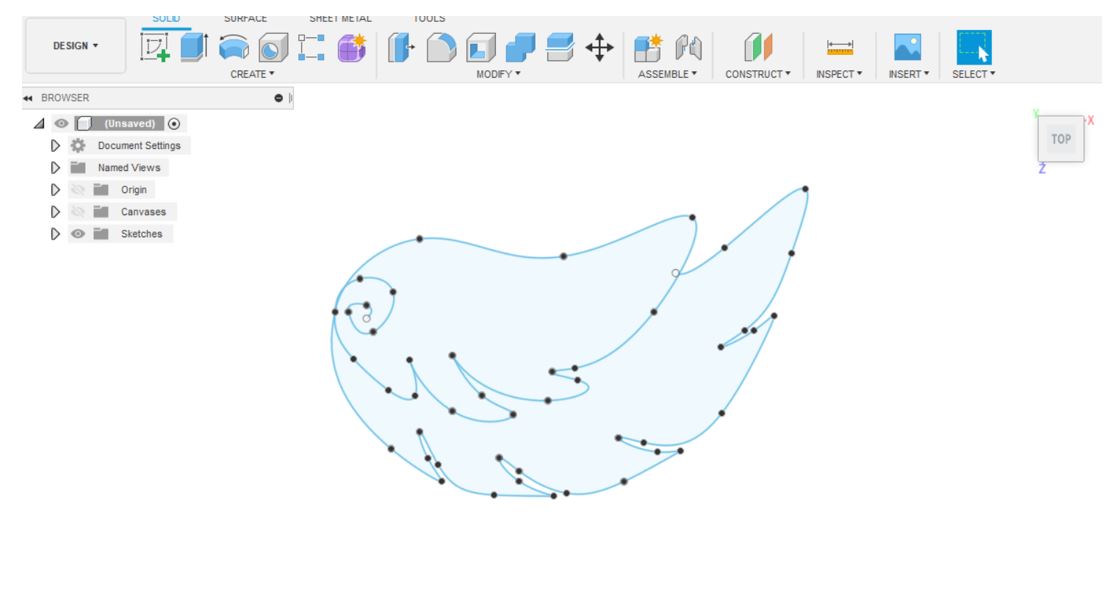
Using the skills, I learned through fabacademy journey I design the mold as shown below.
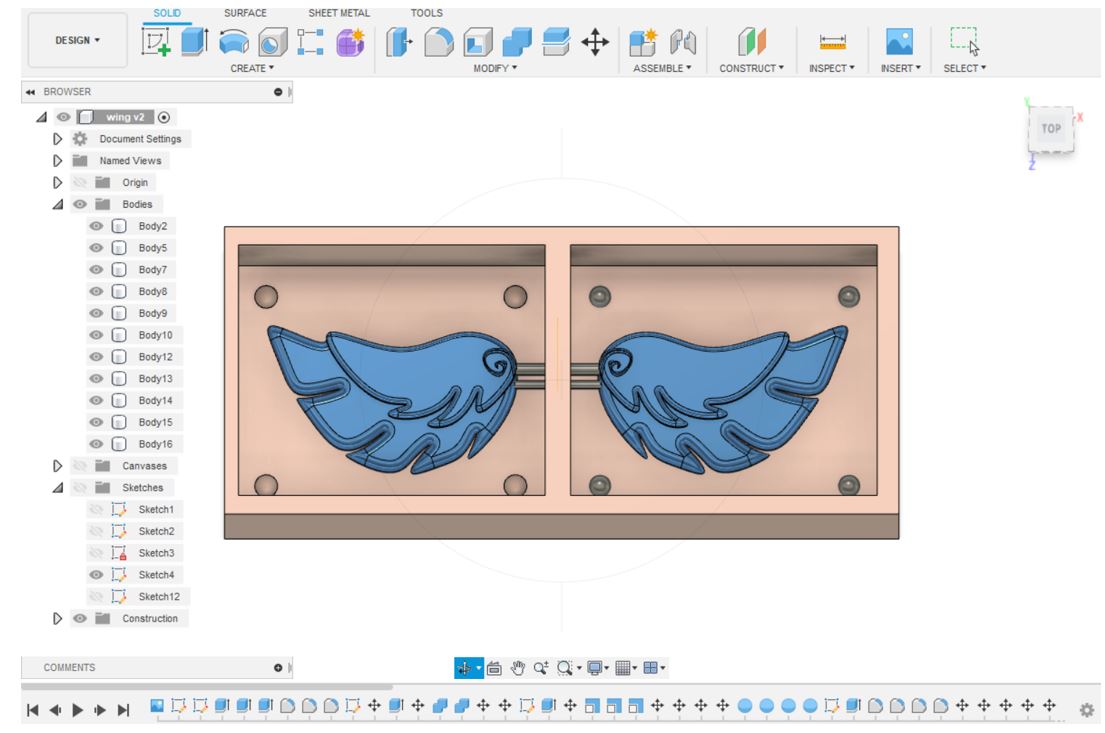
Then move to MANUFACTURE to set the work coordinate system.
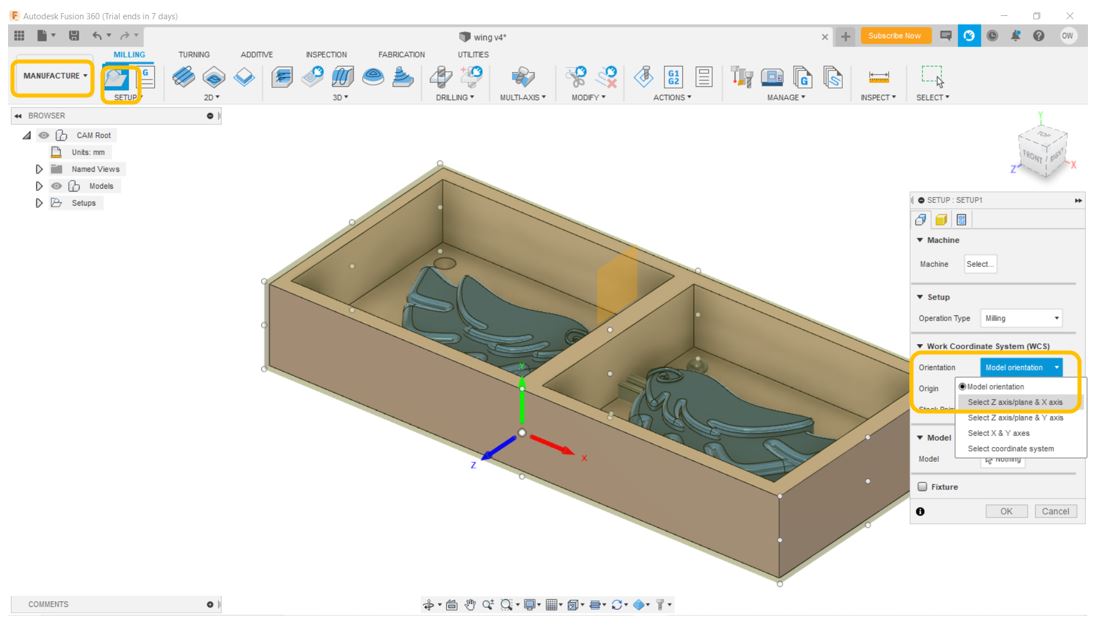
Choose the left edge for Box point.
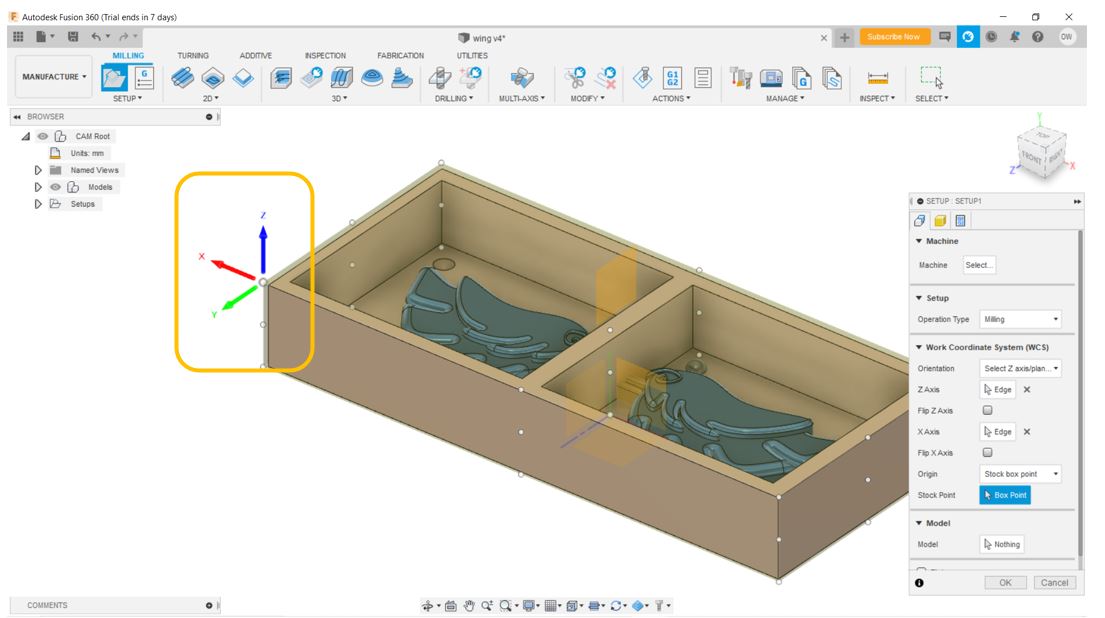
Then select the corner as the Z Axis.
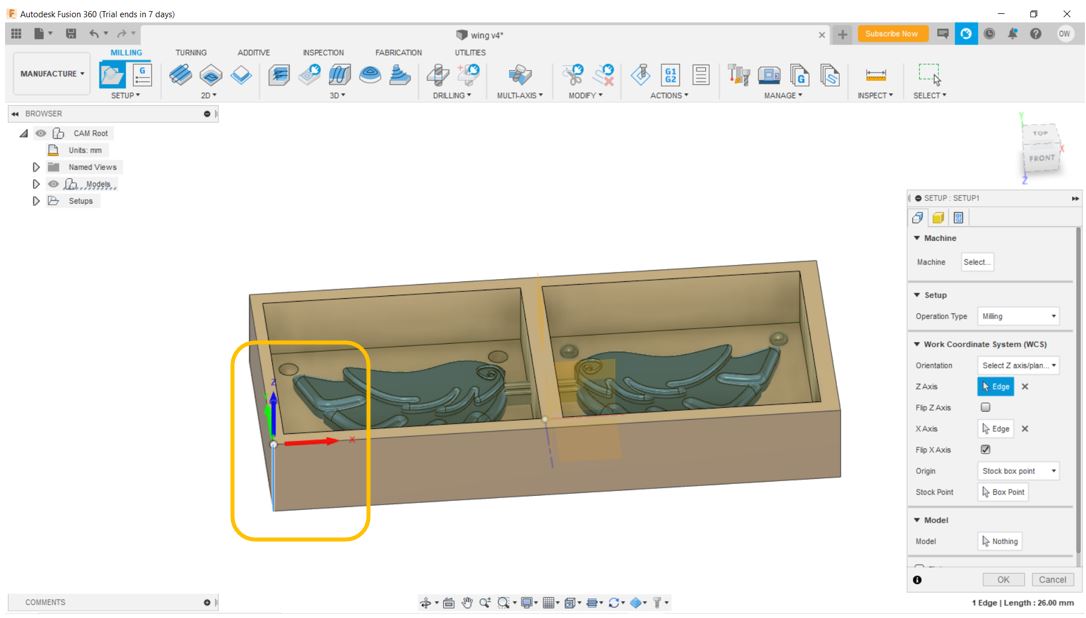
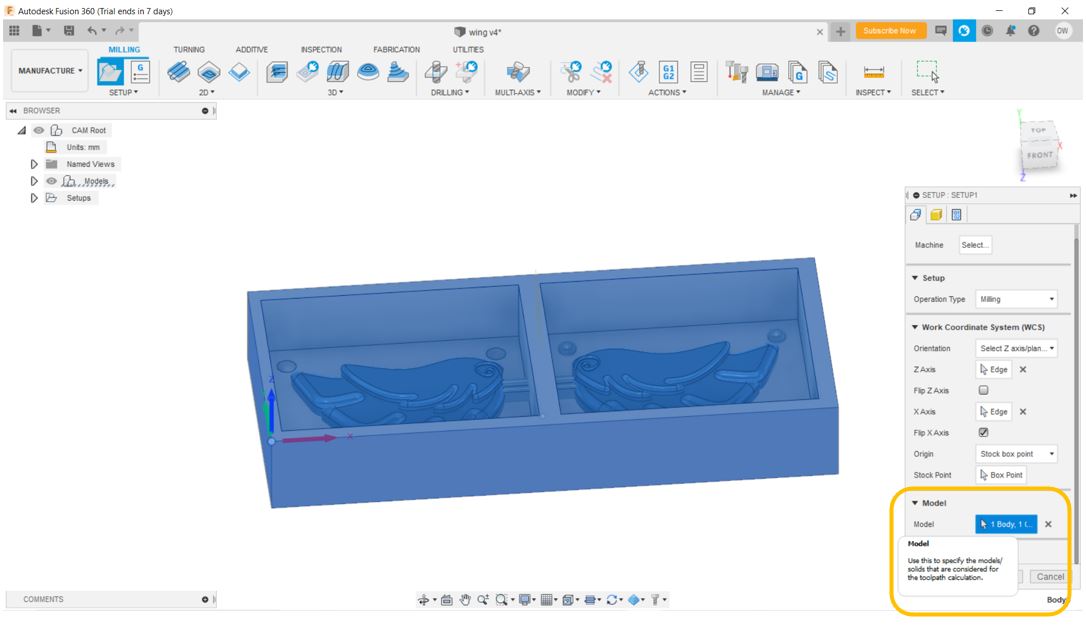
Then select the model.
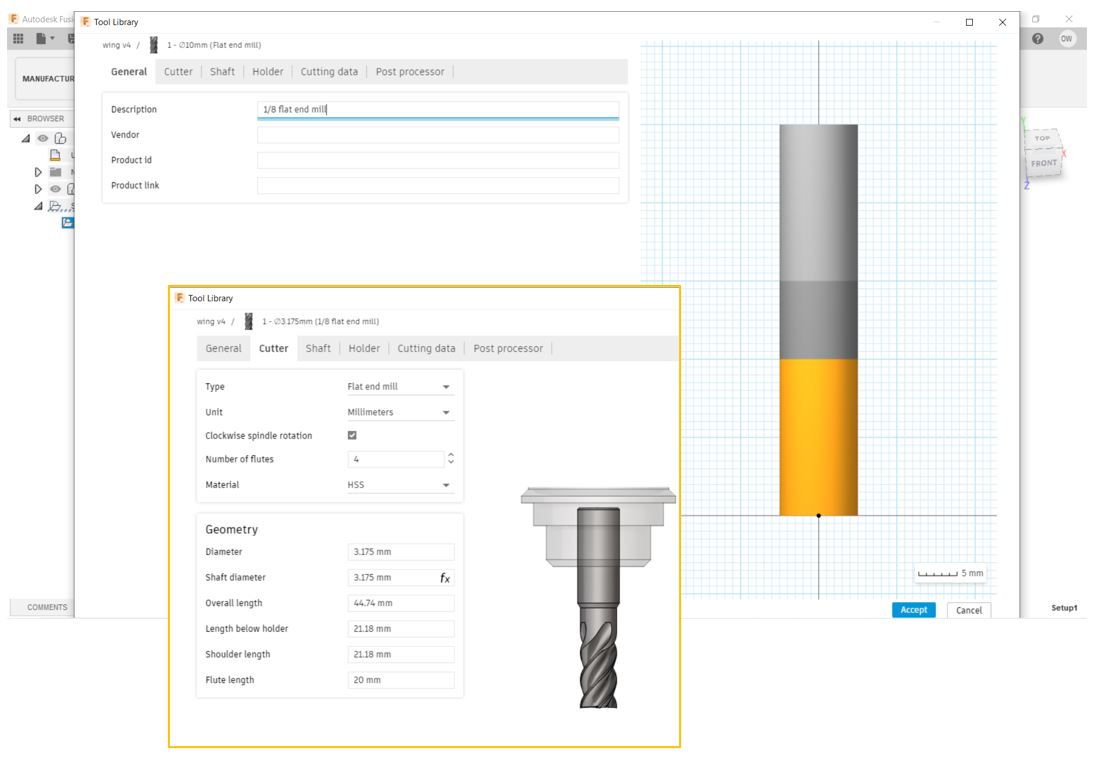
Then select Tool library to generate the tool that will be used for milling, select the design then add new tool.
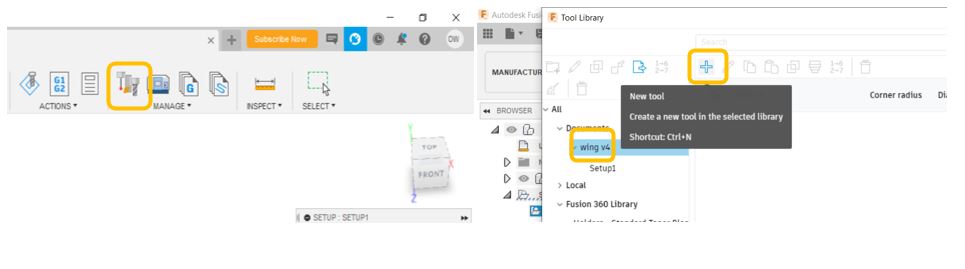
First I added the flat end mill tool.
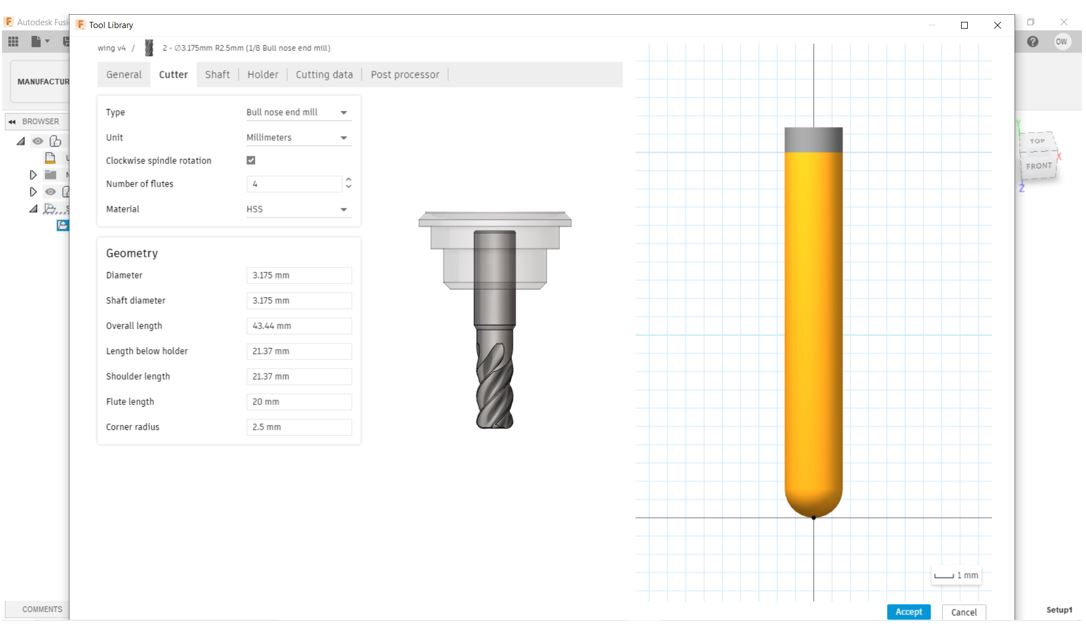
Then adding the setting for the bull nose end mill tool.
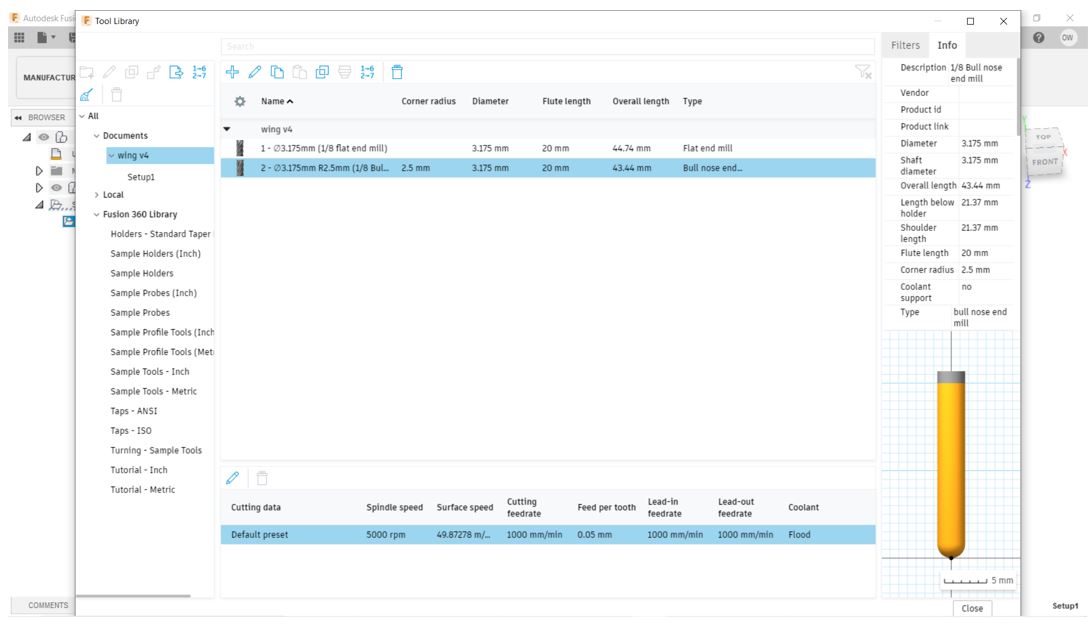
Done adding the tools.
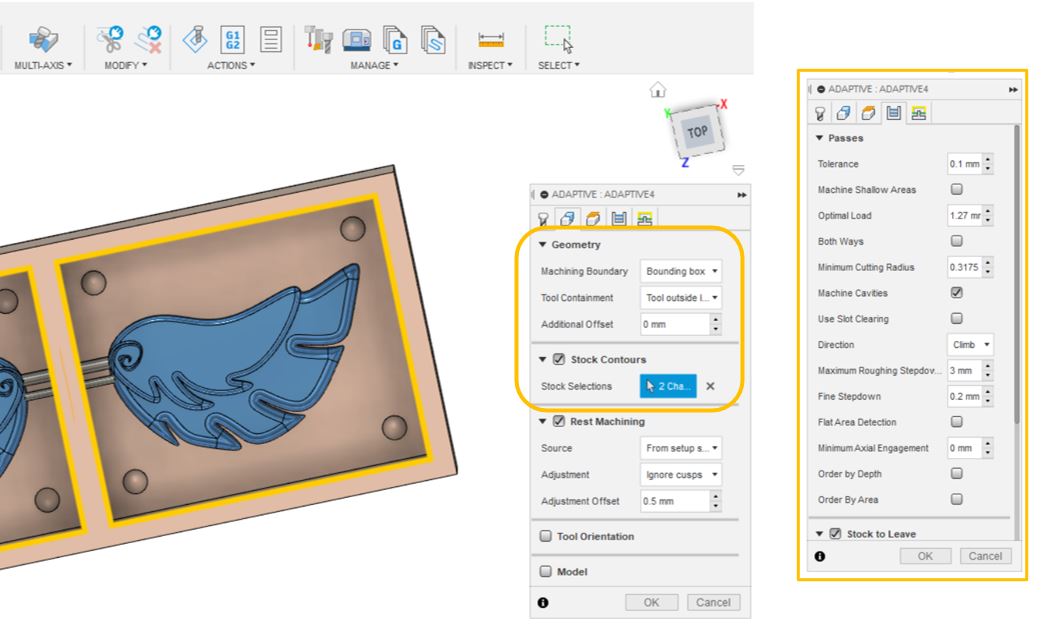
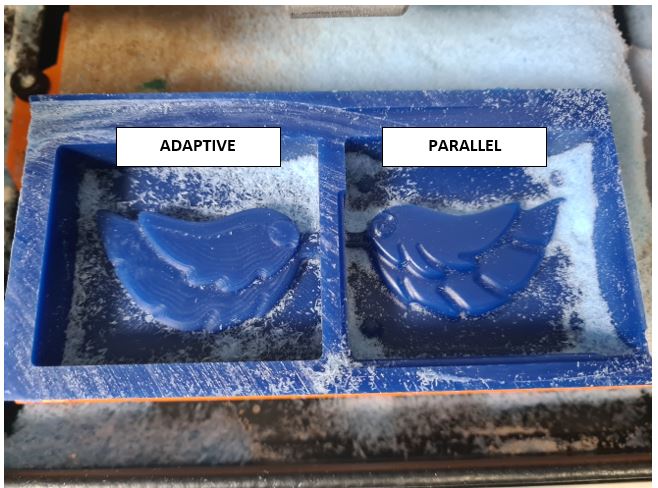
Then I set the ADAPTIVE CLEARING that clear large quantities of material effectively which makes a series of constant Z-layers through the part & then clears them in stages from the bottom upwards because that it is important to set the tools length.
Adaptive Clearing > Tool > select the Tool “flat end mill”

Then select Geometry & select the two blocks of the design. Also, adjusting the passes.
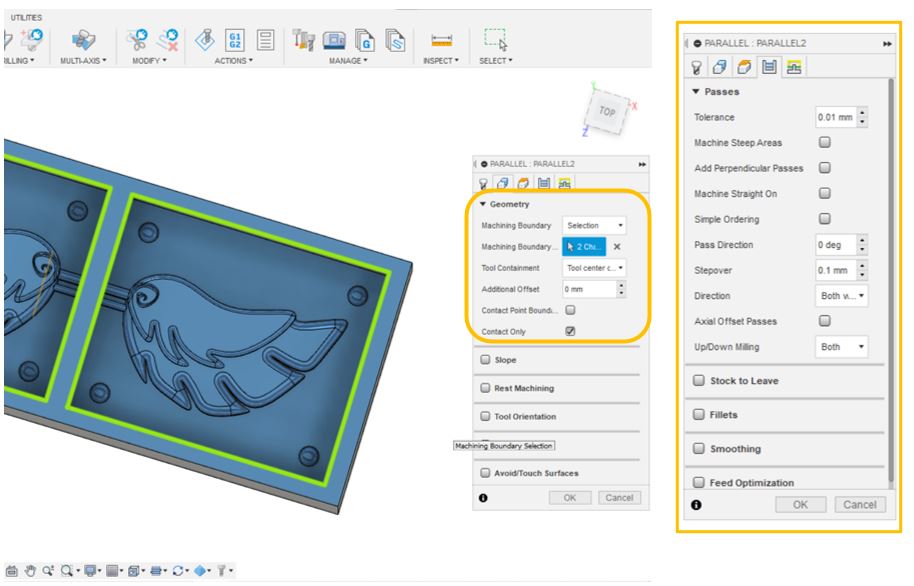
Then I set the PARALLEL to make the finishing surface smooth> choose the Tool “bull nose end mill”

Then select Geometry & select the two blocks of the design. Also, adjusting the passes.
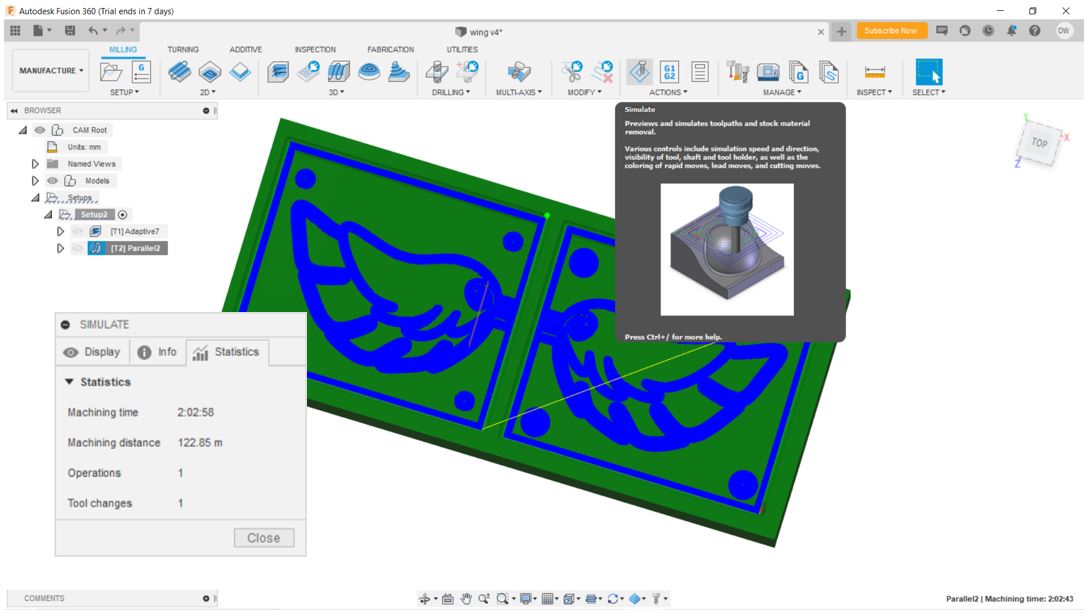
Clicked on Simulate to simulates toolpaths & material removal & calculate the timing
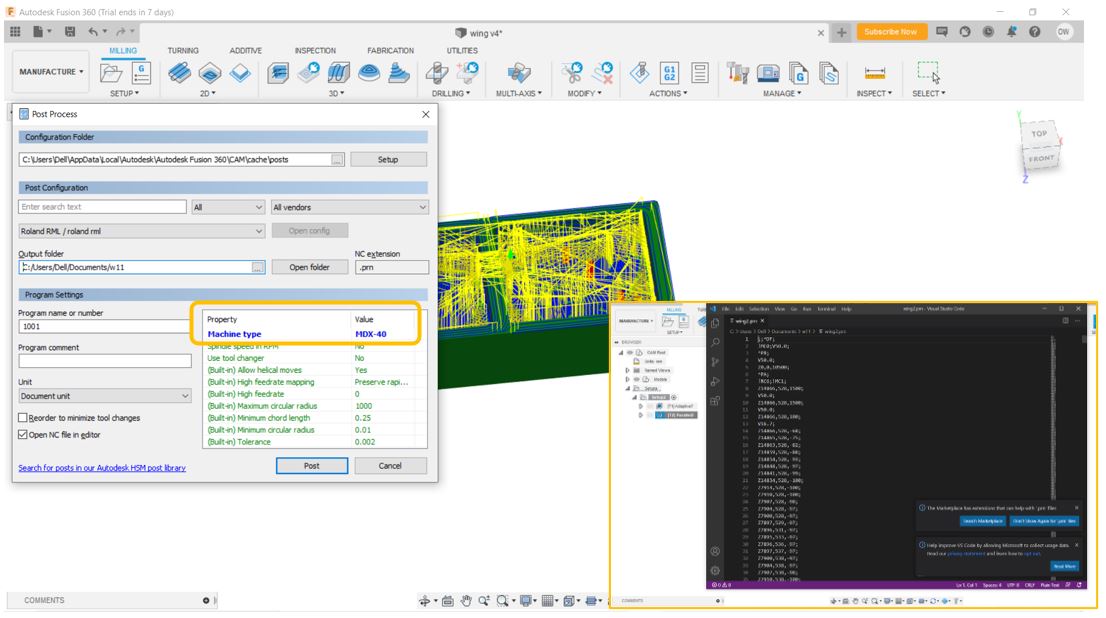
Then save the Toolpath by clicking right click on each toolpath from the setup > Post Process > Machine type (MDX-40) > Post
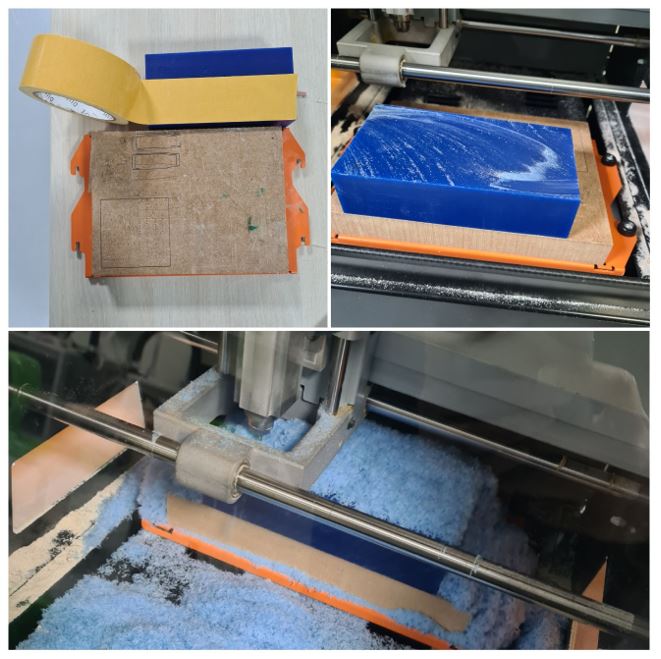
2.MILLING
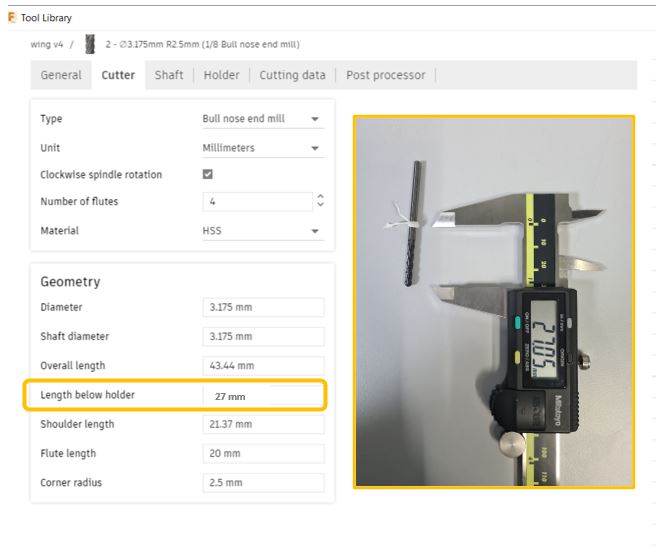
Fix the WAX on the board and set the CNC machine setting & the origin location
Also make sure to check the (Length below holder) and do the required alteration then save the file again
I milled the design and the result is satisfactory as shown in the video below
This is the different between the Adaptive & the Parallel finishing
3.MOLDING
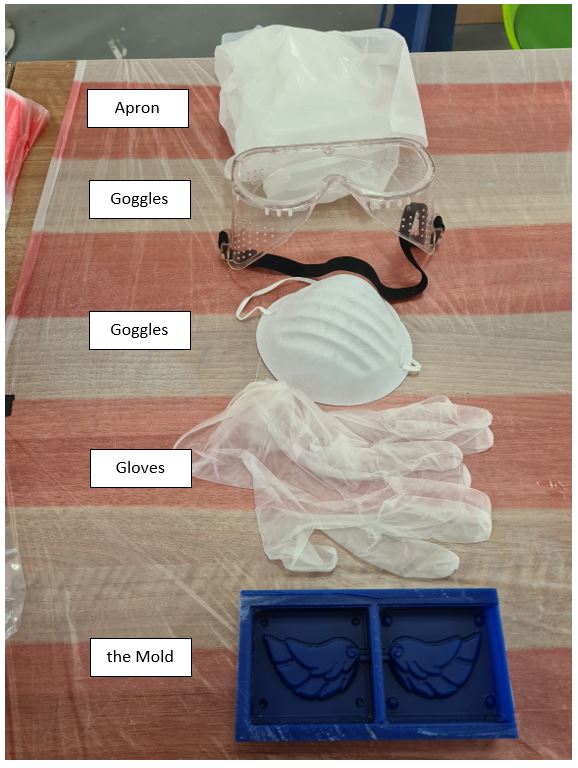
Before making the silicon mold I have to follow the safety procedures & wear the following:
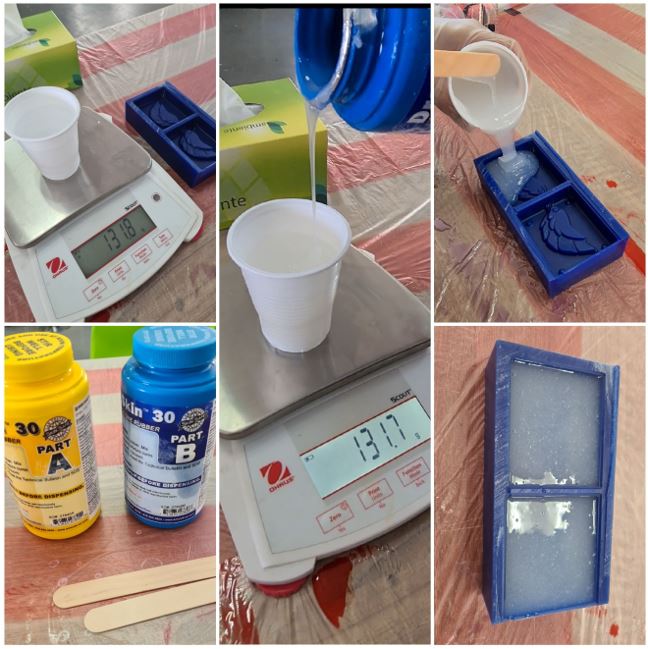
Make a negative mold by silicone rubber using “smooth on silicone dragon skin”
Following the product guidelines, I started by measuring the amount of liquid I need for the design then I poured from the silicon rubber part A then part B with ratio of 1:1 then mixed it for 2 min then poured it in the mold and shake the mold for a few minutes to allow the bubbles to be released then allow the mold to cure for 24 hours.
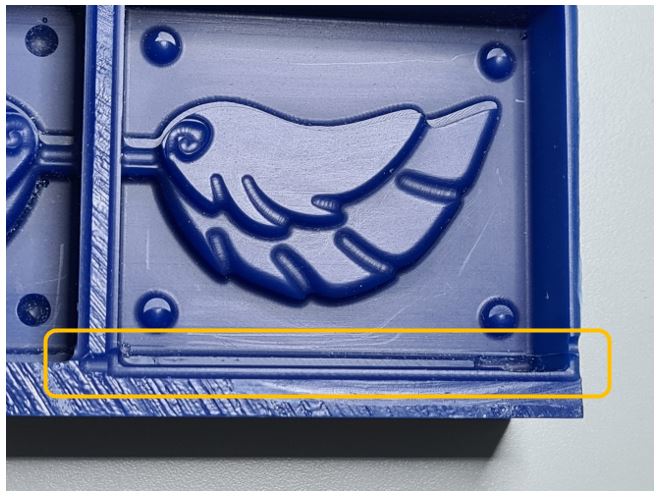
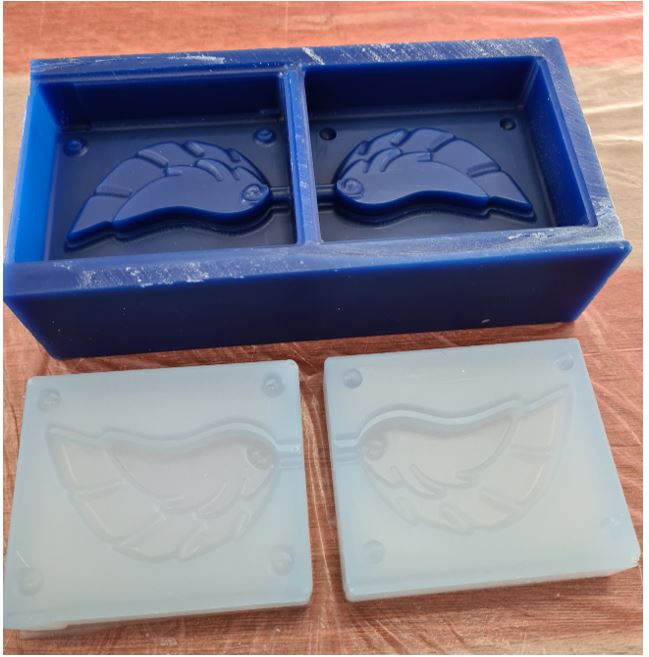
My end result of the silicon mold.
4.CASTING
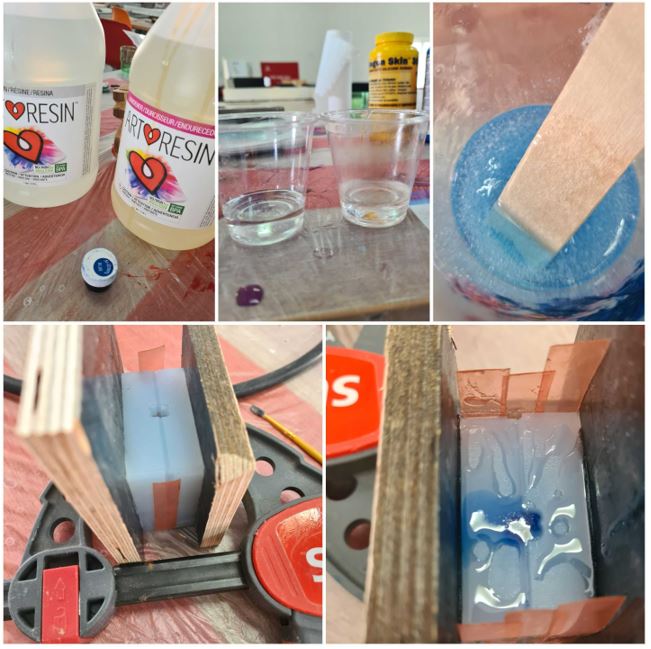
We reached the final stage for the resin I used Art Resin product, I poured equal amount of part A and part B 1:1 ratio then I add drop of colouring agent I chose blue then mix it well for 2-3 min then join the silicon mold and secure it using wood panels and holder to make sure the mold is fixed and stable then using transparent tape to cover the mold to protect from any spillage. Then I poured the liquid through the hole using strow.
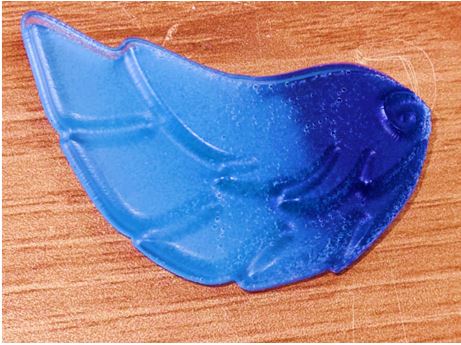
This is a hero shot of my end result the blue wing.
Challenges & Important Tips:
I faced a challenge when changing from Adaptive to Parallel finishing because I did the parallel the day after I lost my origin location because the battery runs out then the laptop switched off so I lost the origin setting when I wanted to mill again its change the location so I tried to remember the origin location & fixed it again until it worked.