Computer Controlled Cutting
Week four

In week three we try the Computer Controlled Cutting in Fab Academy by trying different laser cutting machines and vinyl cutting machines.
The goals were the following:
Group assignment
Individual assignments:
Vinyl Cutting machine
vinyl cutter is a type of computer-controlled machine that look like a printer, the computer controls the movement of a sharp blade over the surface of the material. To cut out a design, a vector-based image must be created using vector drawing software.
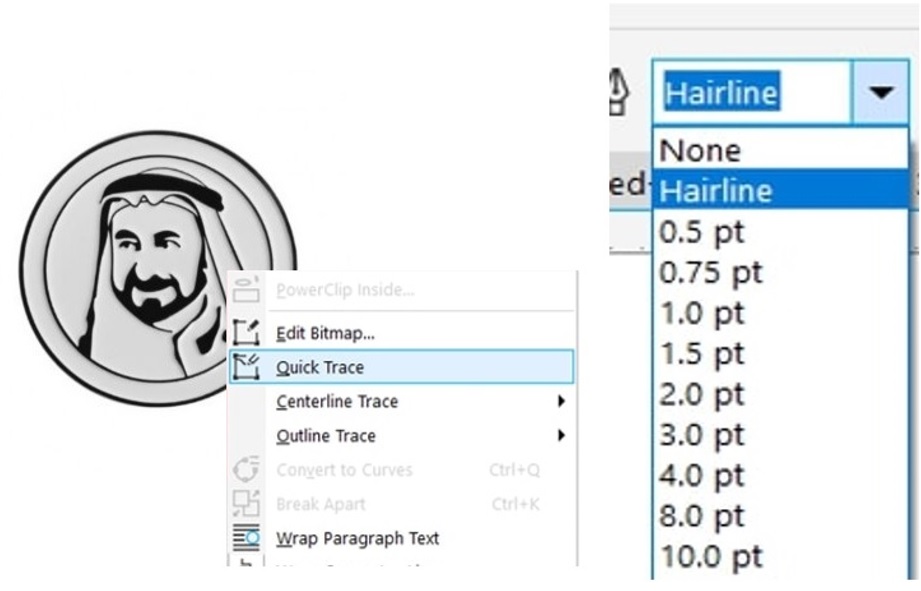
I decided to print the logo of the man who set a pattern for us to imitate his words and actions HH Shk Dr Sultan AlQasimi
The available vinyl cutting machine is the Roland CAMM-1 GS-24
The software used was CorelDraw 2017.
- • copy the picture on a new project file in CorelDraw.
- • To create a vector copy of the image you need to select the picture.
- • I select the picture and chose hairline for the thickness
The steps :
I clicked on the Roland Cut studio icon
Roland Cut studio icon tool is connects CorelDraw directly to the software activating the Roland Vinyl machine.
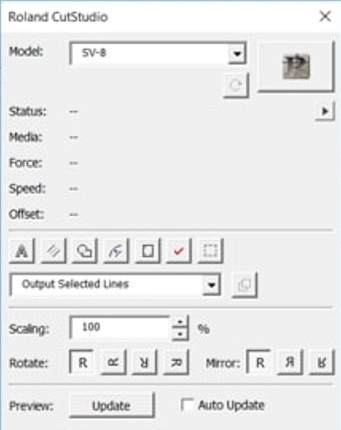
Cut studio software
The window opens to display the design.
I click on file -cutting setup -media size -change
I changed the width by pressing the bottom of Get from machine
I changed the length to a manageable value.
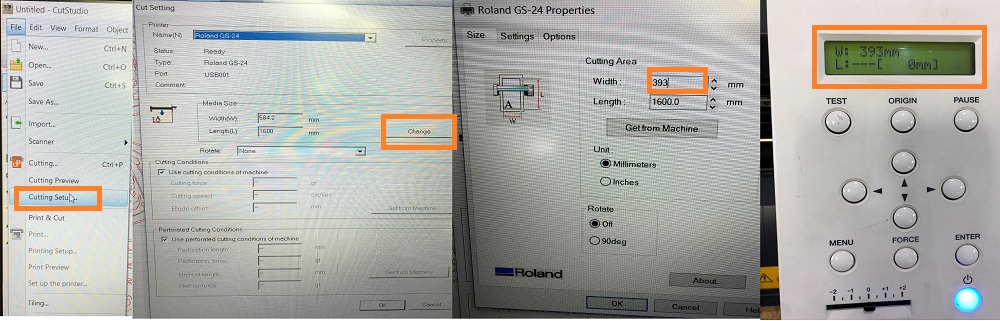
Checking the machine proceed to do the final cutting command:
1. Adjust the start point by pushing the handle on the left then I can adjust the sheet easily and pull the handle back. Change the power if needed.
2. Test the cutting setup by pressing and holding the TEST button (the test will print a circle with the cross inside)

The final step is to click on the cutting icon on the toolbar and click on OK.
The tools I used :
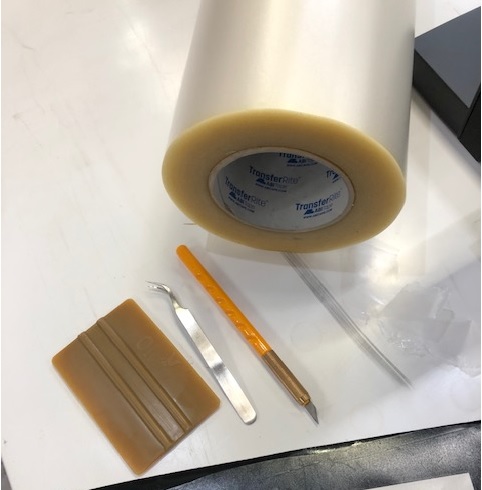
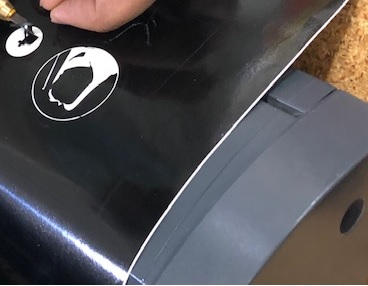
I use black sticker sheets
I started removing the extra tape around my design by referred to my design picture to see what to remove
I attach scotch tape to the design, and make sure that there are no air bubbles.
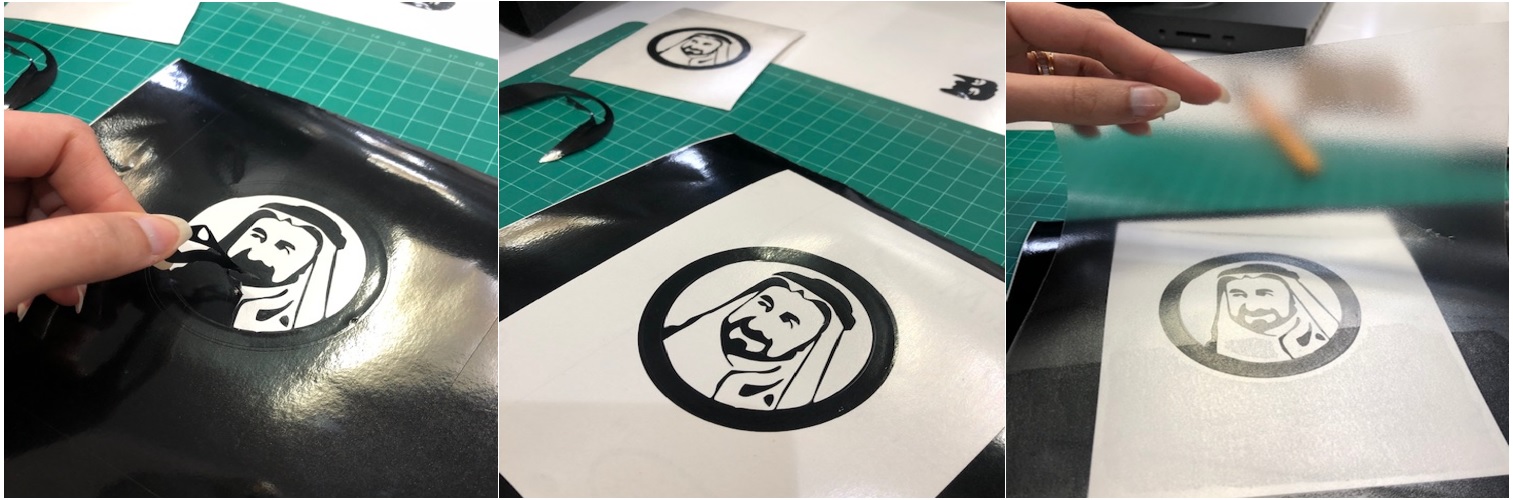
I attach my design on my laptop and also on the bord of lab academy learning room.
The final product looked like this!

The first time I tried to cut I face a problem that the stickers was damage and peel out will the machine is cutting the reason was because of the power was high in the machine then we do the test by using the test bottom in the machine.
The group task
The group tasks were all about assigning different materials with different thicknesses by using Laser cutting machines in the lab. The work as a group task found here
Press fit Kit:
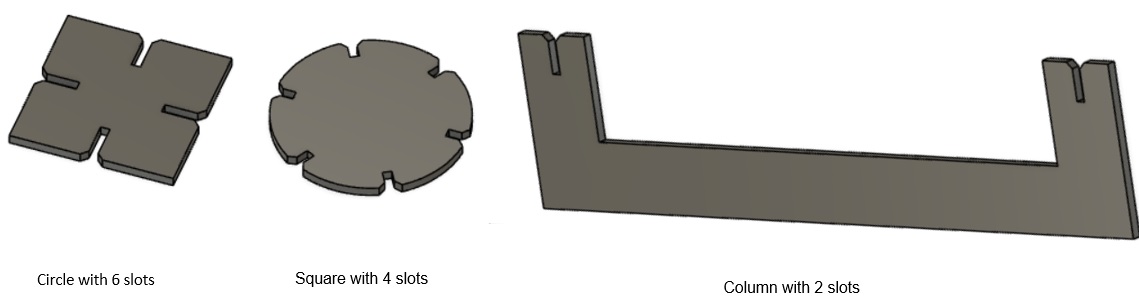
My press fi kit design consists of circle with 6 slots, square with 4 slot and column designed using Fusion. The structure design gets to know the importance of teamwork.
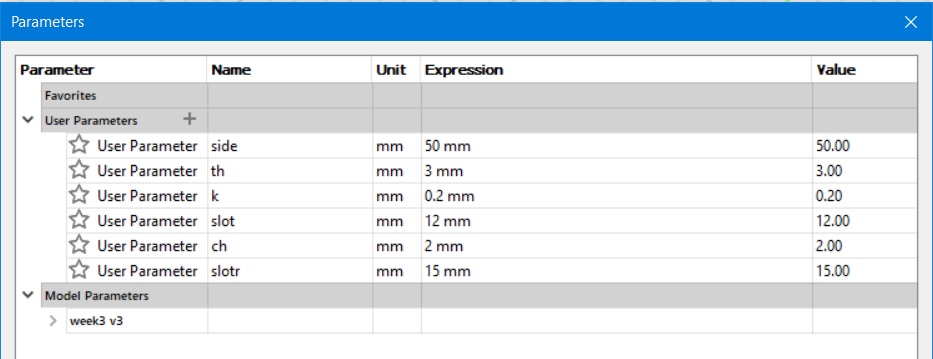
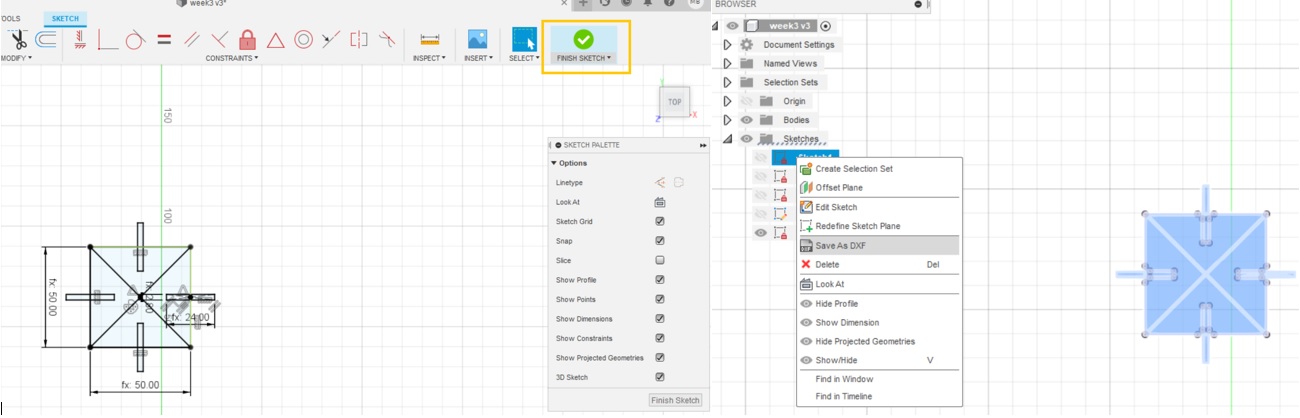
I set the dimension parameters to have a parametric which is shown below:
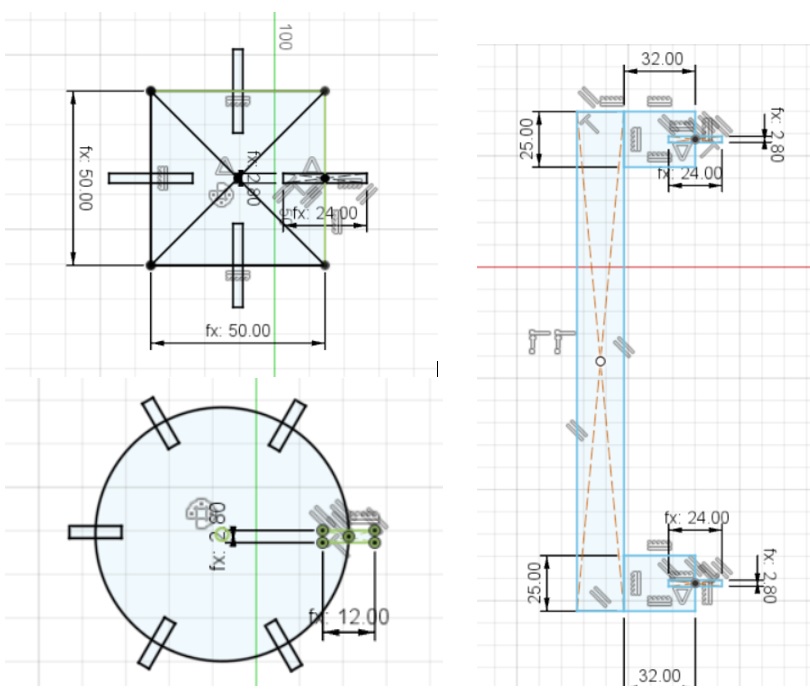
I made sure that the thickness (slot width) and the kerf values are perfect in the design
I press Finish sketch to save the file
The format must be clear by corelDRAW
Right click on sketch save as DXF.
I open the file corelDRAW with a computer connected to the laser cutter machine.
I open the design in coraldraw
Select the design then go to color left click to make the lines in red color
I press hairline bottom
Go to edit – step and repeat to copy – horizontal setting – distance 2 mm – direction left – Apply
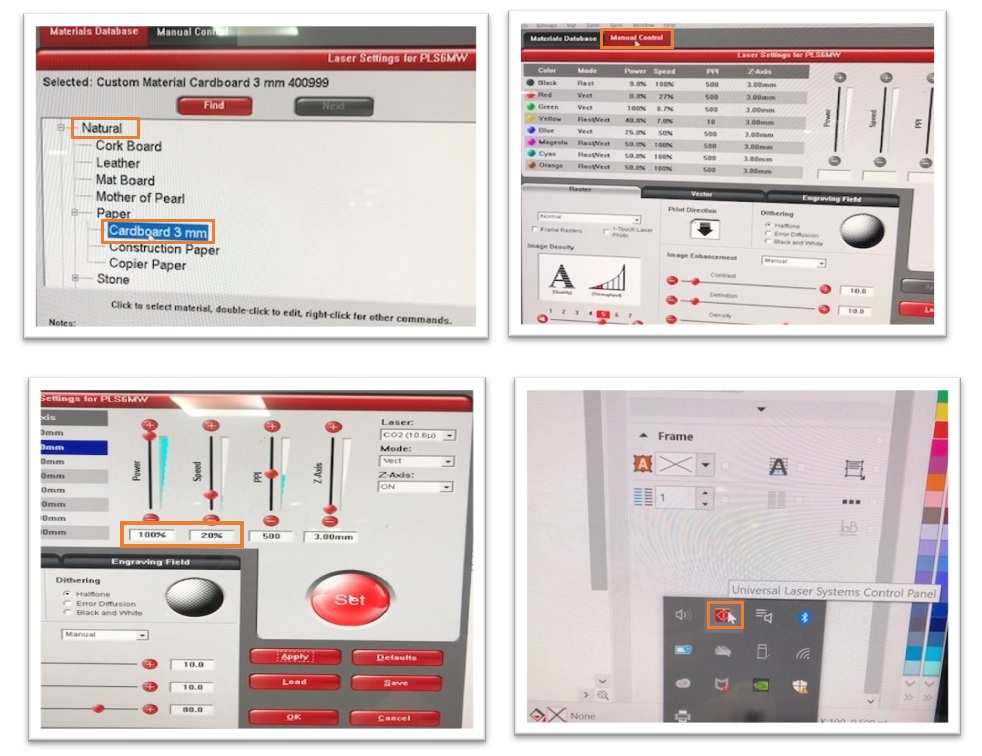
Go to file – print - preference

Materials database – select the material – natural – paper – cardboard 3mm – apply
-
Manual control Red colour for Cutting:
- • Power : 100%
- • Speed: 20%
Then apply
The machine I used was "Universal Laser systems PLS6MW”
Select the x , y and make them 0
Point – start bottom
I Use not expensive and easy to find material which was “Cardboard”.
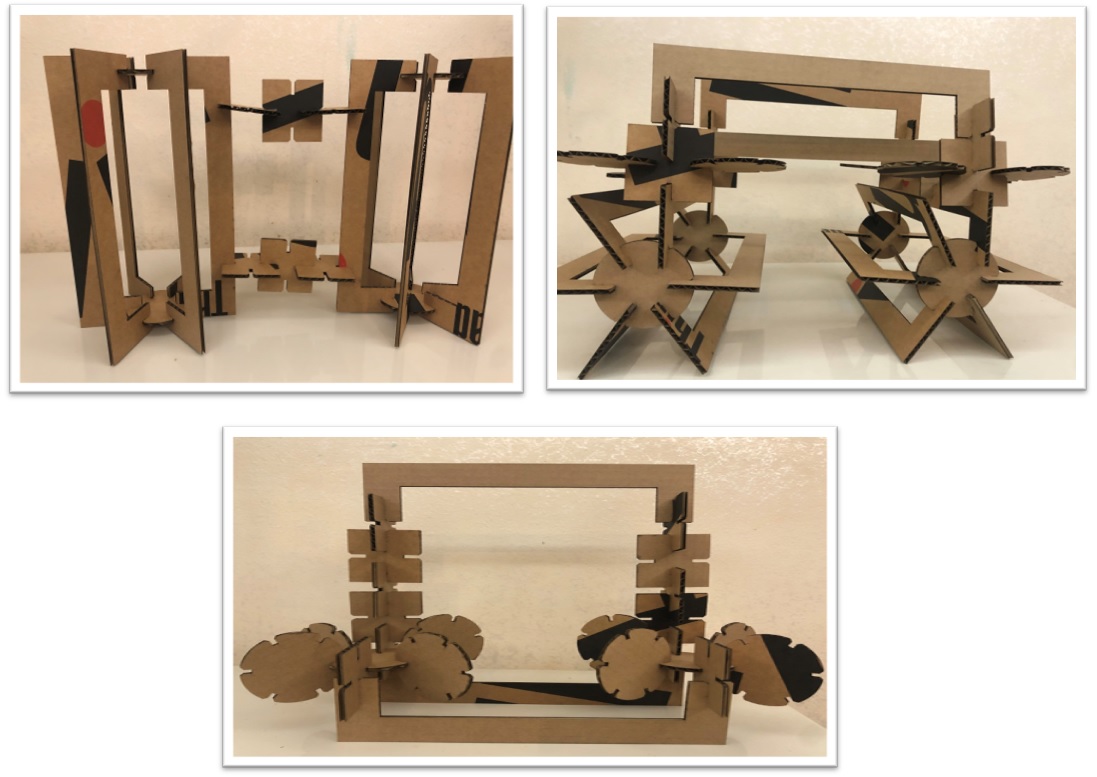
The image below shows my final press fit kit from different sides View:
 _______________________________________________________________________