Week 5
When you prepare a file for the 3D Printer and you'll probably wait from 3 to 9 hours

Table of Contents
I didn't expect to love the previous week so much so I'll start the new one a little sad because I want to work on the PCBs more, it's way too fun than I expected them to be. I'll probably change my mind as time goes by, but for now I don't know if I'll enjoy this week as much as the forth one, let's have a look!
Photogrammetry
Download
Objectives
- Individual assignments: Design and 3D print an object (small, few cm3, limited by printer time) that could not be easily made subtractively 3D scan an object, try to prepare it for printing (and optionally print it)
Design and Print
First attempt
[25th and 26th of February]After working quite a lot on the objects that we had to do as a group assignment we moved forward to the personal assignments, trying to learn our lesson from two weeks ago and optimize our time in the best way possible. Unfortunately, I'm quite bad at learning, so after promising myself that I would do something really simple (so that I wouldn't find myself panicking as in Week 3), I started working on some things that proved themself really hard to do.
Since my mother is a huge Pokemon GO fan and recently she's not doing so well, I wanted to create for her some sort of a Pokeball with a hole inside and a Charmander (taken from Thingiverse) inside. The idea was to paint it at the end, by I didn't even arrive far because once I tried to do the sphere is seemed to work in Fusion but it didn't in Ultimaker Cura.
Problems:
- It didn't work because it was really (like really) huge and I was not able to fix it from Fusion neither from Cura itself;
- Secondly because it didn't see the sphere inside Cura, so I couldn't risk to start printing it like this because it wouldn't be good enough for the weekly assignment.
So I decided that, as soon as the group work would be finished, I would do something simple and start from that - moving then, based upon how much free time I would have, to do eventually something more difficult. I've seen a lot of beautiful things on Thingiverse, including a BB8 that could be made from a lot of different parts, and so on - but I can't really take all the time for myself, so I'll really go with something basilar.
Second Attempt
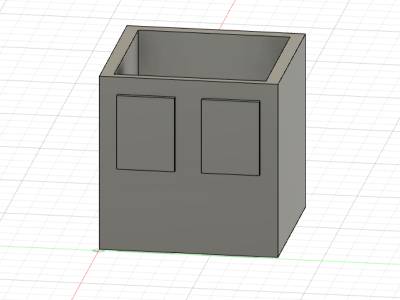
As I said, I decided to put that plan away and try to do something easier. So I decided to do a simple box with a sphere inside, that should be big enough not to come out from the holes that I would do on a wall of the cube. I had a moment when I started looking out for Doctor Who's Tardis and my mind started thinging about how I could do the windows to see on the inside, but I realized that again I was starting to think about things that are bigger than I can do.
I pulled myself together and decided to do a little box, with two "windows" and a sphere inside, the idea was to make something simple without panicking too much about the time left and the time that we have to devide between each other since we work with only one 3D Printer. And again I had to hold myself from trying to do something nerdy, even more useless and possibly with some 16hours long process that could bring all of us to ruin.
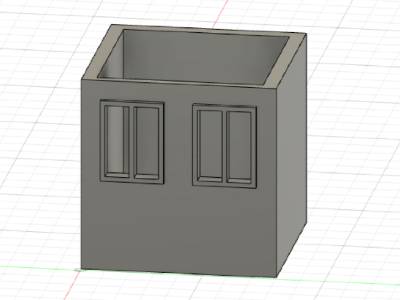
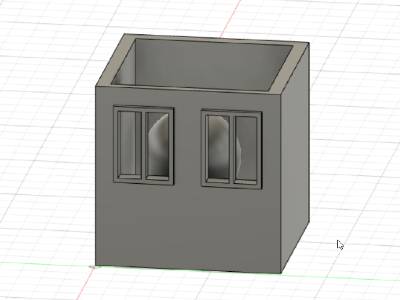
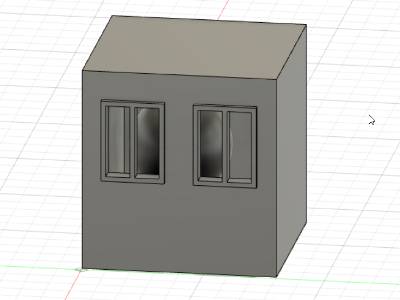
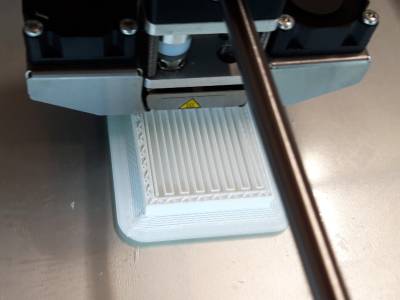
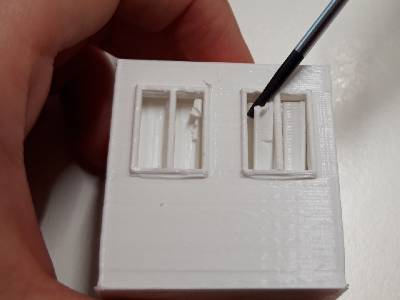
I saved the .stl file and opened it on Ultimaker Cura, setting it with the numbers and choices that we used in our Group Work for all the other objects that we created. They actually told me that my tiny house seems a prison, so I guess I'll have to underline that spheres shouldn't roll over where they want to because they're going to get punished by finishing inside a 3D-Printed-Sphere-Prison. So that being said, I started to prepare everything and the machine began to work.

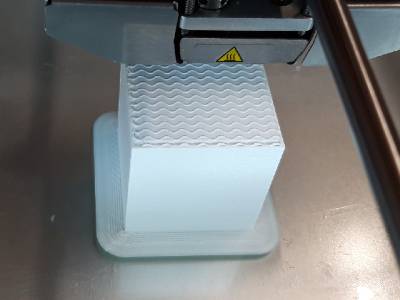
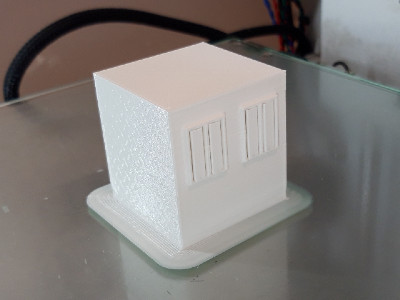
It turned out quite nicely, I had these nice windows of the house. I'm using the past here because my windows had a very short life, since I later realized that I had to remove all these parts manually with a pair of pliers - and a lot of strenght and hate. So while trying to do so I lost the tiny part in the middle of the windows, but now at least they can't tell me that it seems a prison.
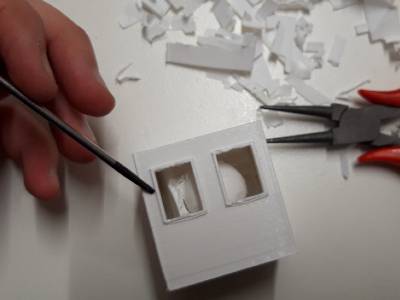
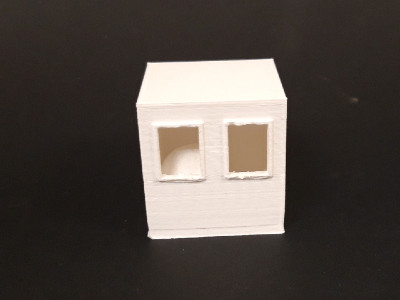
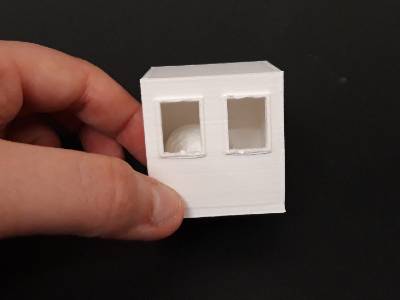
It's no big deal, really - it's elementary, but I really wanted to take it easy for this moment and I tried to do something that wouldn't bring me on the edge of folly by monday. I'm quite happy with the result, it doesn't seem but it took me two hours to get rid of all the material inside the house and at times I had the sensation that I wouldn't be able to get everything out. It took quite the effort, but I already know that I'll try to do more "complex" things as time goes by, with my Update section down below!
... I'll have my Pokeball, one day.
Photogrammetry
Several Attempts
[27th of February to 2d of March]After trying to do the tests (both group ones and individual ones) I moved on to photogrammetry, with one of the few objects that I have in my room here in the dormitory in Siena. I was the only one between my collegues that has never done photogrammetry before and they have been very kind trying to explain to me again some things that I might have missed from our Instructor Flavio's Lessons. Having said that, I had some problems with this part of the assignment because I might have done some errors (a lot of them) so most of the time I wasted some hours trying to work on things that in the end proved wrong from the basis. I trying starting with a little puppet, then moving to a little piece of chess made from 3D printing, then I moved to an onion (a corridor voice says that food turns out better) and I even tried again with some objects that I had in my room. None of these came out nicely, sadly - so I had to really try a lot.

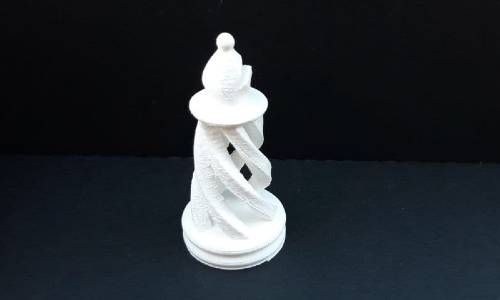
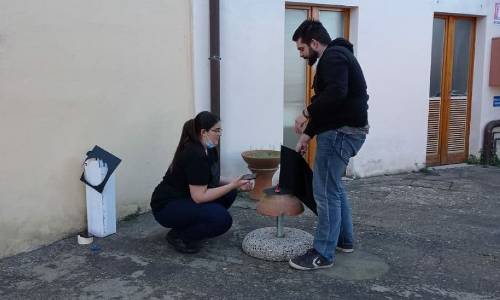
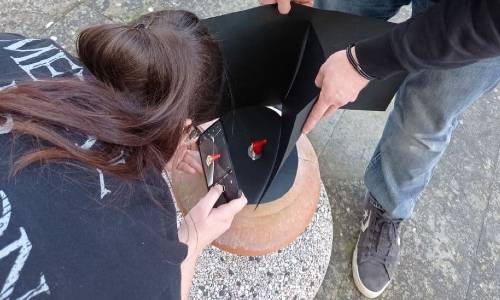
Here you can also admire me and my collegue Alberto while we're trying to do a basic, primitive and totally useless photographic set - which, as you might have understood already, was a complete failure for both of us. We tryied to work during daylight, it was also a cloudy day so we thought that it could work and turn out at the first attempt, but it didn't go that way. The problem with my first object I think was related mostly to the red hat and the fact that the material reflected light too much, so it didn't actually turned out as I wanted - even when I tried to do the photos indoors, taking care of the light that it reflected. It didn't work, with two attempts, so I moved to anothe object.
Then I moved to the little white object that you see up in the photo, at that didn't come out at all even if I tried to do a lot of photos, but in this particular case I do think that I'm to blame as regarding the light. It was already nearly sunset, and the light was terrible, and since it was already Monday night I decided to go home - relax, study a bit, and then start all over again.
Final Result
[2d of March]Moving on, in the week-end I tried to study a bit about Photogrammetry. I've seen some videos that I find useful to understand better the process and to make things with more attention, even if I don't have a photographic set as those in these tutorial. You might actually find them useful and so trying cheking them out: ProductionCrate , Prusa 3D and (later on)I tried to follow this tutorial about another program that deals with photogrammetry, which is Meshroom Tutorial Guide. We use Metashape and Meshmixer here in the laboratory, we started using these two and my collegues as well used them when they did Photogrammetry last year with a University' Course. I tried using both of these with all the attempts that I told you before, and I also used them on the attempts I did on Tuesday morning with the onion, the objects in my home, and so on. I also used them for the final attempt, which you will see shortly, but I wanted to also try Meshroom. It didn't last long, but it seems a beautiful program and it has some nice functions that I'm not entirely sure Metashape has at all (I'll check it).
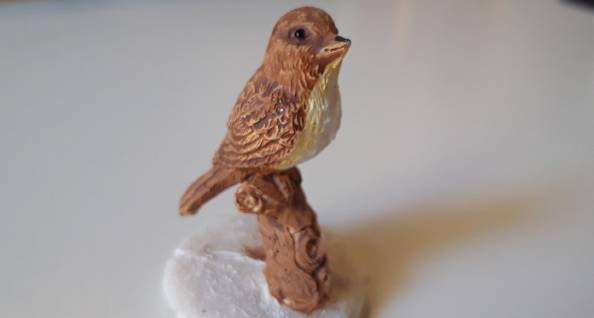
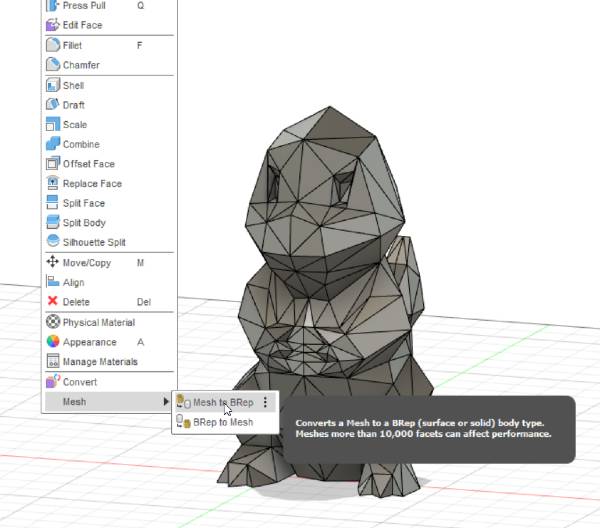
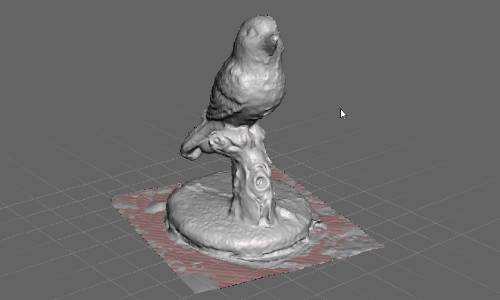
So, I moved to this little object, which I went out to buy for this purpose because I was quite angry that none of the previous objects worked. I really tried hard to understand what I did wrong and how to fix it, I tried making the photos with much more care and having attention to the light more than before; I also tried some times to work on Metashape thinking that maybe the project had a way to work but it didn't; and I also tryind looking at some material online. I decided anyway to take another object into consideration, this tiny little bird, which seems quite opaque and I thought it could work better than most things. I did one hundred thirty photos of this, from different angles, trying to take also the details of the wings and the wooden brench on which it sits.


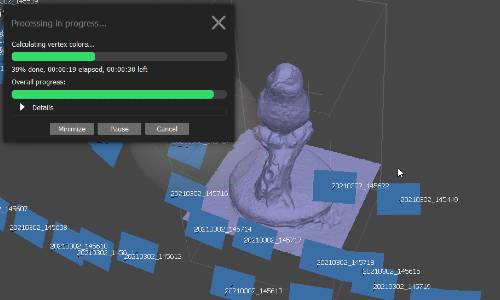
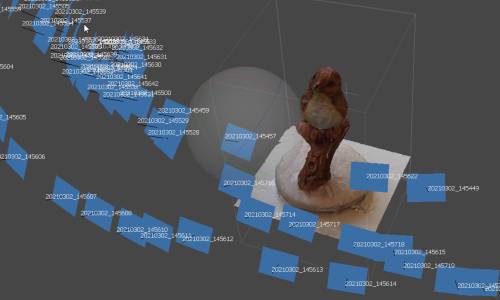
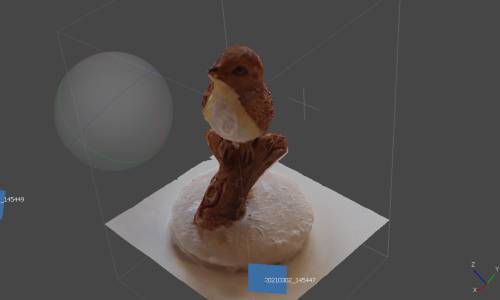
With my extreme surprise, it started working. I noticed it from the beginning, when all the dots had already a precise shape and it was similar to the object - then I started removing the dots that shouldn't be there. It was a quite long process, there were a lot of photos and the program (or my computer) was not particularly fast - I have to say that it gives you a lot of satisfaction to see everything take shape as you go on through the processes, specially when you add the texture. Seeing something go from dots to a concrete shape, and from this one to the final object (that you see in the last photo), is something really beautiful - I wouldn't think so.
.jpg)
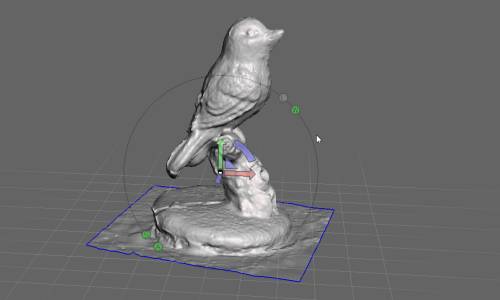
In these photos you see the passage from Metashape to Meshmixer, where the first photo is still the first program, while the other three are the latter. In meshmixer I launched my .stl file, after exporting the model of the bird, and I had to do some steps to prepare it for a hypotetical printing. You have to follow some steps here, first of all aligning the object to the plane, then cutting it so that it has a plane surface on the bottom, and you also might want to sculpt it to remove edgy points. I did it, not too much because I liked the shape anyway - but it had some pointy parts on the head that I didn't want at all.
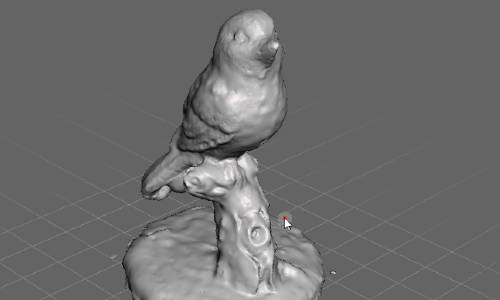
Final result: it worked! I don't think it's perfect, not even close, but I'm quite happy with how this turned out - even because I really had to do a lot of tries and seing something work in the end brought a glimp of joy. It has been a ride, I wanted to do more with the 3D Printer in the "spare time" or even try something new, but in the end I didn't have much time because the photogrammetry took a lot of energy and time, but I'm happy with how this turned out. I'm trying to keep up the weeks with those other students that have more experience than me and even if I do really basic things I'm keeping up, so this is something really nice. I hope I'll be able to continue doing so.
Download
Tiny House