Week 2
When my program refuses to work or is not clear enough.

Table of Contents
Method of Work: A quick hint of how I'll try to document my work in the weeks to come: I'll write the starting day of each week below in the Objectives section, and as I go on and divide my documentation into some parts I'll write the days of work near each one of them (orientatively). In this way I'll be able to explain better what I did in a certain day and how I tried to get better the next one, going step by step until the end of the week. Meanwhile, when I'll look back to the previous weeks I'll write an Update Section with all the things that maybe I change later in the weeks or that I learn as I go.Some 2D
And 3D as Well!
Working for my Project
Some things to remember
Updates
Objectives
- Model a possible final project, compress your images and videos, and post it on your class page
Some 2D work!
[Until the 8th of February]I had the opportunity to use some 2D programs before, even though it has always been something that I followed personally in my free time and never learned properly in a course or during the University (as there are no courses about this in my Department). I used Photoshop, or most likely Pixlr, sometimes to edit digital photos for my Characters in Dungeons and Dragons, so you'll understand that it's no big deal. I rarely did something more than changing the blonde color of my character's hair to brown, with rather scarse results (I won't show you, I still have a dignity).
So I convinced myself in trying something "new", like Inkscape and Illustrator: the first one is new to me, the second one was a program that I had for quite some time in my computer and tried previous times to use it to do something nice that never came out. The reason why I installed Illustrator in the past is the fact that I quite enjoy flat landscapes, but I was never really able to create them as those that I see online. I thought: "It's time to give it a real try, since I want to learn as much as I can", so I started working upon Illustrator a little to take a bit of confidence with the tools that it offers.
[Under construction]
And now some 3D!
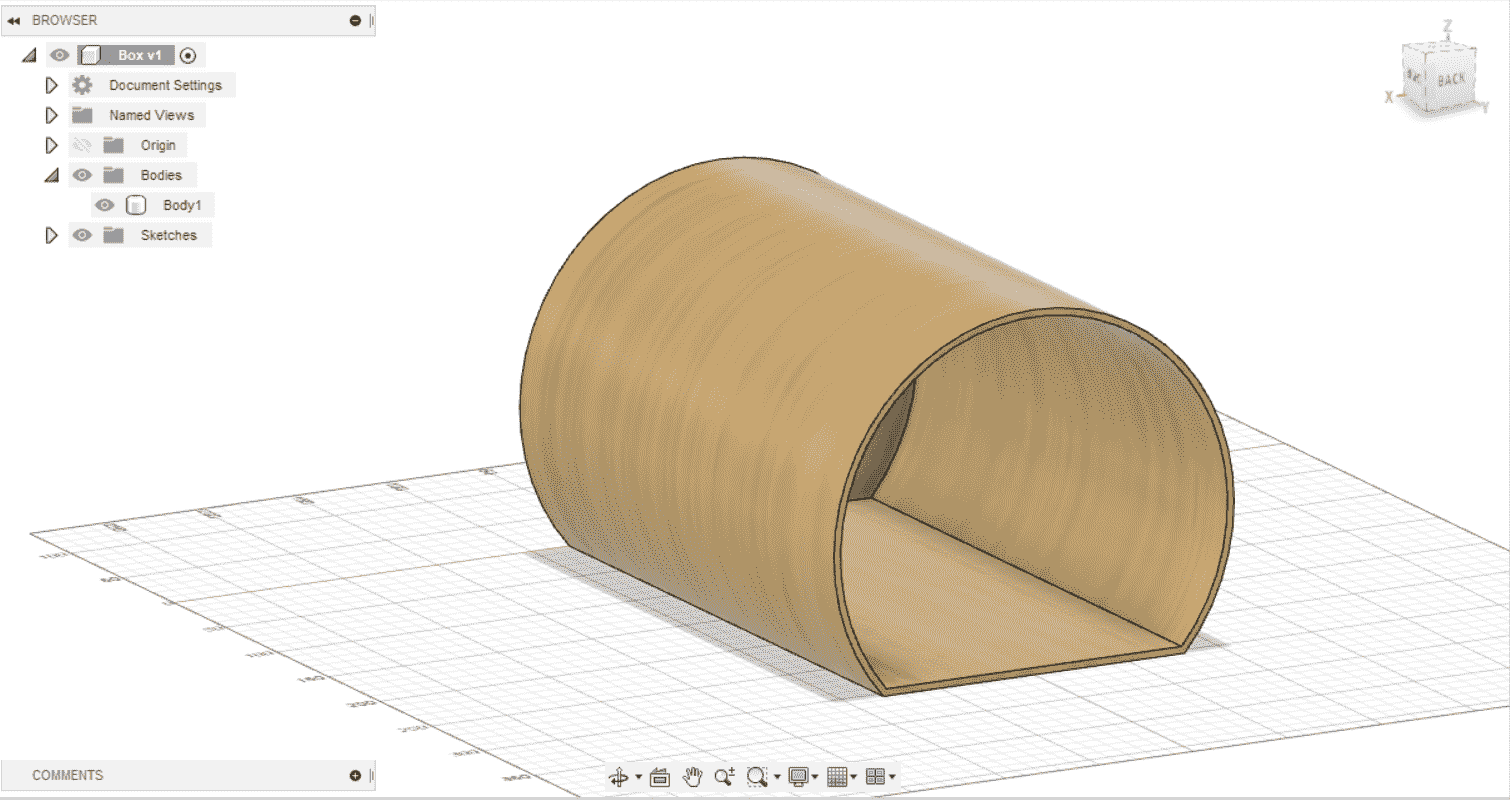
My face when I opened Fusion 360 for the first time.
... And the other times as well!
Tutorial, Hint and Choices
[Untill the 8th of February]In case you're wondering, Aye - I do have a Lord of the Rings reaction for everything, I'll show you going on. Having said that, I decided to start with Fusion 360 for my voyaje in the 3D experience: I followed a two hour lesson of Antonio from Open Dot Milano and I also follower our lesson in Santa Chiara Lab with Simone and Flavio about OnShape. From the two, I understood that one of the main advantages of the second one is the fact that it works on the Browser so you don't really have to work on the computer. Despite this, I decided to learn more about the first one.
One of the things that I enjoyed the most about Fusion 360 is the internal tutorial section that is available at any time about every kind of tool that you select, which I find really useful: it helps you to learn first hand without even leaving the program to go on youtube or online tutorial unless you really want something specific. So, I really do recommend trying out Fusion if you're new (as I am), because for me these hints and guides at the right side of the project help me to learn something while experimenting without further distractions.
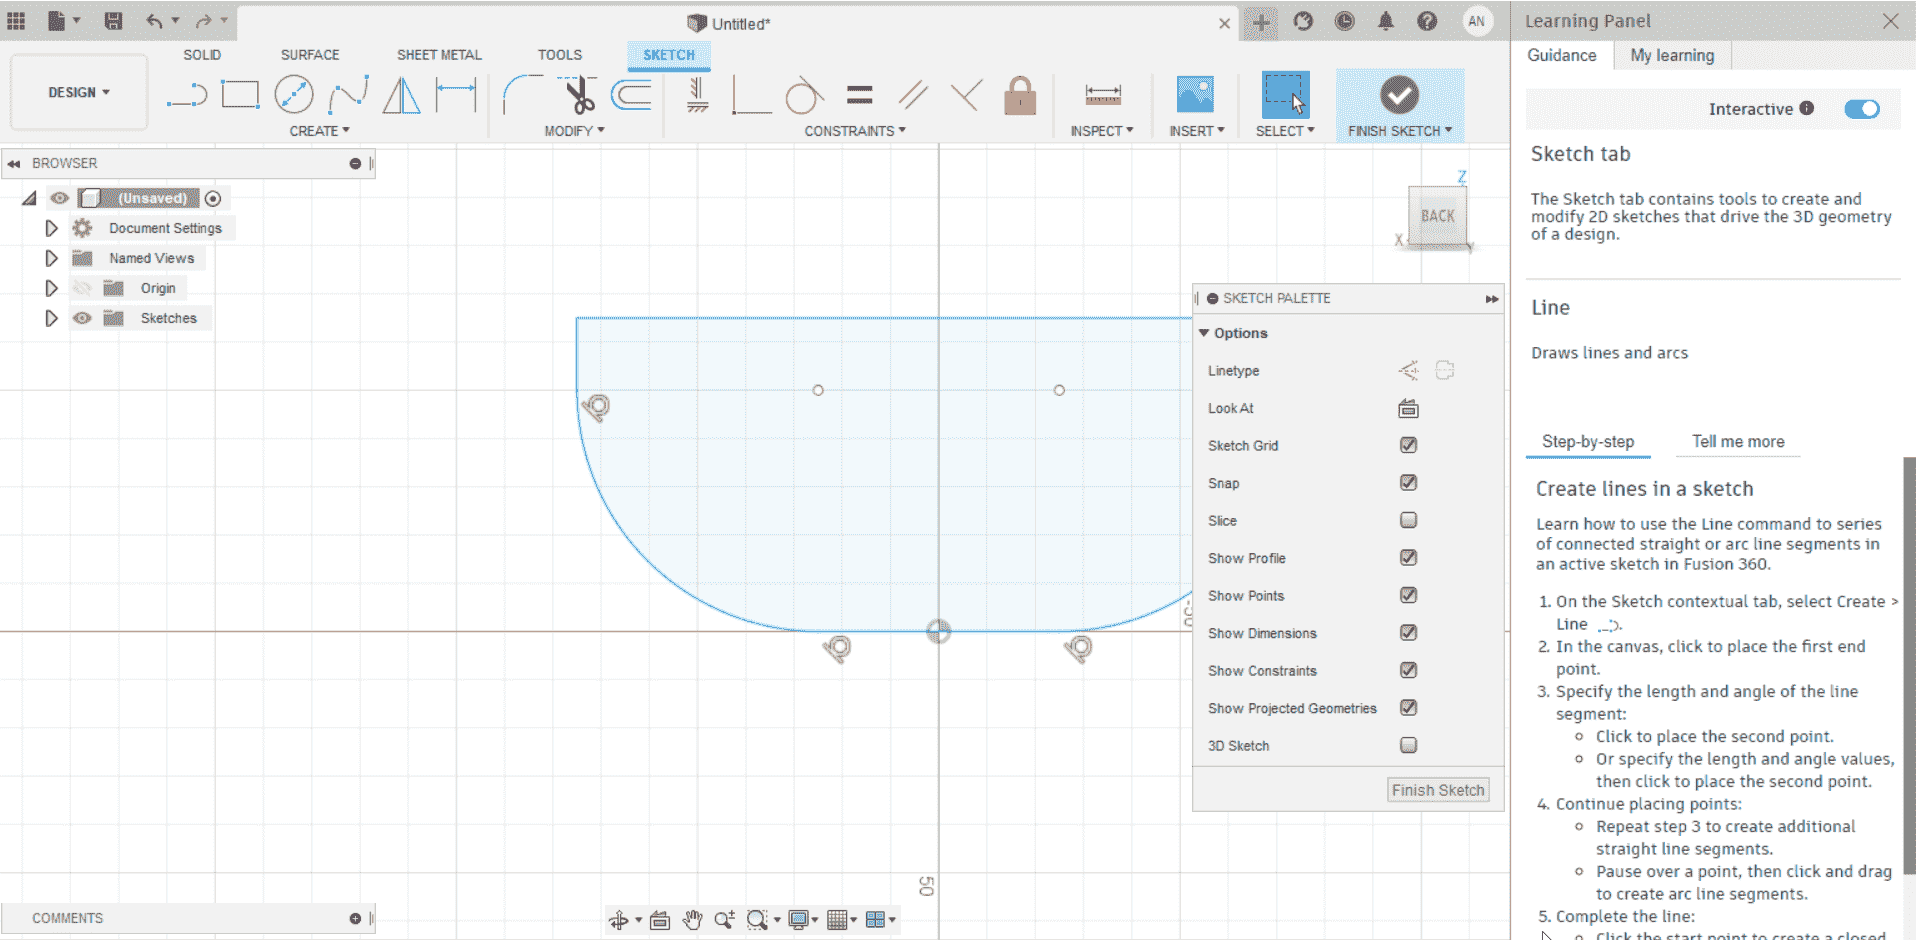
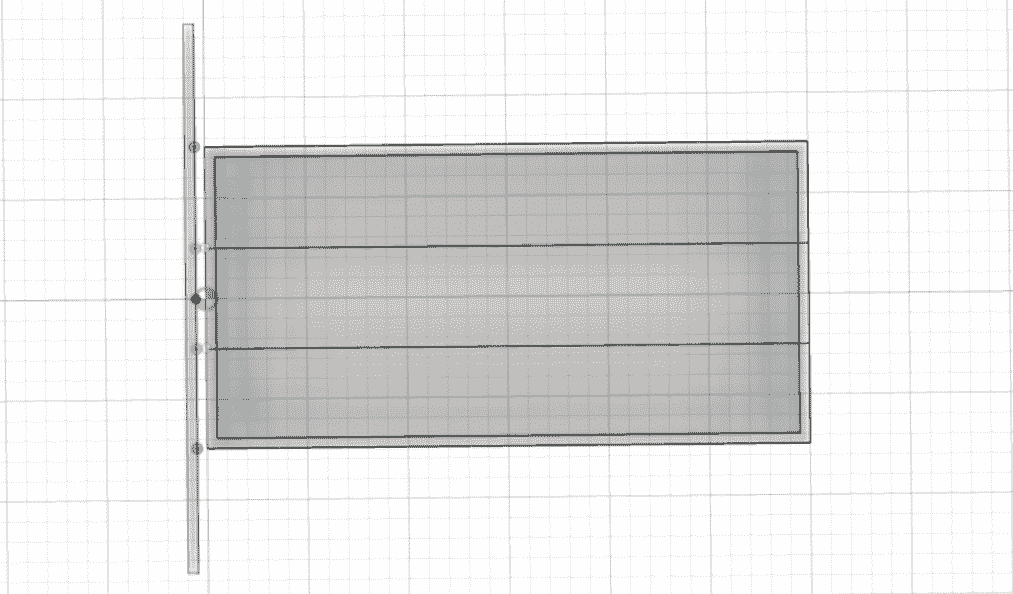
As you can see, if you right click on the image and open it in another window, you find on the right a really useful "Learning Panel", you can open and close it whenever you want. It helped me to understand why I could make a 3D figure from my Sketch, the reason is that there was a tiny little free space that was not connected with a line - when I did so, the figure turned Blue, so that was the moment I realized that I have to create a blue figure to make it work.
I tried to follow some online Tutorials, but mostly the ones that Fusion offers on the official site, and some from youtube, in particular Arnold Rowntree's Tutorials for Beginners. I find myself confident with the Official Autodesk Tutorials because, as I said in my previous week regarding sketching my Final Project, I already had occasion to descover SketchBook so I really enjoy the interface that this program has and that Fusion offers as well. I find it particularly easy to follow and intuitive enough to try on your own, which is something that (lazy as I am) tend to do a lot.
Working for my Project
[8th of February]First of all, this was the potential drawing that I did last week for the project:
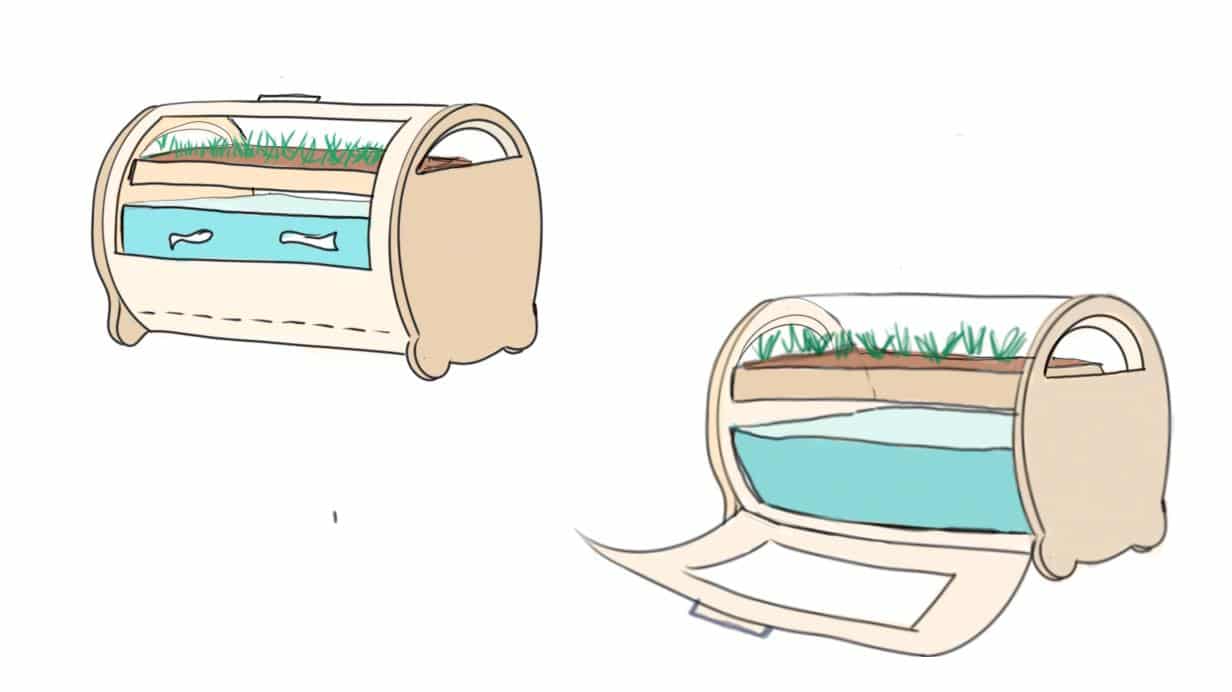
I started to "work" on Fusion with some basic sketches, like some rectangular shapes that I tried to extrude, and at the beginning I didn't really do much more. Then I thought about how my project could take shape, process that I don't really find intuitive when coming to 3D, and I decided to start from my first and important component: the fish tank!
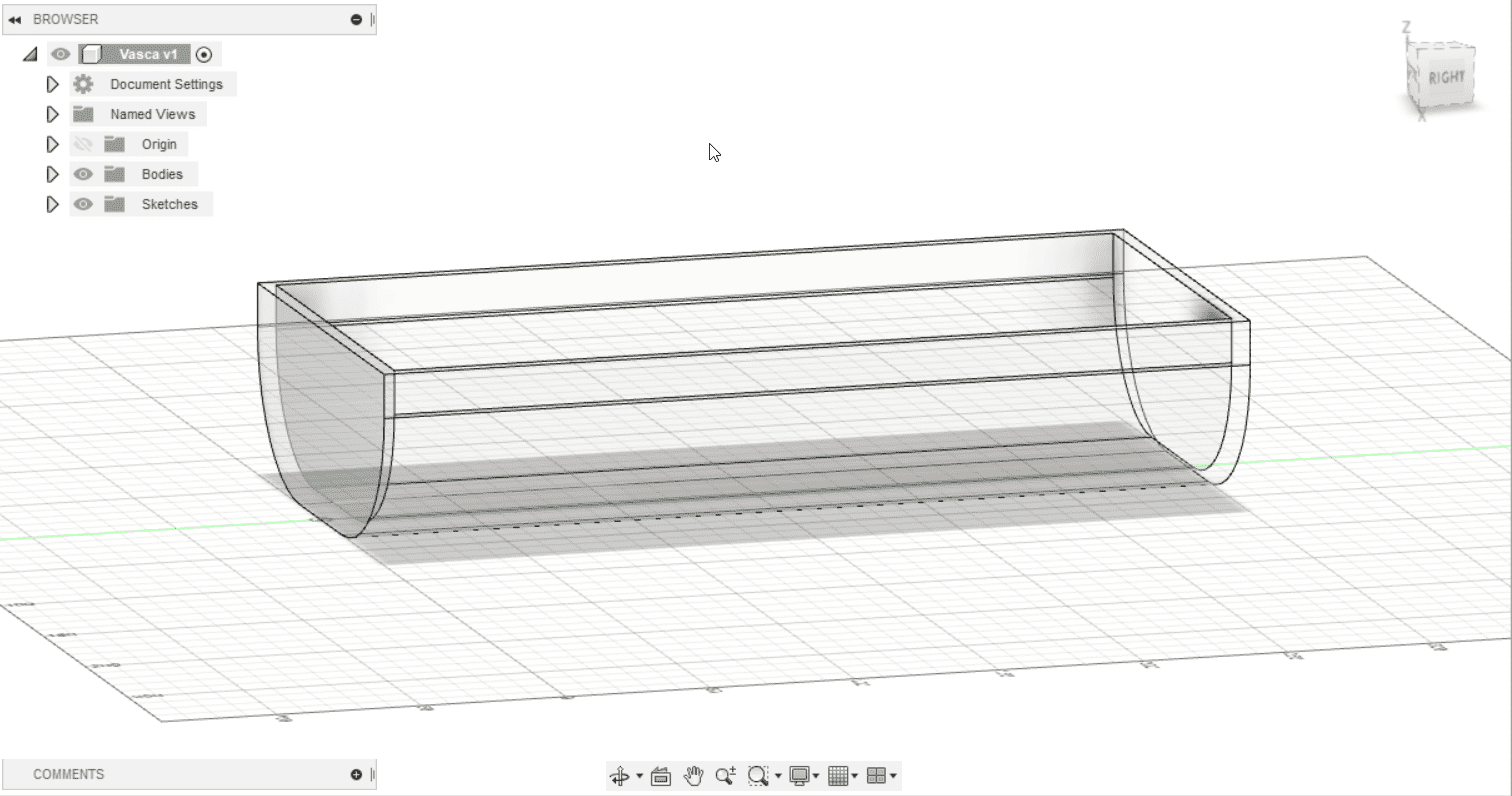
Then I tried to create the wooden box that will contain everything, I managed to create something but I still have no clue on how to insert one into the other. [ Now an afternoon coffee Break]
I'm back again. Since I wasn't able to understand how to insert an object into another one, I asked my Instructor Simone how to do it and explaining to him how I tried to do it. I've spent an entire day just to do the two objects that you've seen before, which is not much but it's all that I've been able to achieve so far. He explained to me how Fusion works and some things that I had to modify in order to work in a cleaner and simplier way, organizing my components accordingly.
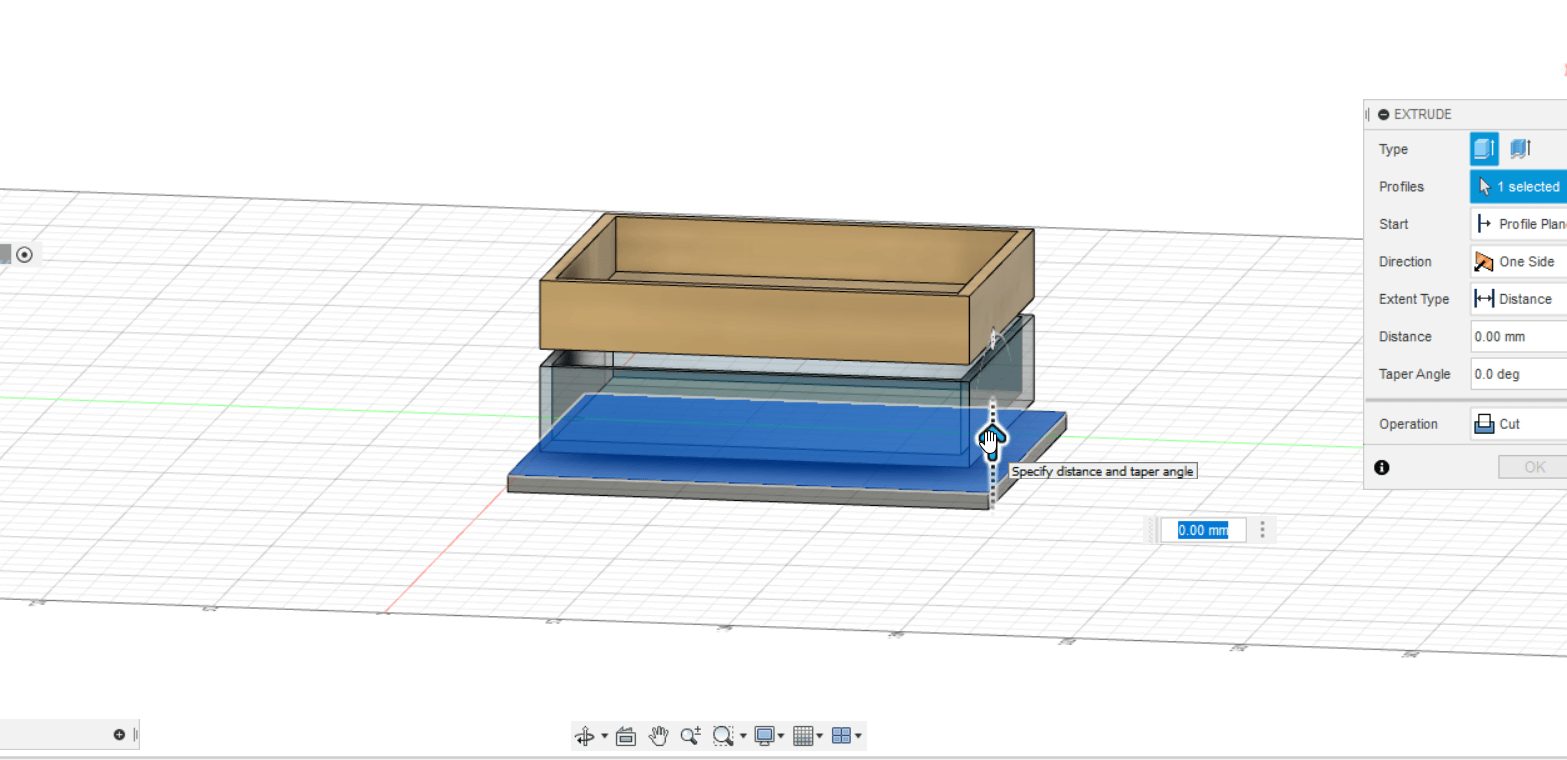
The problem was that I tried to create the external shell starting from the XY plane but I needed some spaces between the "fish tank" in glass and the shell (the box). Simone explained to me the "Offset Plane" function (Construct - Offset Plane - Decide the distance and Create), which allows me to create a new plane and decide at which distance I want it from a certain plane. It blew my mind because I've been trying to do this for the past eight (damn) hours, but at least I will remember this.
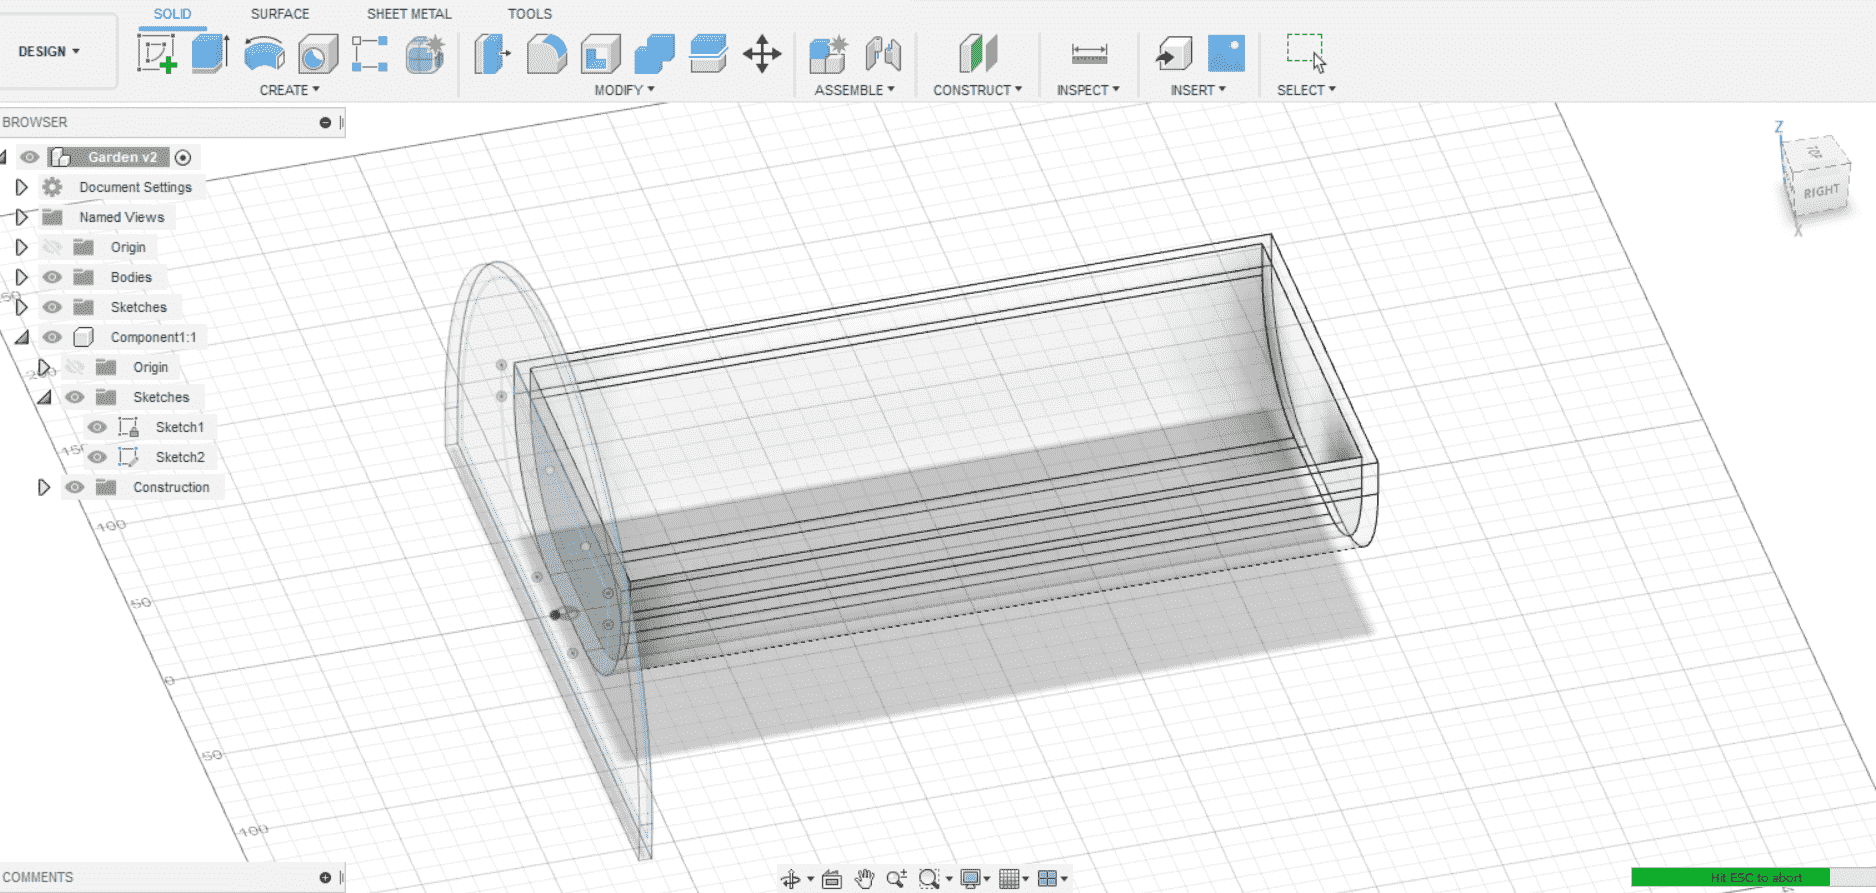
So I created this new plane, gave it an orientative shape (remember that I wanted to do a spherical box/shell?) and then the next step was to extrude: it had to create an empty shell so I needed to create something like an external armour which was empty on the inside, allowing the fish tank to stay inside.
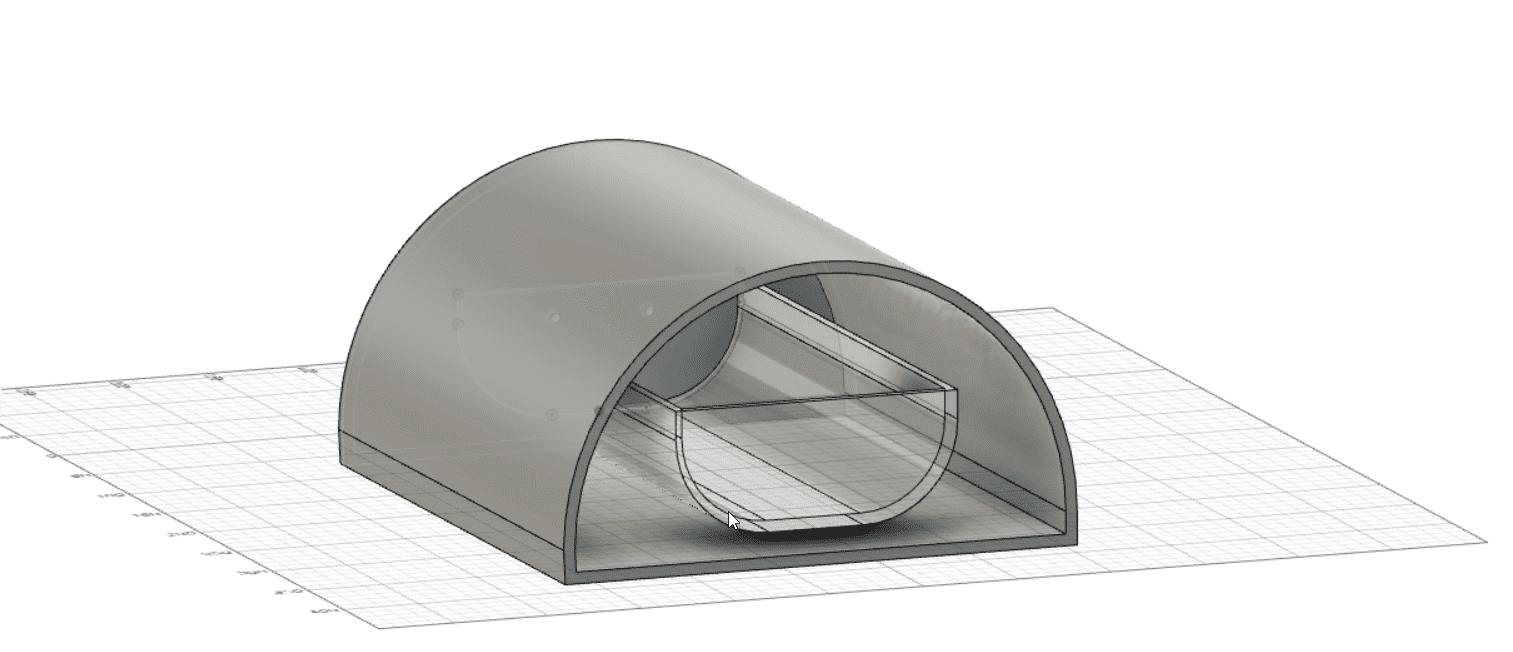
As you can see, I managed to understand how to extrude something that is empty inside: he told me to create a kind of wall with a little bit of thickness, from that wall I can extrude an empty shell with will go on until the end of the object inside. The other problem was the fact that I had to create another wall to close it, so we added the same amount of mm on this side to close the object.
I also learned that doing circular wood shapes is particularly difficult because you have to bend the wood (which has to be of a very good quality) and start doing so in time. What I'll try to do in this time that remains is to imagine a different shape of my project, in order to use the wood material in an easier way.
Trying a new shape of my Final Project
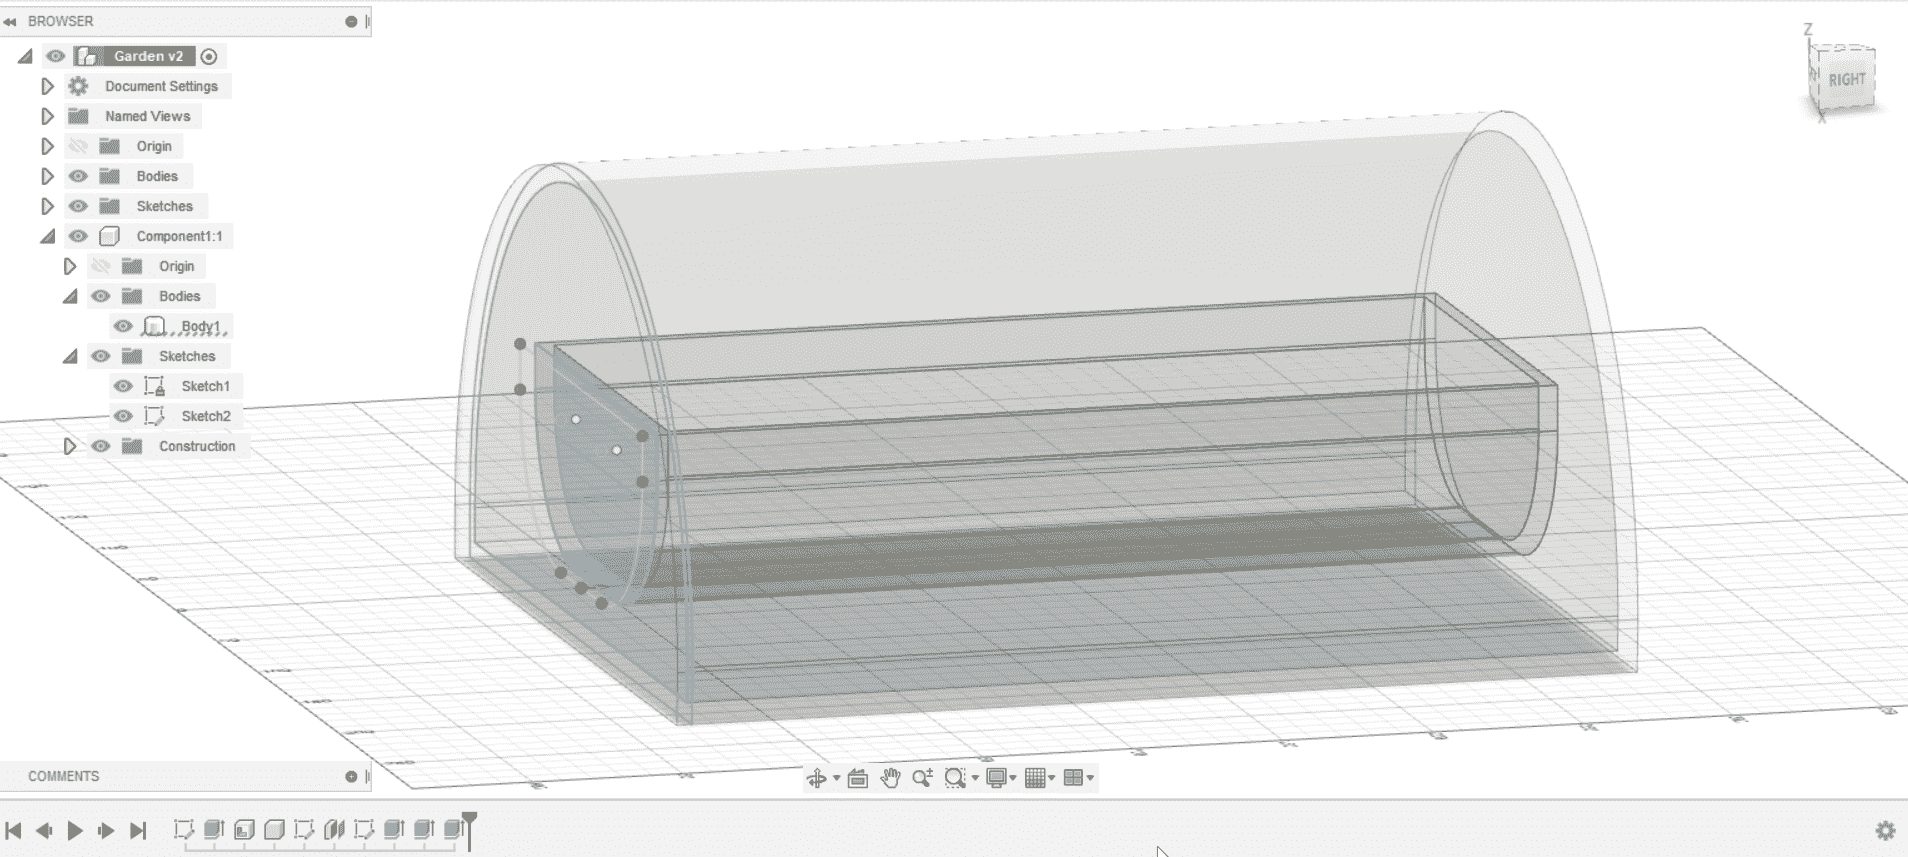
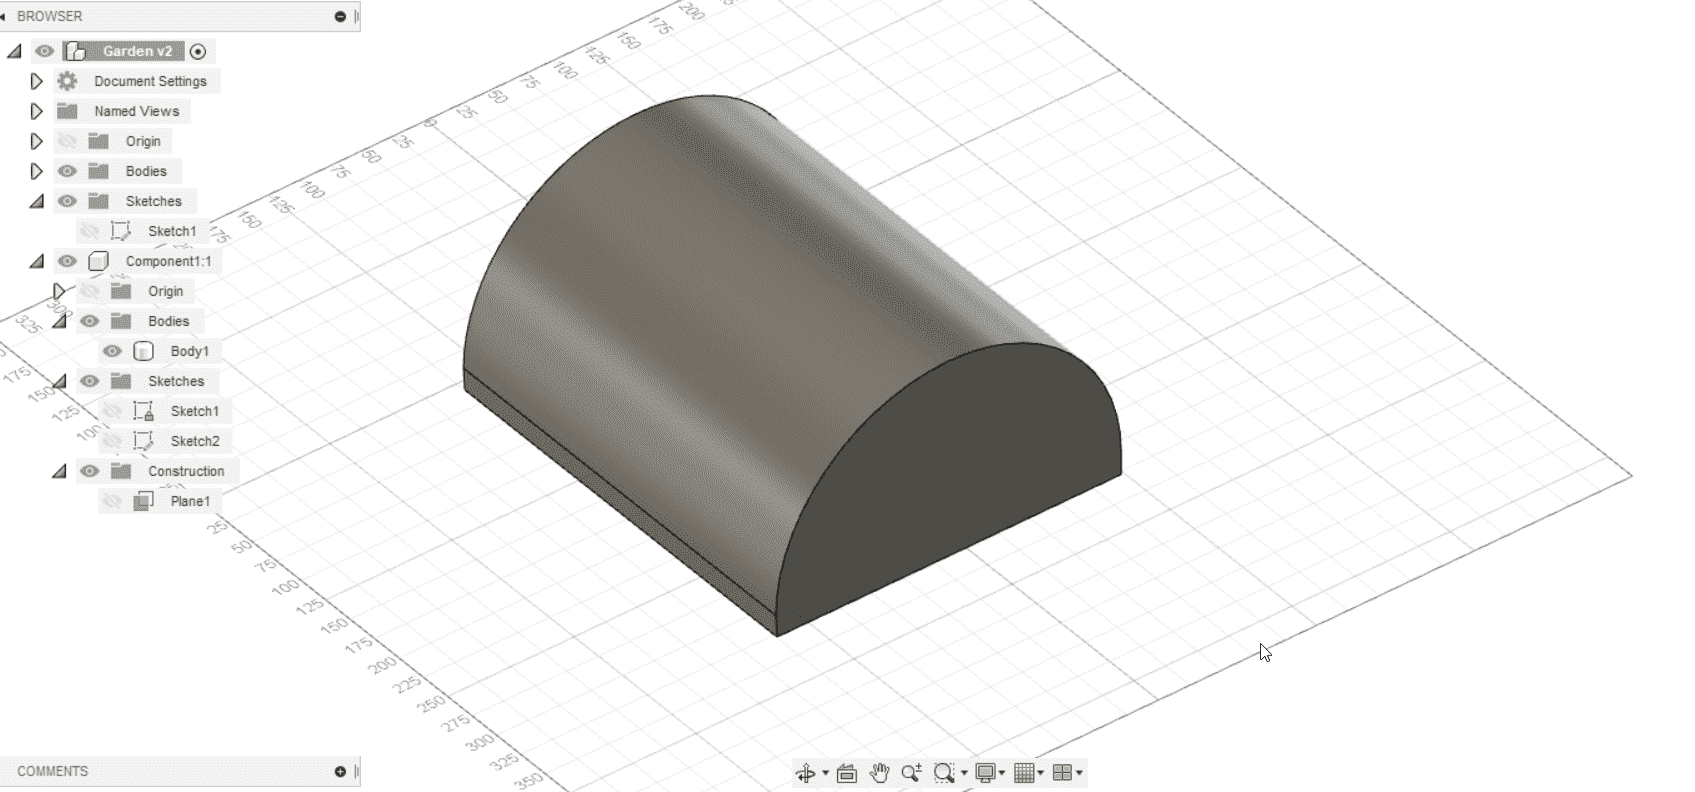
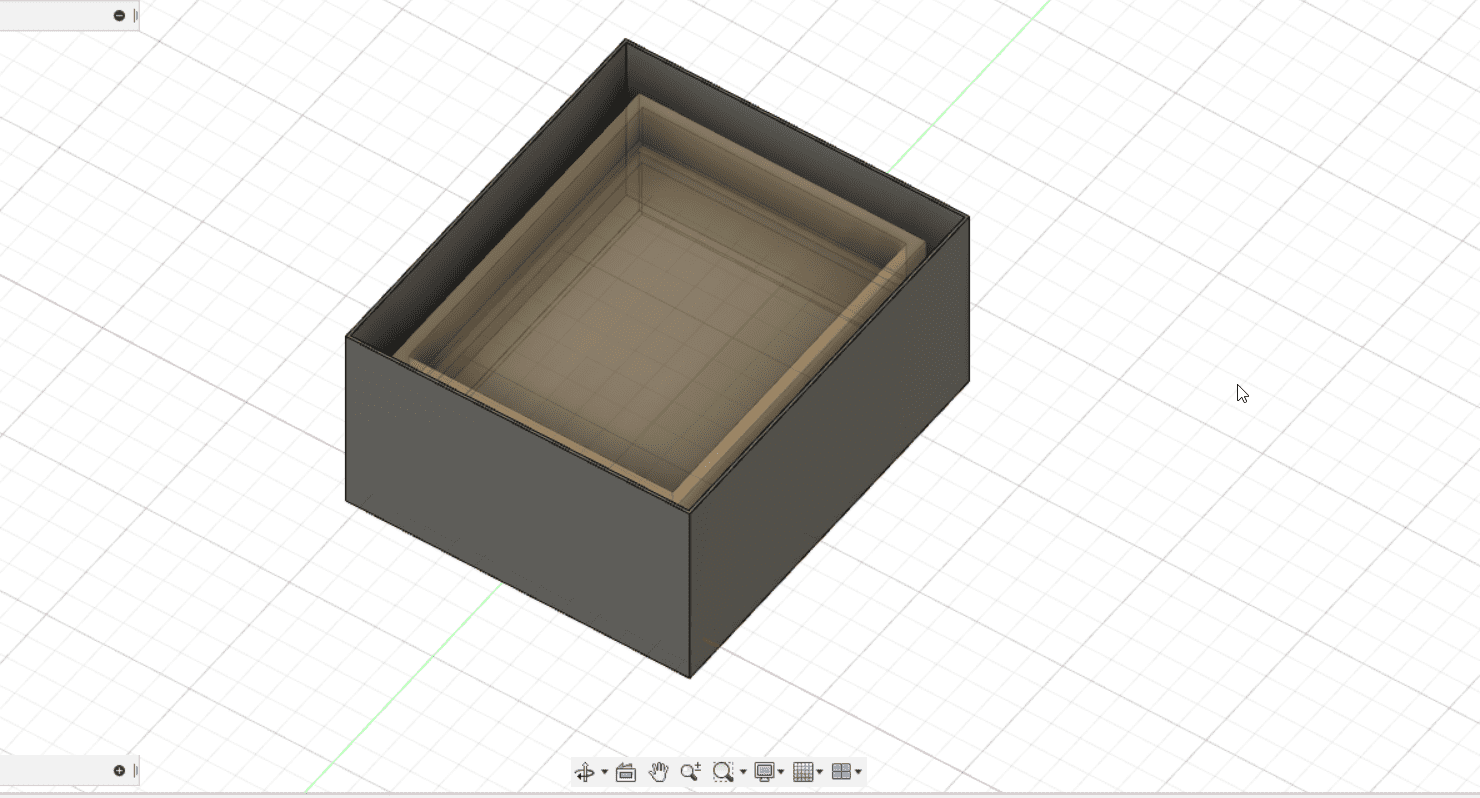
[9th of February]I tried to model then my final project in a different way, which may be easier to create - it could have the form of a house, with a rectangular box and a triangle on the top to close it. I started all over again from zero, trying first of all to organize my work differently thanks to the indications of my Instructor.

I started from the glass tank and then I moved on directly to the one that should hold terrain and plants. This one should stay on the top, and I still have to figure out where and how should the pipes go to bring the water from the fish tank to the plants and viceversa.
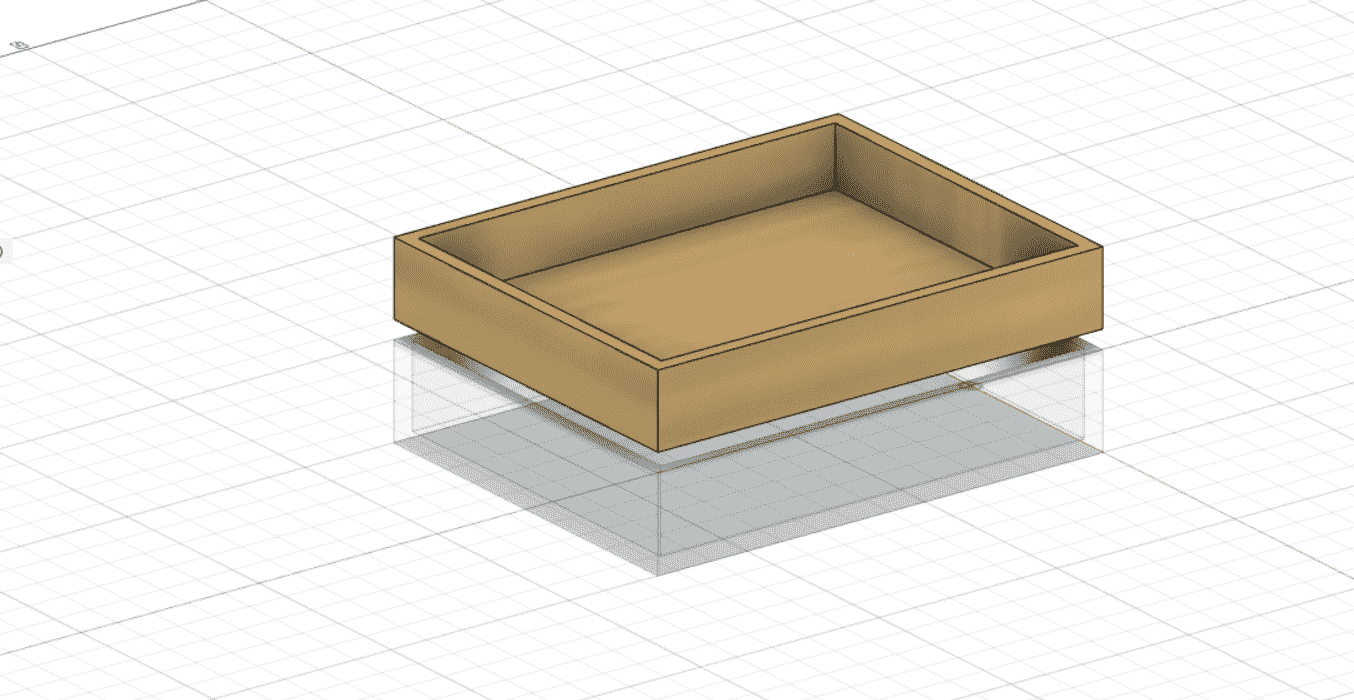
So I created a box on the top, with a little bit of distance, and I shelled it. I then applied the Wood appearence to have an idea of the visuals and because I really like the fact that you can apply the materials.
Then I created a base and I tried to extrude it, going up as if it was a box. This was a way to replicate the things that Simone explained to me yesterday so I tried to understand passage by passage what he has done and how to do it on my own. Then we did a lesson about some things that are important to know about Fusion and I also followed some other Autodesk Tutorials in trying to familiarize better with the program.
Some new things to remember from the Lesson with Simone, our Instructor:
- One important thing is the History Bar in Fusion 360, which can be Activated/Disactivated based on what you are doing. You usually want to have it always activated, but there are some situations when you might want to turn it off - for example, when you are sculpting or modelling, or when you import an .stl from another source. Something about this is also available on the Autodesk site, at the following Tutorial.
- I learned something more about what a Mesh is and that I cannot work upon it because it's not a solid/body. In fact, if you try to cut it, it actually tells you that "No body is found to cut" - and you have to go Right Click on the Mesh Component to select Mesh to MRep in order to work upon it as a solid. Here you can also choose how many faces you want to reduce from the original mesh, you might loose a bit of quality but you'll then be able to work on it. One important thing is that Mesh to MRep won't even show up if you have you History activated, so it's better to unable it before doing all of this.
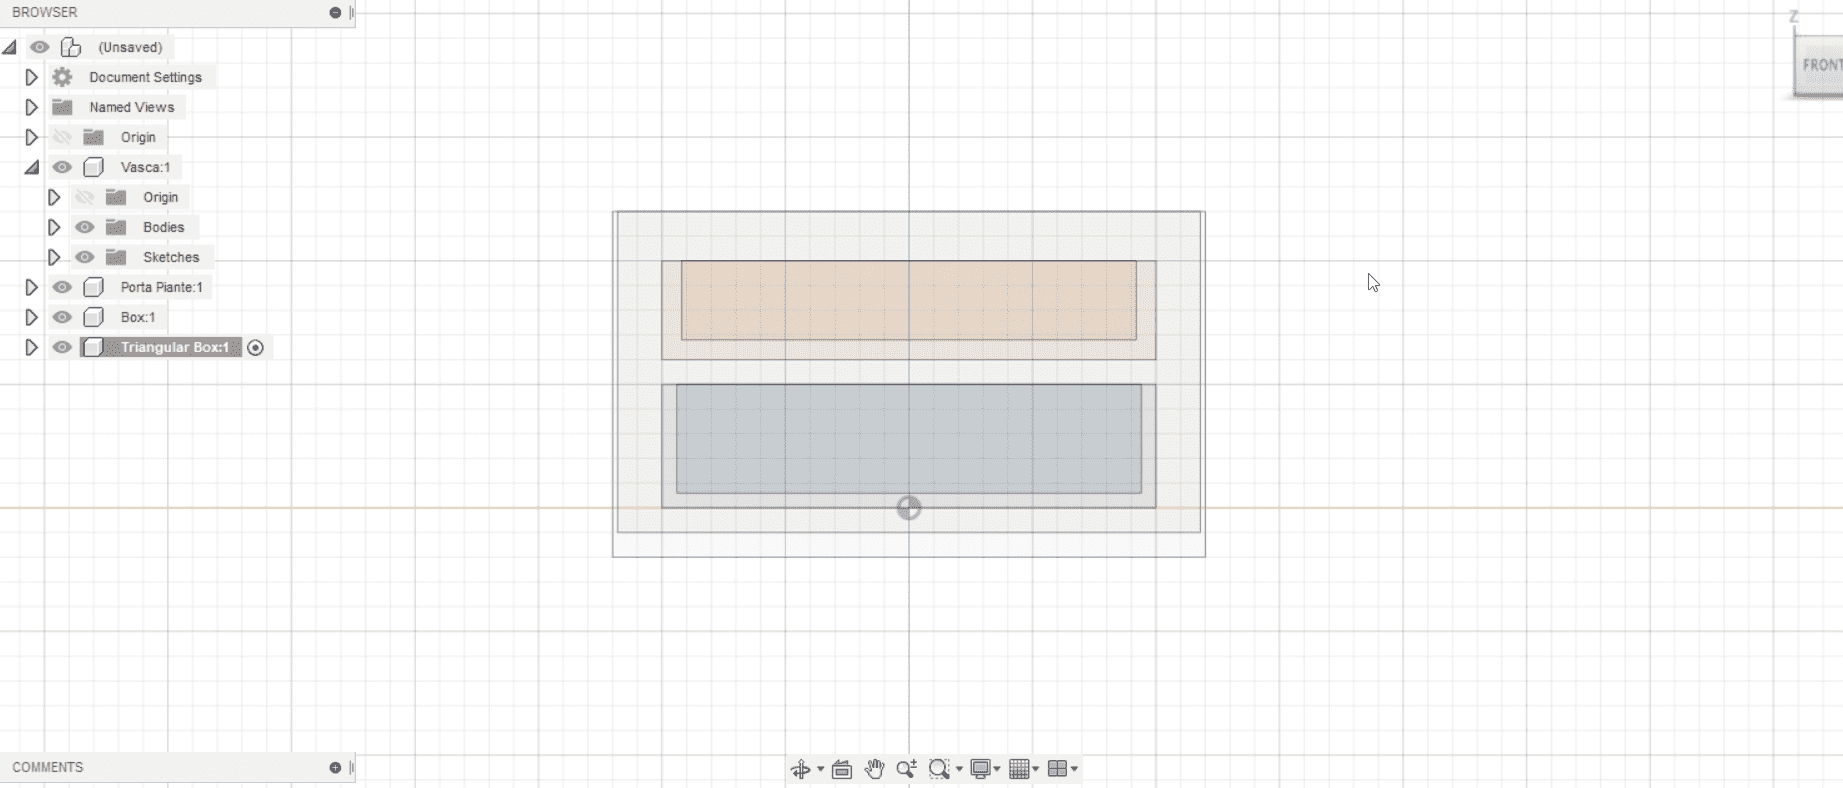
- The Browser Feature we have some important sections: Document Settings (in which I might want to change or not the measurements displayed), Named Views (where you can find the different planes' views) and Origin (which is usually hidden by default but you might activate it, finding the 0,0,0 point).
Fusion thinks in Components and Bodies, the first one is a big "feature" which might contain one or more bodied, and these are solid objects. You cannot create movement between bodies, but you can create it between components (although you can transform a body into a component by right clicking on it and selecting "Create Components from Bodies"). Every component has its personal origin which may or may not be in common with the Main one. When you start doing more components, the icon of the Main Root changes. A find it really useful that each component has its own colour, and thanks to this it's easier to find the specific component changes along in the total History of the project.
Also, Fusion acts only on the Bodies that are visible, so on those levels that have the "eye" activated (it's the same icon as in Illustrator or Photoshop). So if you make a level invisible by mistake it will not be affected by the changes you do with the other levels.
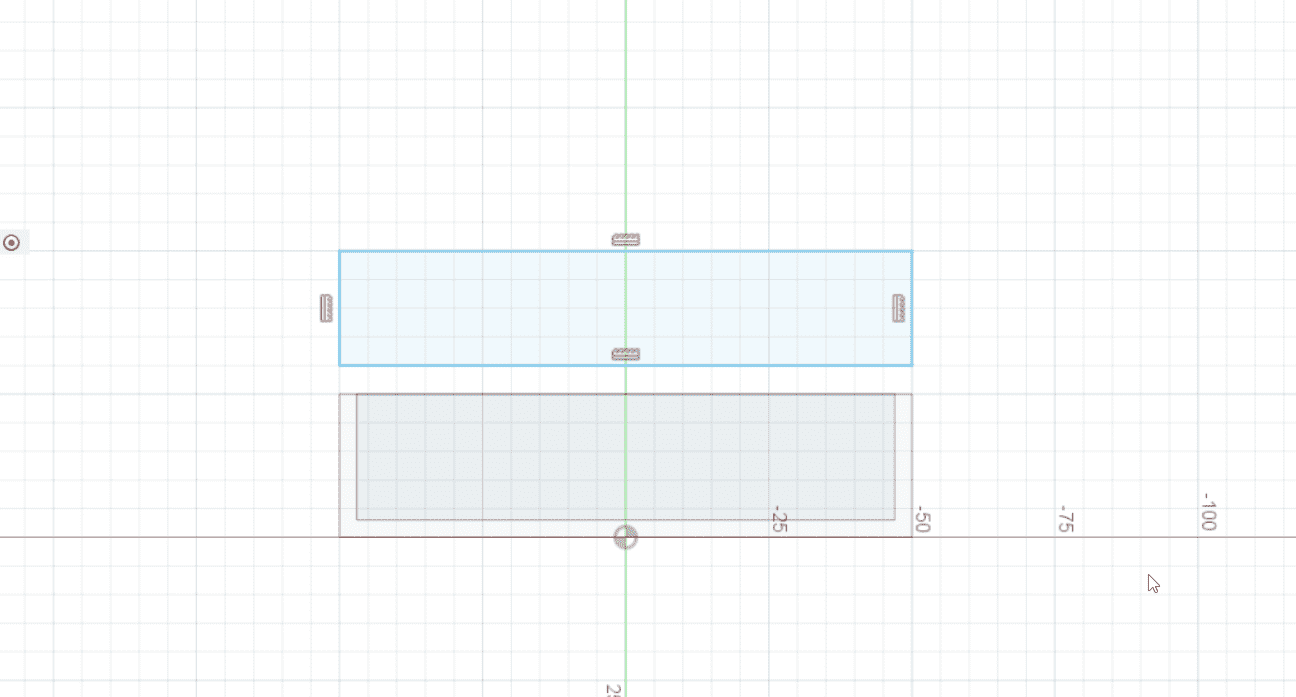
- It is a good practice to draw sketches that don't have tons of degrees of freedom, and you can control and limit these degrees by using the Costraints. I also learned about the importance of using both costraints and parametric measurements in order to work better and make it easier to modify things later on in the process of creation.
- We also talked briefly about the two most commonly used and main Joints, the "Joint" and the "As-build Joint": the first one is useful when your components are not in the right position and the latter is useful when the components are already in the right position and they only have to move/rotate and so on. We also made some examples and saw the fuctioning of the different types of joints.
- We tried to replicate a lego brick with the parameters, just because I have really no knowledge at all in these things and we started with something really simple. I got the function and importance of the parameters, but I'm progressively more convinced that I'll have to fight with them for a really long time (since there is a reason if I never touched maths and precise sciences since elementary school *coff*). Our Instructor also made us notice that there is some difference between the virtual dimension and the real one, in the moment in which we create the physical object that we drew on our computer - which might sound trivial but I didn't really give a thought about it. It will be really interesting to find out what comes next!
End of the Week
In the end, I tried out something new! Since I imagined that the fish tank and the plants tank will be inside a greater box, I tried to illustrate this using an Animation! Have a look, but I must warn you - it's very simple. (I am happy with the risults, though - it has been a long but productive week!)Update
10th of FebruaryThis has nothing to do with my personal project but it's related to the process of learning and I thought it could be nice to let you know some of the things that I do to take confidence with the program. I started a Tutorial online, that I really recommend to everyone who is new to this stuff and wants to learn something nice step by step. The sad thing is that the Tutorial is in Italian, but I think it could be quite easy to follow visually even for those who don't know italian. You may find the Tutorial here. I tried to follow it and I also took quite a lot of notes, writing everything up even advices and insights that might help me as I go on.
I started the video and my work in Fusion following his steps. It might seem silly, but I really do learn a lot from following tutorials and trying to replicate what others do, taking notes, making experiments on the go and looking how people work. I learned a bit about parametric work, in this work.
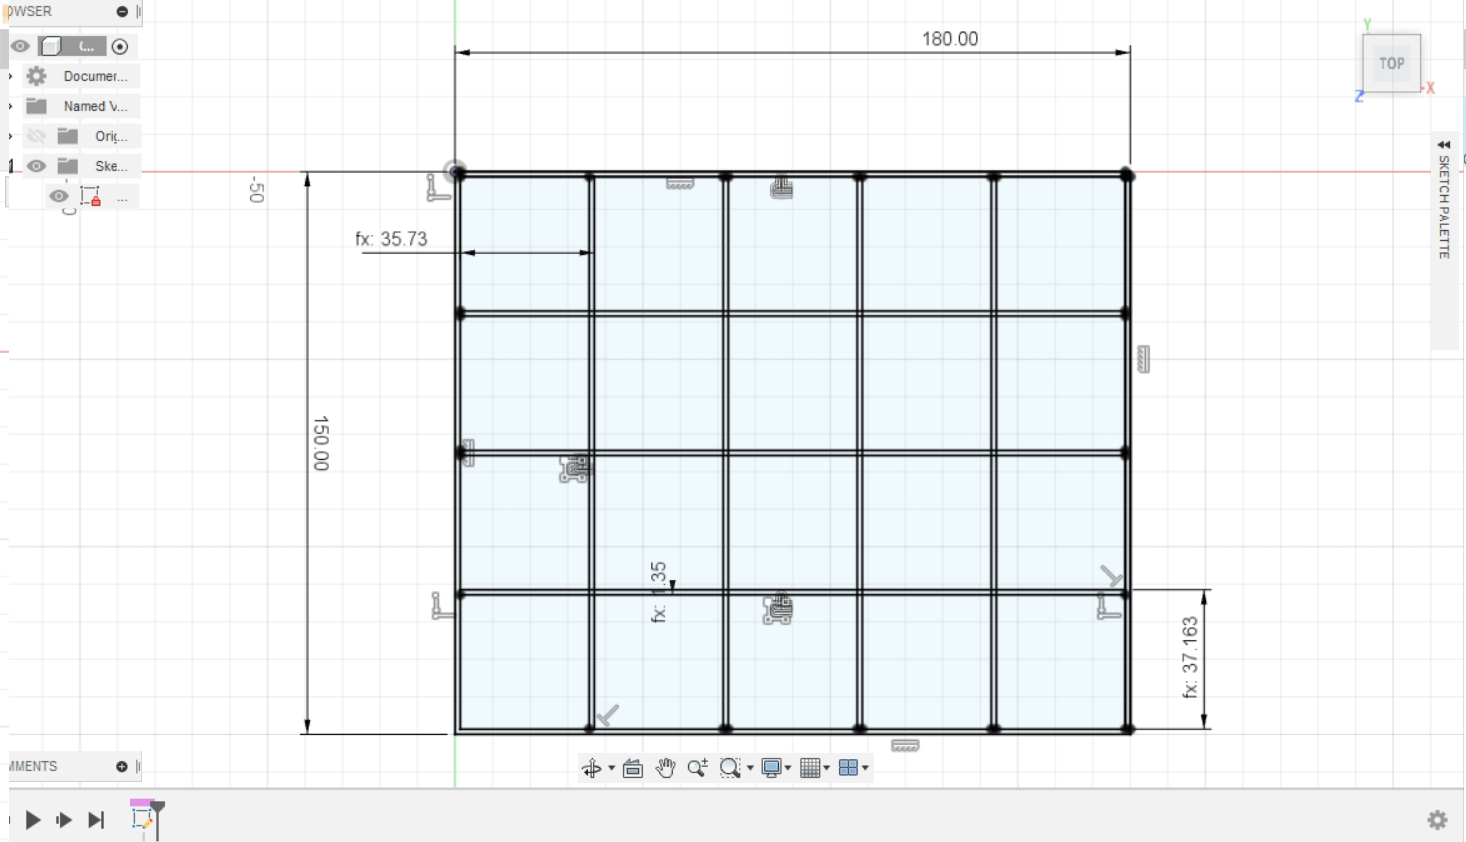
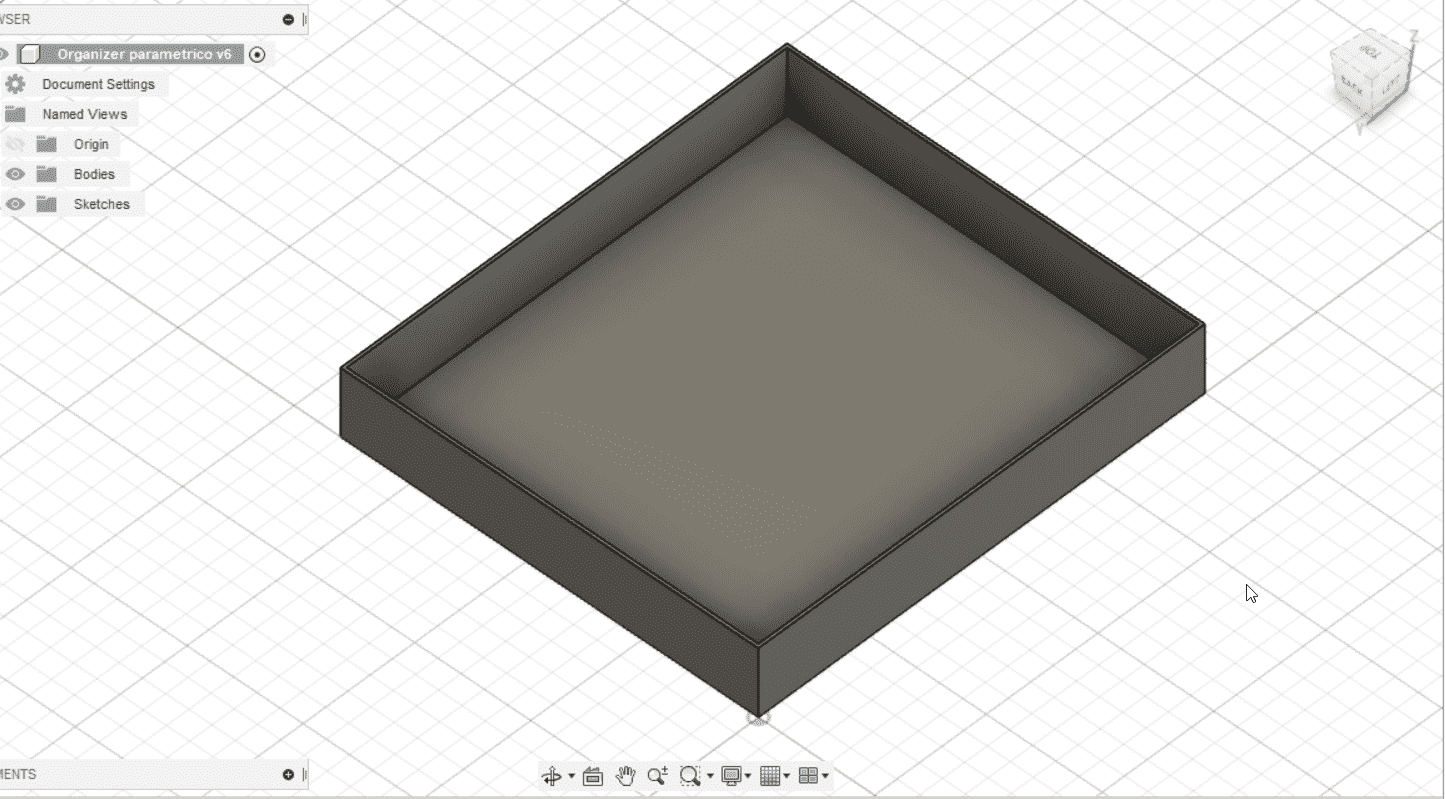
I learned more about how to change parameters, how to modify them and their utility when you are working - since if you change something everything changes too automatically. And when I finished extruding it and doing the Organizer, I started to play a little bit with it to have bigger spaces and longer ones.
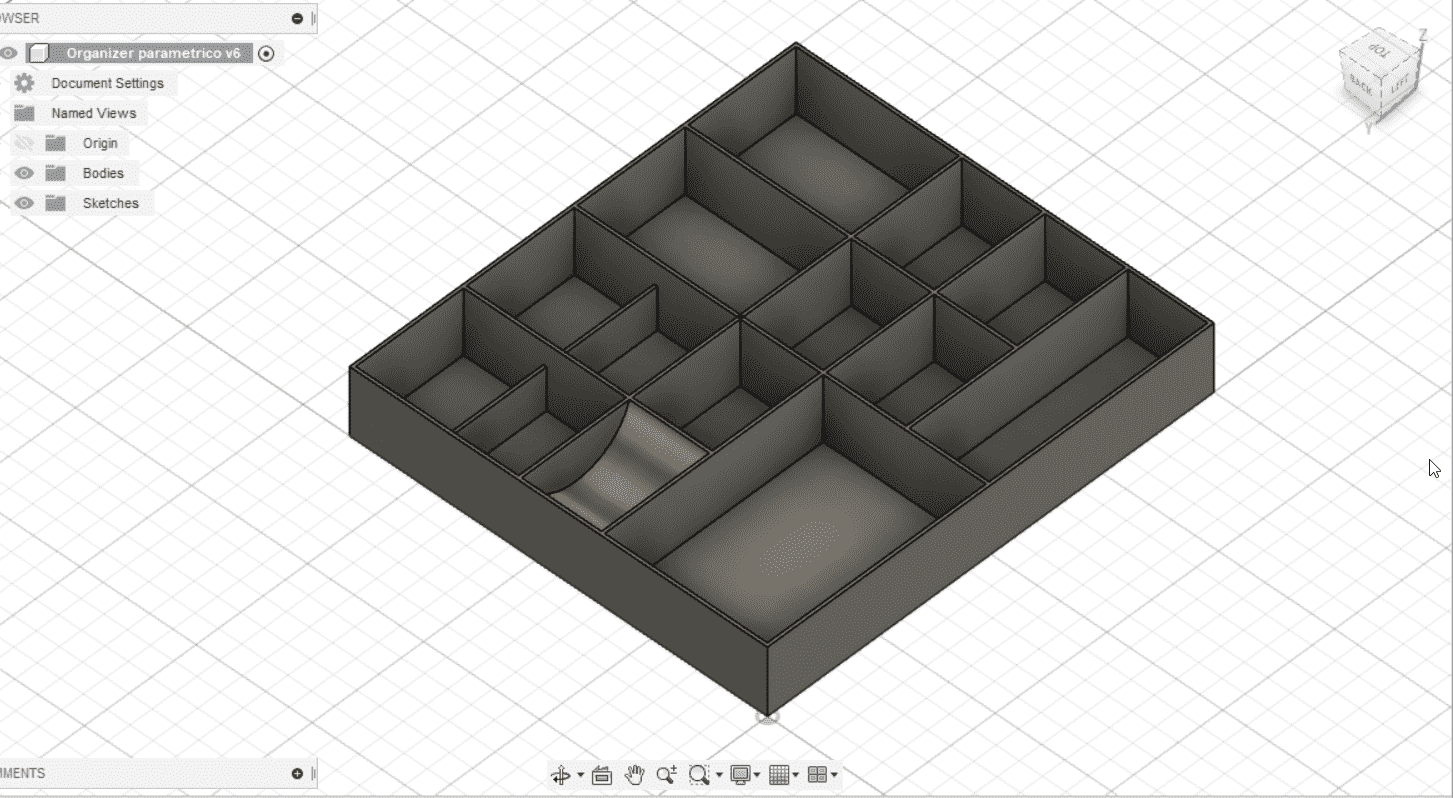
What I did here has to lower some of the little walls inside, or to use the Fillet command to do a little round space. I really enjoyed doing this, I think I'll try to keep going doing Tutorials and document them from time to time (not all of them, obvsly).