Week 1
"You step onto the Road, and if you don't keep your feet, there is no knowing where you might be swept off to." [J.R.R.Tolkien]

Introduction
I am Indeed.
I know nothing about most of the things ahead of us for this 2021 Schedule and the weird thing about it is that I am halfway between excited and frightened – though I might say that the first one is having the upper hand.
We started the week by discussing what we will be doing in these months and our instructor helped us go through the topics that we’ll be dealing with, raising also our awareness about important things to take into consideration such as time management, planning and accuracy in our documentation. He gave us some advices that I’ll try to make my own, such as proceeding documenting step by step in order to avoid forgetting important things or trying always to remember linking the guides, tutorials and sites that I found useful so that other students could take benefit from them as well. He also suggested to organize our files in an appropriate manner, so that It would be easier for us later to save, find and modify our work in a precise and clear manner.
Starting to know Git
Working on my Site
Thinking about my Final Project
Updates
Objectives
- Work through a git tutorial and upload to class archive
- Build a personal site
- Plan and sketch a potential final project
Getting to know GIT
We moved forward in introducing and talking about GIT. I must admit, for someone who has never used something like this before and who usually tends to panic in seeing a terminal, my first approach to GIT has been similar to what I could try to do with a bomb. Looking at it, standing still, hoping for the best and trying to do something without making everything explode. Step by step, I started to understand the basic steps but it’s still a long way ahead of me before I can define myself confident in using it.
I did try to follow a wonderful Tutorial, that I really enjoyed and learned a lot from. I learned about Centralized and Distributed Version Control Systems, where in the first case if the central server goes down, all have to wait in order to work - while in the second case everyone has a copy of the project on their own computer and can work and share their results when they want. Git, and Mercurial, belong to the latter, and their are a sort of "history of your work" - allowing you to turn back to previous stages of your projects, or many other things.
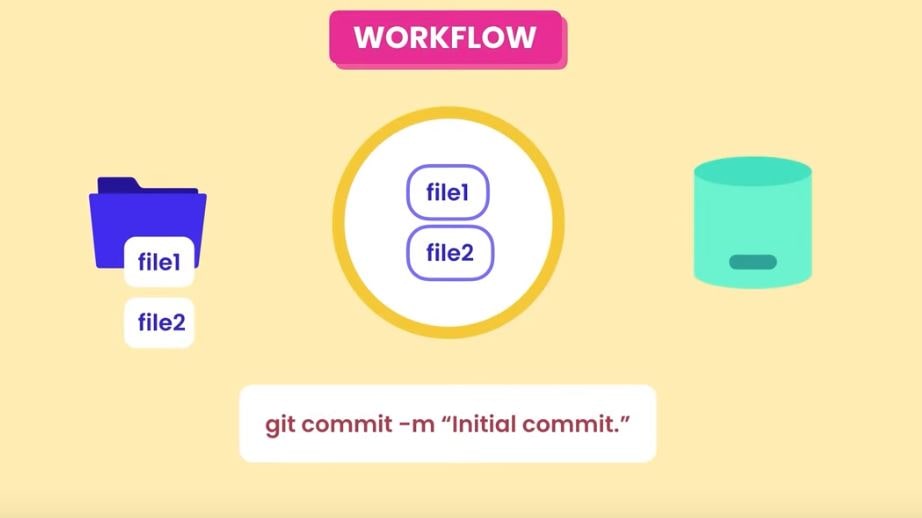
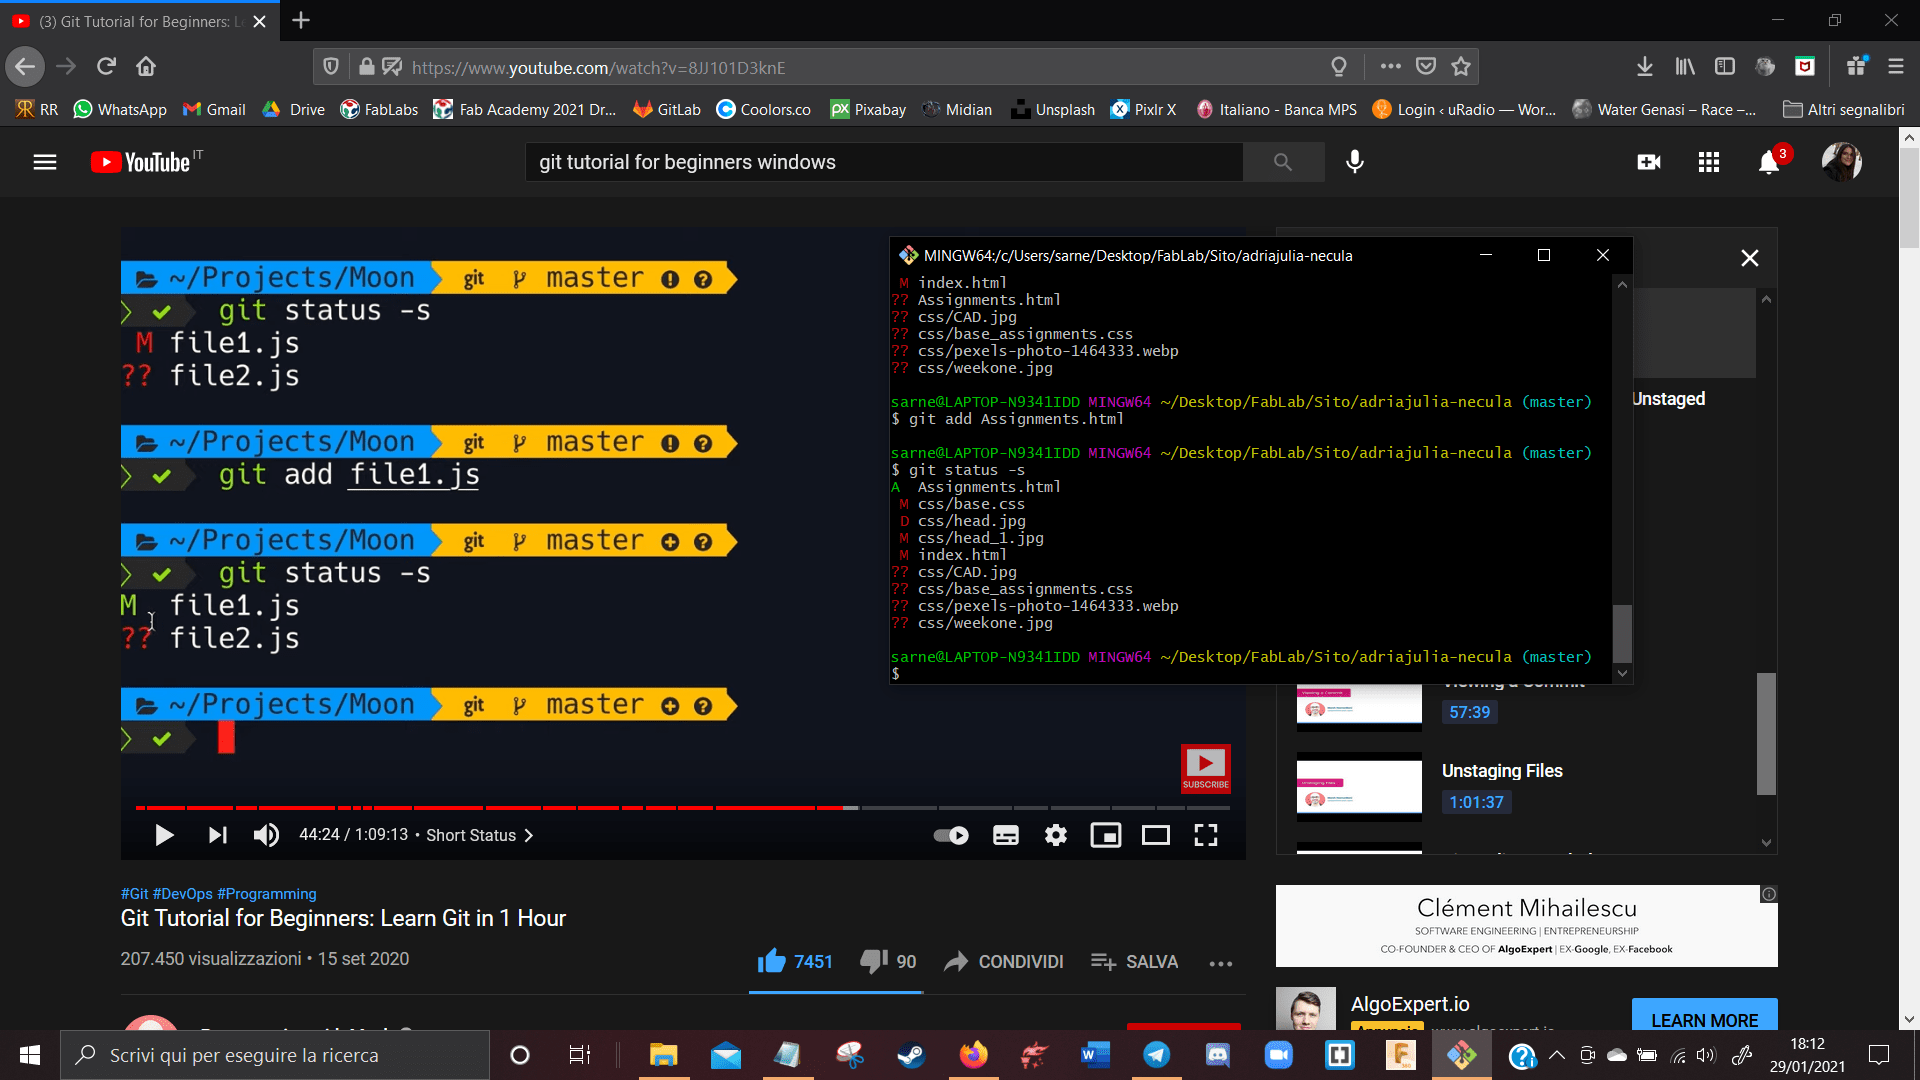
What I really enjoyed about this tutorial is the fact that it made Git simple, by using a lot of drawings and infographics in order to help beginners to get used to Git's mechanics. When you have some files and modify them, you can decide to add them to what is called the "Staging Area" or Index, which is this kind of virtual space where your files are safe, and then you might choose to finally commit them in your repository. If I'm not mistaken, if you delete a file from your working repository it still exists in the staging area, so you have to still use "add" comand to remove it from the index as well. The tutorial also mentions that you might skip the staging area, but it actually gives me a bit of assurance. I passed from using the first lines in GIT to learning new things and dealing with some sort of shortcuts - for example, I learned the usage of "git status -s". (Aye, I wanted to write it down because it really feels like a big deal for me.)
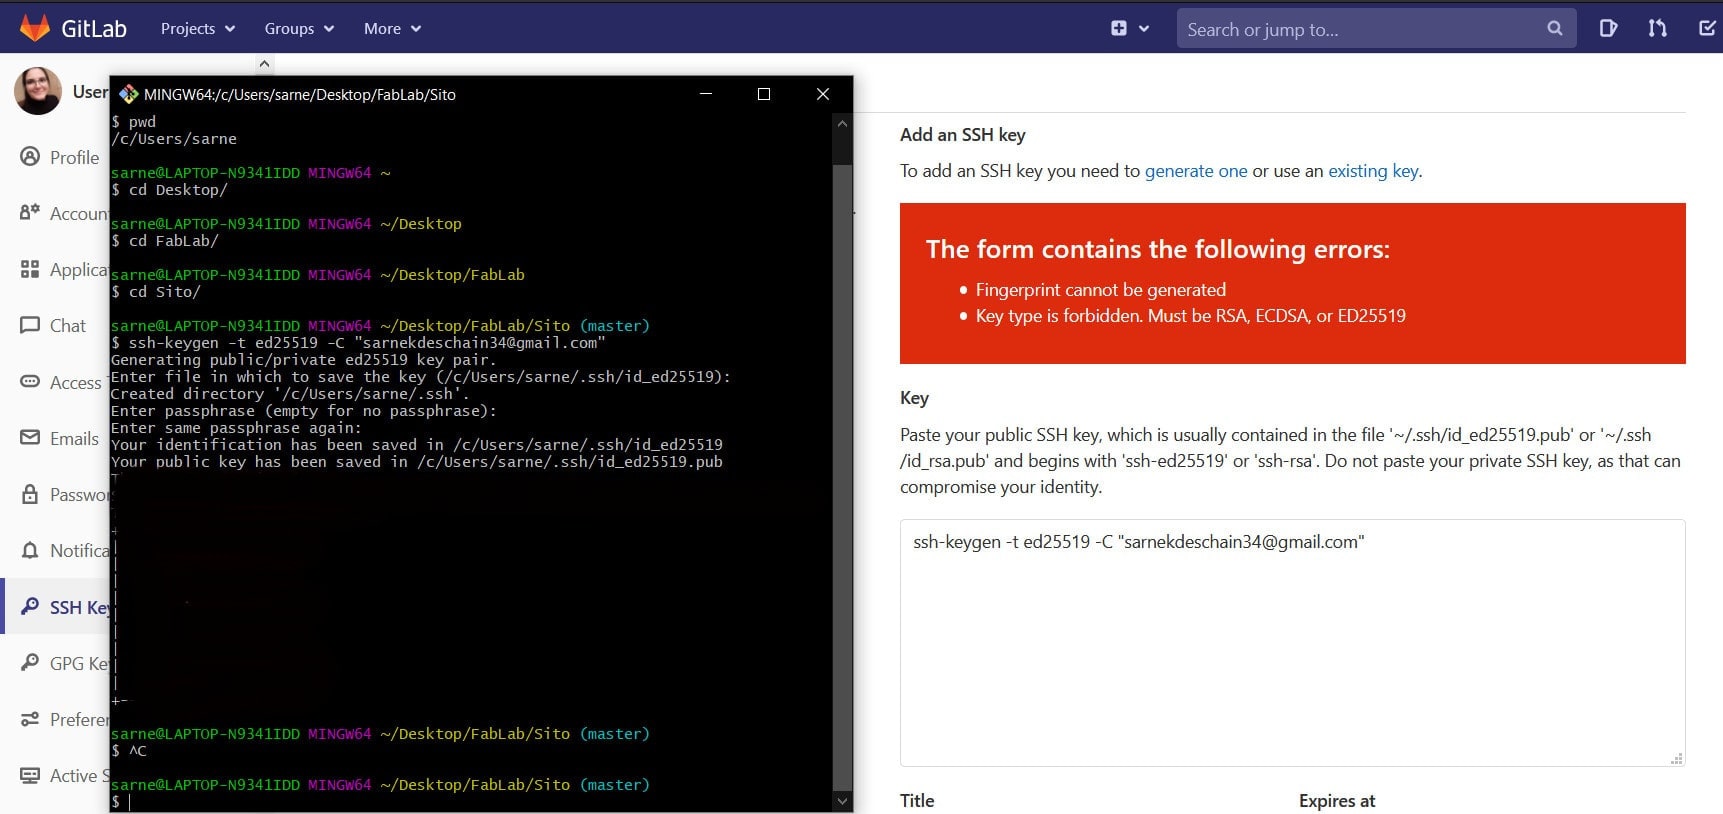
My journey didn't come without some problems, in particular when I had to learn how to generate the SSH Key. The tutorial that was available on GitLab wasn't very intuitive for me, or simply it happened that I red too quickly and missed some important things that inevitably made me fail. I know that I do tend to read too hasty and miss things on the road as I go on, but since I don't want to stop myself at every step I'll really try to fix this in the weeks to come.
Most of the problems came when I tried to understand what needed to be copied in the apposite space and what not, the division between private and public key, but in the end it worked. How? Well, I had to close Git and re-open it, try again the same way as before and look at it for a long five minutes - and then change my strategy, reading all over again what I had to do and trying this time to do things better. Once the problem was something simple such as writing "Shh" instead of "Ssh", and I swear I didn't notice it. I colored the fingerprint part with black since I'm not entirely sure it's safe to post it online, but still - I wanted you to see.
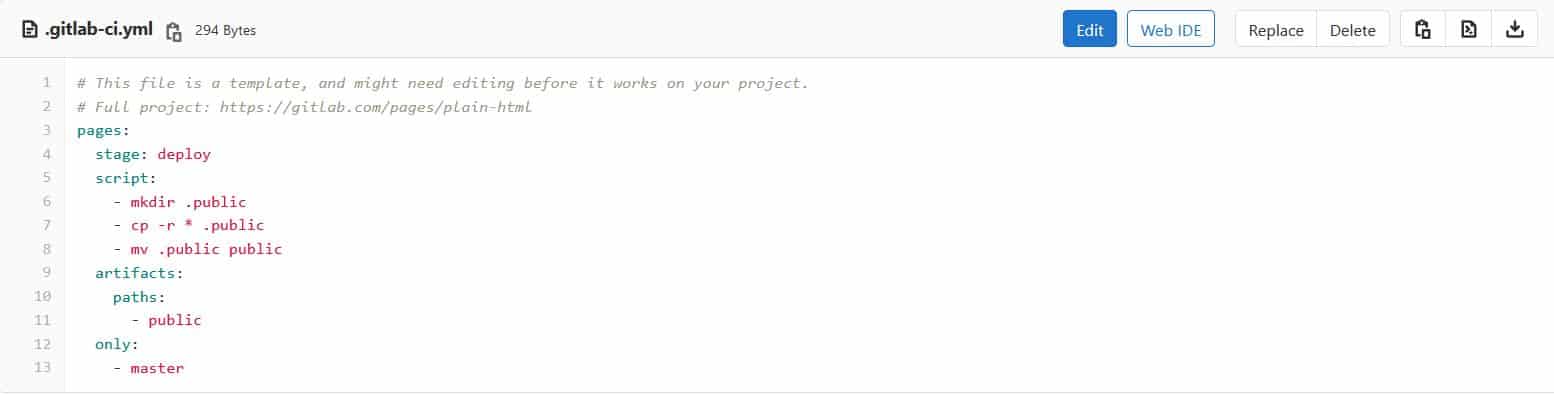
I also had problems with the creation of the site in the Archive on GitLab, because when I tried to push my folder in the archive it didn't work. I tried to solve it on my own but failed, so I asked my Instructor what did I miss, and he explained me that I had to modify the file which reads md and make it able to read the html. Or, alternatively, I could delete this file and then it would appear a button which would enable me to select html.
A few days later I had some problems with the changes that I made and I wanted to push to GitLab, and it was in this moment that I knew I ... messed up. I tried to solve it without googling it, trying to understand what I did and how could I try to fix it based upon what I learned about GIT so far.
I can't say much, but I do think in the end in worked. It might seem really simple for most people, but I freaked out when I started to see al those messages from Git. I had to stay still and read them carefully in order to understand what went wrong, but I'm happy that in the End it all worked again.
So, for now this is what I managed to accomplish with Git! I'll try my best to keep going and trying to descover something more as days and University' exams get going. I also tried to have a beautiful terminal as the guy in the video, I tried to follow his lead on checking a PowerShell (get..?) but I really didn't manage - so I guess I'll write it down and try it again as soon as possible!
Working on my Site
So! This task is quite immediate, since you can see in this very moment how my Website is like. I must admit that I had to take back some notes that I made a year ago when I did a course in my University where I had to do the basics of HTML: learning how to deal with text mostly (bold, underlined, and so on) and with the division of a page in "sections", not going to much in detail because it was only one course. It helped me nonetheless, since I now can browse through some stuff with much more confidence, although I'm far from being really good at it.
I did have some problems with html/css as well, but I really wanted to do my site by hand mostly instead of using the site that I found already in my GitLab archive. I had some difficulties mostly with my anchors, since I'm still not quite sure if the "map" of my Site is efficient enough - but it seems to work, so untill proved contrary I'll keep it this way.
I worked using Bootstrap, I had to work a bit in order to understand how to use it but then it became easier when I found websites such as Codepen, where there are a lot of examples made by others from which you can learn a lot. You can copy a pen and implement it in your website, and I learned more by doing so rather than opening and reading long tutorials or watching videos. You find examples of how to create a navigation bar, how to color things or do masterheads in your site, but I usually try to browse a lot - like really, a lot - in order to find something that can satisfy me (for the moment). I do suggest do some evergreens such as W3Schools, since it is really useful for learning the basics and trying do create something that is your own even if it's not perfect! My Site is far from being perfect, but at least it is somehow similar to the idea that I had - and I hope that I'll find more and more things to implement as I keep going in the weeks to come!
Plan a Potential Final Project
I did mention in the About Section that I've been here in the Fab Academy laboratories before, in particular the first time when I did my Internship and the second time for my Thesis. I've always watched from afar and now that I have the opportunity to follow this wonderful world I find myself sorrounded by tons of beautiful ideas, projects and inspiring people. I followed the Bootcamp at the end of January and I've seen wonderful projects and capable students, so I must first say that I don't really have any particular skills or abilities and I hope I'll be able to learn at my best. I've done some research and I've been able to narrow down a potential area of interest, something that is completely new for me and challenging: Sustainability.
I really enjoyed some of the projects that I've seen in the bootcamp and some for the past years, and I also found some inspiration in the recent Campus Party event, which was about circular economy and similar. In particular, I'd like to pin these two projects in particular: Aquapioneers and Oxgrow . What I really do love about these projects is the circular idea of using the water ecosystem to grow plants and then these ones clear the water which turns backwards again. I also love the idea of growing something inside your home, or inside small places like schools, perhaps a classroom (to raise awareness on the subject) or even museums, and so on. I know this is not an original idea, but I'd really like to take the challenge and try to realize something like these projects on my own and try to give it my print.
How? Well, I'd start by saying that mine are hypothesis, since I don't know yet if I'll be able to do what I think I'd do. That being said, I noticed that projects like this take ... no small amount of space, even if they are being created to be placed in homes or small houses. Online I also found similar projects and activities of all kinds, but usualy become quickly huge industrial solutions to climate change and environment difficulties. I would like to do something even smaller, something that really could actually stay on the desk without being too huge - and I'd also like to find a way to cover the usual LED light that helps veggies grow. In houses this kind of light is not the best choice to have always ON, it would be nice to ideate a shutter of some sort.
So, I thought about something of this sort. I'm not particularly good at drawing but I hope it's easy to understand, I'd like to create a sort of "piece of furniture" aquaponic garden, made in wood and glass (I do think that I might have some problems with a circular glass but let's see).
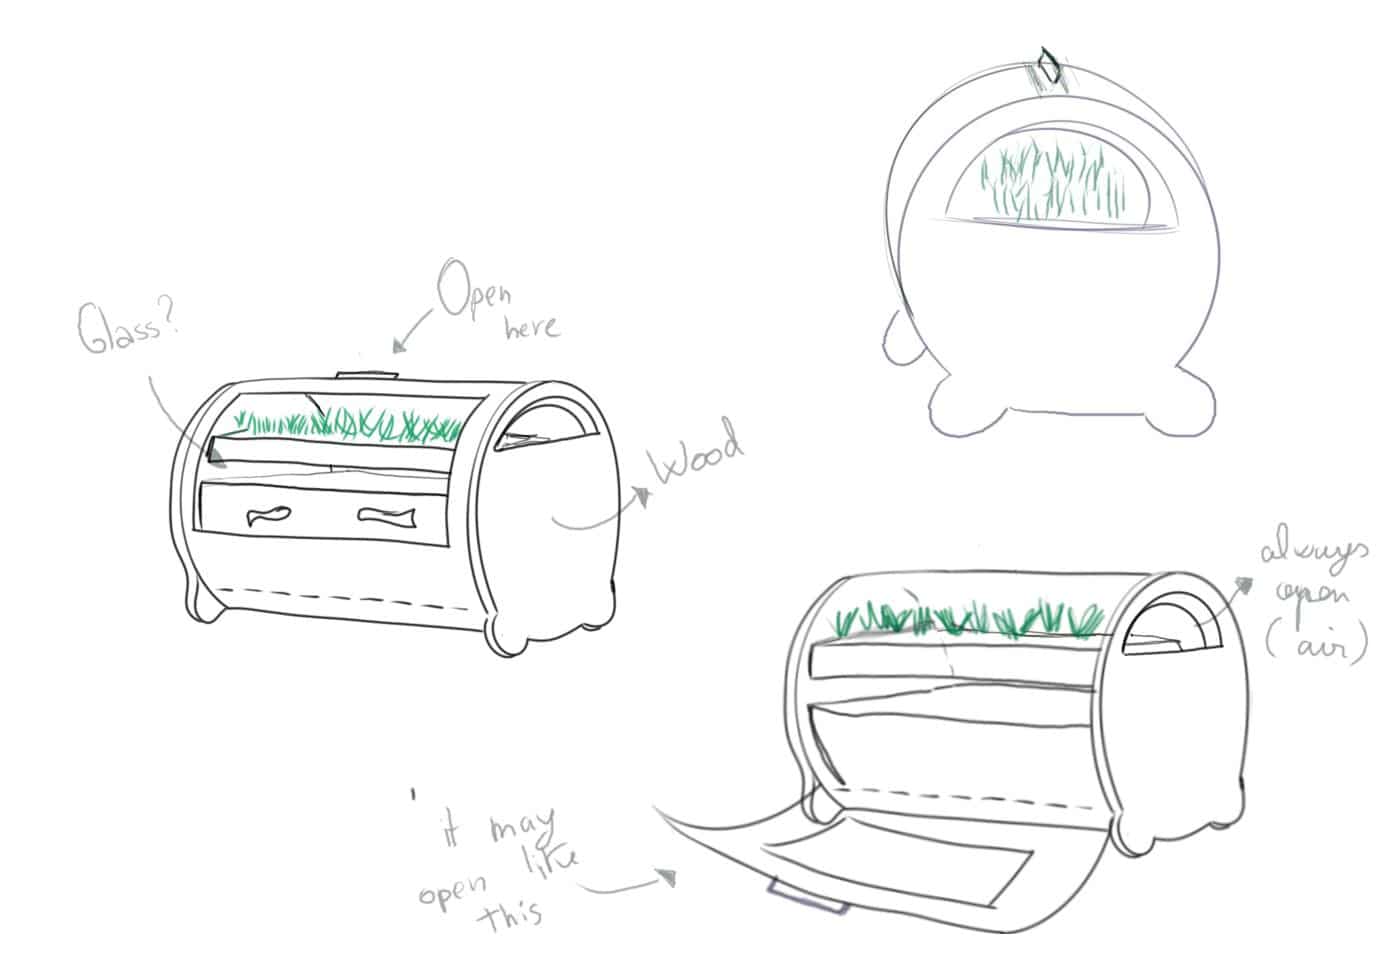
The major problems that I thought about were the level of humidity and the space to insert all the pipes and motors that this project should have (?). For the first problem I think I might solve it by cutting those half-circular spaces at the edges of the project, in order to let air filtrate continuosly; and by offering the possibility to open the project, in order to change the water, feed the fish and clean if it gets dirty.
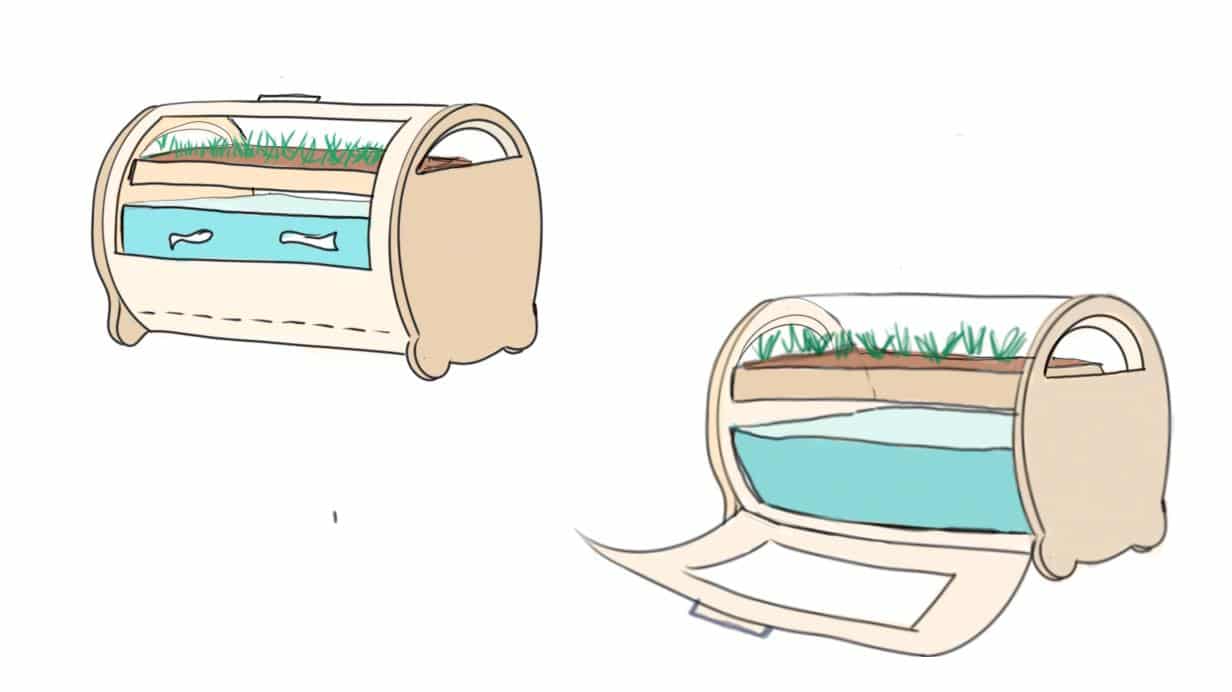
Aside from the "form" of the projetc, if I will have problems with the shape I guess I'll always be able to change it and make it triangular or rectangular of some sort. I'd like also to make a line of LED light at the top, as I said before, but I'll physically have to try to create this in order to better understand if I'm flying too high or not. Guess we'll see.
Updates
(08/02/2021)If it makes any difference at all, I finally understood why my footer wasn't right on this page - basically I made a "container" for my text, in every week's page, and the footer adapted to this container and I didn't realize it. Then, out of nowhere, I thought that this might be because the footer had to be outside of the container in order to occupy the whole weight of the page, and it worked. I'm Happy. Honestly.
- Another update, I finally learned how to change my links' colors! They to seem a lot better now that they have the same overall color of the site.
(19/02/2021)
I try to keep working on my site while doing other things, now it's the starting of the forth week and I was reviewing the "functionalities" of my Site: I noticed that I tend to have very long pages and it's difficult to navigate easily on them, that's why I tried to do a new section on every page - the Table of Contents. I searched on Google how to create the Internal Anchors, which you do with the usual "a href" comand but followed by an "#something" symbol, which indicates that the anchor is inside the page. Then I moved to every subtitle or section that I was interested in and added an Id parameter to them. I also devide my html documents with the usage of comments, because when I'm tired and have long pages with tons of text I find it easier to browse my files. It has this kind of structure:
As you can see, it has a comment on the top in grey ("Inizio New Shape" is a mix of Italian and not, it means the "Beginning" of the New Shape section), then the subtitle doesn't have an anchor because I didn't want it for that part of the site. If you look on the bottom tho, you see that the new section ("Lezione"="Lesson") has an "Id" there, because I wanted that section to have an anchor in the Table of Contents.
The site it's still not perfect, but I'm working on it as time goes by and new ideas come forward (I still have to figure out how to do a "Turn on top" type of Anchor, I'll do it I promise)!