

Week 9 & 10 - Mechanical & Machine Design
Assignment
Week 9 group assignment
   - design amachine that includes mechanism+actuation+automation
   - build the mechanical parts and operate it manually
   - document the group project and your individual contribution
Week 10 group assignment
- actuate and automate yourmachine
- document the group project and your individual contribution
My individual contribution to the group project
Katie and I agreed that I should make the archimedes screw that would drive the marble upwards to the start of the marble run. There are 4 parts to this:
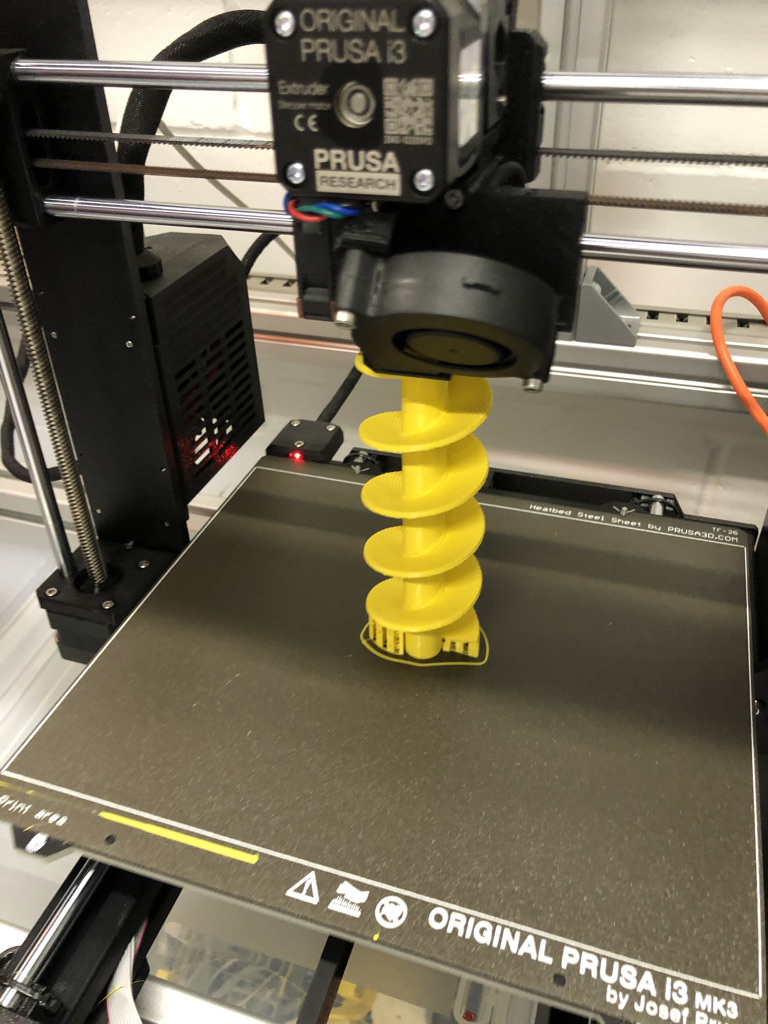
- The archimedes screw. I decided to 3d print this.
- The housing that surrounds the archimedes screw. I decided to laser cut this on plywood.
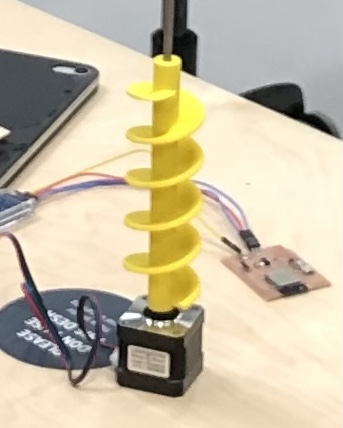
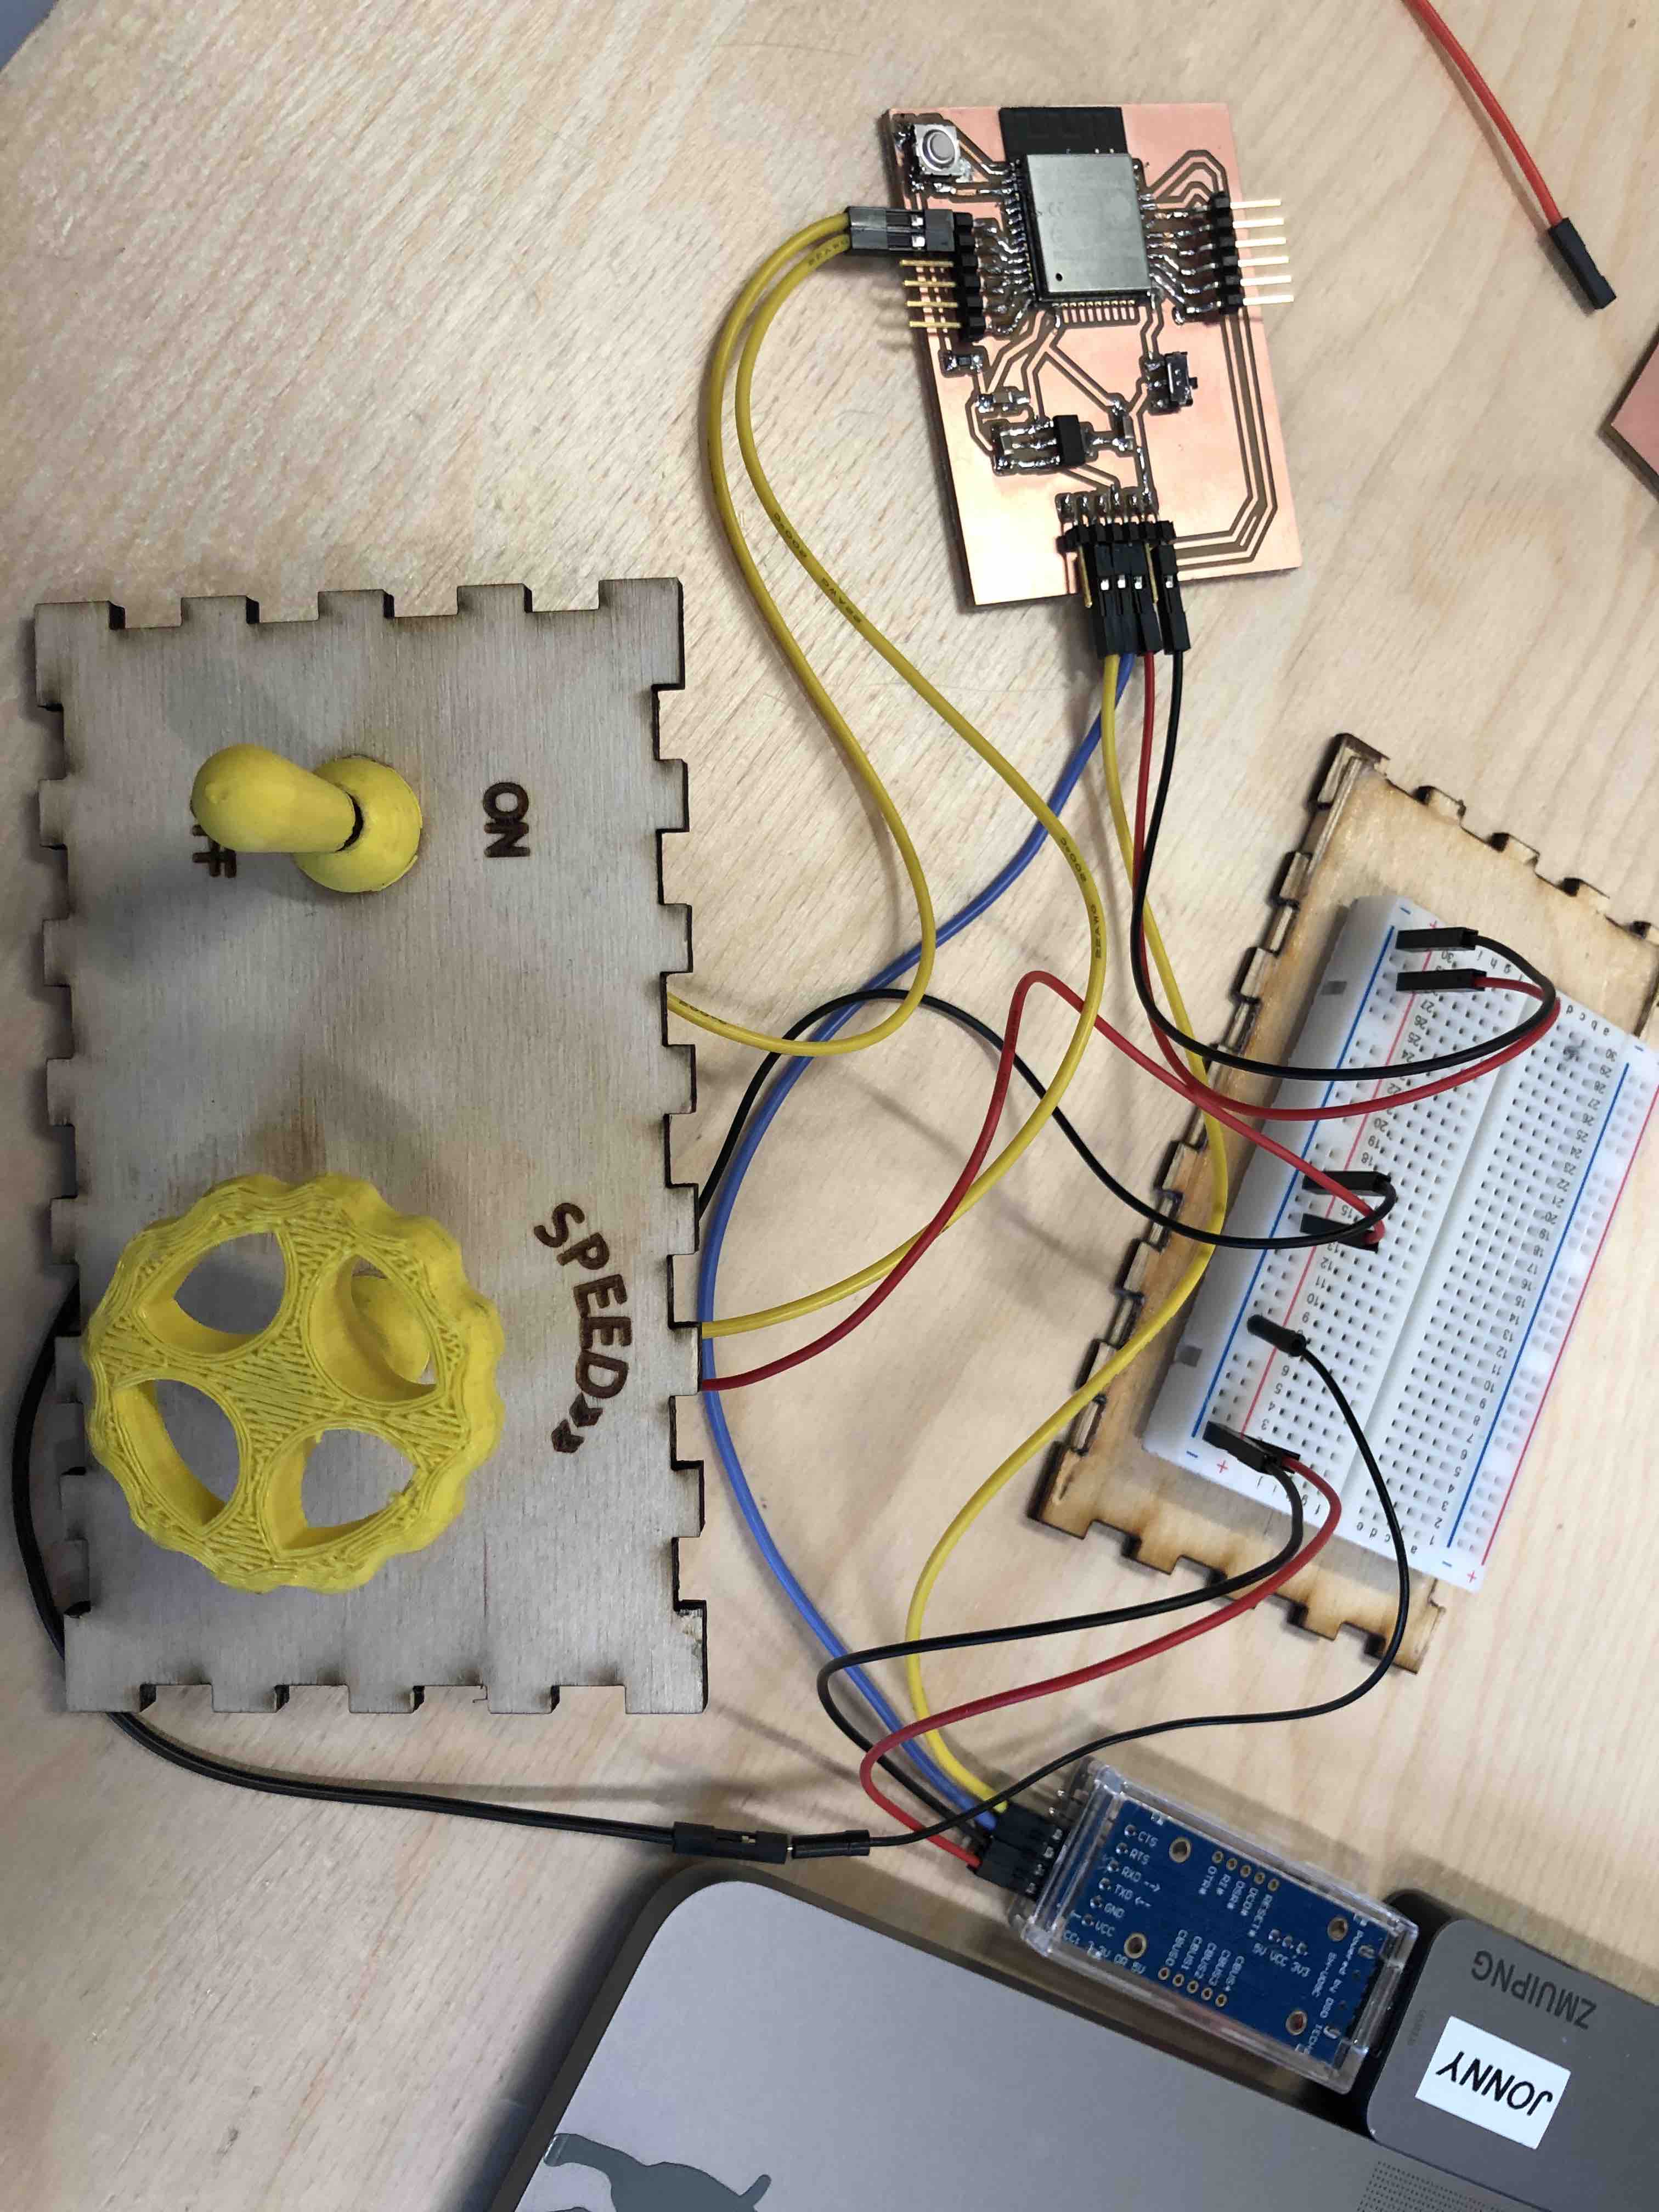
- An electronic circuit that includes a stepper motor and at the very least, a switch to turn on and off. I decided to use a breadboard for this.
- Some code that makes the motor spin at a suitable speed when turned on. I decided to use the Arduino IDE for this.
I started with a small prototype so I could test the functionality.
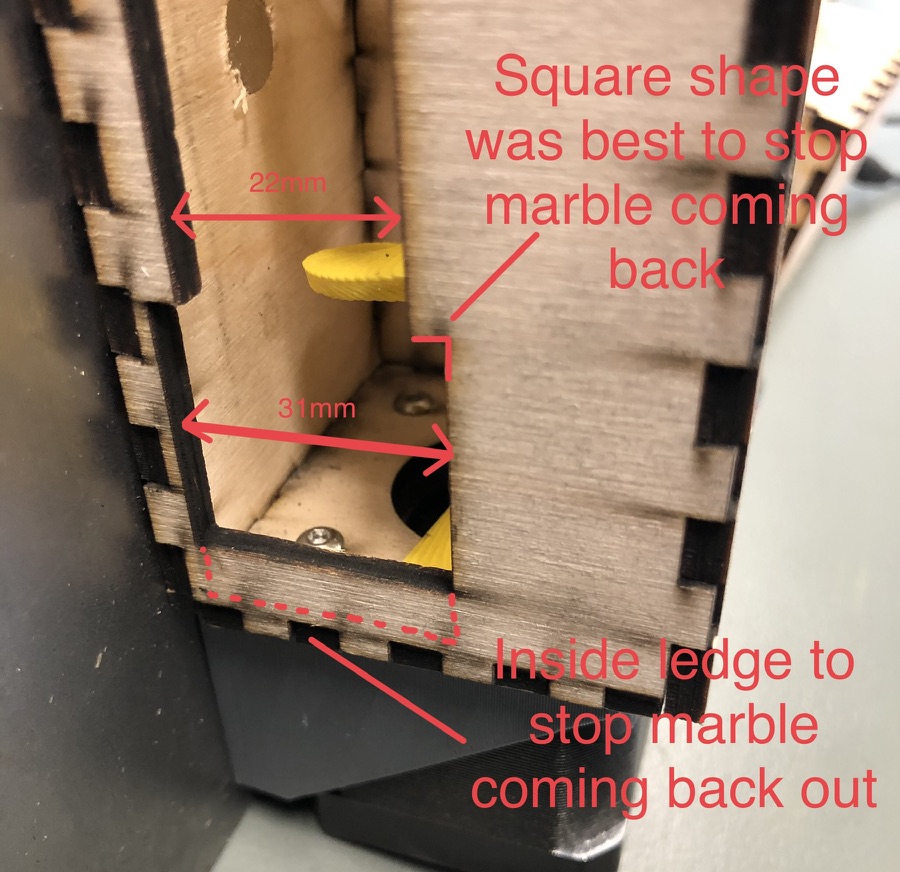
The laser cut housing was simple to make but difficult to make functional. It needed to do 3 things:
- Let the marble enter it easily at the end of the marble run
- Keep the marble inside. It should not be pushed back out of the entrance hole
- Fire the marble out at the top
I played around with several sizes and shapes for both the top and bottom holes. The most effective design was a square hole for the entrance. Most importantly there was a small ledge allowing the marble to drop down after entering the hole. The ledge would stop it coming back out again. The marble was 25mm wide and the hole was 31mm wide.
There is a channel that runs up the length of the enclosure. This allows the marble to be kept in place and gently glide upwards. Without this channel, the marble would not fit inside the housing. The optimal width of this channel seemed to be about 22mm.
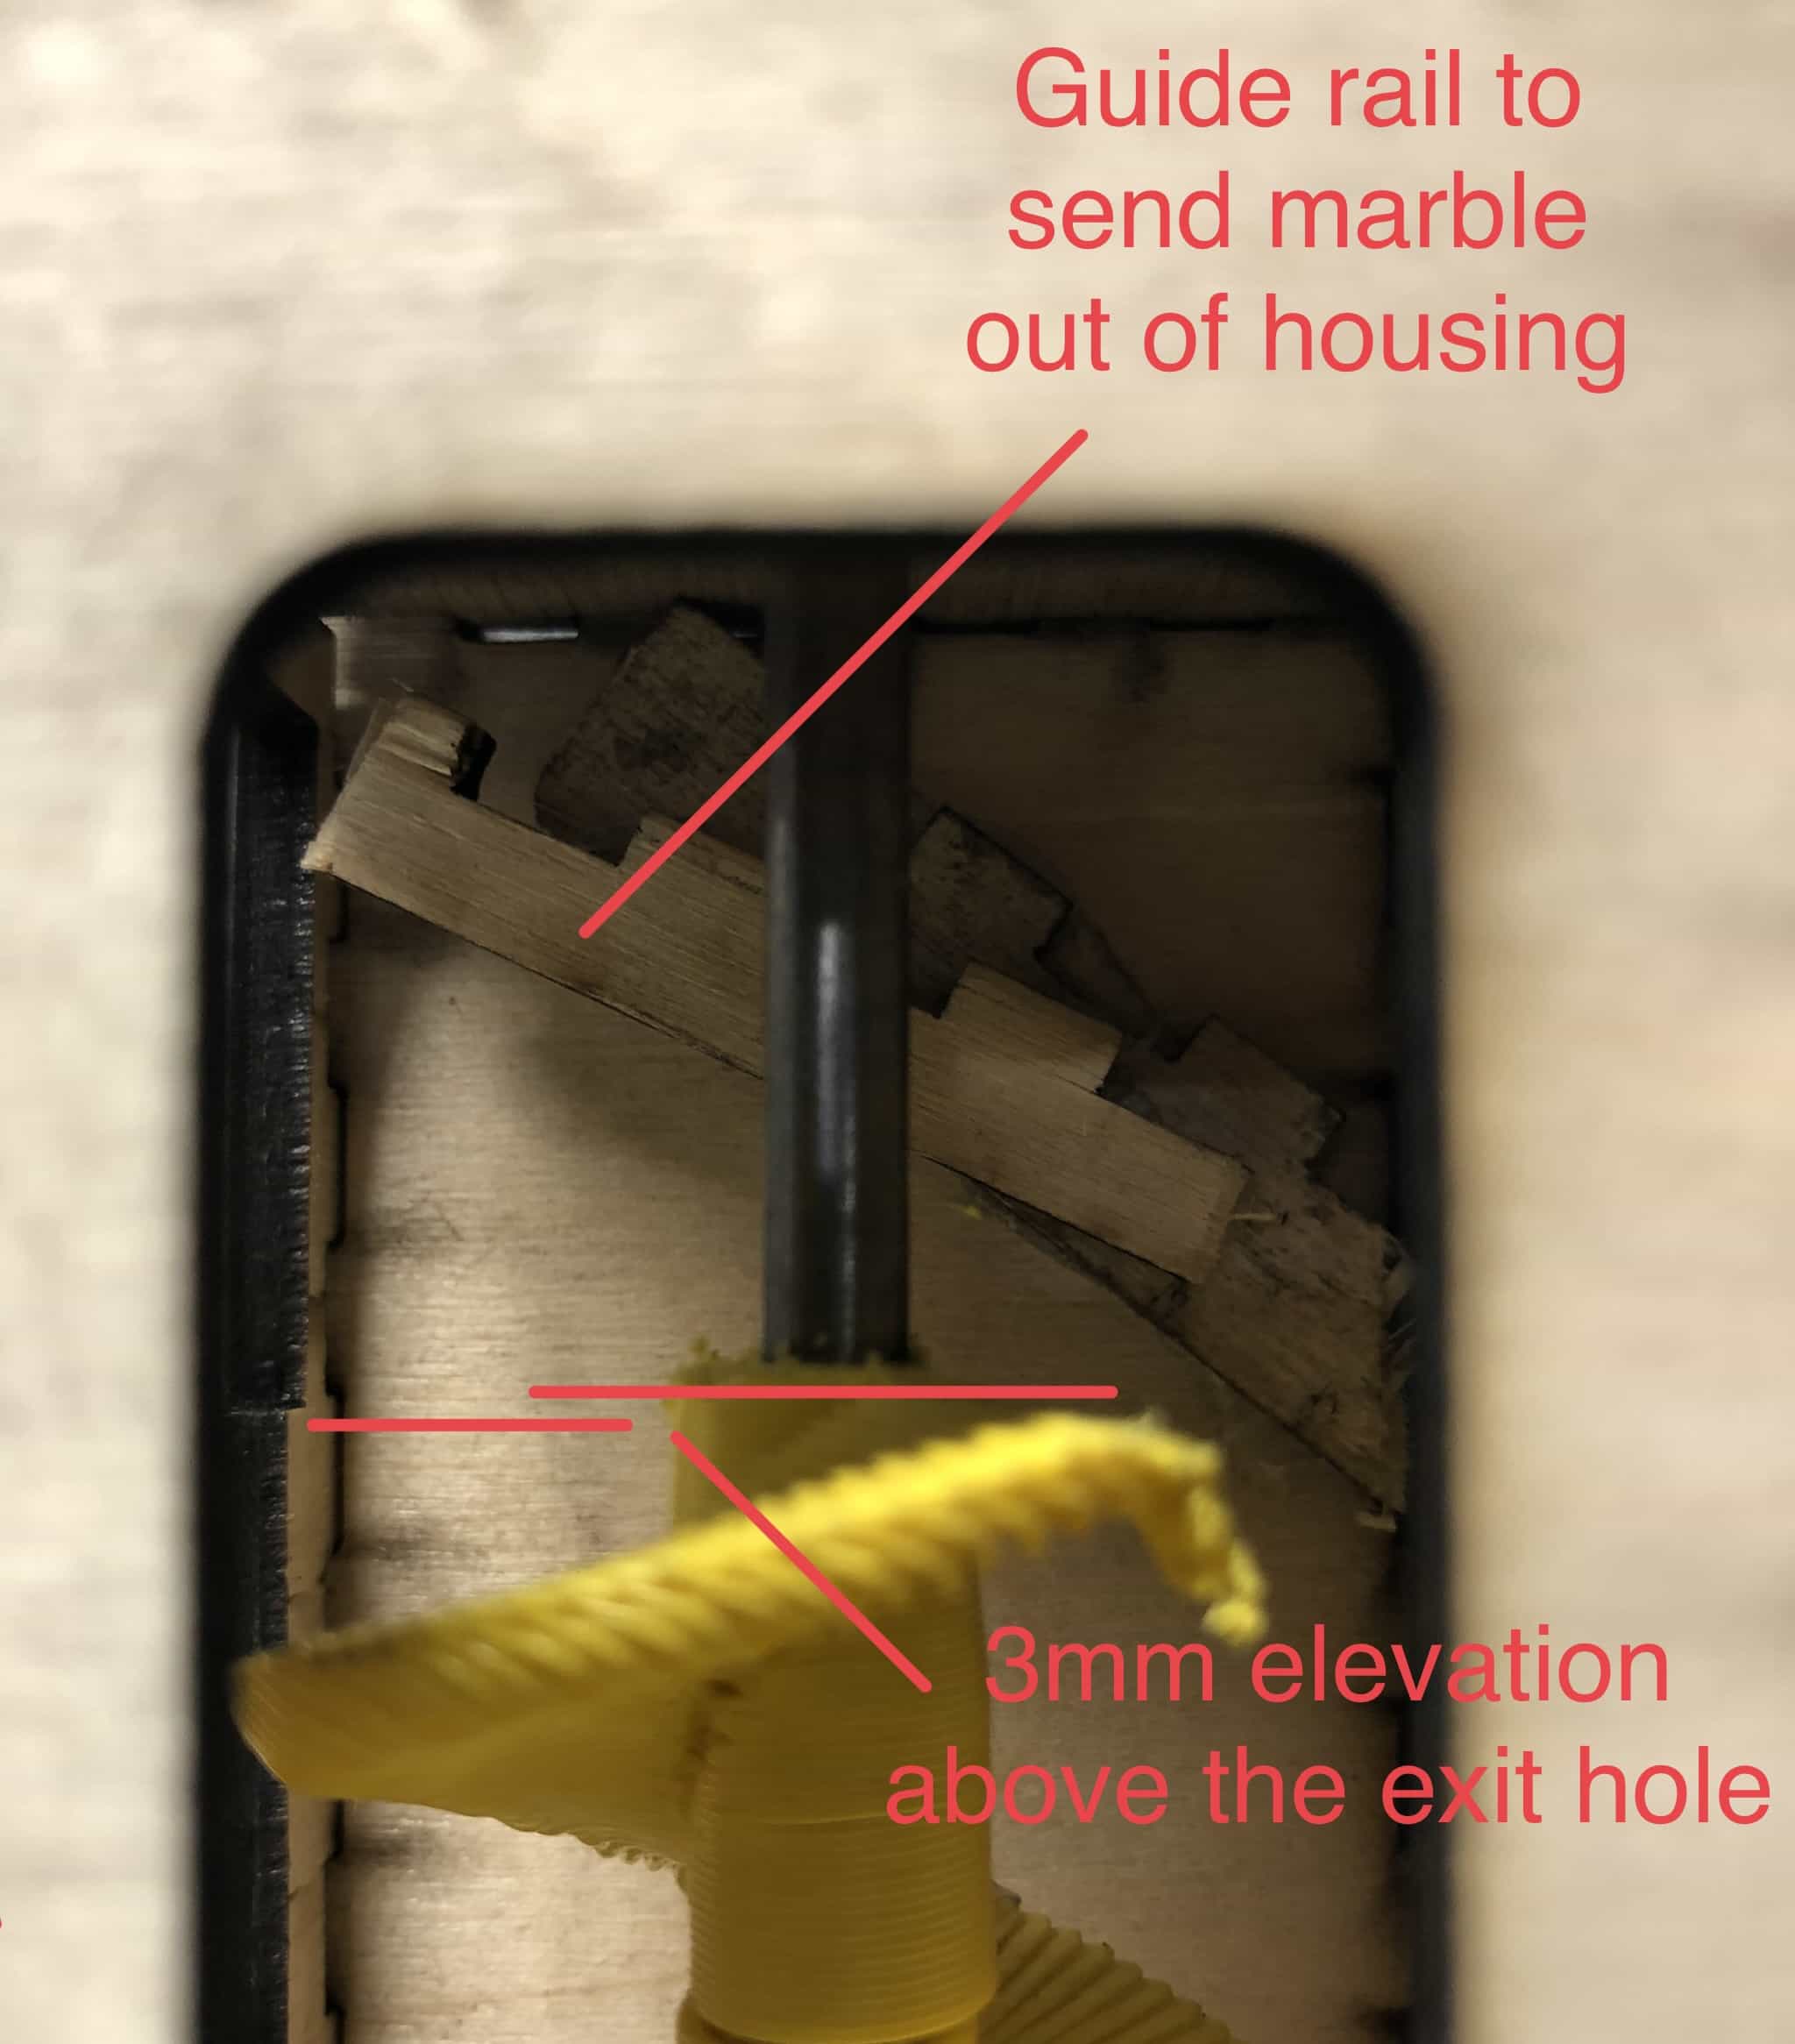
The exit hole at the top could be a rounded square shape. The size and shape was not so important, just so long as the marble could easily fit through. More important was a guide rail and that I fitted inside. This would guide the marble out of the hole once it reached the top.

Final Build
After I'd settled on the optimal design, I went ahead and made the full size version. Katie and I worked together on the enclosure and this is well documented on our group page.
For the archimedes screw, I 3d printed 5 small pieces and connected them together with a steel rod.
For the code and circuit, I used exactly the same as I had used for the prototype above.
Files for download
Link to the group assignment:
Back to homepage: