Week 5 - 3D Scanning & Printing
assignmentgroup assignment:
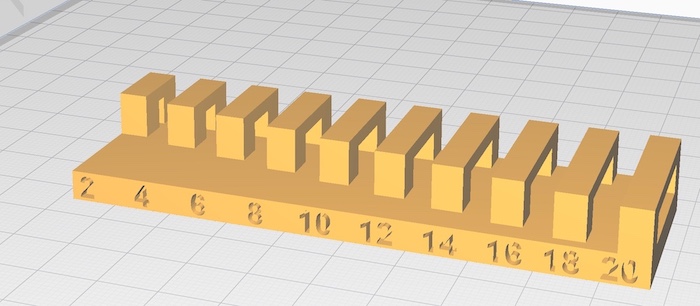
- test the design rules for your 3D printer(s)
individual assignment:
- design and 3D print an object (small, few cm3, limited by printer time)
that could not be made subtractively
- 3D scan an object (and optionally print it)
3D scanning
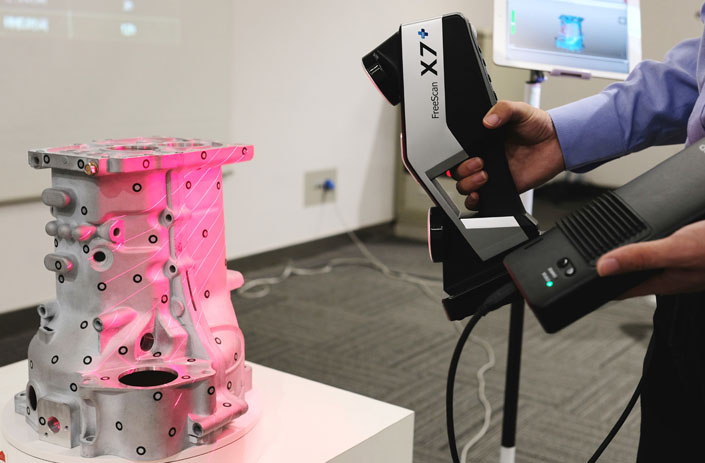
Our FabLab is the proud recipient of a brand new Artec Ava Lite 3D scanner. Here is the link to the manufacturer's website:
Artec ScannerI made the following notes during our online training:
Scanner setup:
- look carefully down the hole when you put the cable in
- use the eyes of the scanner, rather than your own eyes
- click anywhere on model and then you can rotate it around that point
- you can’t have multiple instances of the program running at the same time
How to scan:
- click 'scan'
- always use 16fps unless you’re old (his words, not mine)
- click on align
- click a point on model 1 and its corresponding point on model
- use shift key to move things around the screen
- join the points, you don’t need to be super accurate
- click align and they should morph together
- use the editor to get rid of the table that the object is placed on
- use clt and mouse button to make selection
- use clt-alt to undo a selection
- use ctlr+shift+scroll wheel to adjust plane level
- click preview to initialise scan
- click record to start making a model
- use the space key to start and stop the scan
How to edit your image:
- come in the editor and use erase to clean up the bits you don’t want
- when aligning points, you can drag click the point to fine tune location
- you can merge different meshes but selecting them, exporting them and ticking the box to merge
- use software ‘quicksurface’ to smooth surfaces
- use bridges within ‘fix holes’ to creates holes through models
- when rotating objects on a lazy susan, you can’t have fixed objects in the background
- if you’re rotating an object that is perfectly symmetrical, you might want to add some extra objects around it. This will help the scanner know that the object isn't rotating, but just happens to look same from multiple angles
- you can build a plane using the construct menu.
- select multiple spots and click ‘create plane’
- construct seems like a great menu. you can basically create multiple planes, spheres, cylinders etc. just select a few points, select whether it should be a plane, sphere etc. it constucts shapes and planes to clean everything updon’t use sweeping motions.
- rotate around the object once you have all your scans
How to use autopilot:
select the piece you need and click next
choose whether you have good or bad geometry
use scanning spray or talcolm powder if you need to scan something transparent
go through each bit by turn and erase the bits you don’t need
lasso out the random bits you don’t need after you tweaked position of a point
press space key to de-select
press continue with the auto pilot
use the smoothing tools as necessary in editor
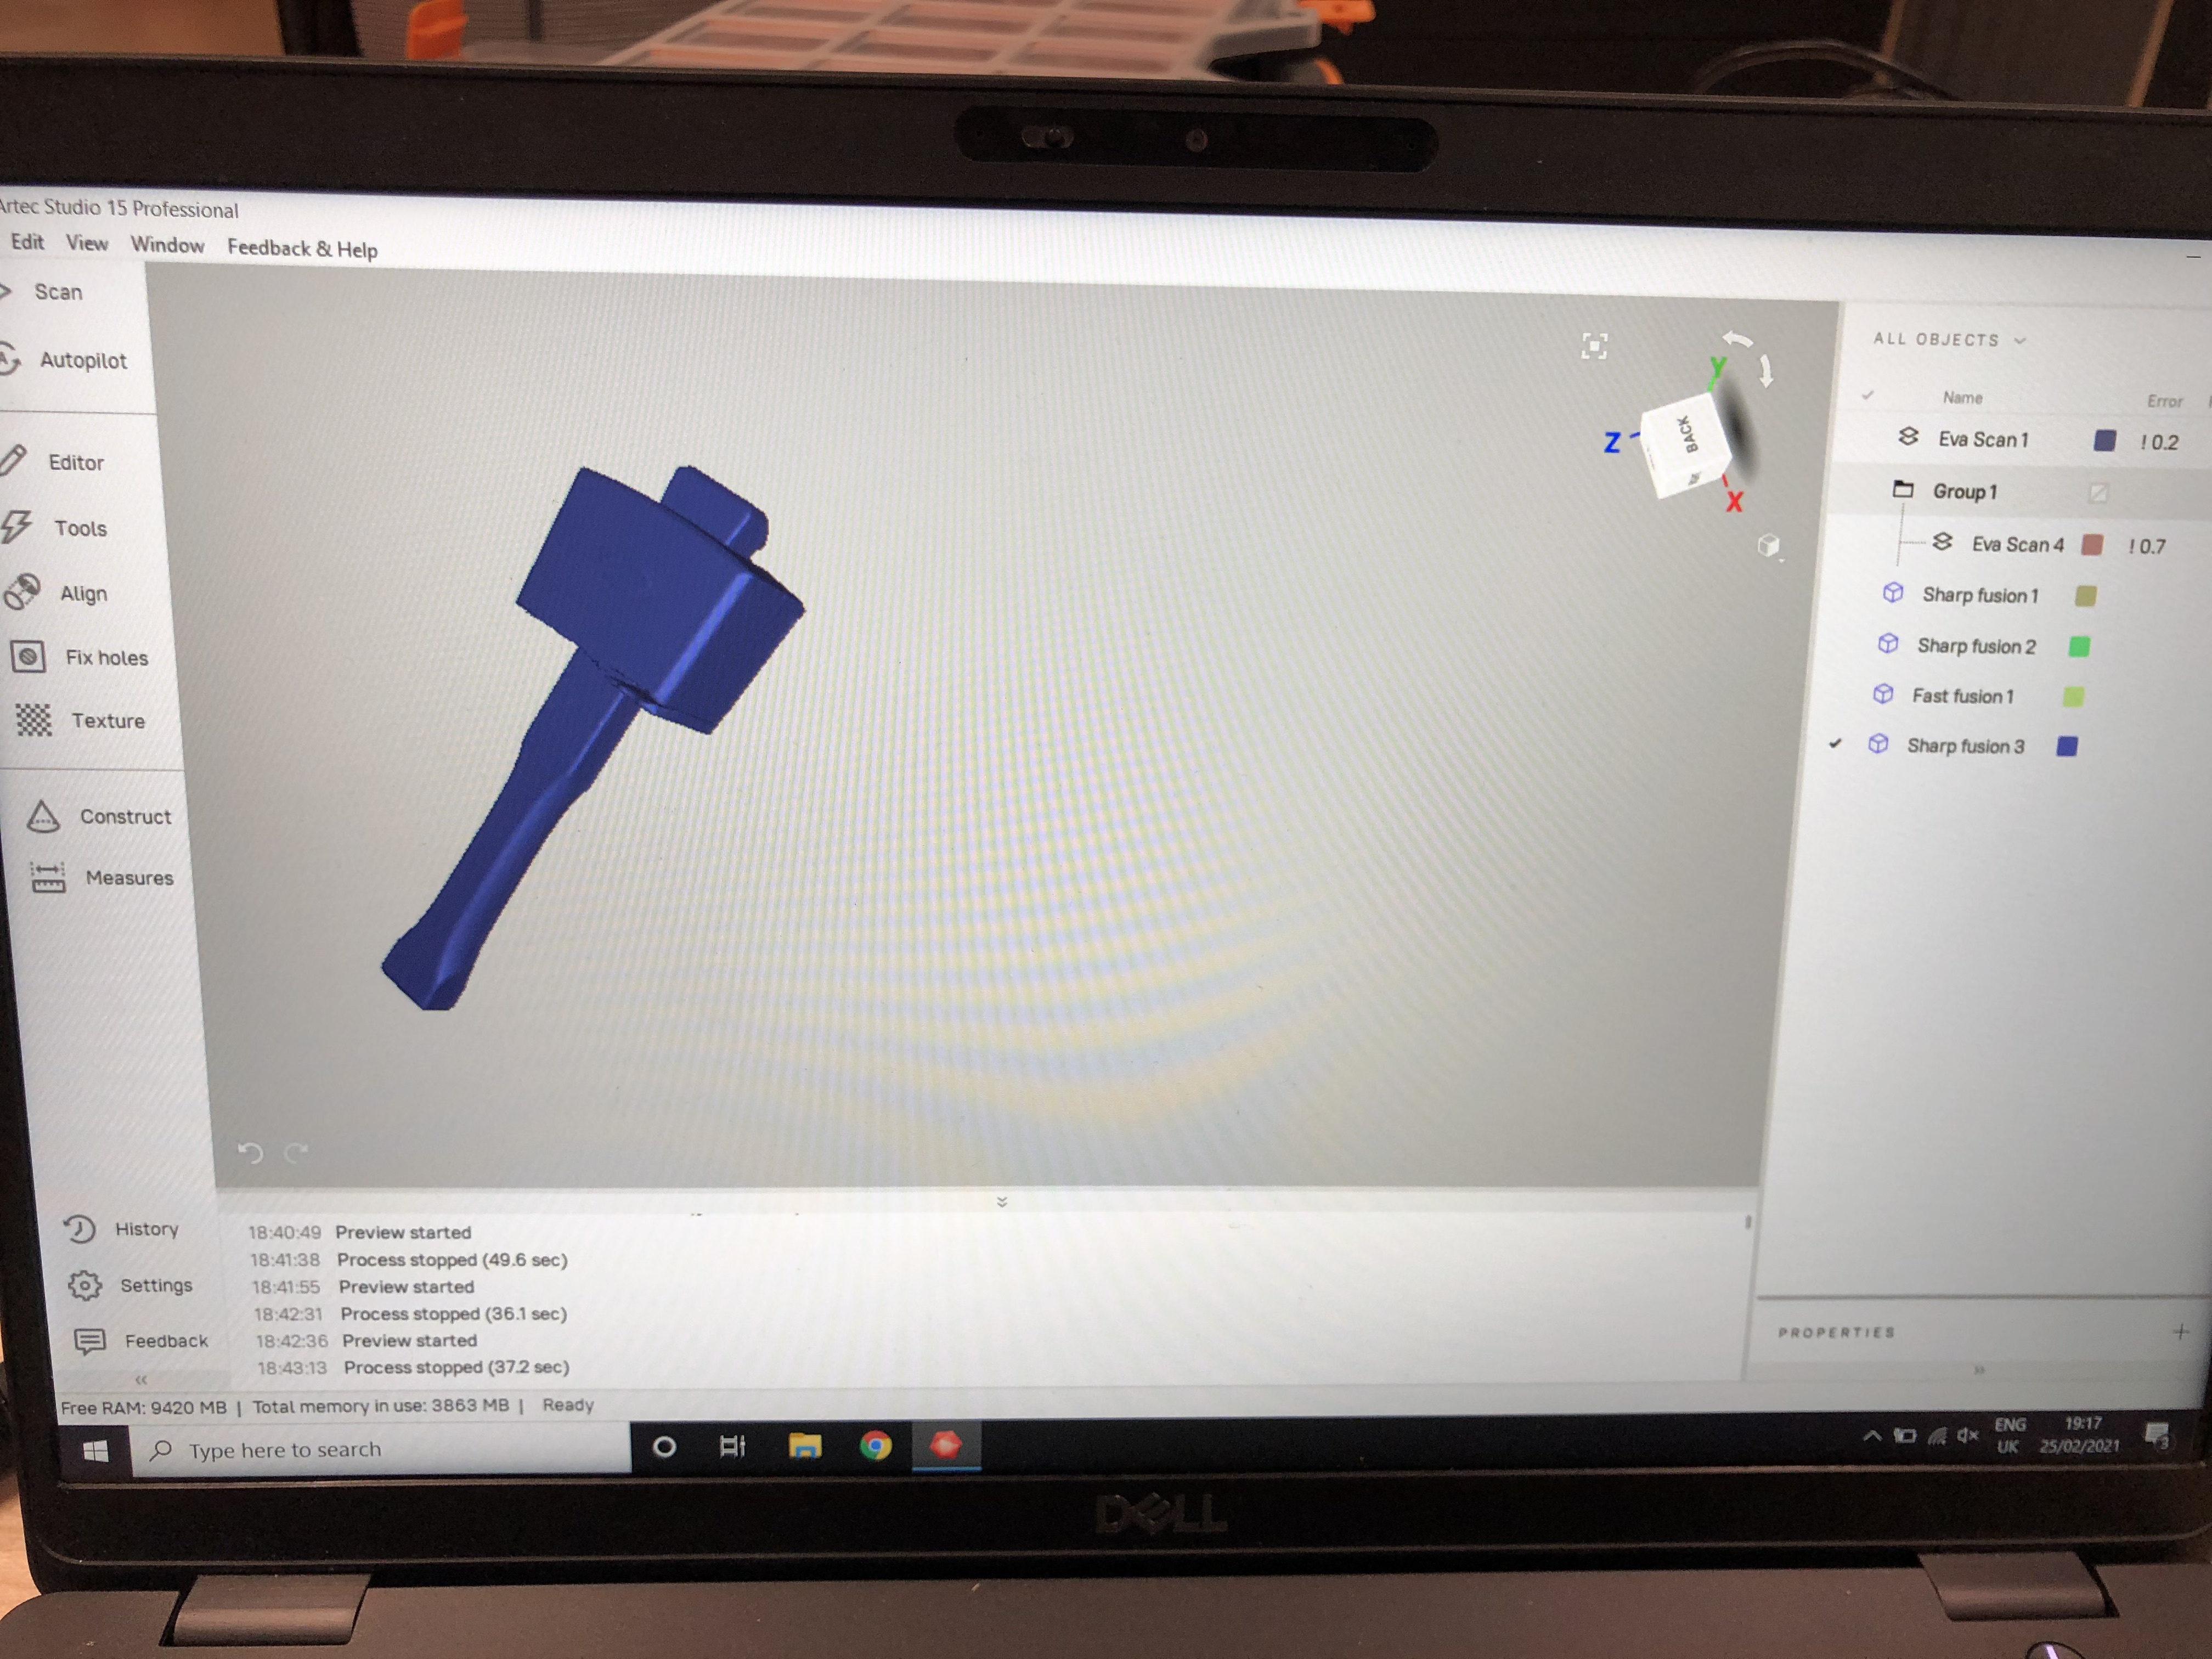
My first scan
I chose to scan a hammer from our workshop. I thought this would be easy:
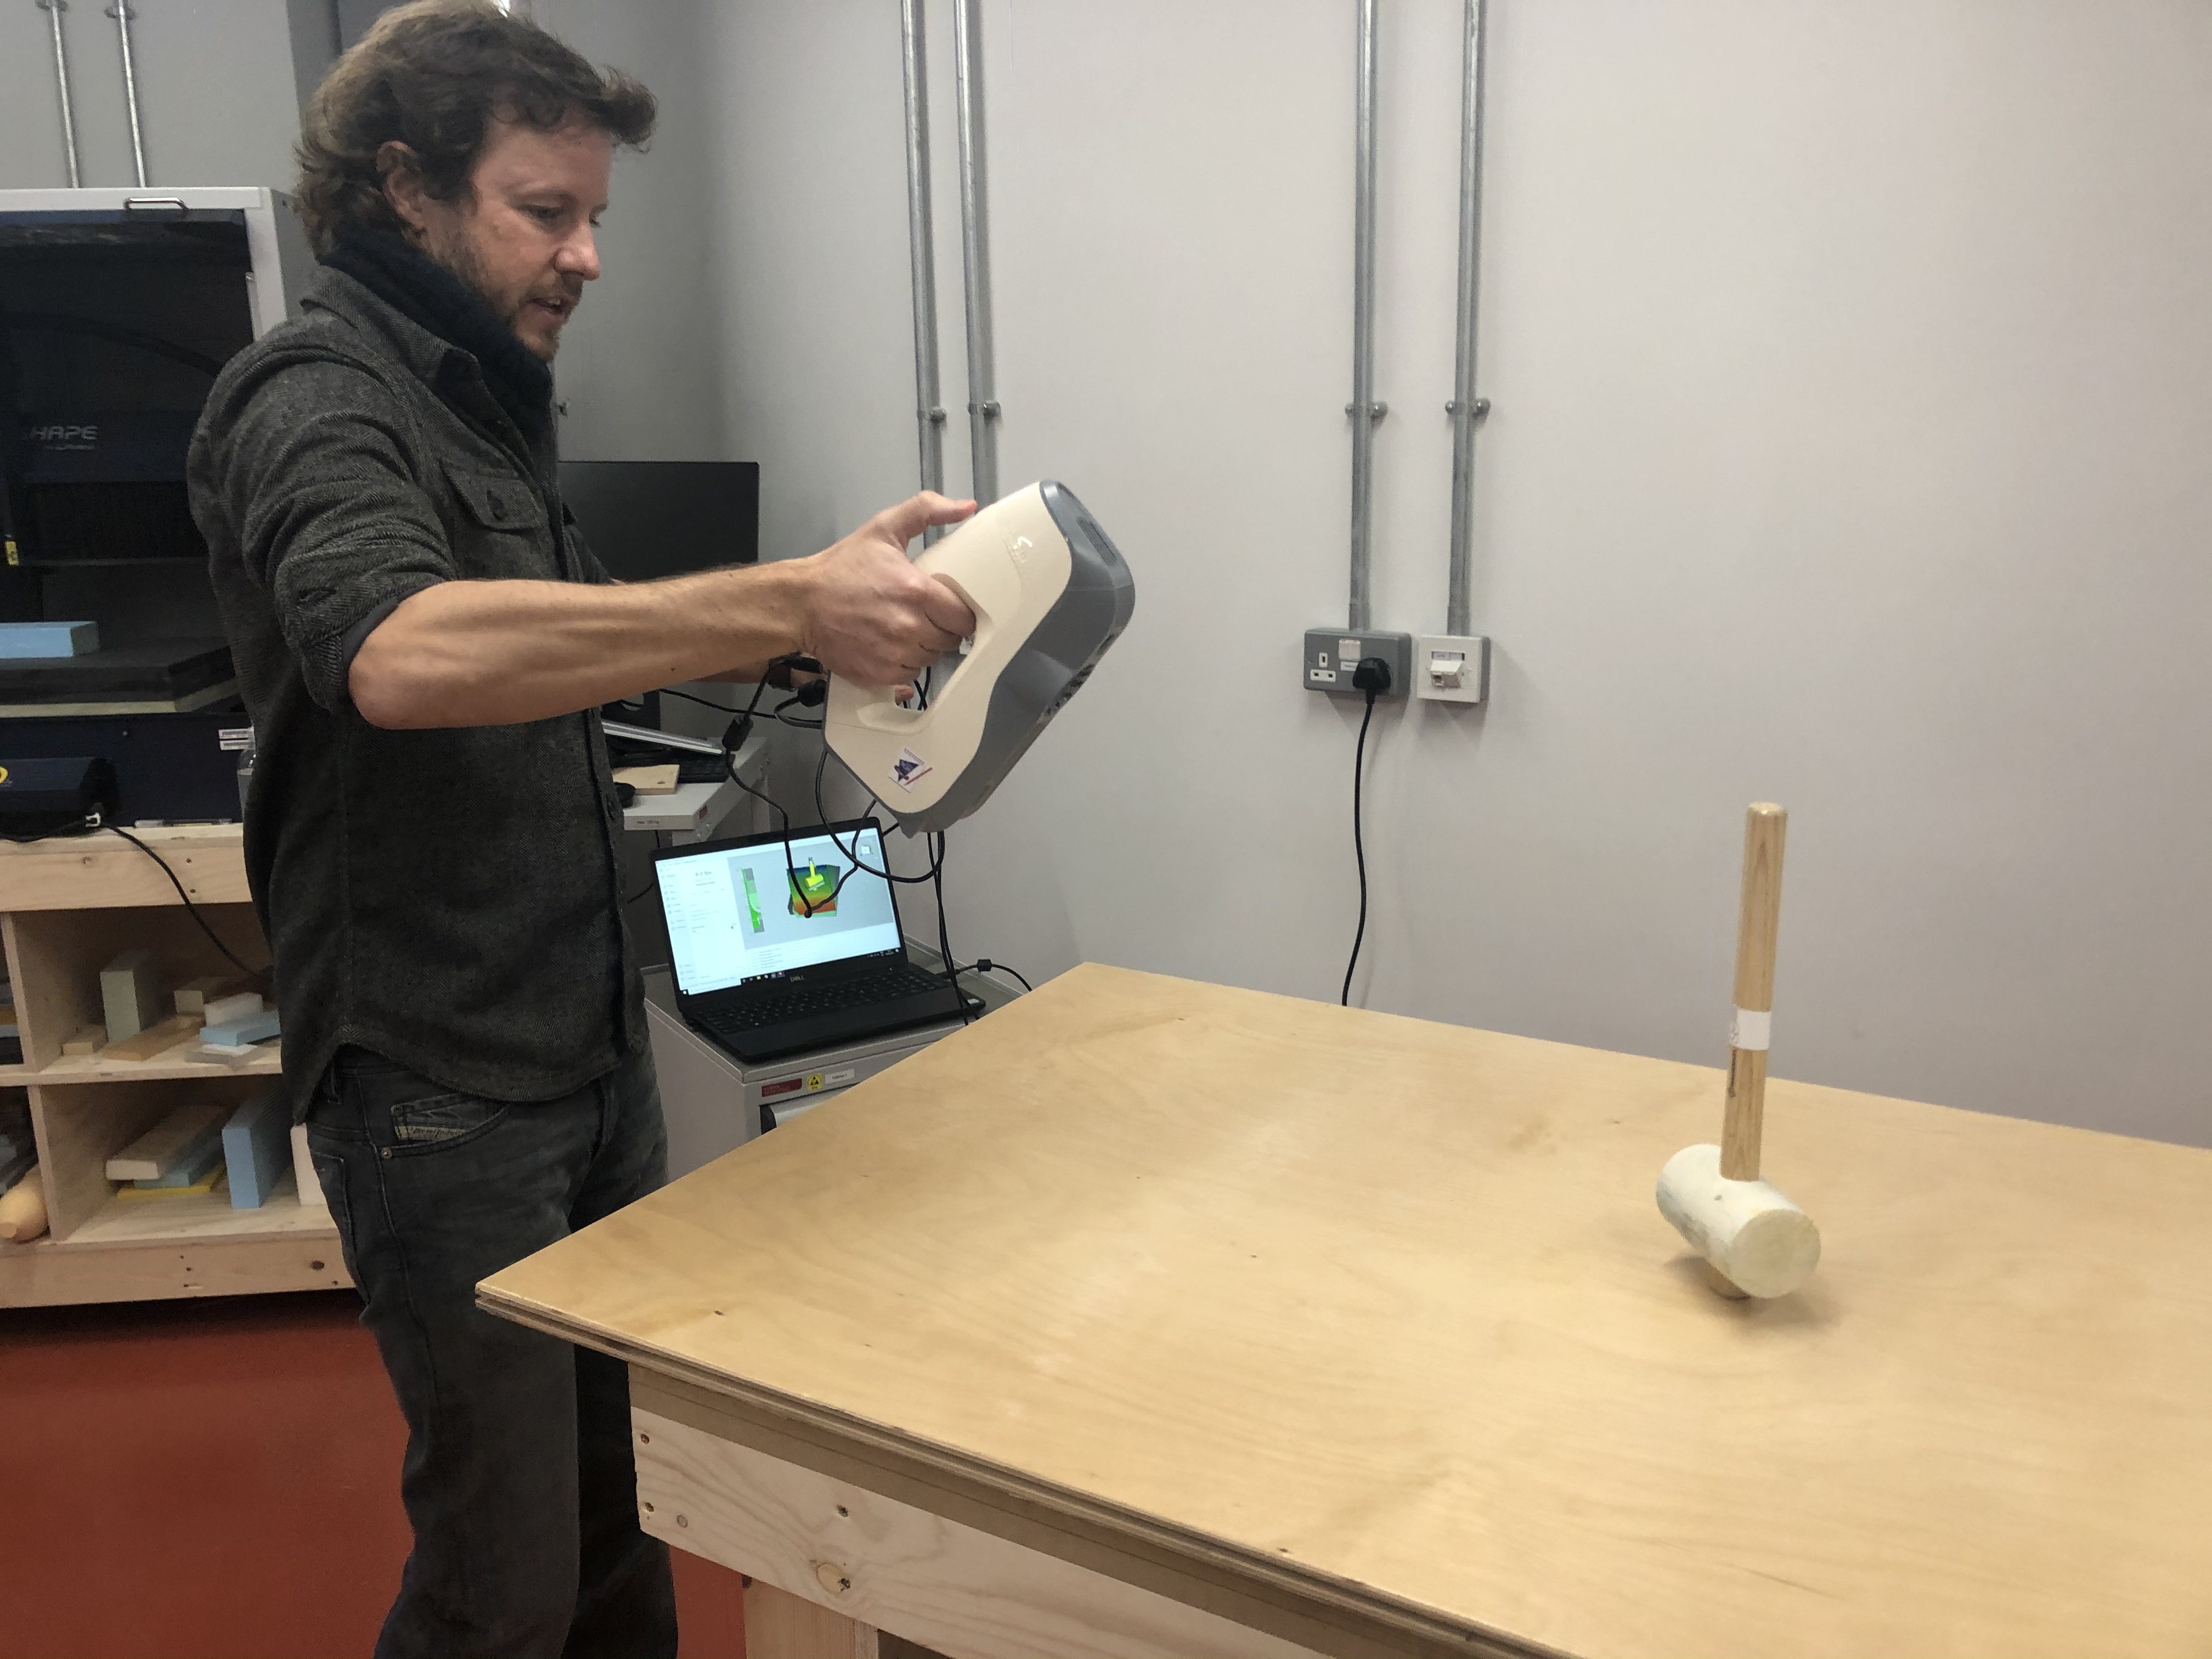
OK so it seems 3D scanning is pretty fiddly. I think I've been sucked in my Apple's marketing for the Lidar scanner on their new iPhone. They made it look so quick and easy. This scanner is actually quite difficult to use and after a little research, it seems the Apple scanner is only effective with large items. My first few scans all came out like this one below. On one side it looks a bit like a hammer:
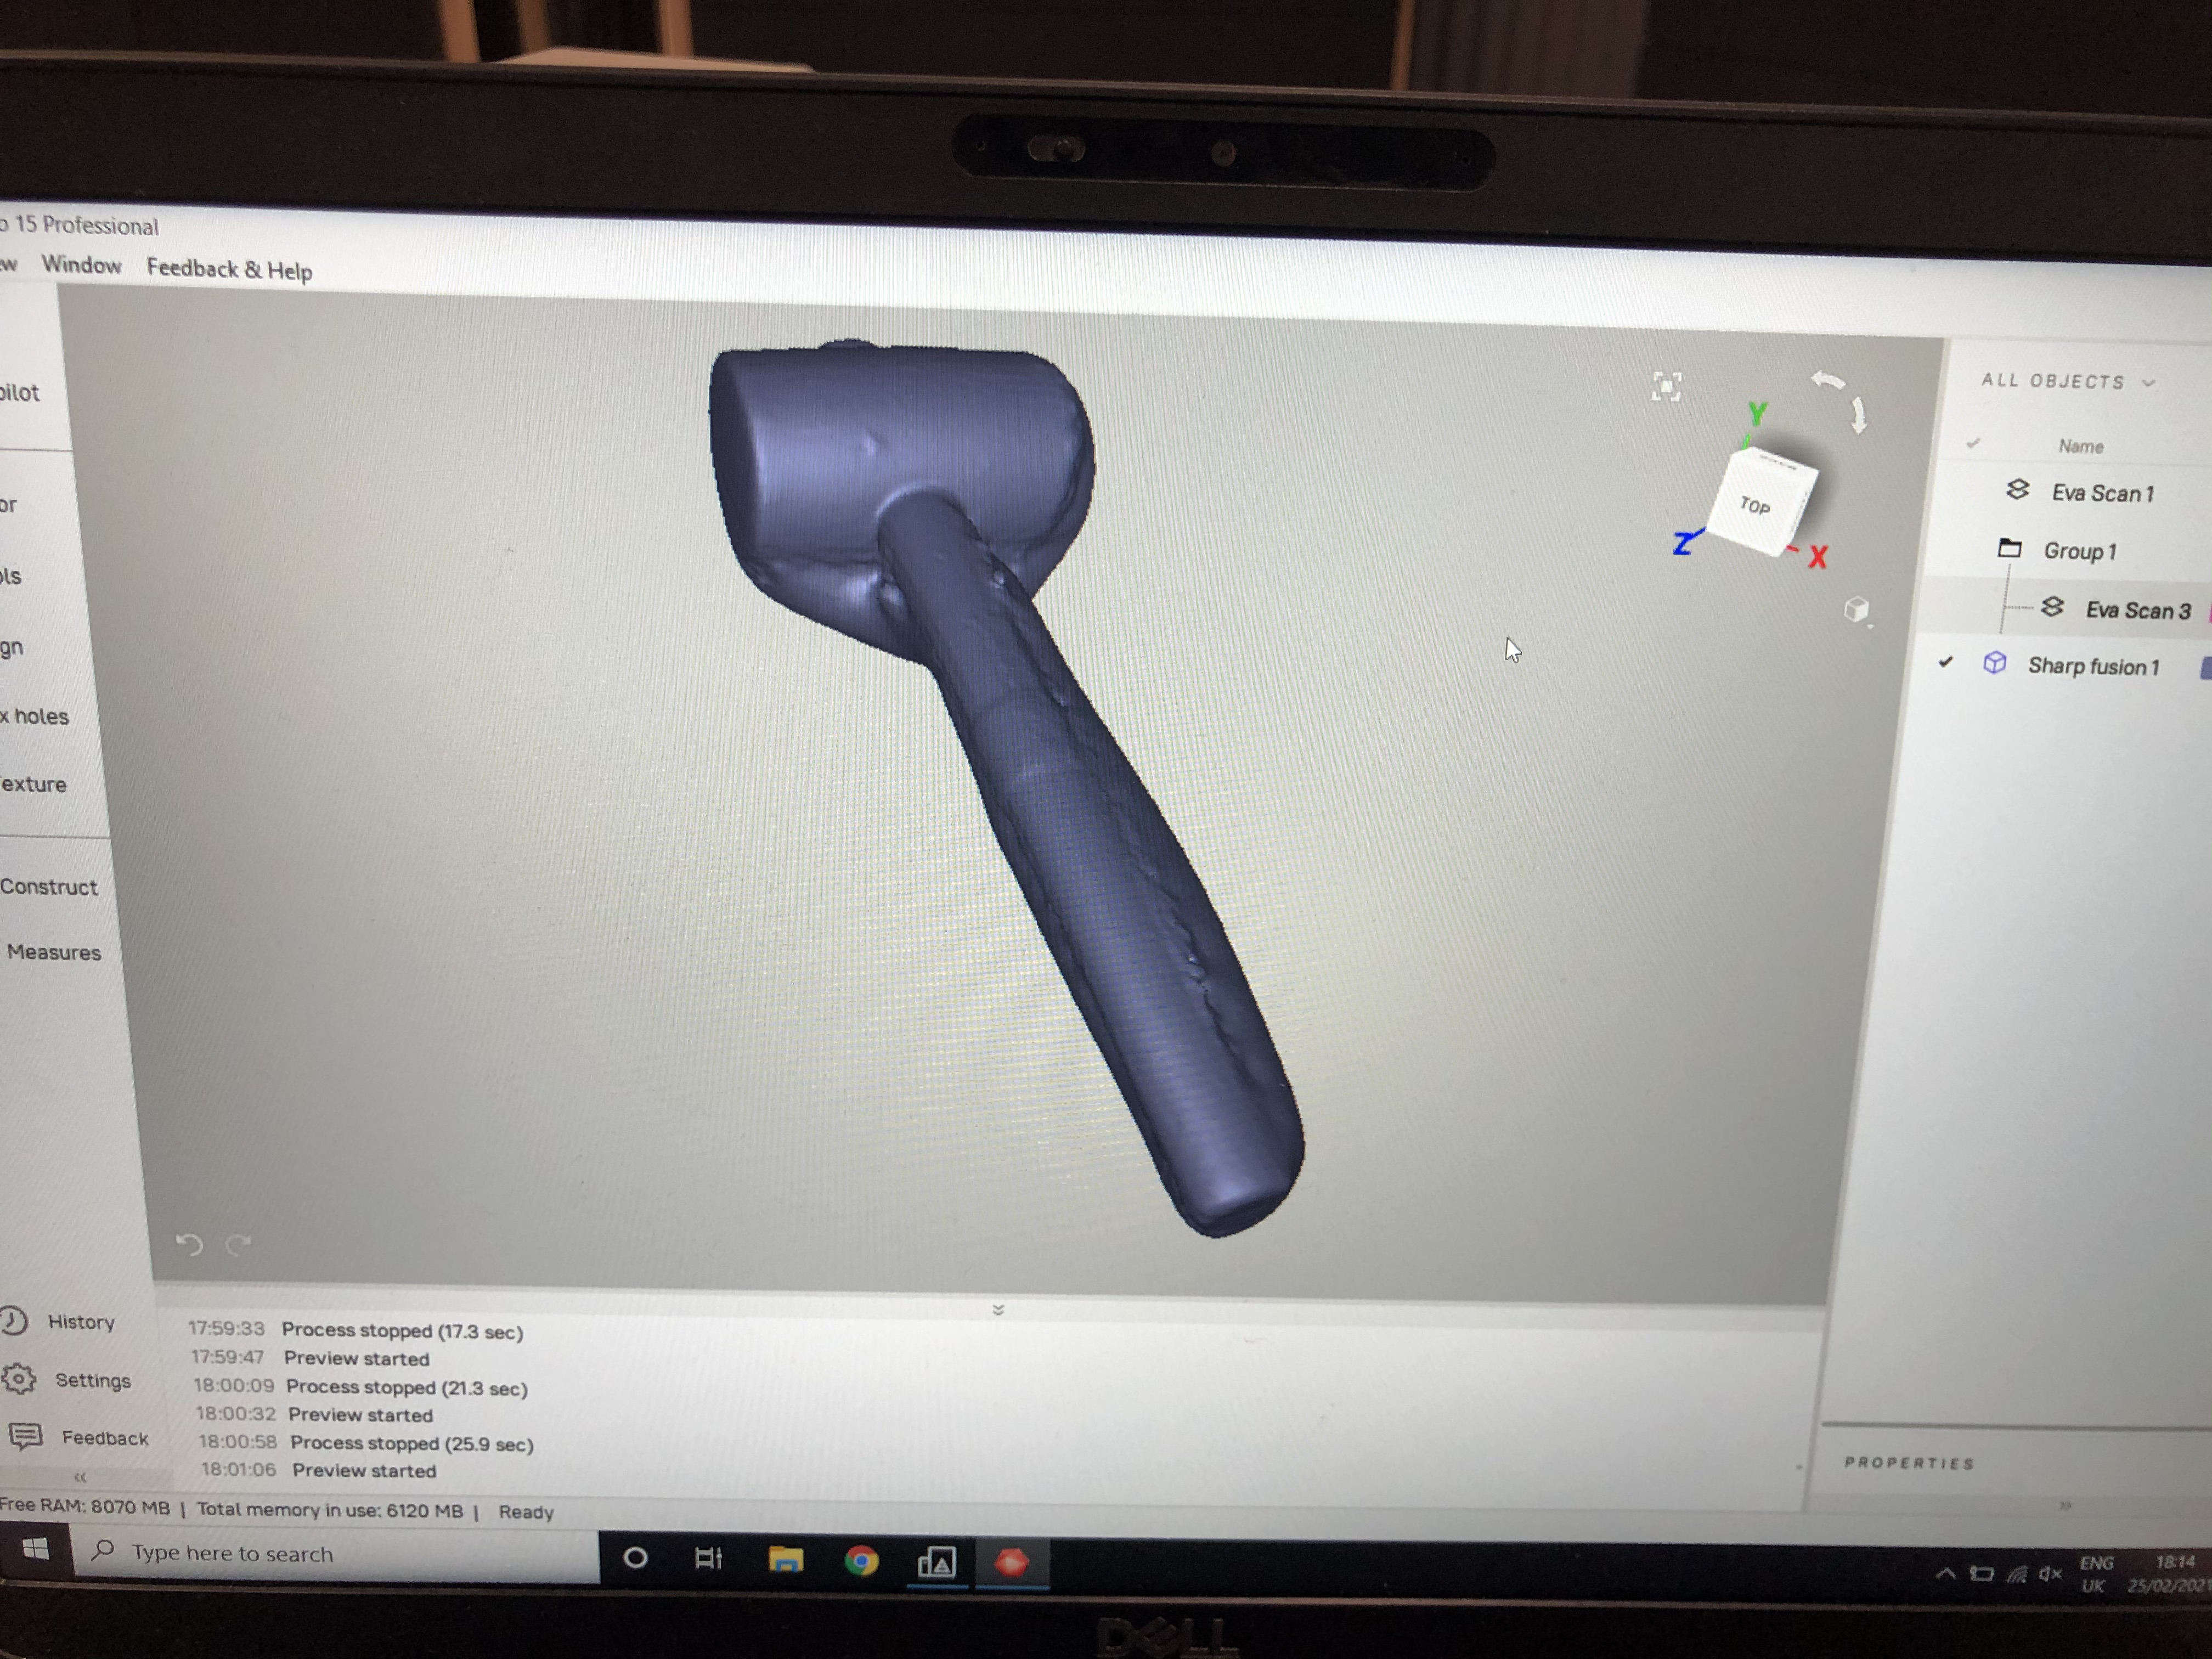
The other side looks like this:
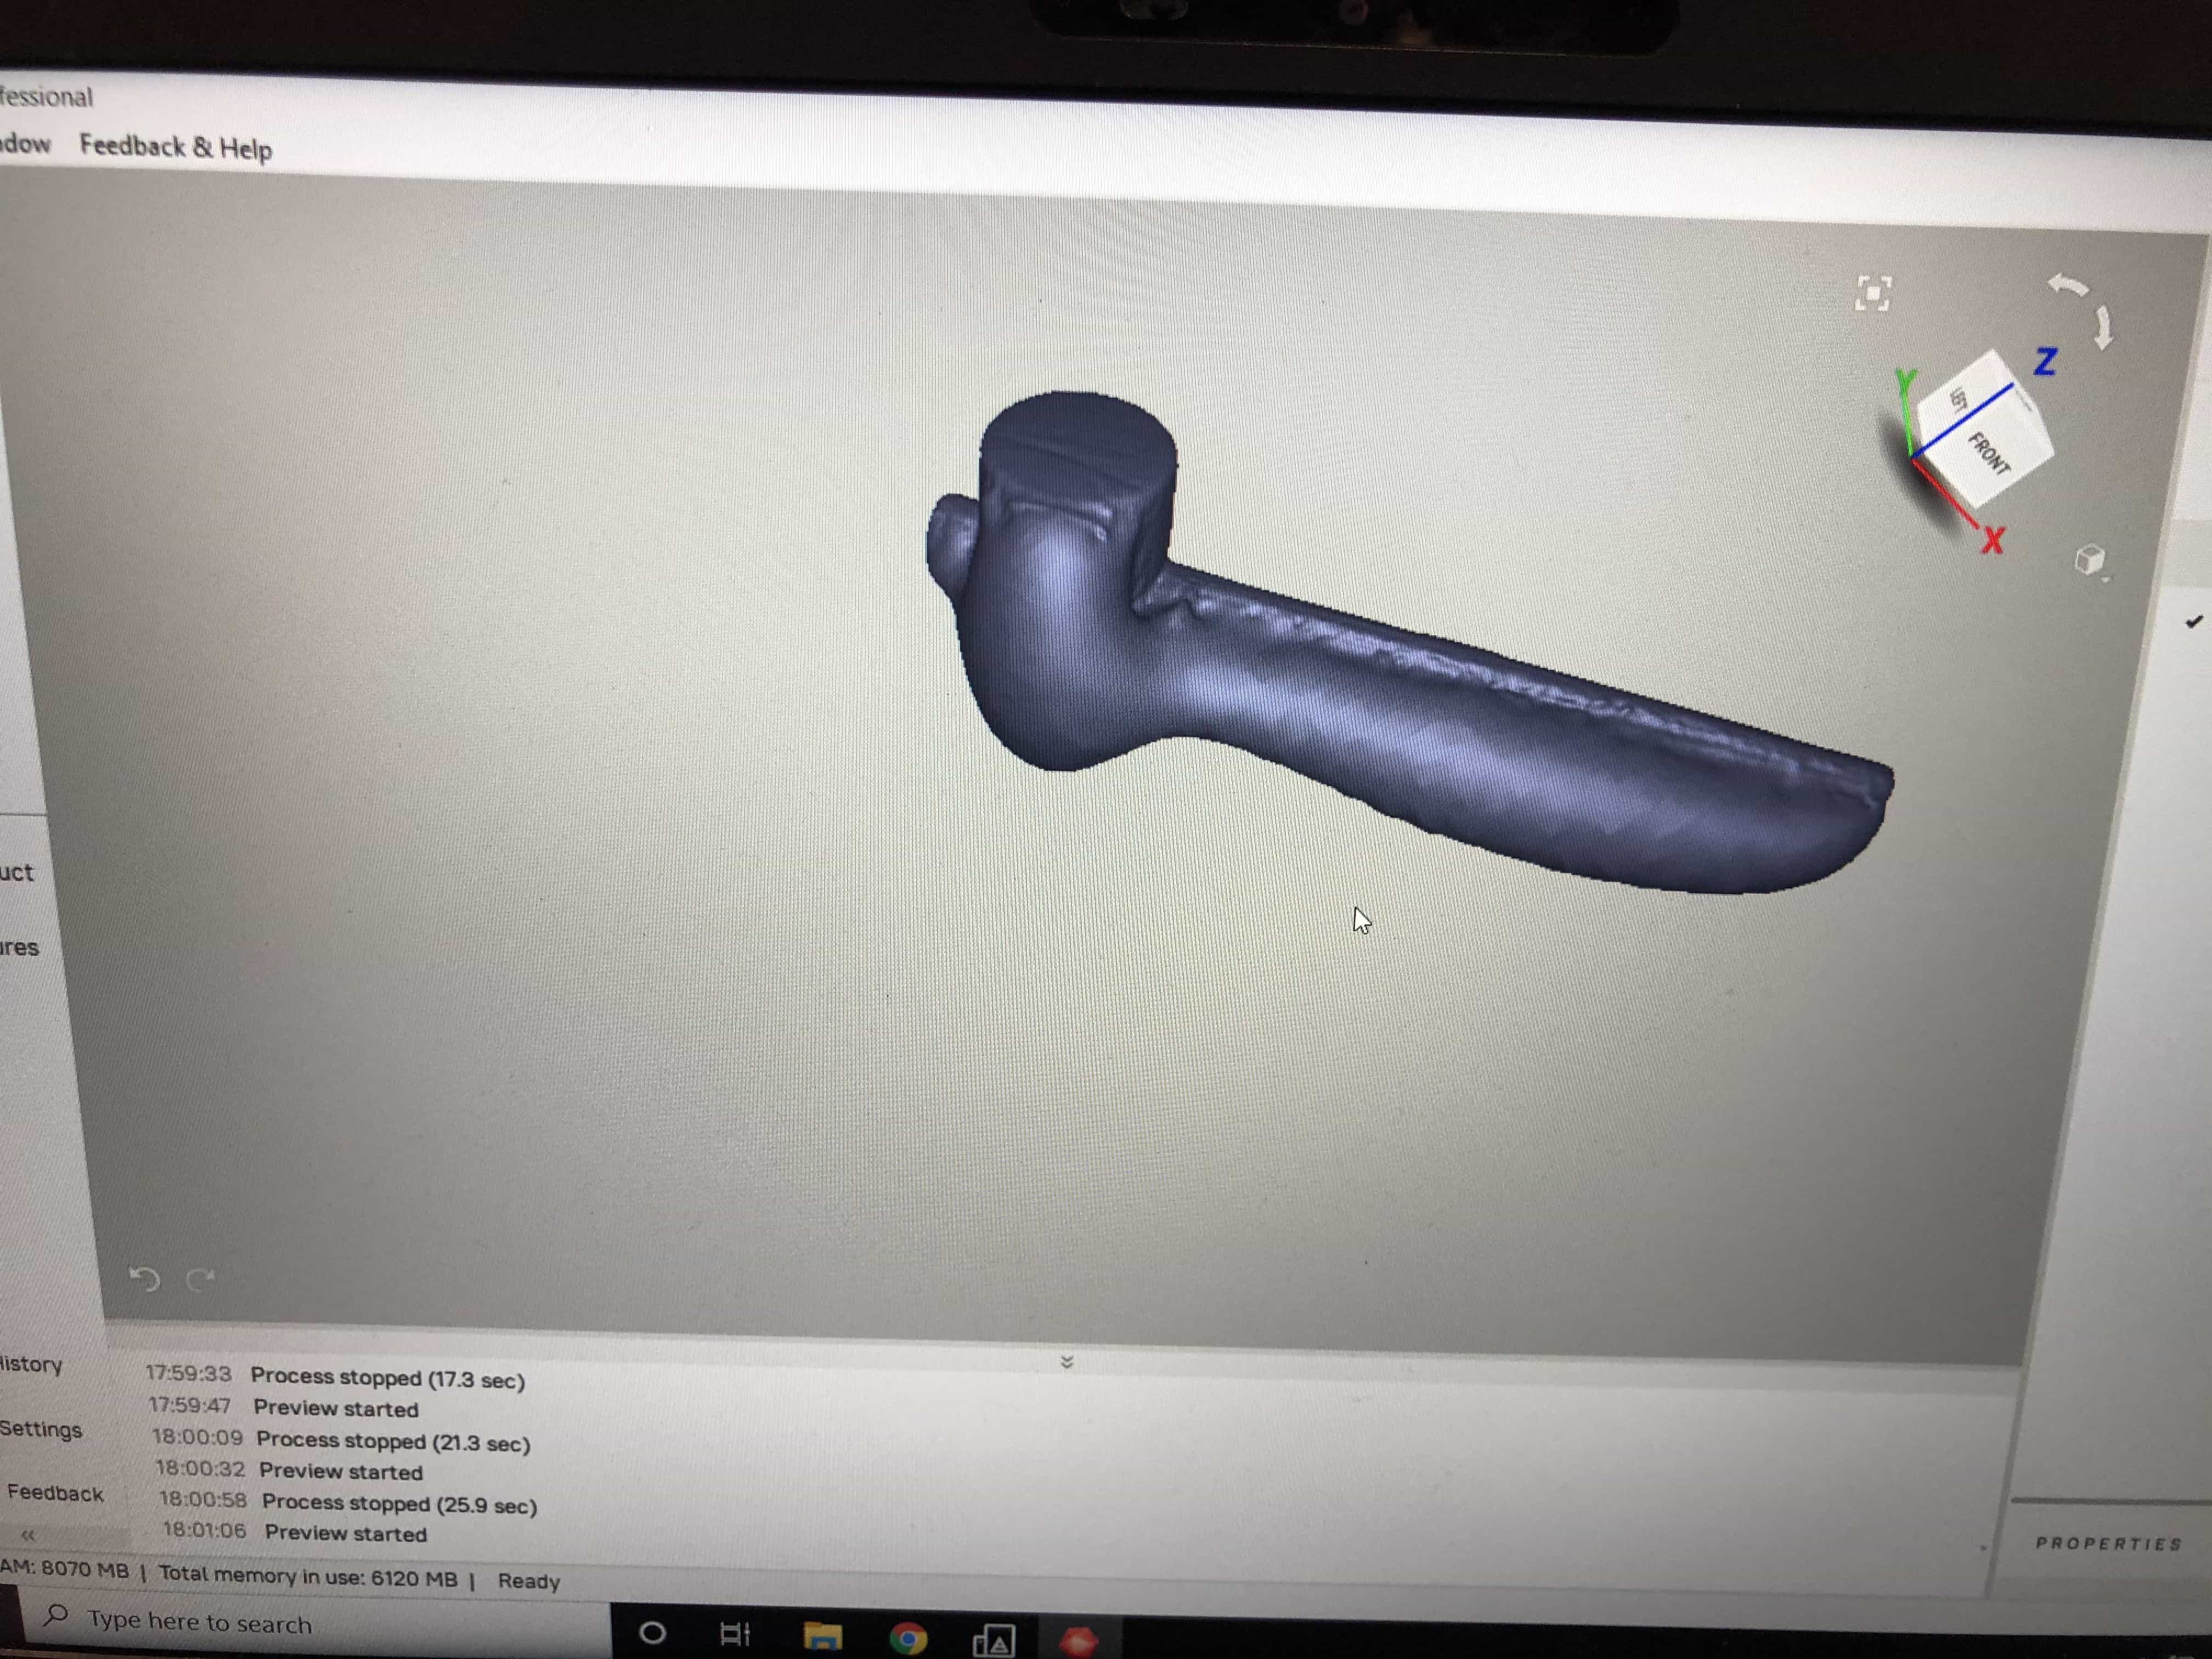
It took 5 or 6 attempts but eventually I had something that looked like a hammer on both sides:
3D printing
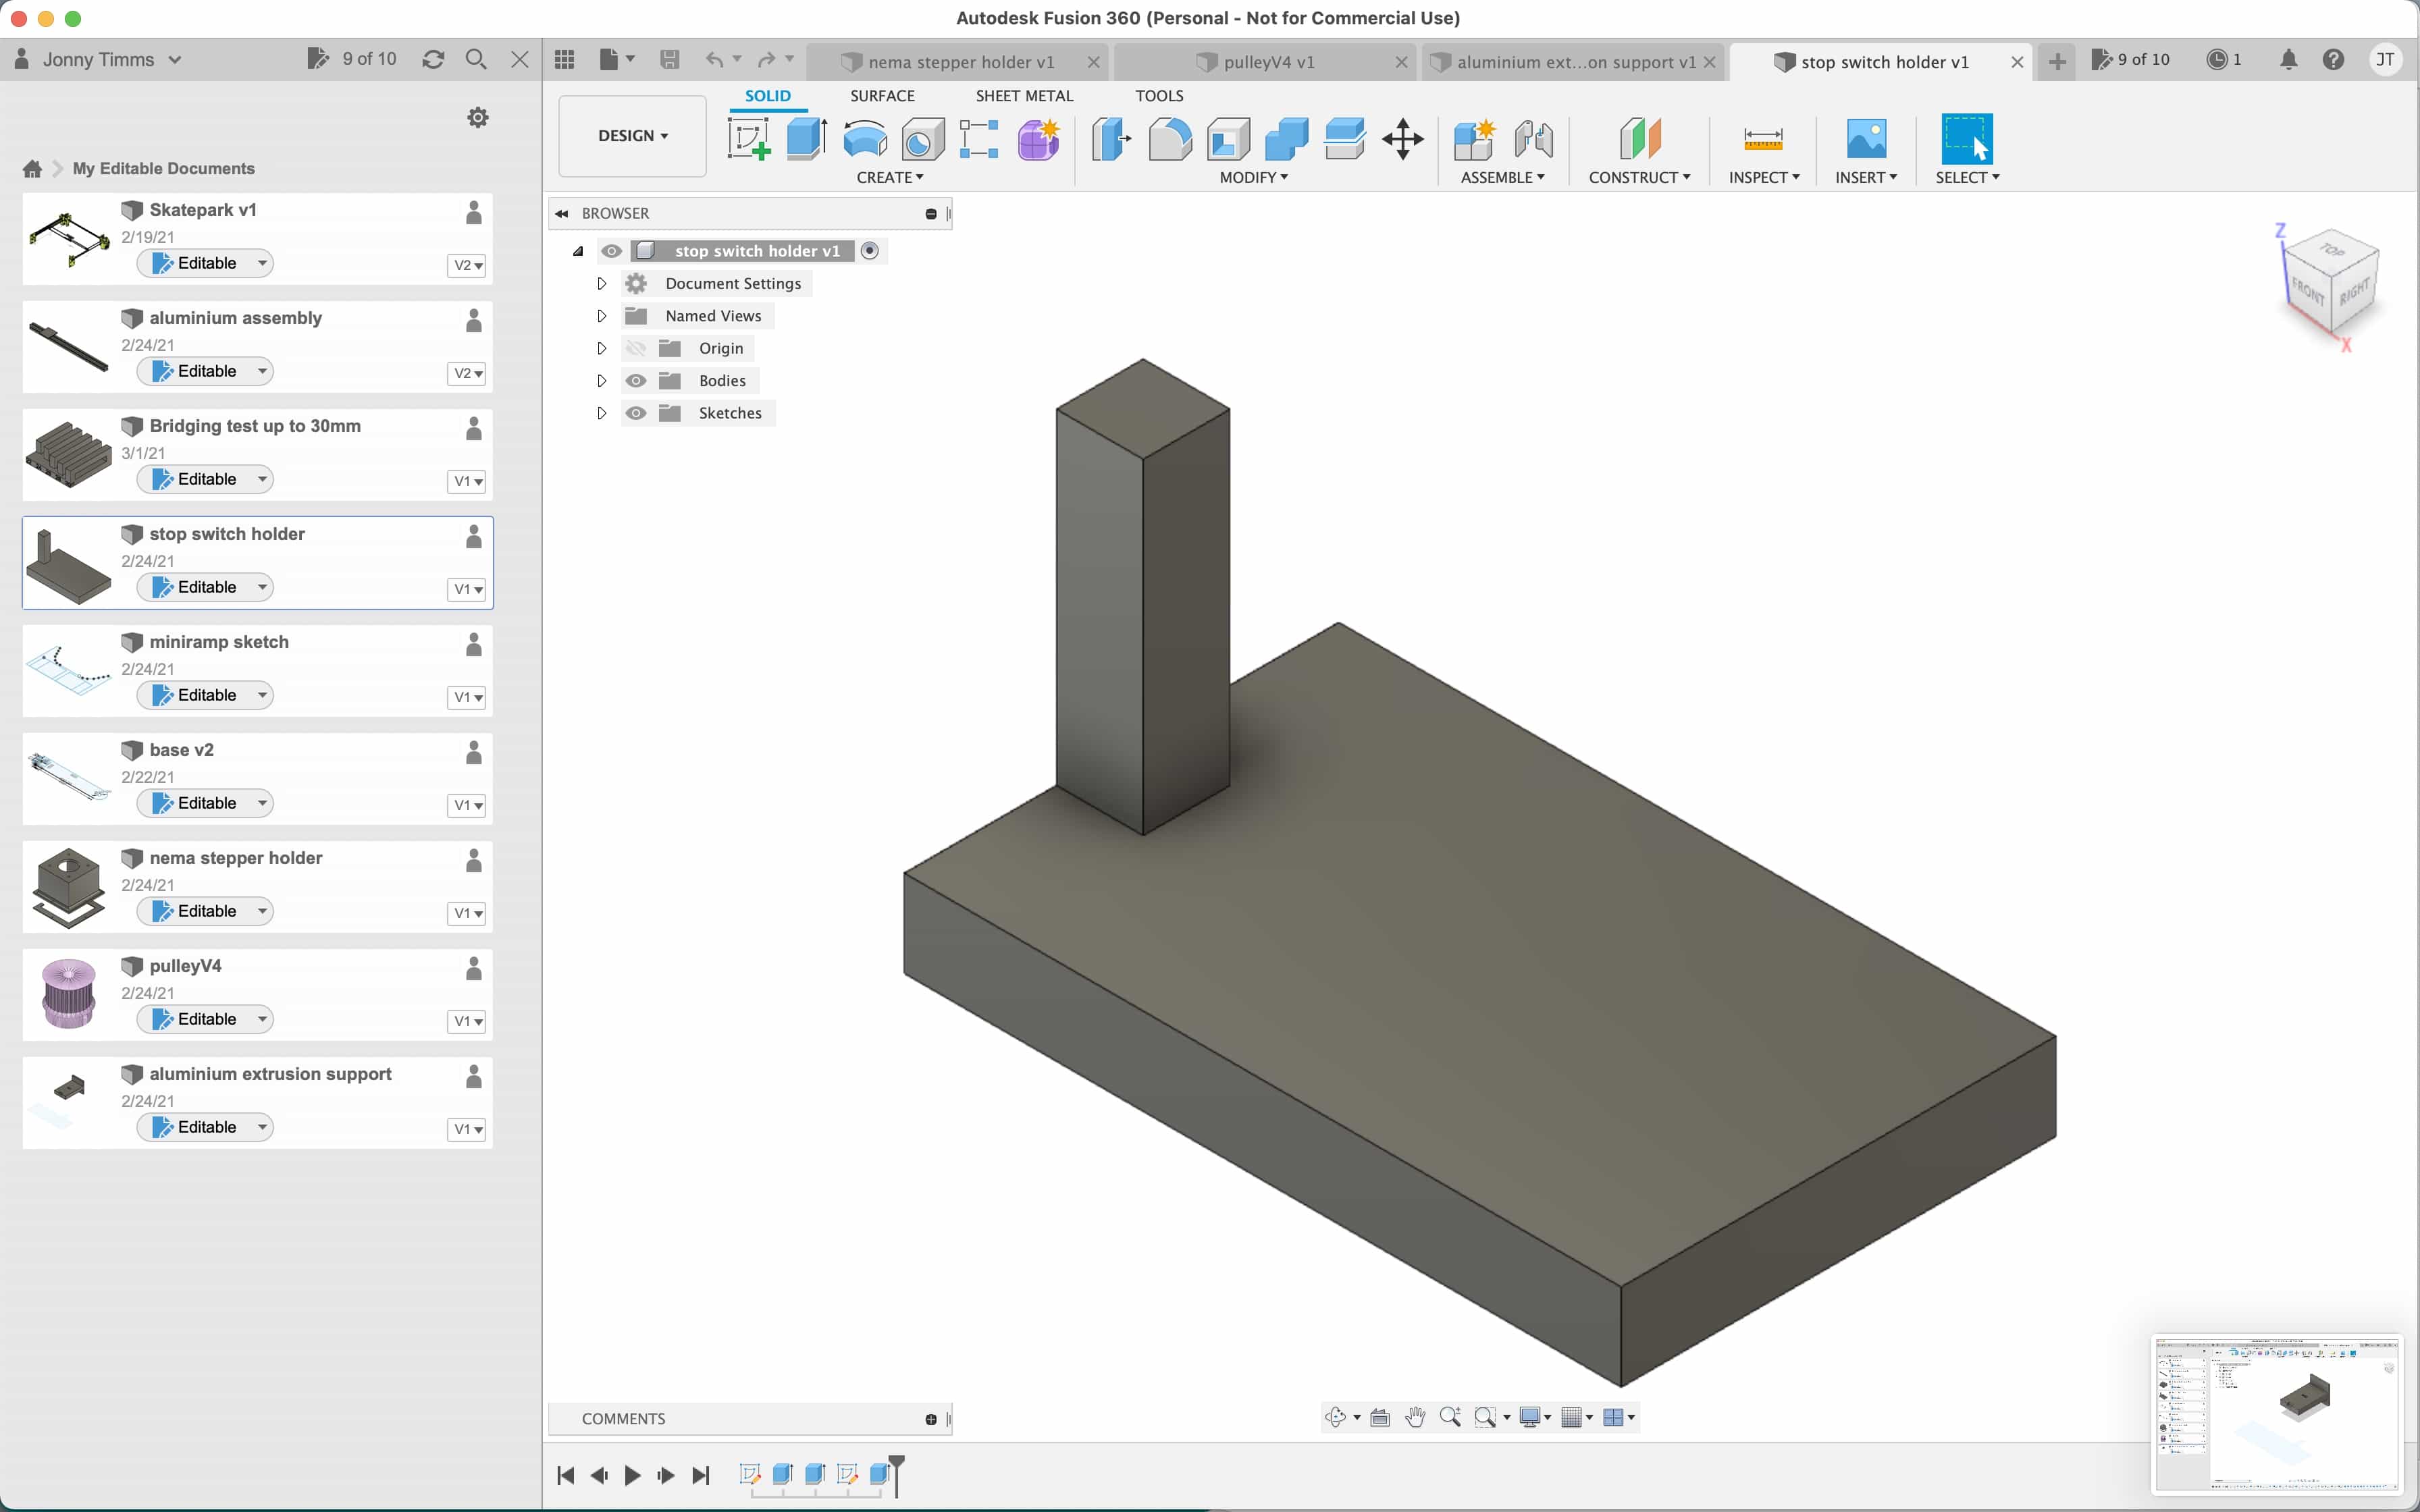
I have a potential final project which is an architectural model town built above a 2 axis stepper motor drive system. Its rather like a laser cutter but with a magnet in place of the laser and a magnet-controlled device (probably a skateboard). Before I sign off on this final project, I want to test the functionality of moving a skateboard around a sheet of plywood using a single axis. I've bought the aluminium frame, the stepper motor and driver, the gantry roller and a timing belt. In order to assemble everything I shall require several small 3D printed parts. These parts could certainly not be made with a CNC machine and they are all small, thereby fitting the brief for this week's assignment. Our 3D printers in our FabLab are the Prusa i3 models. They are a great printer:

You can see the full specification at the Prusa website:
PrusaSlicer
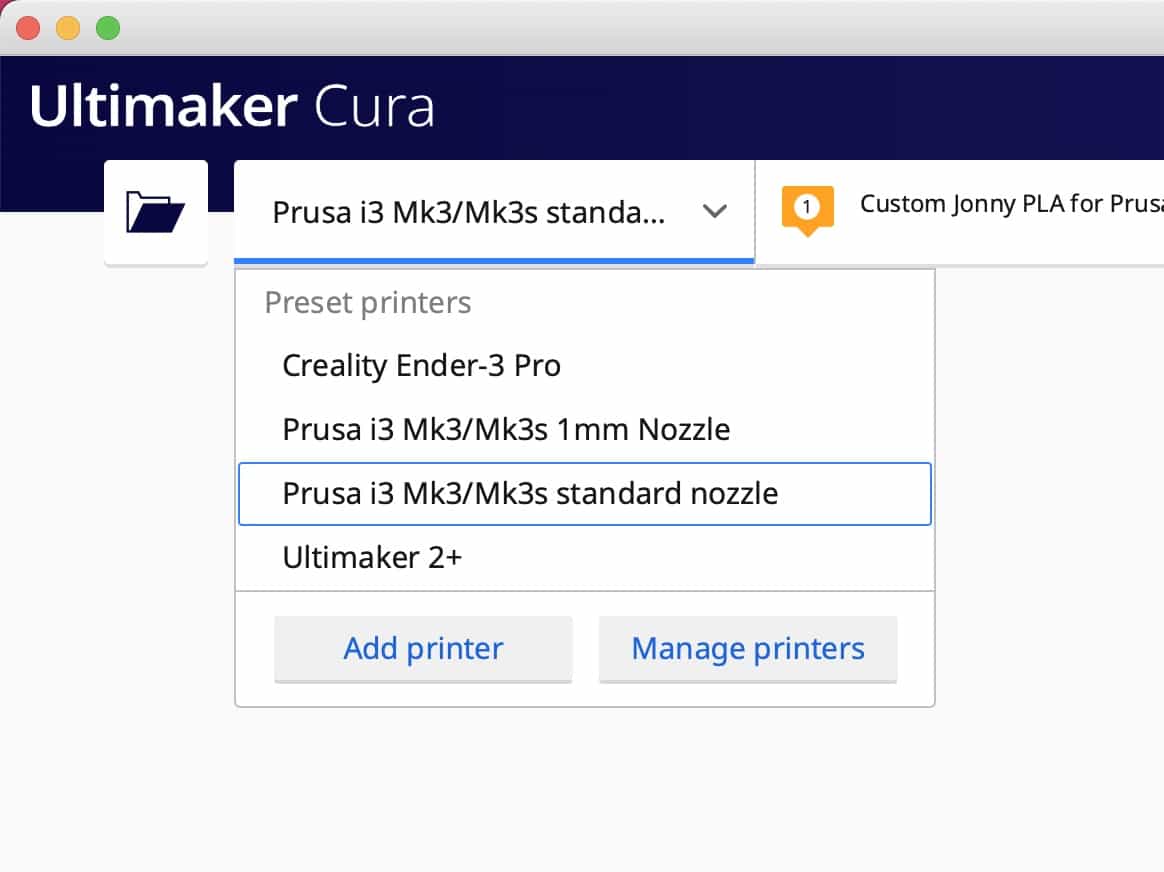
My preferred slicer is Cura. You can download for free from their website:
Ultimaker CuraI love this slicer and it does does everything I have ever wanted. I use it at home with my Ender-3 pro and in the fab lab with the Prusa i3. Often I just use the recommended settings. They are fine for quick prototypes and I normally use layer heights of 0.2mm
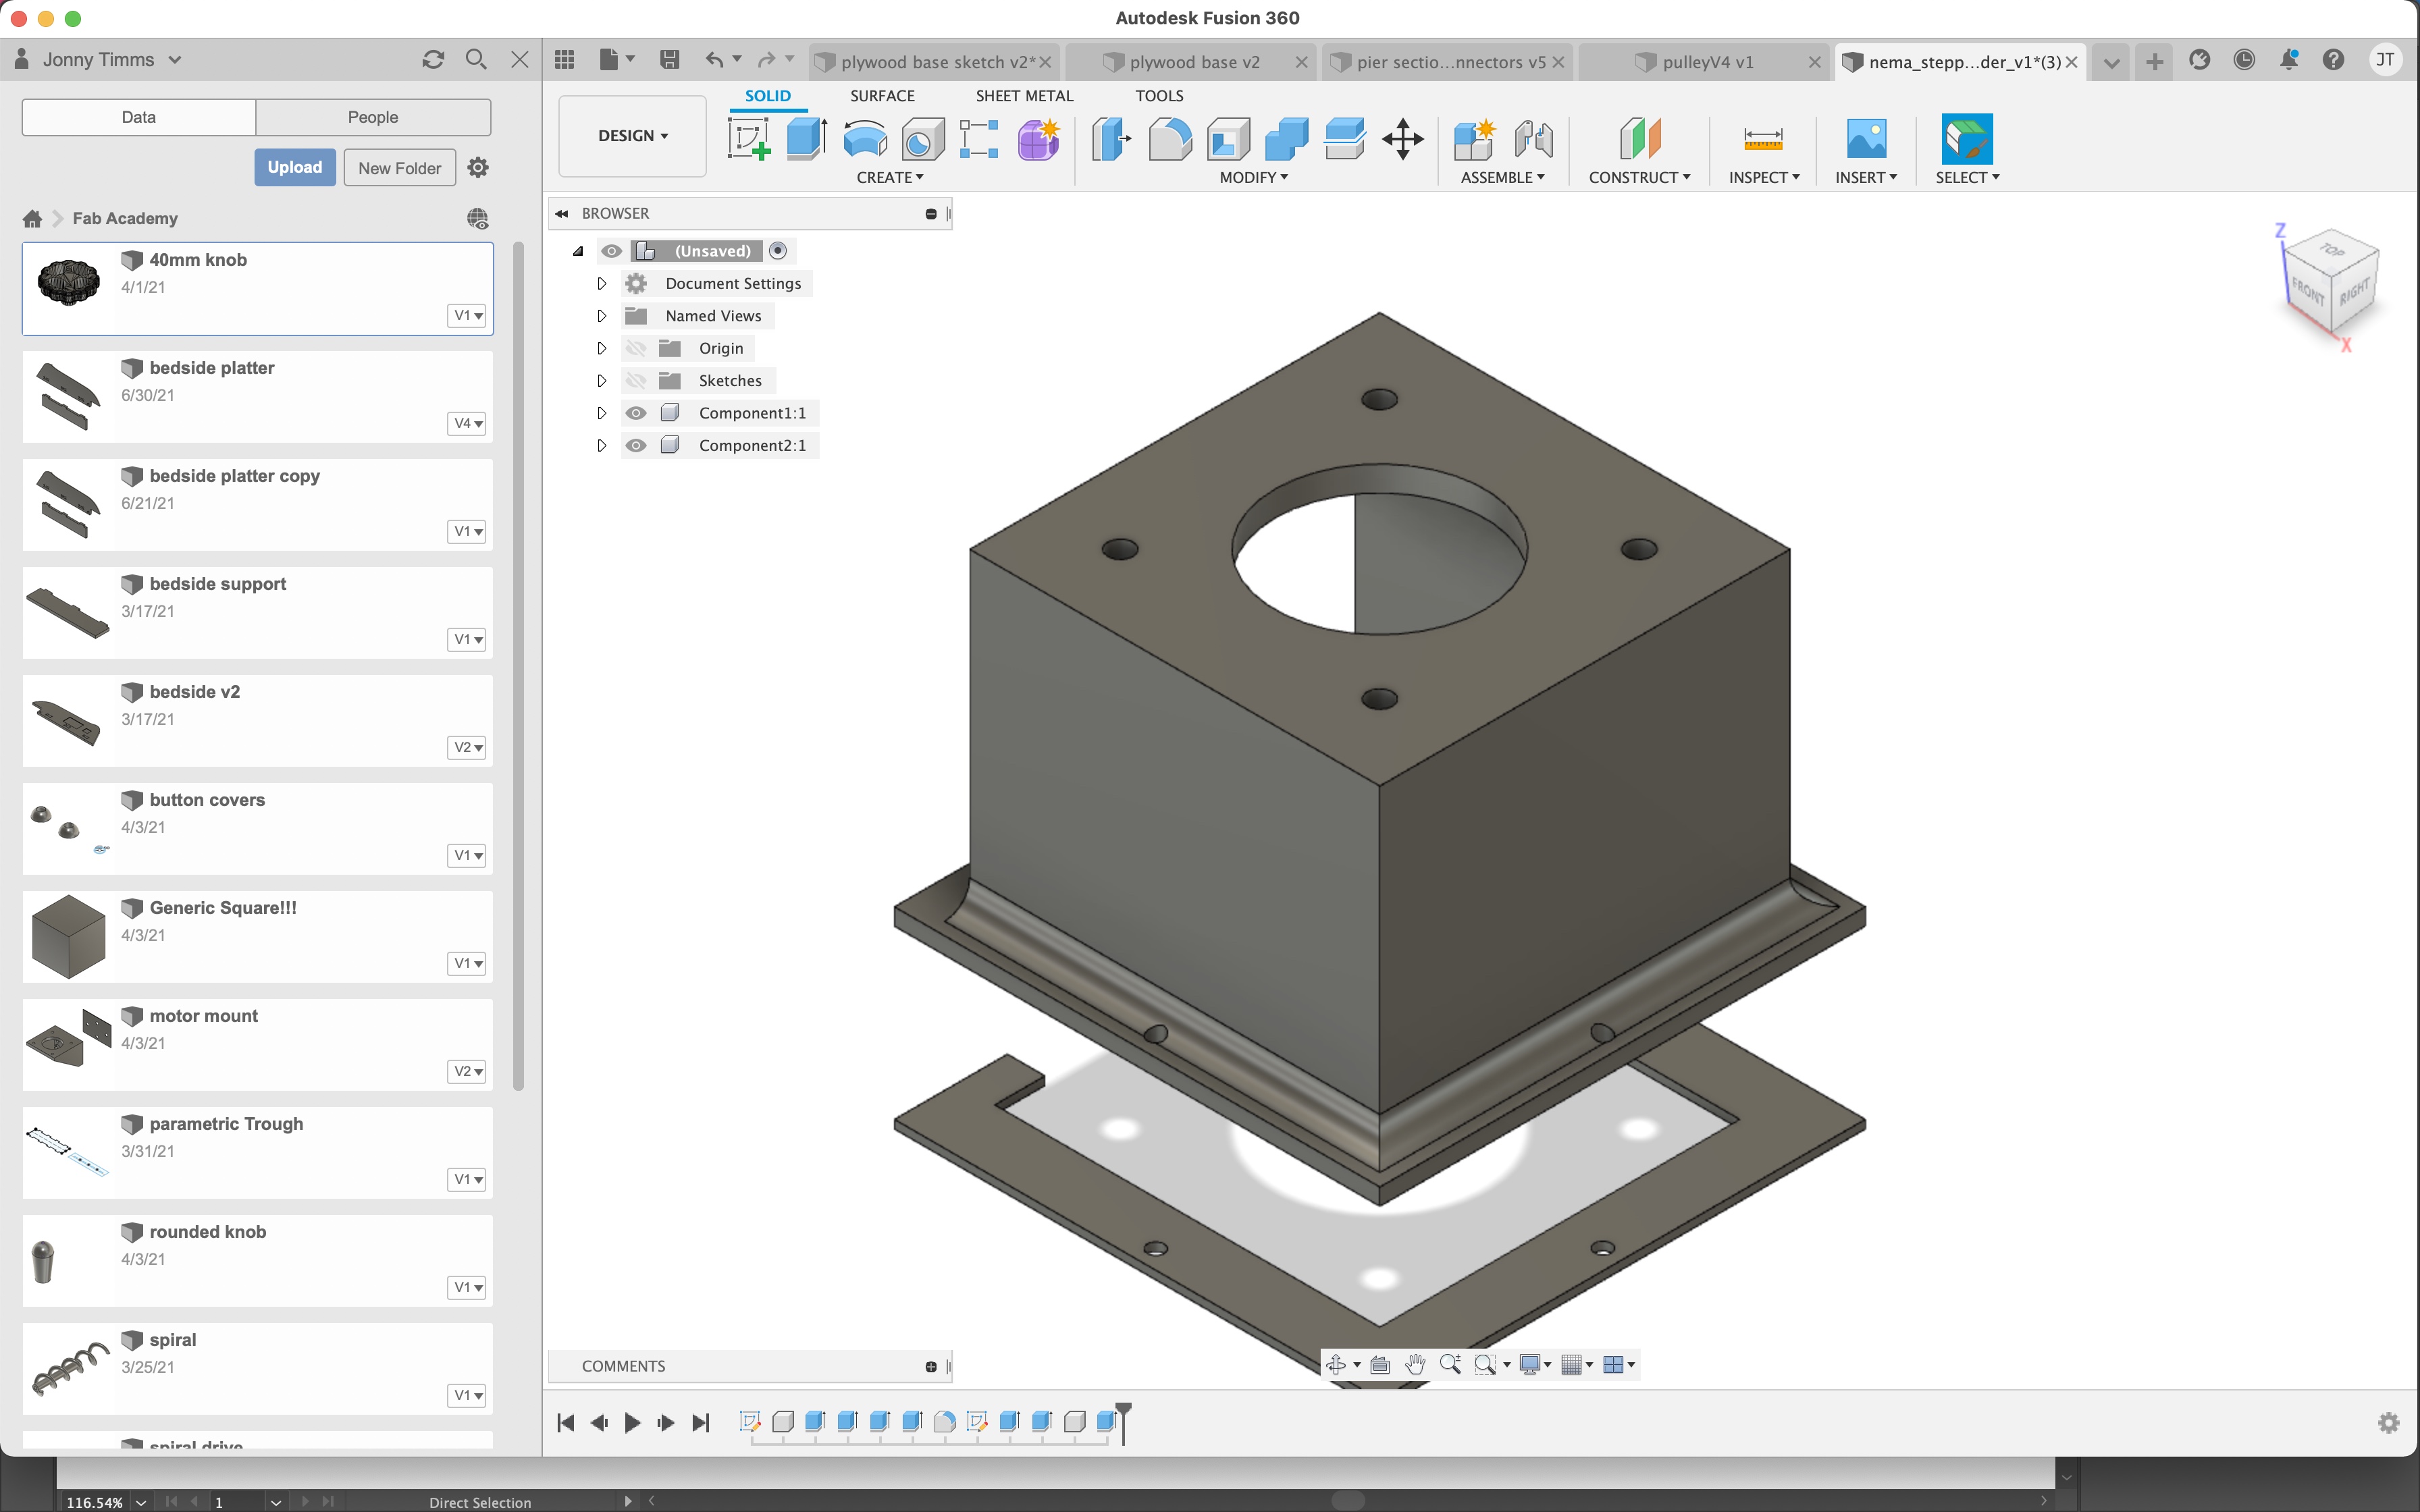
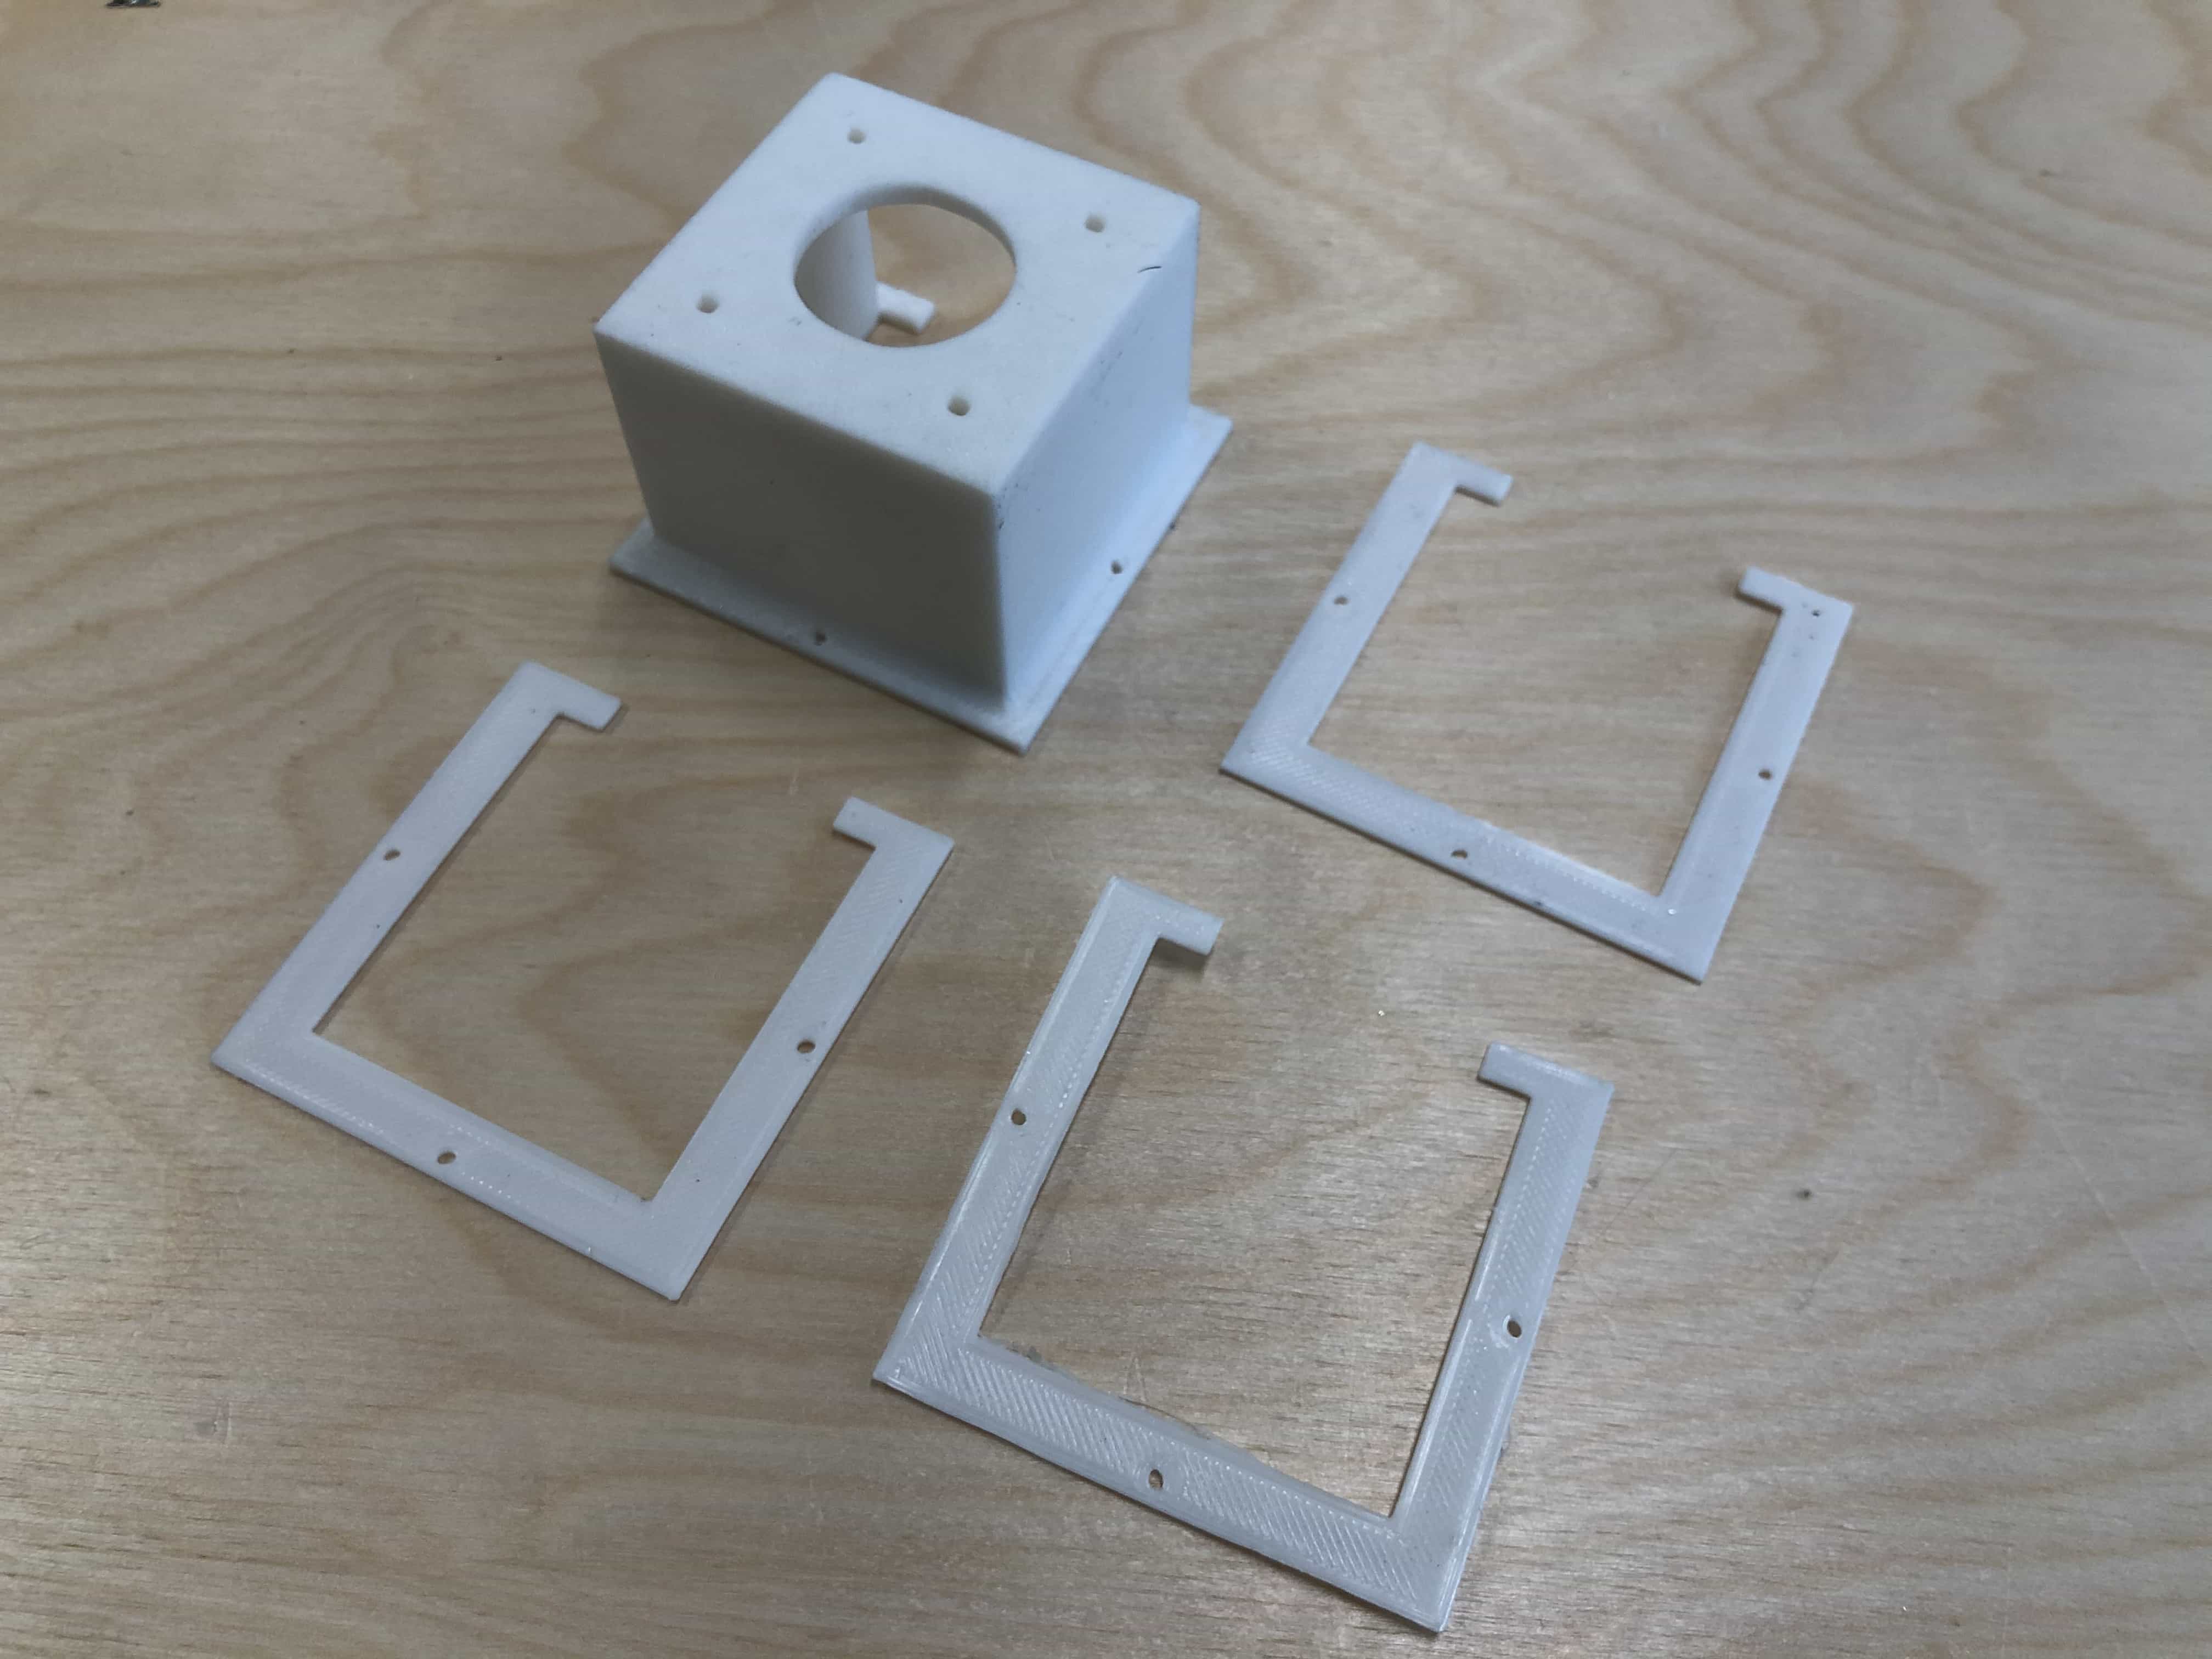
1st part - Stepper motor mount
This part is a great candidate for 3d printing because it can not be made subtractively. The reason it is not possible is because it is hollow inside. If you turned it upside down, the new challenge would be the overhangs that can not be milled.
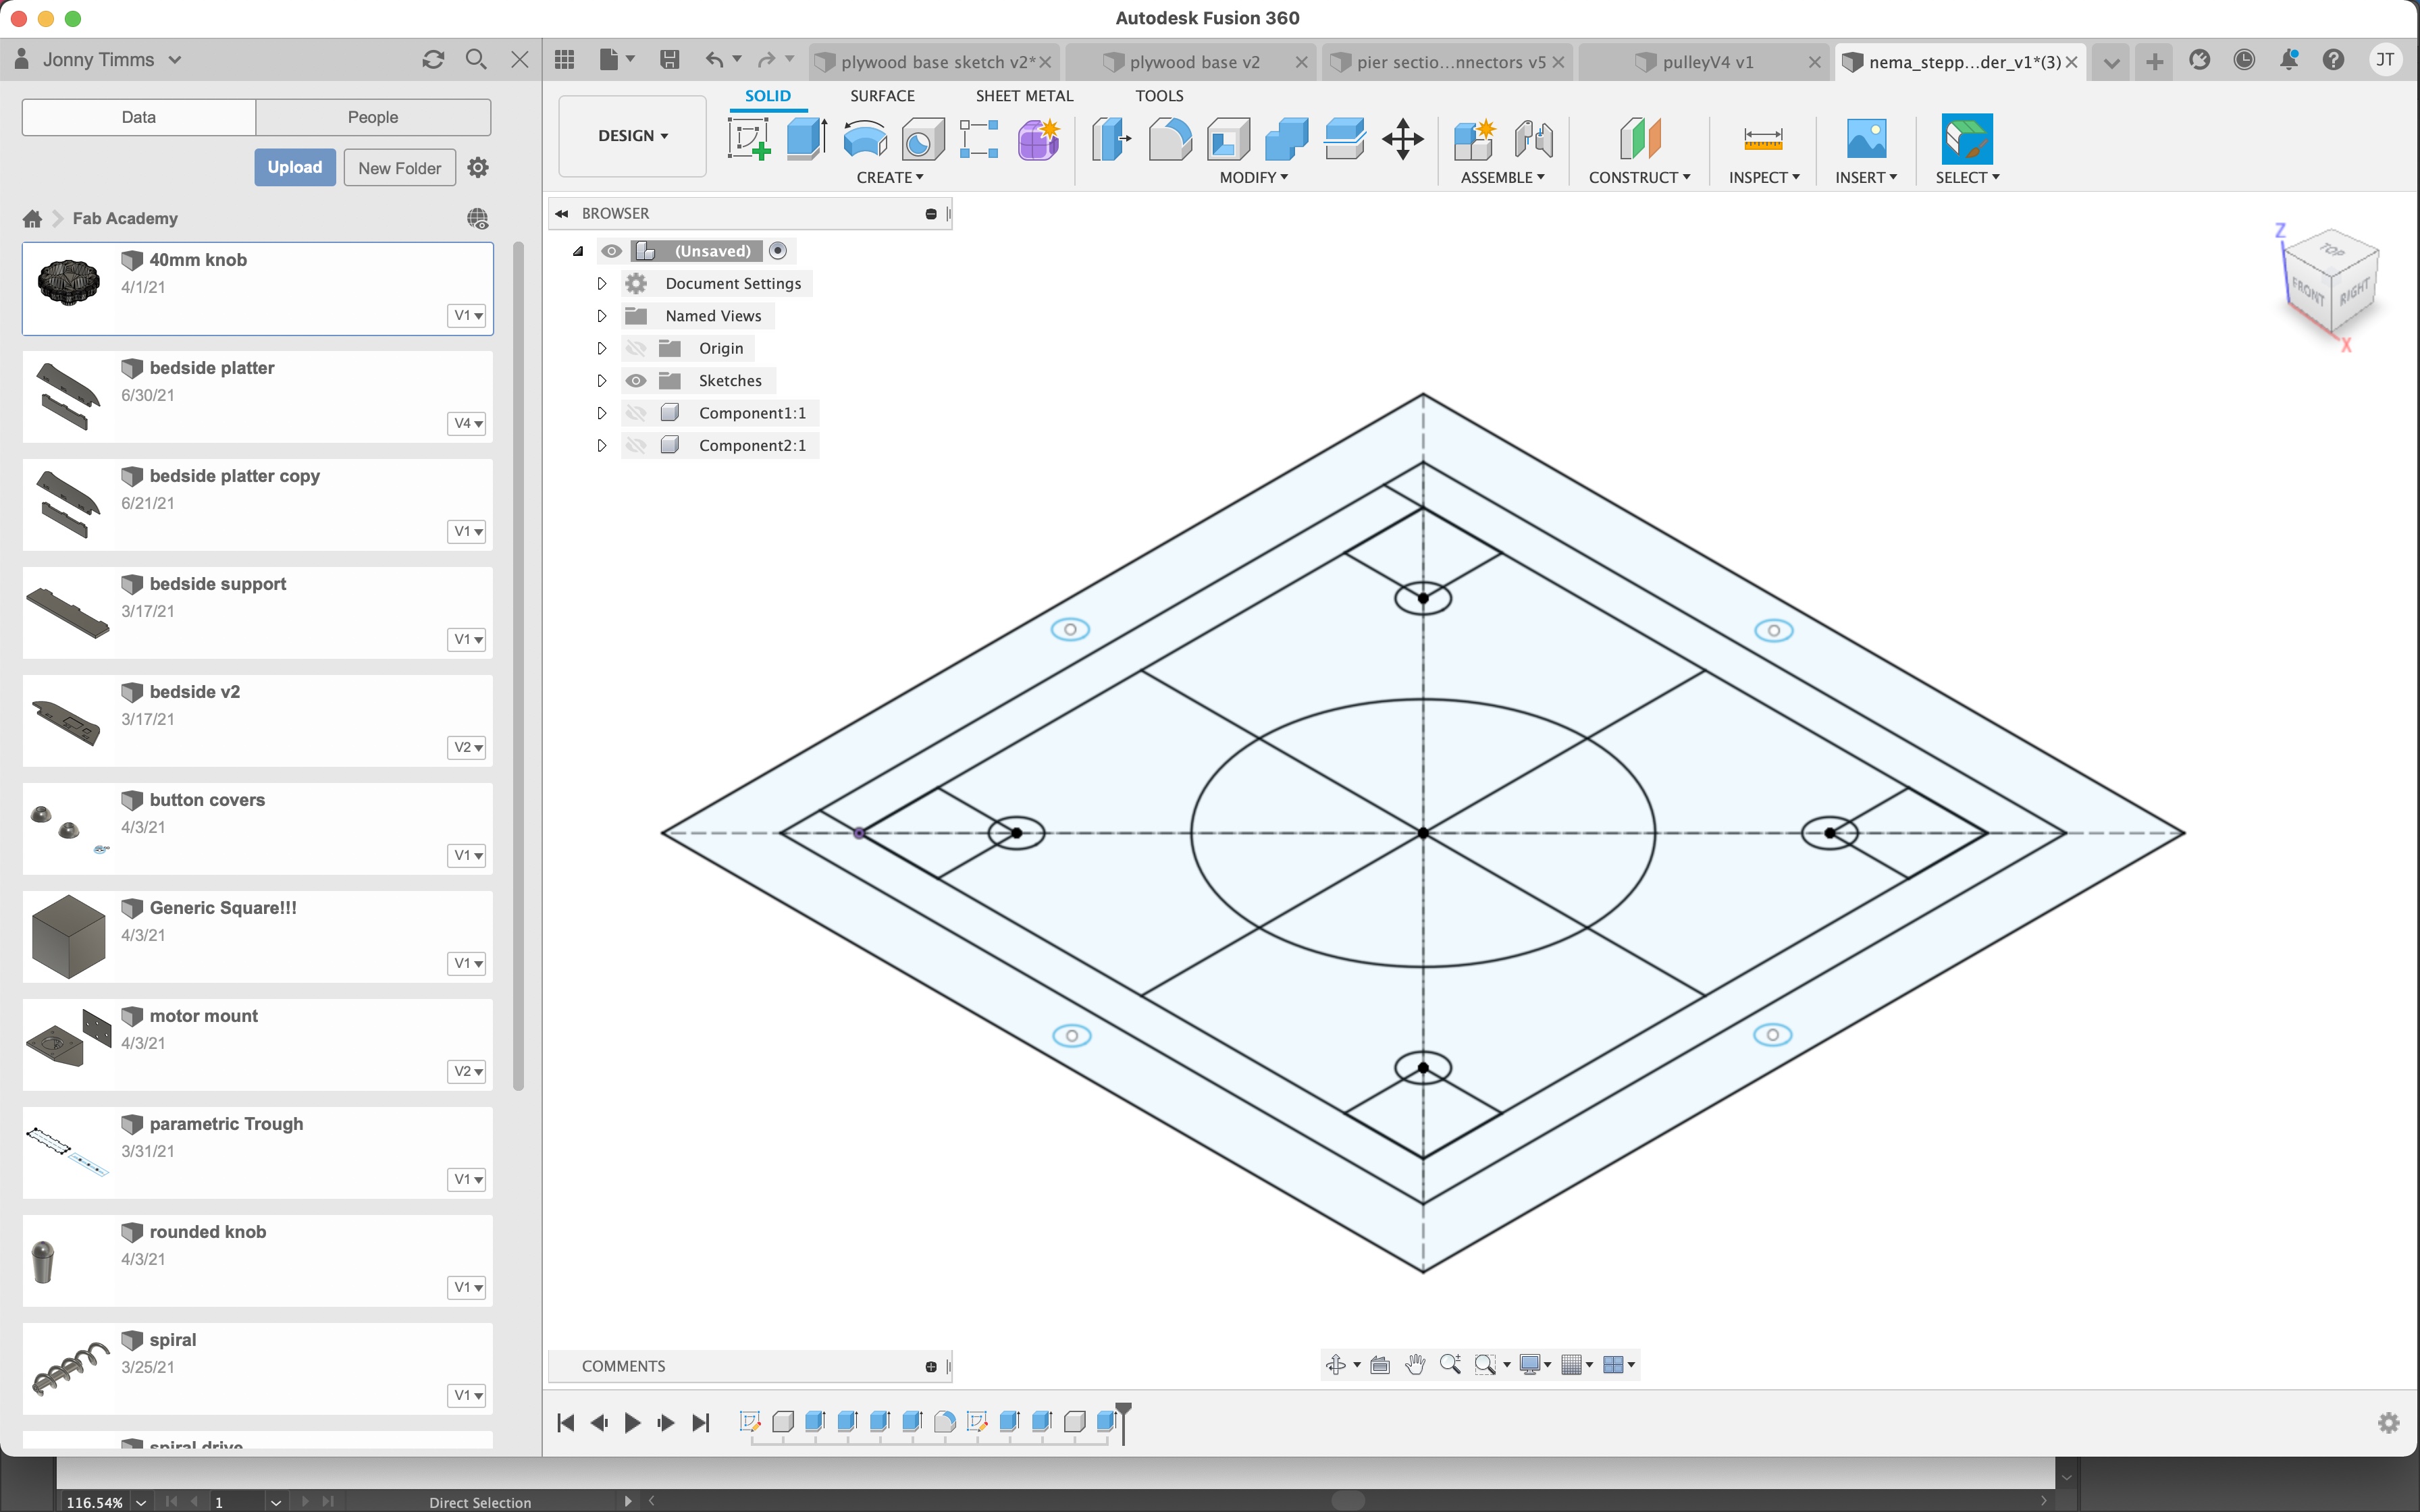
This part will hold my NEMA 17 motor in place. There will be 4 holes on the top so that I can use small bolts to fix to the top of the motor. I want the bottom of the mount to be flush with the base. It can be hard to get this measurement exact and its hard to go smaller if its too big. For this reason I've made a little smaller than my estimated size and I've printed some extra layers to go underneath. I started with the sketch below and then I extruded parts to make the solid shape. I used parts of the sketch to cut the holes and I also added fillets to improve the appearance:
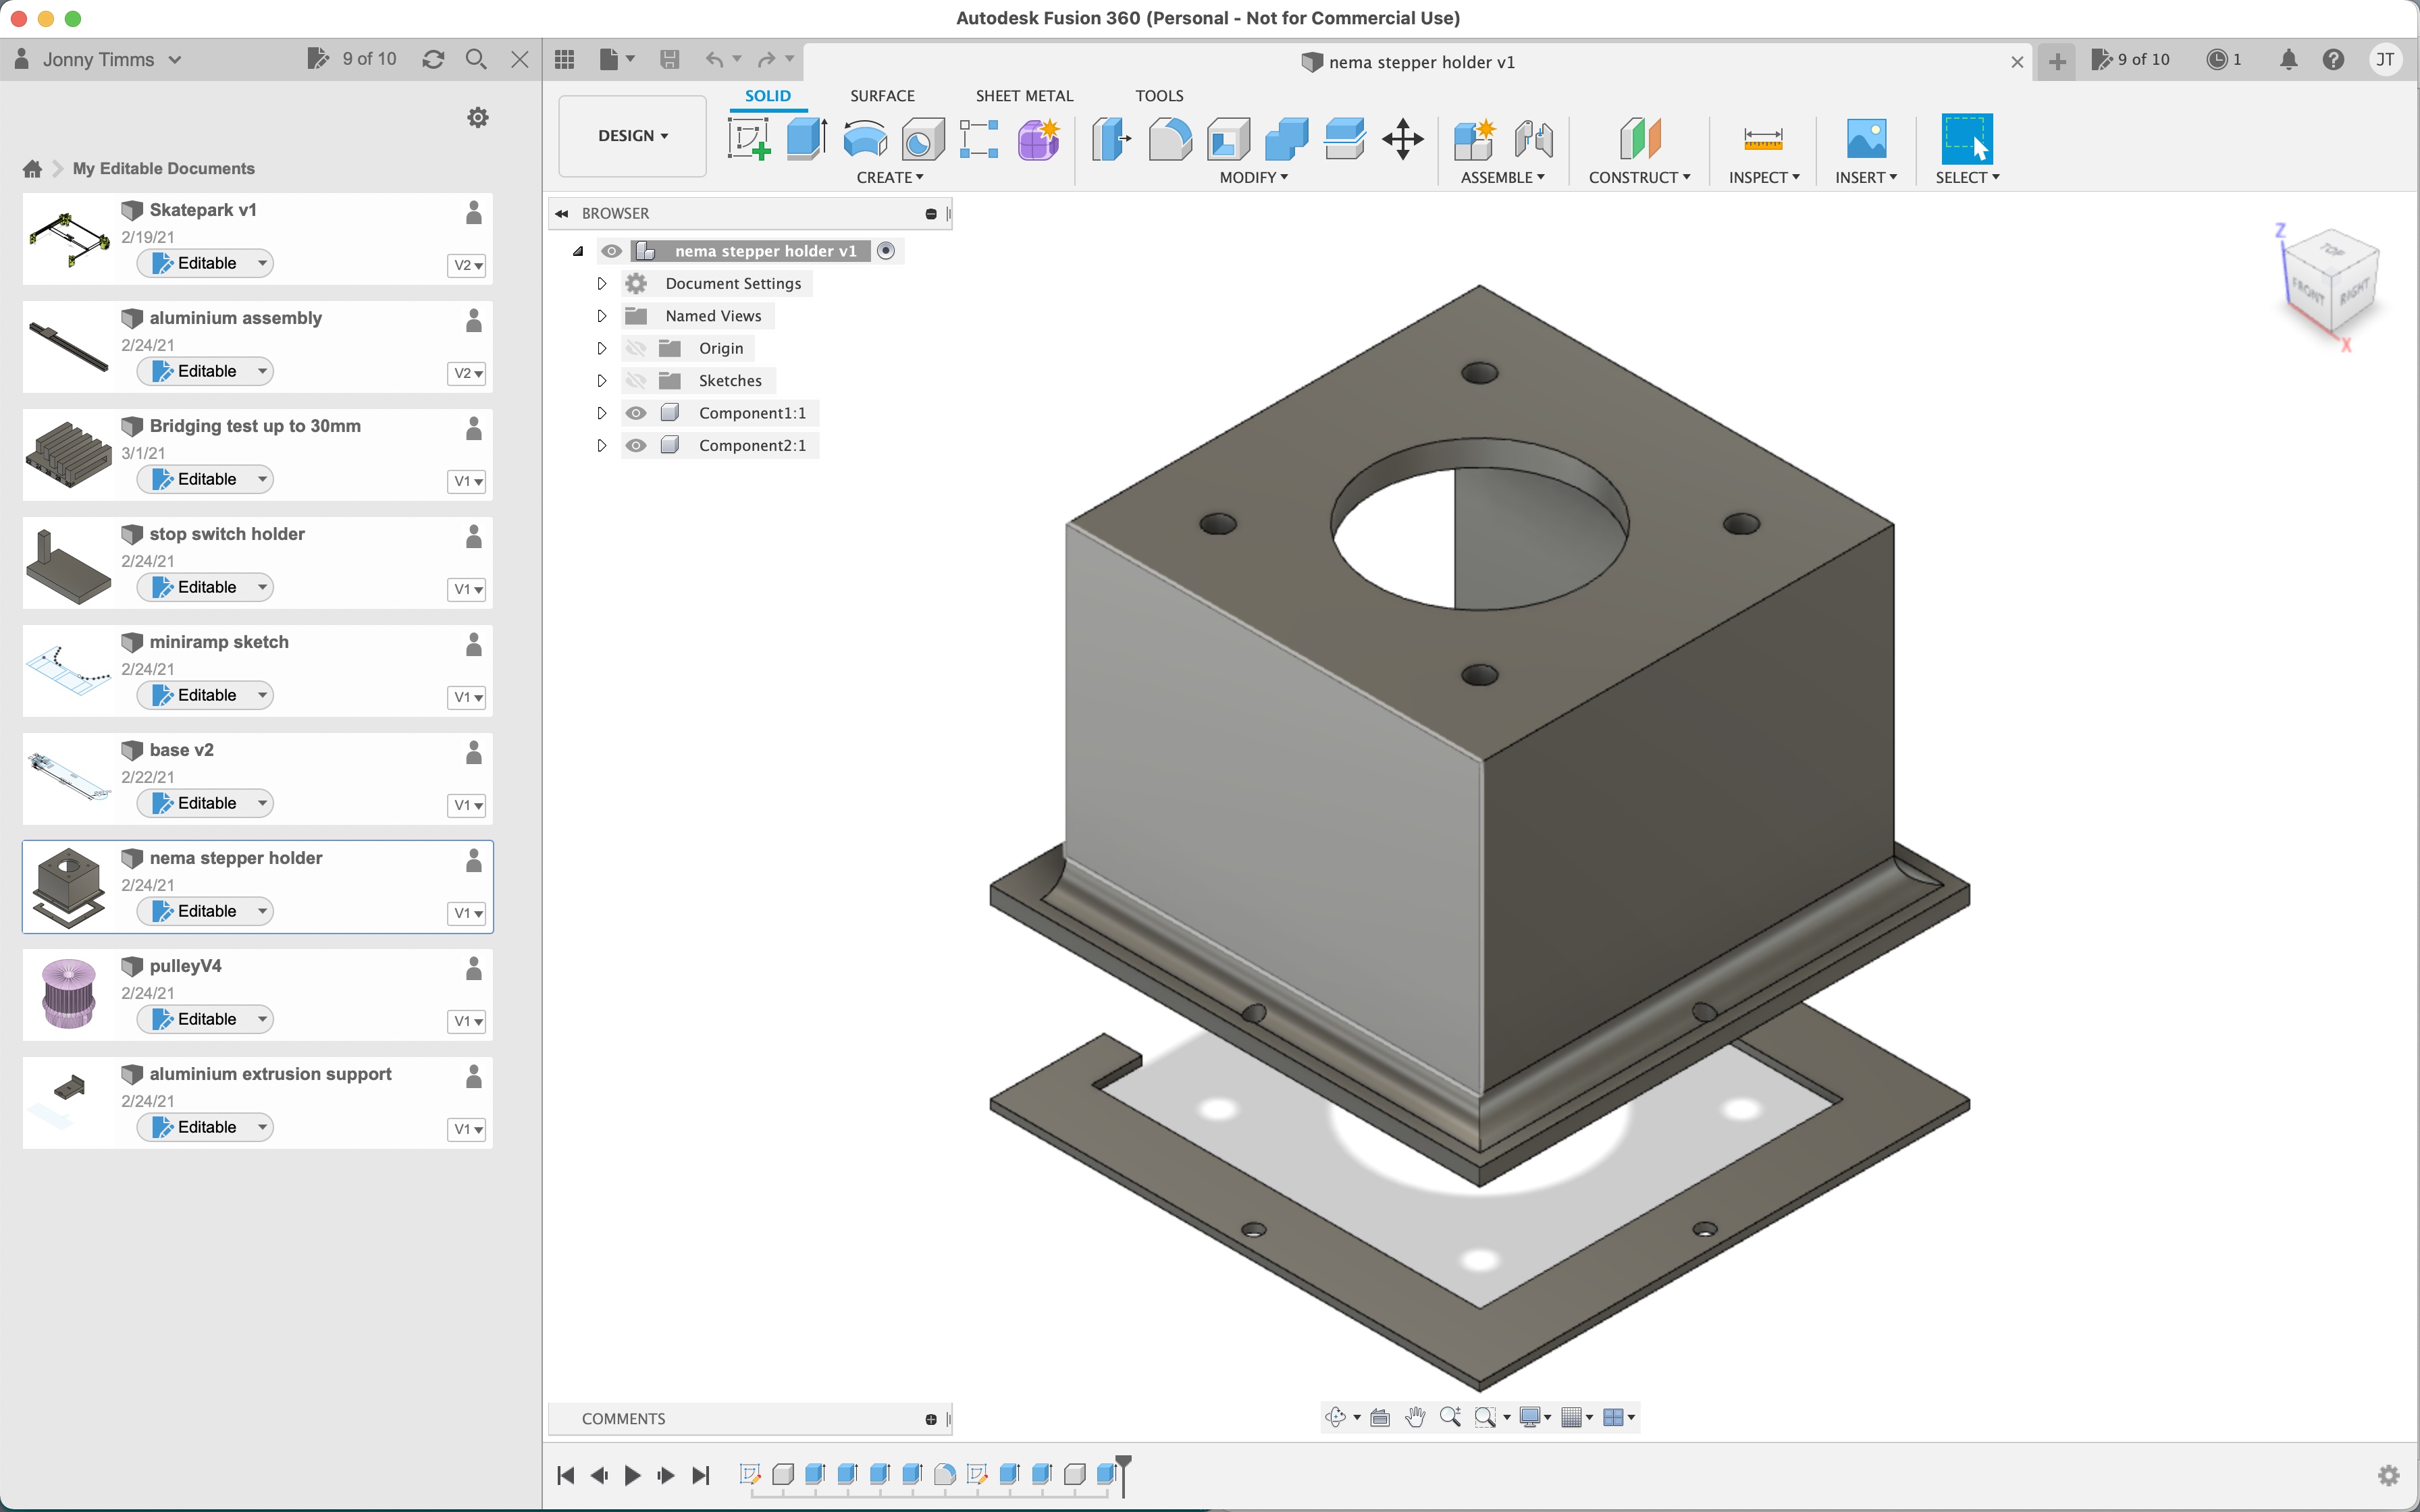
Here are the printed parts:
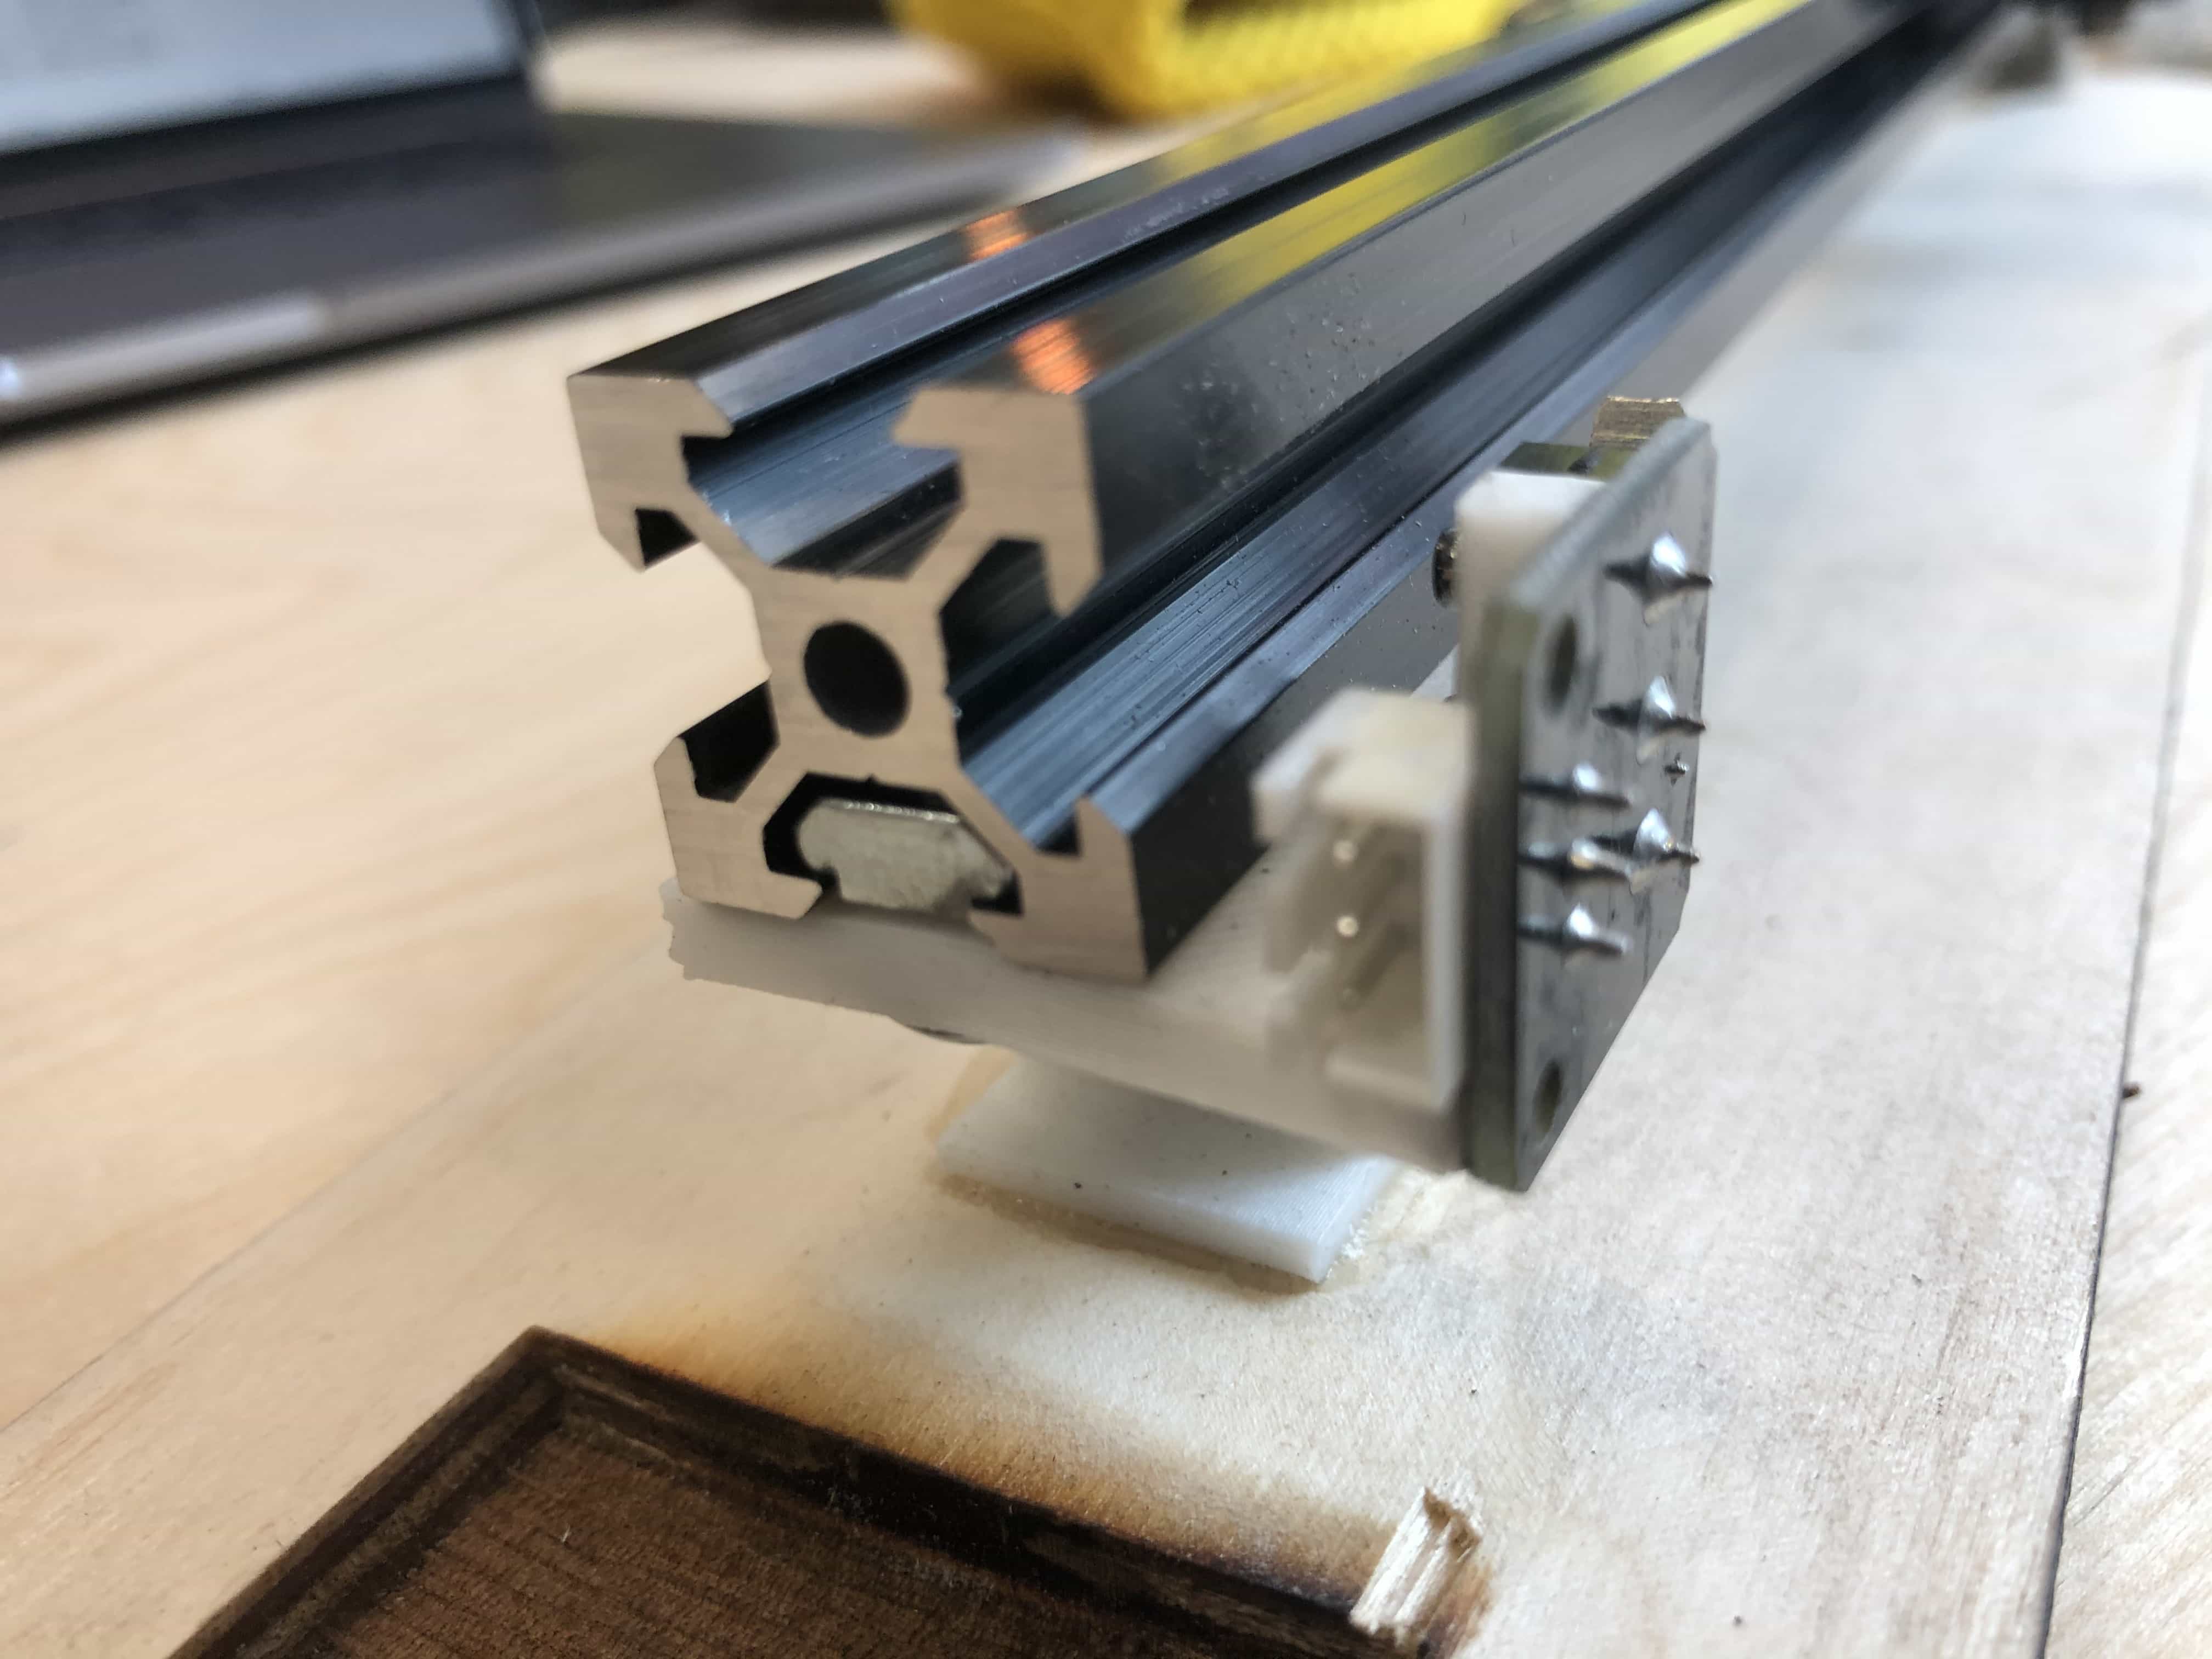
2nd part - Stop switch mount
This part will hold my stop switch at the end of the aluminium rail. There is limited room for this part because on one side of the rail there will be a roller and at the end of the rail will be the stepper motor. This seems to be the design that will fit in place and offer the amount of support required.
Here is the printed part attached onto the aluminium rail. Its fitted perfectly and feels very sturdy:
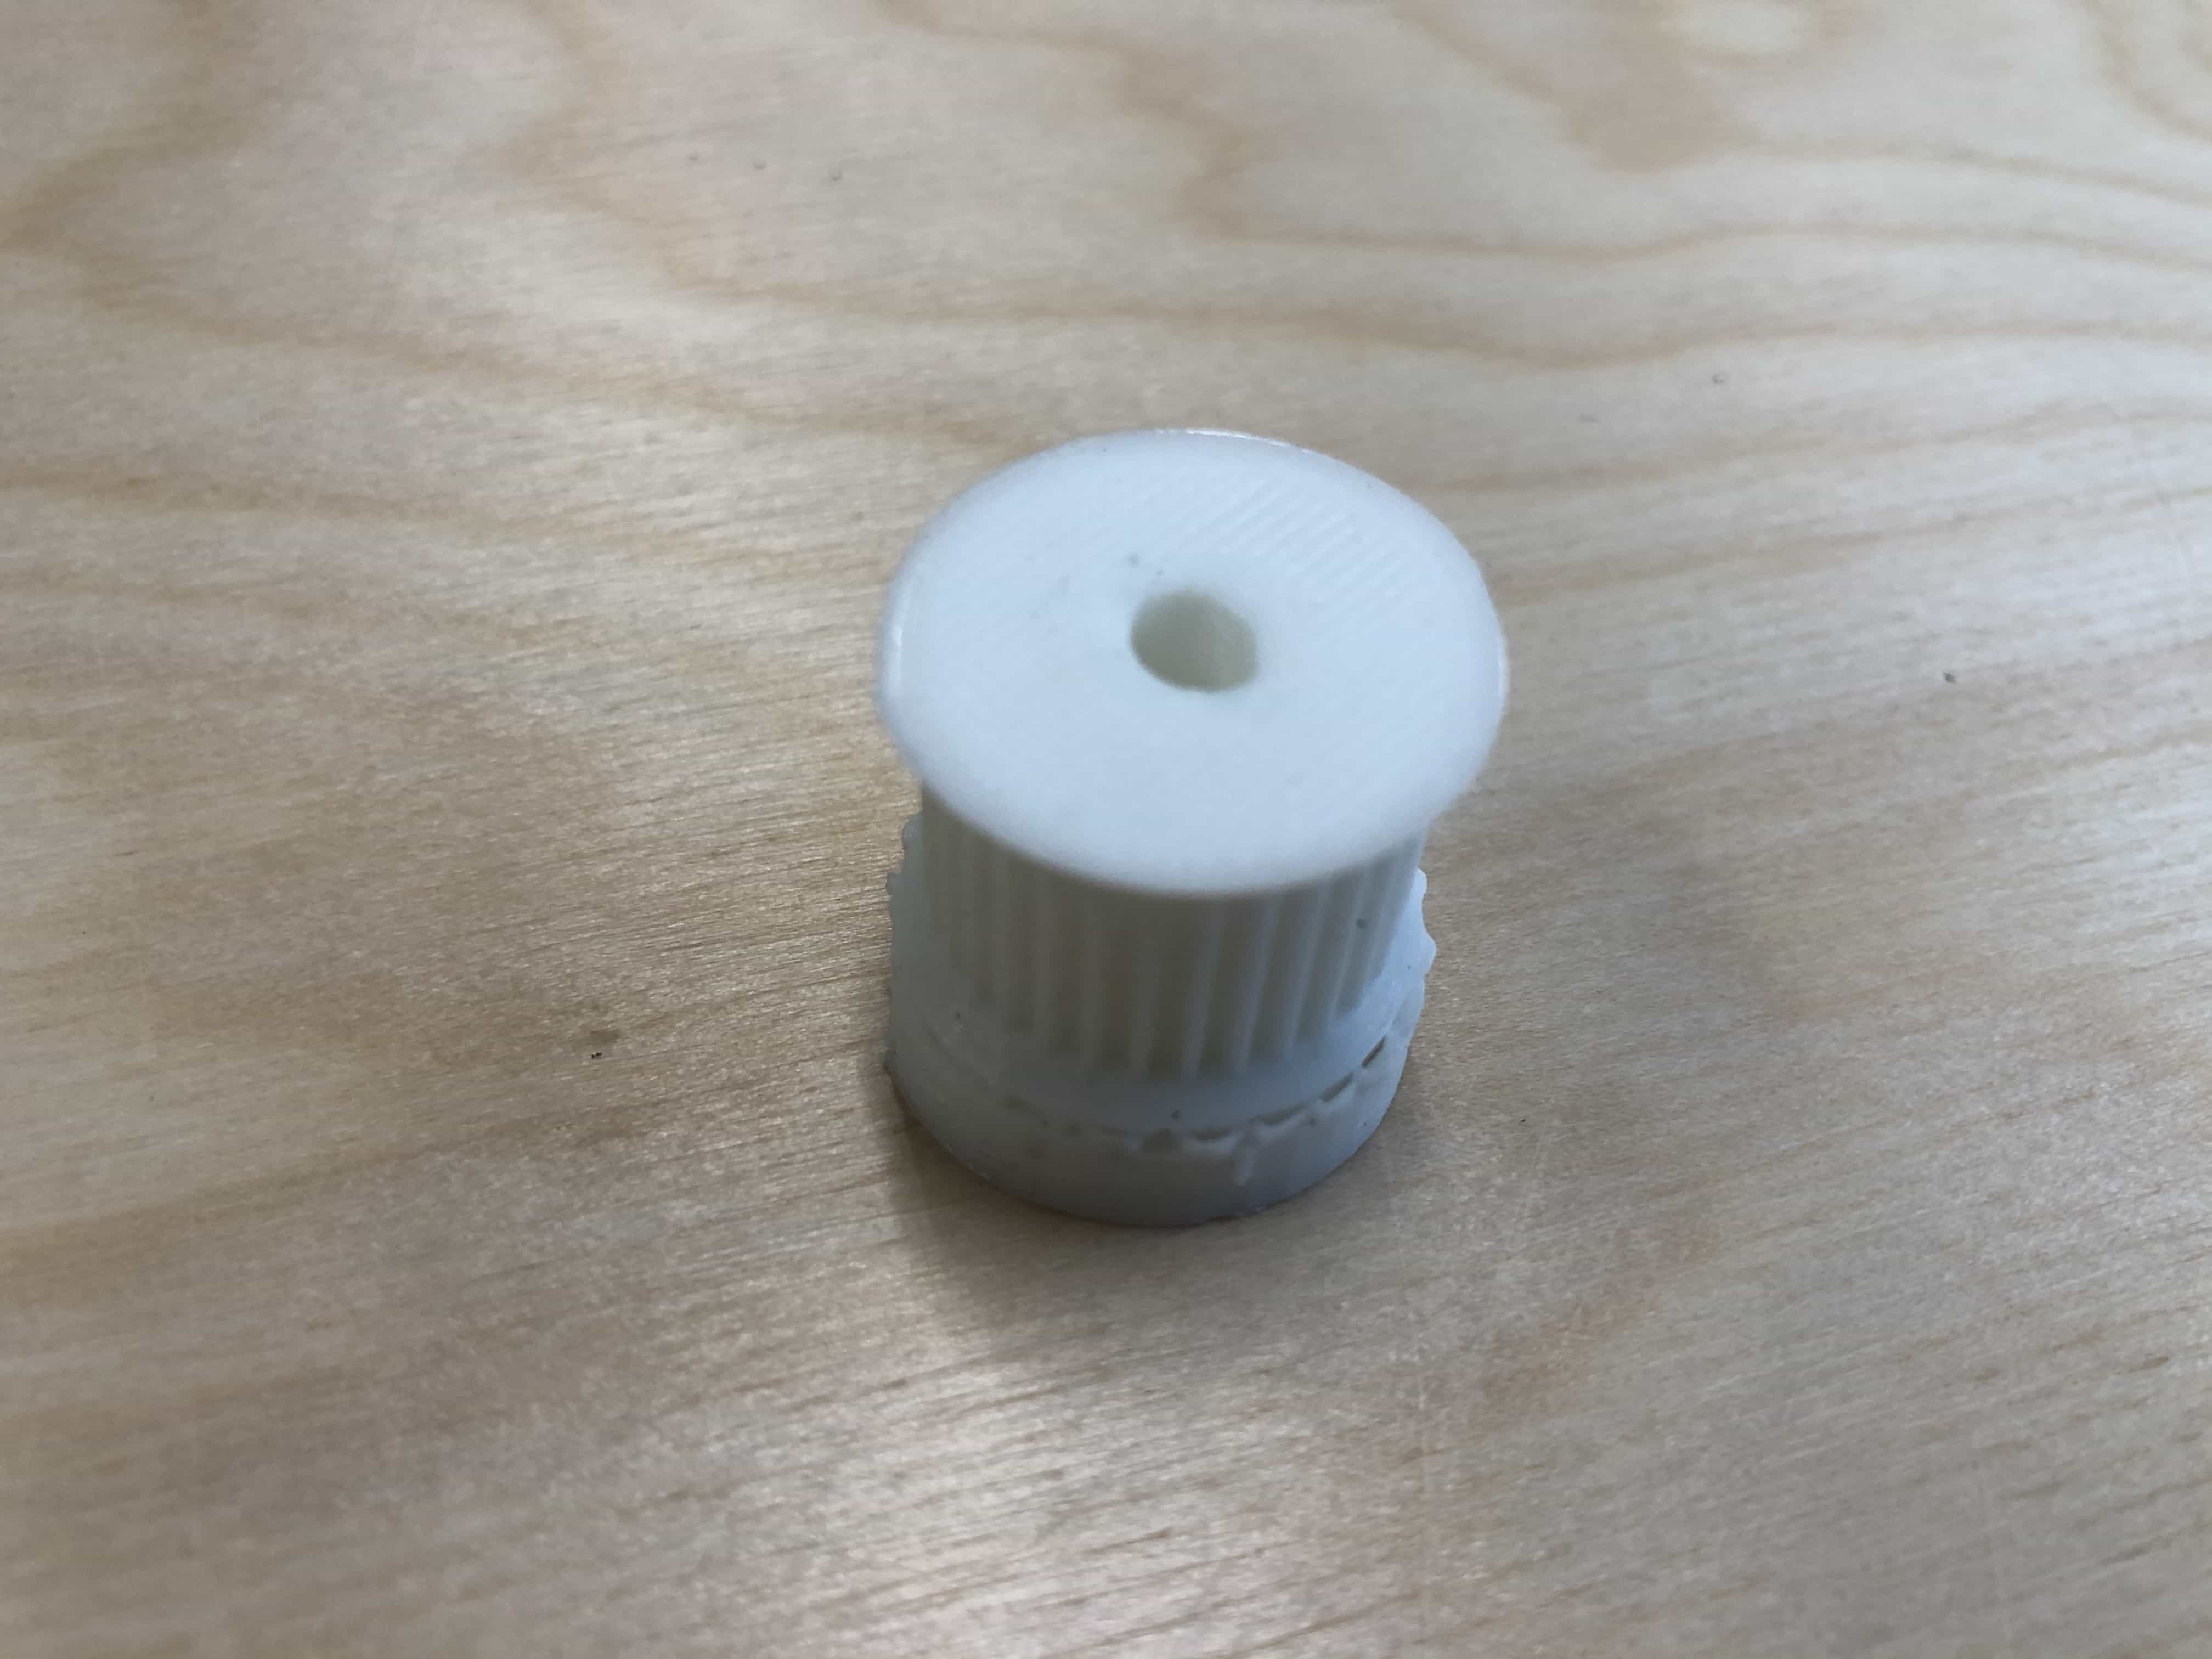
3rd part - Motor cog
This part is a great candidate for 3d printing because it can not be made subtractively. The reason it is not possible is because of the overhangs at the upper and lower edge of the cogged section.
This is the only part I didn't design myself in Fusion. I used a plug-in for OpenSCAD that I found on Thingiverse:
 https://www.thingiverse.com/thing:633772
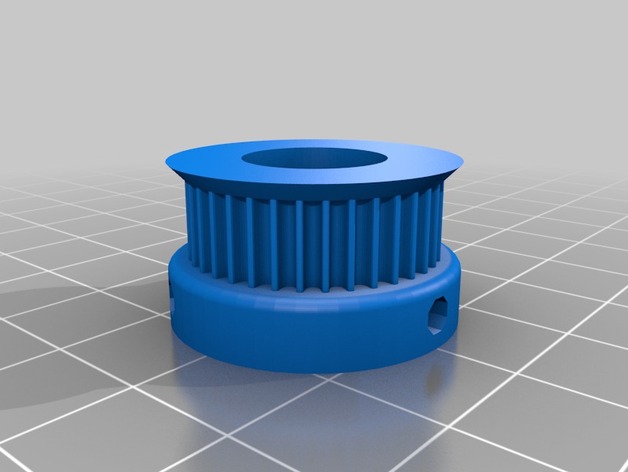
x
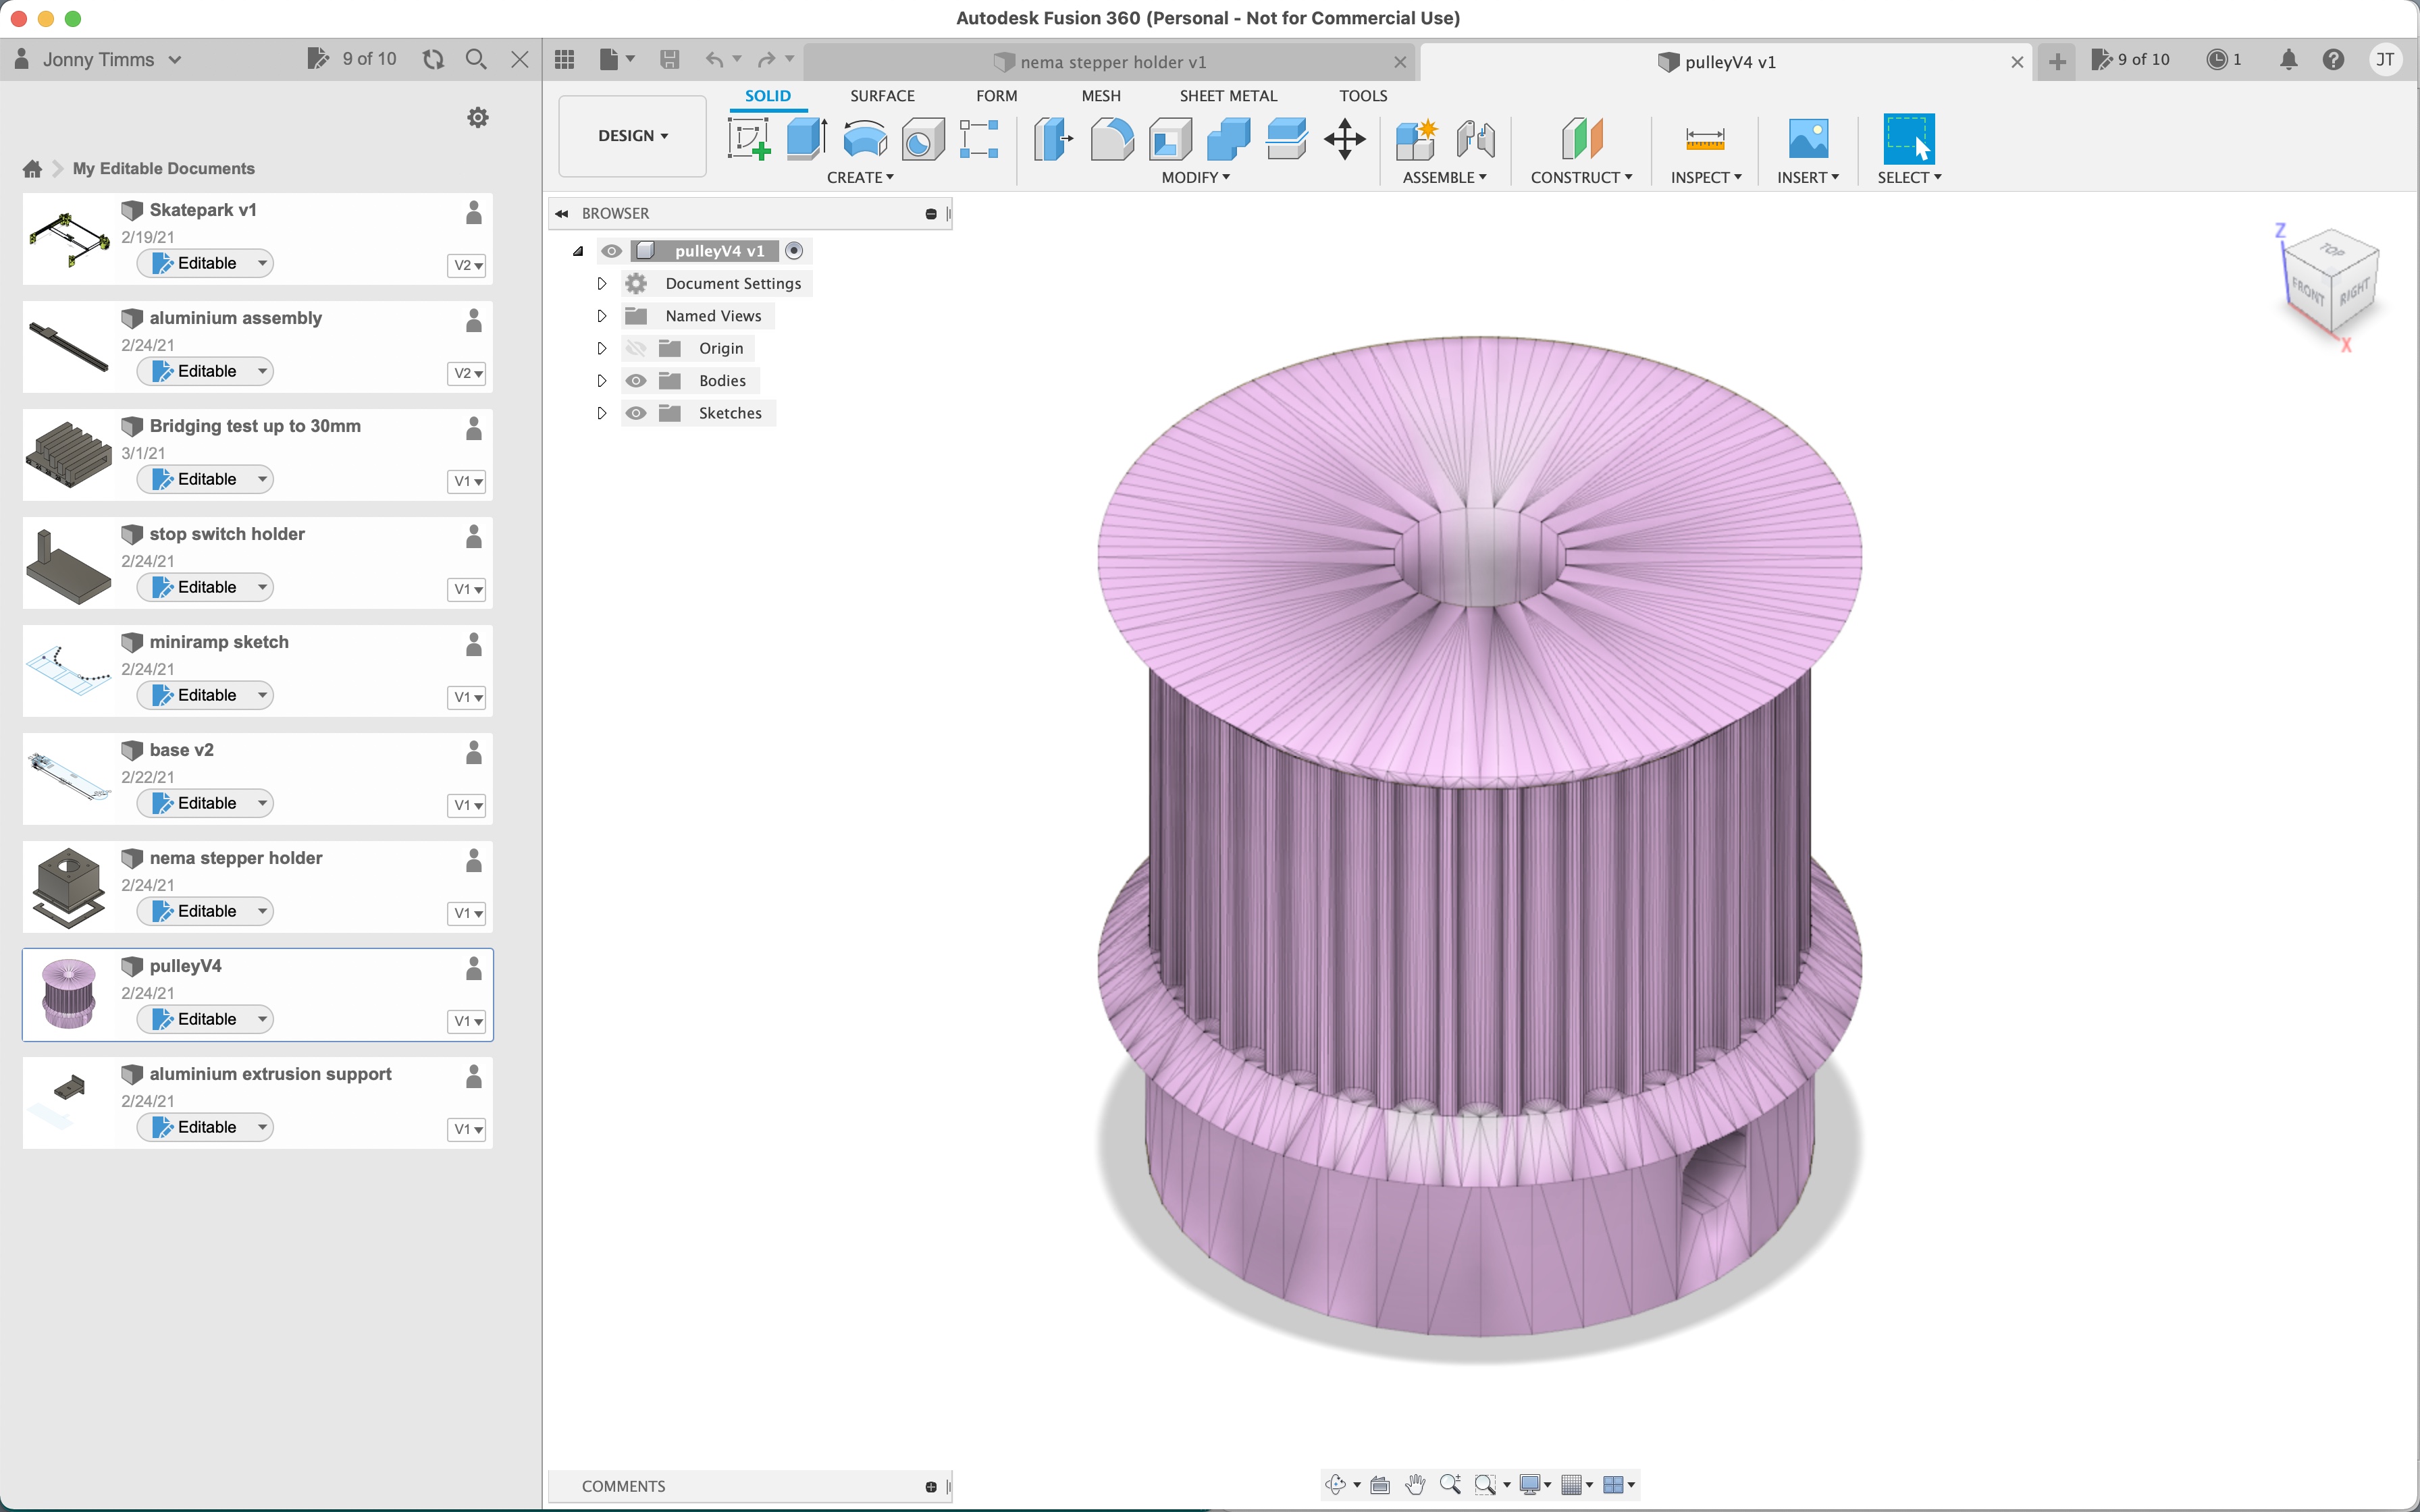
Here is the printed cog. The toothed part on the outside has printed great but the central hole doesn't look perfectly round. I think this should be re-printed using some different settings, possibly a lower temperature and a lower infill %. I shall try drilling the hole first and if that fails, I'll experiment with different prints.
3D printing - Week 15 update
I've done a lot of 3D printing these past few weeks. I've seen a steady improvement in my CAD designs and the print processes I've used.
When I'm in a hurry, I tend to use our printer with the 1mm nozzle. All that was needed was to add a new printer in my slicer (Cura):
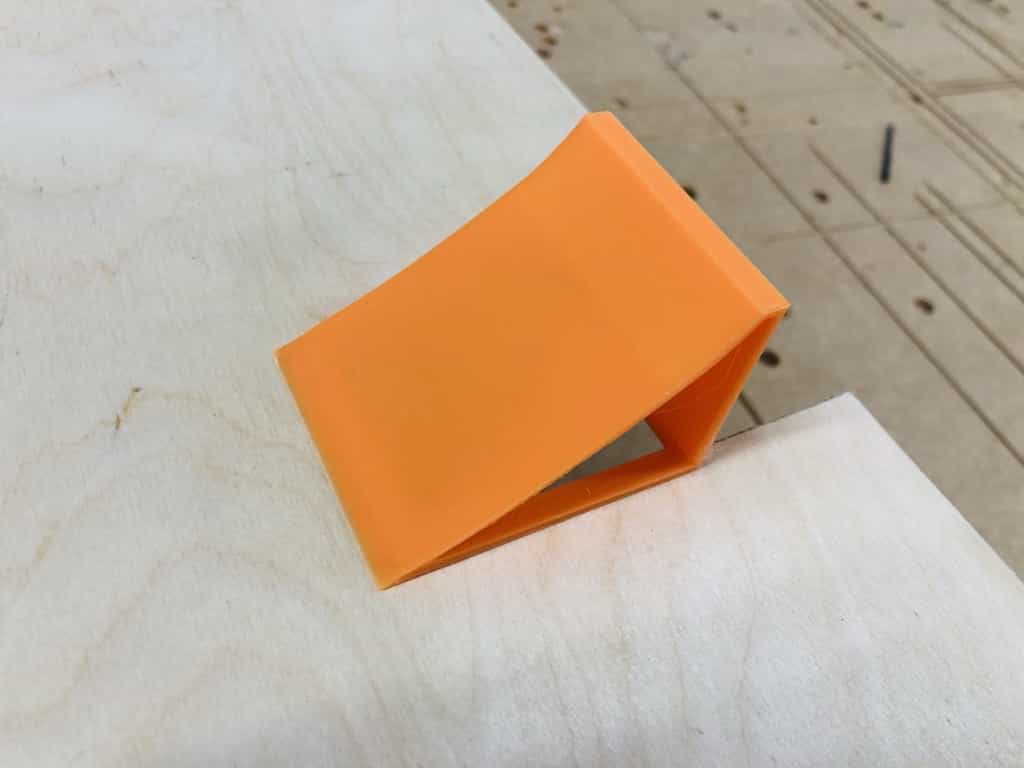
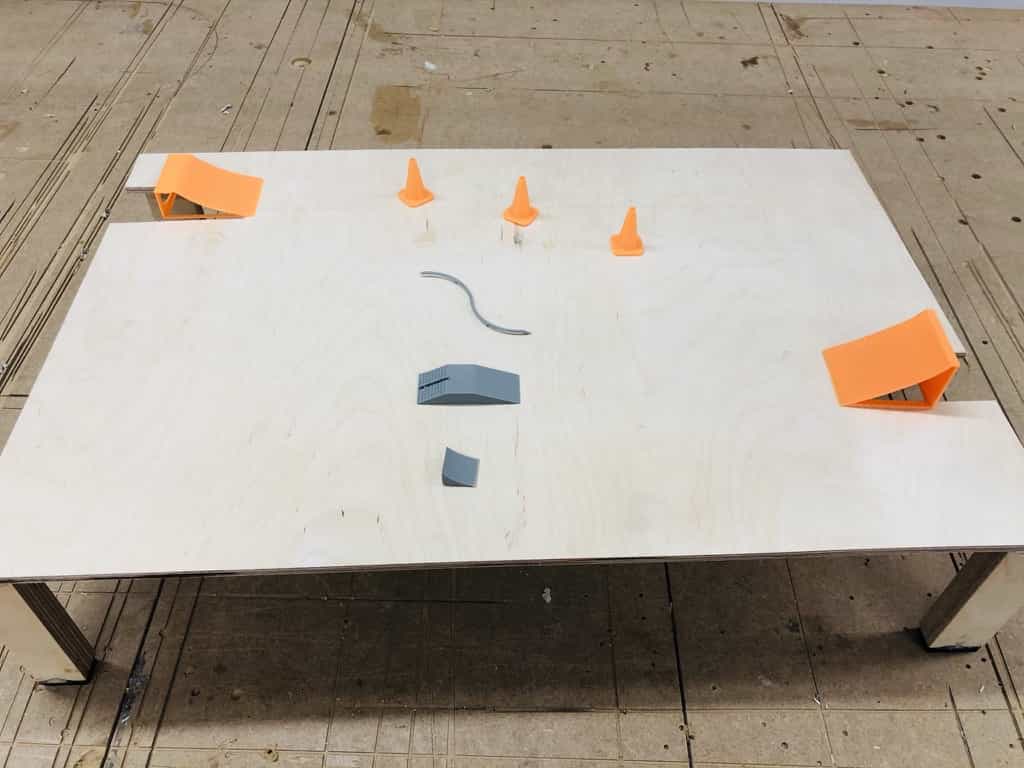
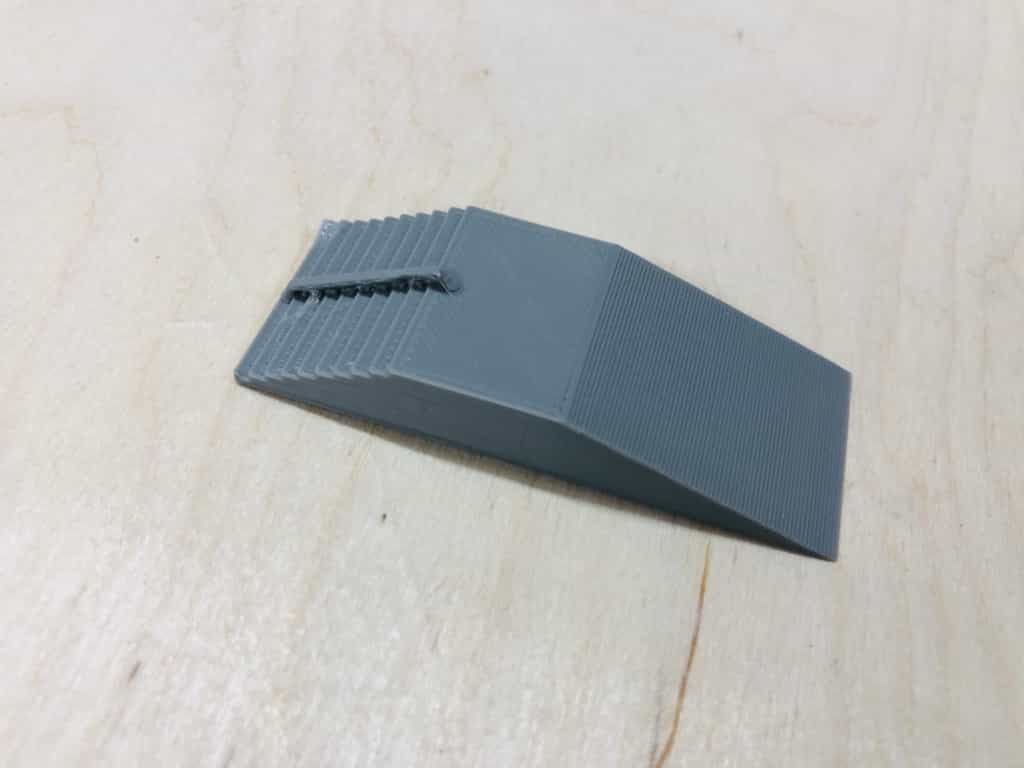
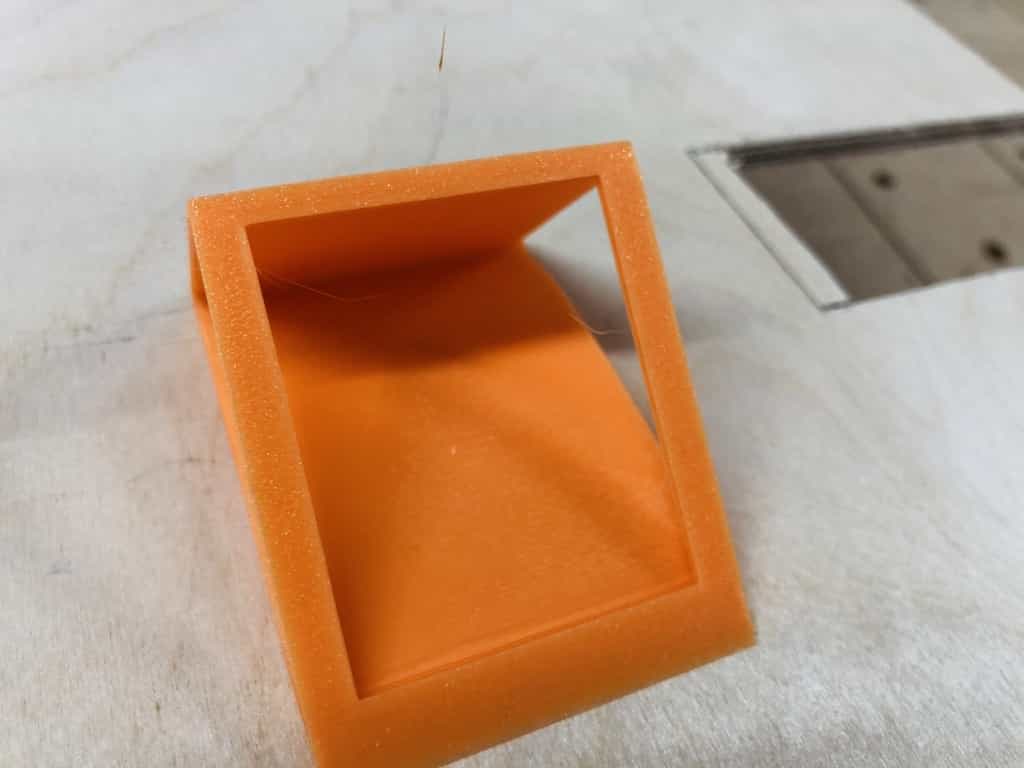
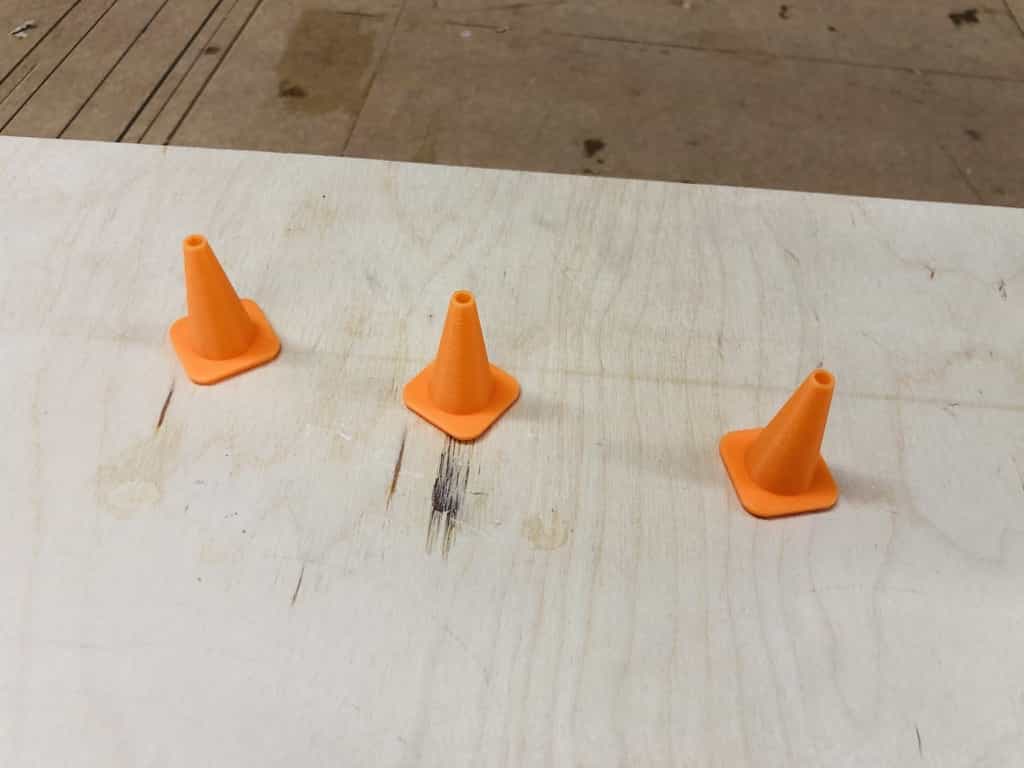
Below are some other new items I've recently printed. These parts could not be made subtractively due to the fact they are hollow (cones and ramps) and due to the raised shape of the rails(on the curved rail and the staircase handrail).
Group Assignment link
Files for download
Back to homepage: