5 - 3D Scanning and Printing
This week the following activities were carried out
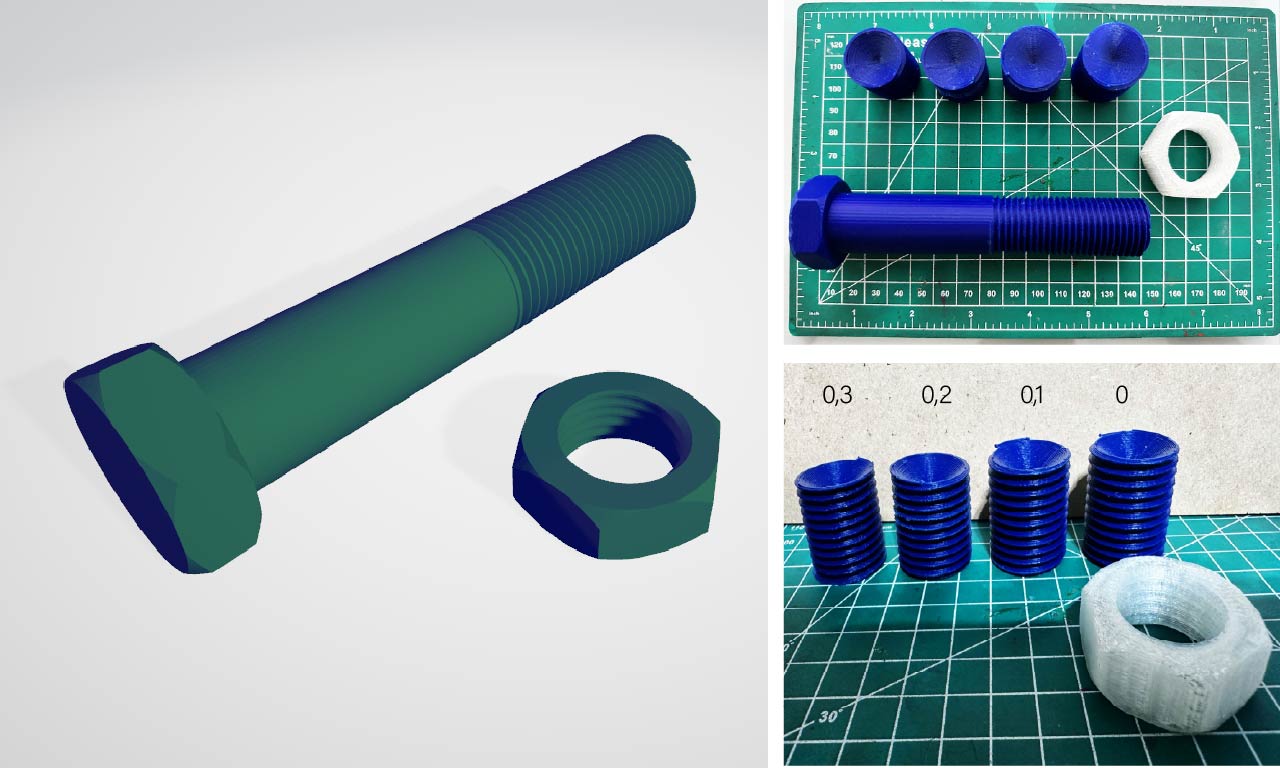
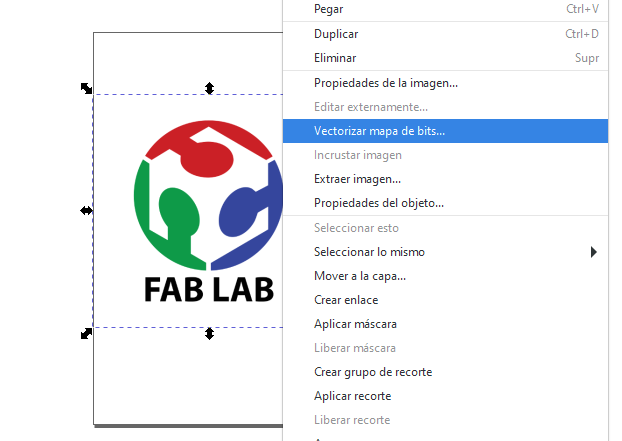
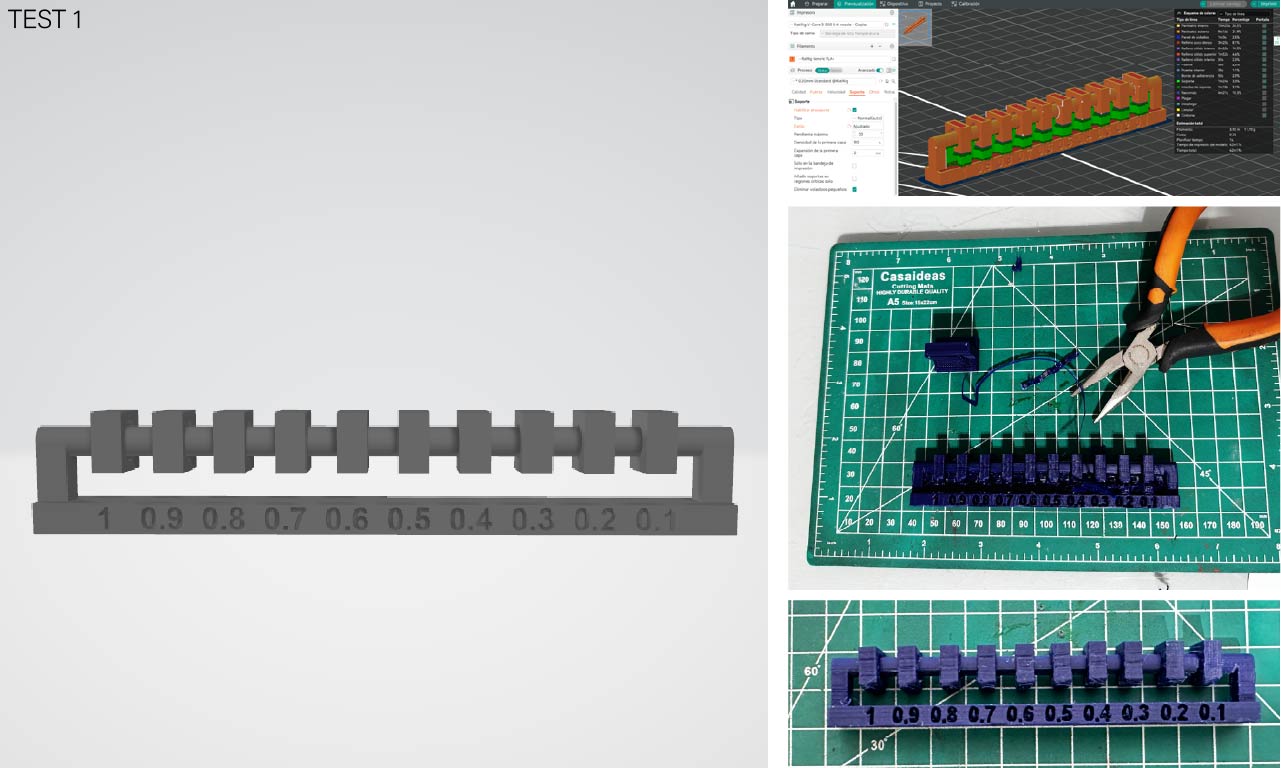
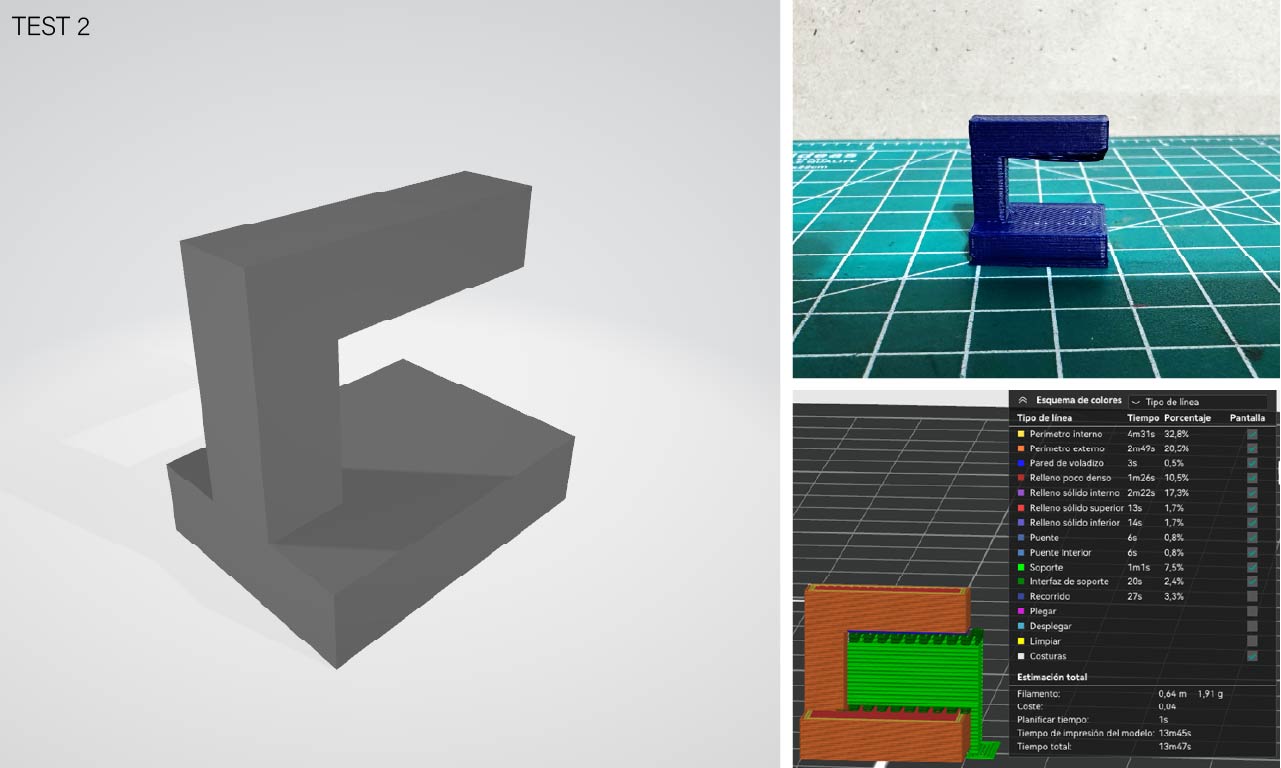
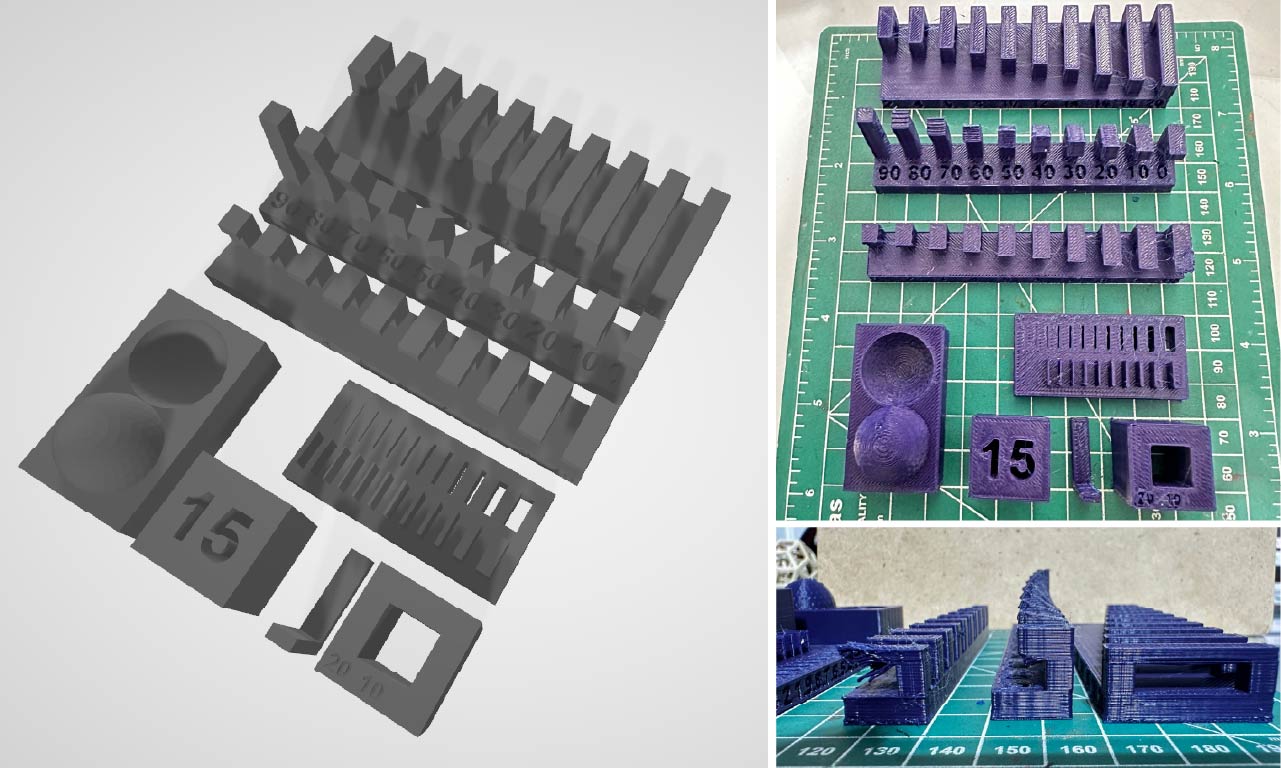
Group Assignment:Test the design rules for your 3D printer(s). Document your work on the group work page and reflect on your individual page what you learned about characteristics of your printer(s). Individual Assignments:Design and 3D print an object (small, few cm3, limited by printer time) that could not be easily made subtractively. 3D scan an object (and optionally print it).
3D Printing and Scanning
This week has been exciting due to my immersion in fab labs, driven by the fascinating technology of 3D printing. In 2018, I acquired my first 3D printer, an Ender 3 Pro, which at that time stood out as the best option in terms of quality and price. Its impact was revolutionary, gaining great popularity and surprising with the excellent quality of the produced pieces. In the current year 2024, the industry has undergone a notable transformation, incorporating continuous improvements in 3D printers as a fundamental part of its evolution.
It seems as if every user suggestion has been heard, resulting in faster printers with superior definition, greater printing capacity, and features like automatic calibration, among other significant enhancements. I also highlight the exciting challenge of working with the 3D scanner, a tool that, combined with printers, allows for incredible work. The integration of these technologies has provided a set of more efficient and powerful tools, taking creativity and manufacturing to unprecedented levels today.
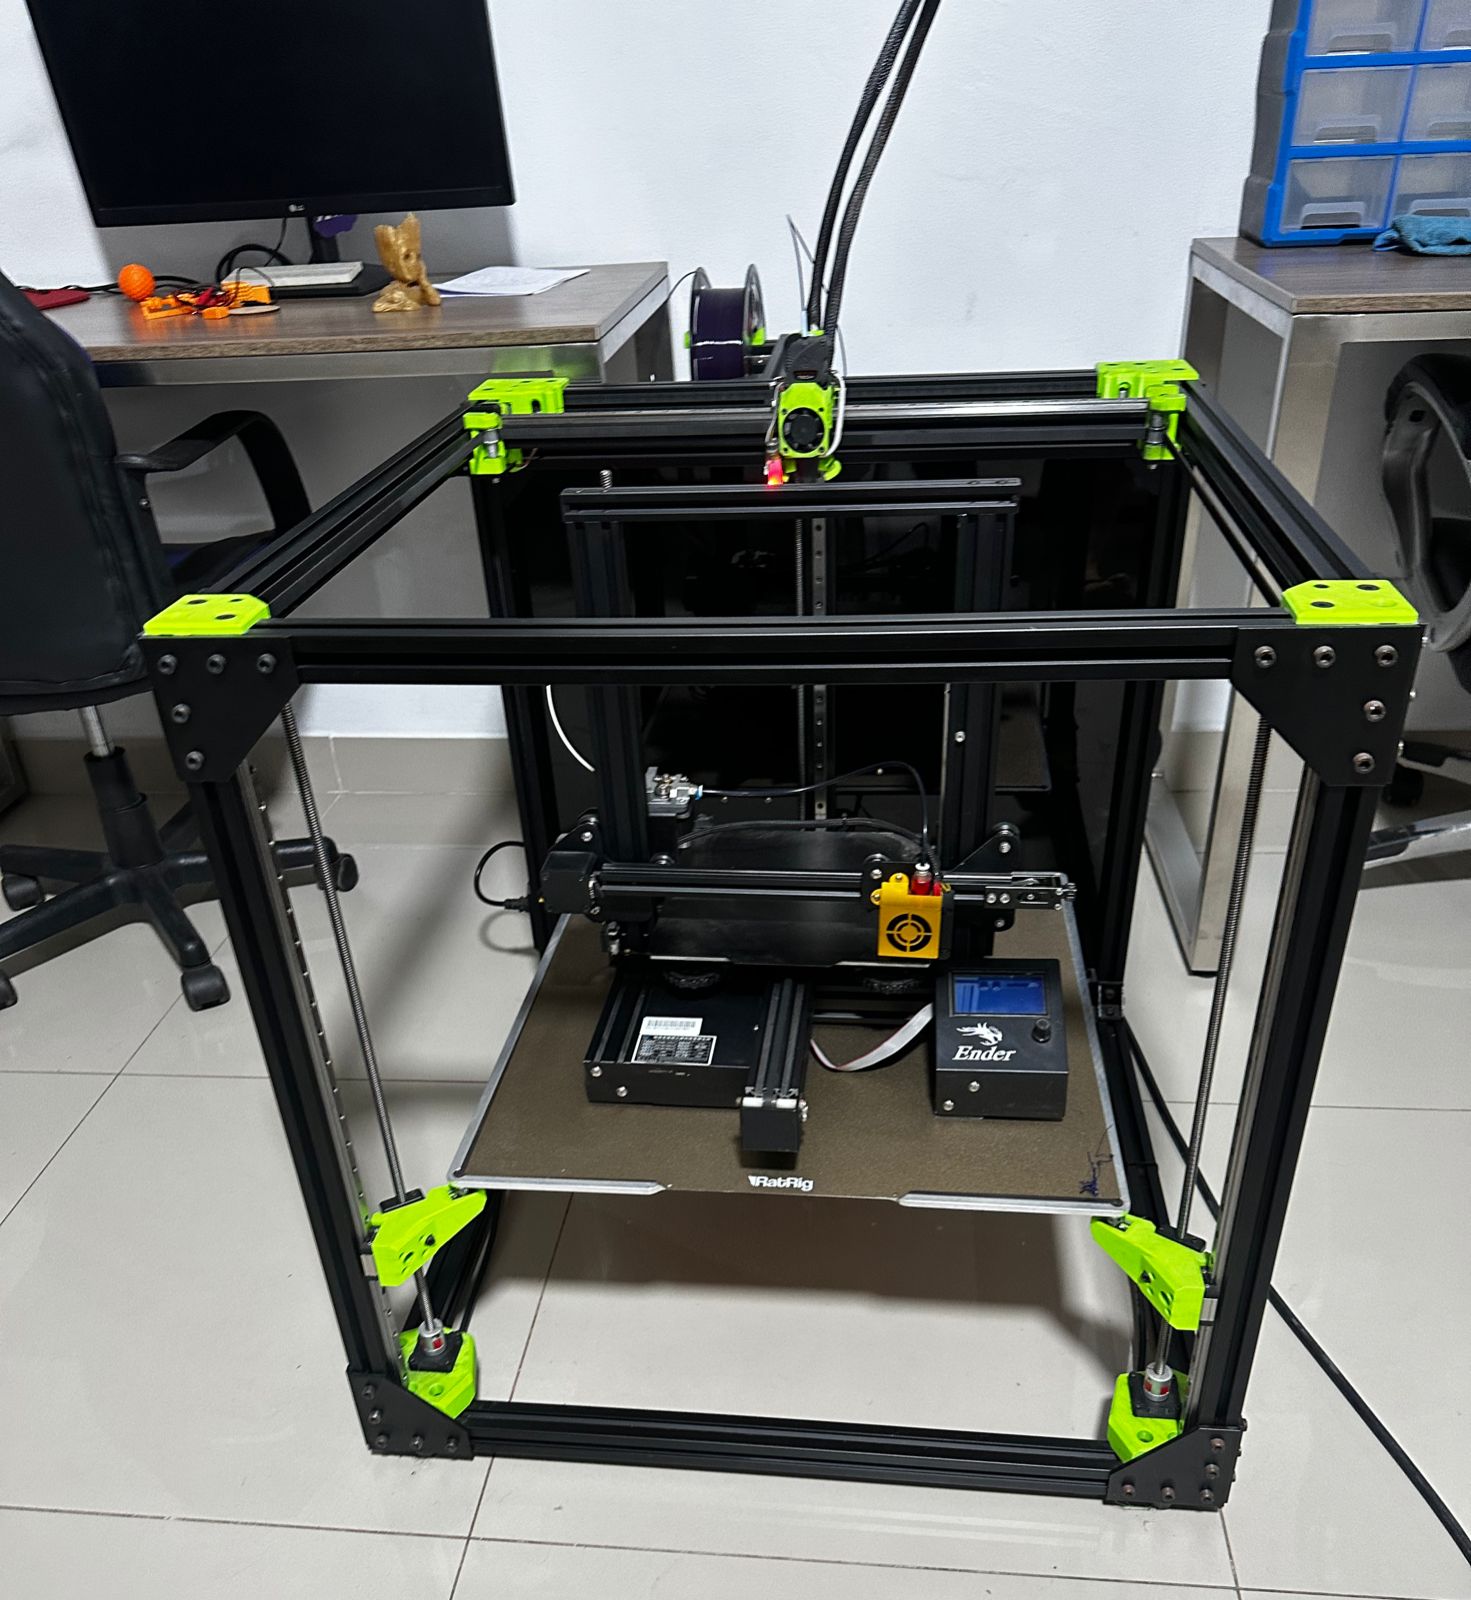
This is my epic photo of the week. My first 3D printer (Ender 3 Pro) fits inside my latest 3D printer (RatRig V3).
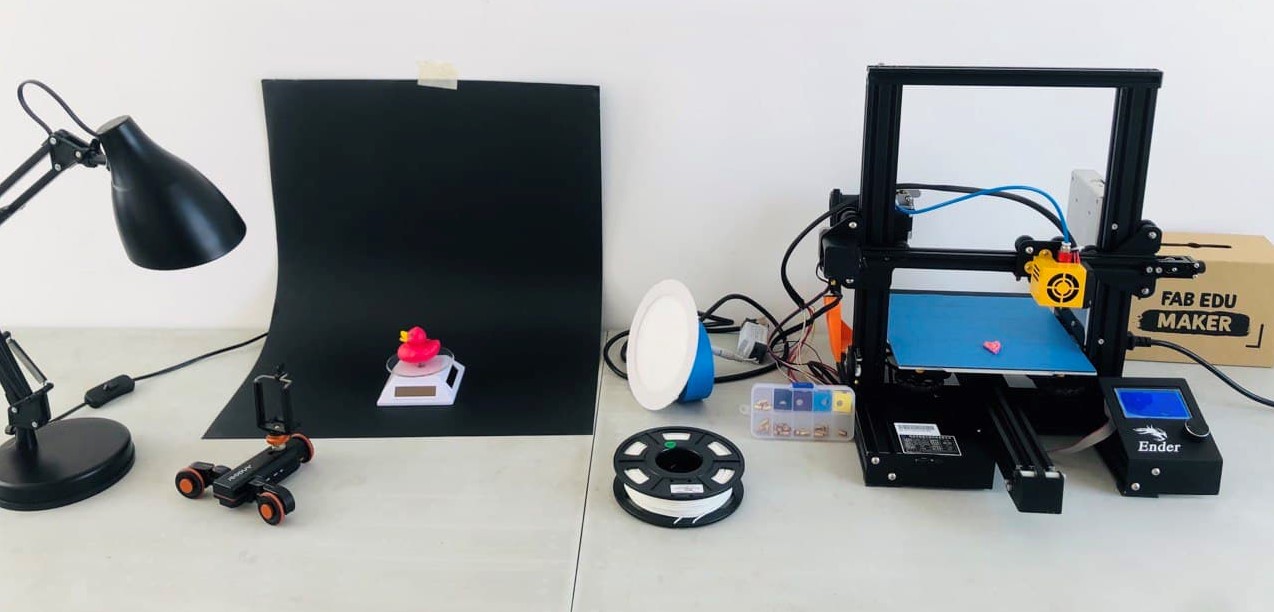
Note: To print all the pieces we will see in the group and individual tasks, I will be using a RatRig V3 printer. In this table, I show the characteristics of this printer:
| Feature | Specification |
|---|---|
| Additive Technology | Fused Deposition Modeling (FDM) / CoreXY |
| Maximum Nozzle Temperature | Up to 300 ºC (Phaetus Rapido Hotend Thermal Resistance) |
| Maximum Bed Temperature | 100 – 110 ºC |
| Printing Volume | 500 x 500 x 500 mm |
| Lightweight Printing Head |
Extruder: BondTech LGX Lite Hotend: Phaetus Rapido Auto-leveling: Automatic (SuperPinda) Extrusion System: Direct Nozzle: Volcano |
| Printing Base | Flexible, Rough PEI, Easy Removal |
| Printing Chamber | Standard open Can be fully enclosed |
| Electronics | BTT Octopus v1.1 + 6 x 2209 Drivers |
| Supported Input Formats | STL/gcode |
| Connections | Card reader / USB |
| Volume and Weight | Printer Volume: 500 x 500 x 500 mm / 30 Kg Package Weight: 500 mm / 40 Kg |
| Power Supply | LRS 24V (Weho 250W for EU/UK) |
| Materials | Filament Diameter 1.75 mm ABS, ASA, PA, PC, PP, PETG, CPE, PLA, including analog compounds and fillers |
Group assignment
For this group task, I have worked in two laboratories, the first one at Toulouse Lautrec and the other at Garage Lab. Both spaces are equipped with good 3D printers, and I was able to print the requested parts in the newal to verify the quality on both printers.
Individual assignment
In my experience with 3D printing, I have always believed that slicing is a crucial part, serving as the control room where each configuration will have a different impact on our final piece. In my case, I have used the ORCA SLICER, which is based on Prusa Slicer and Bambu Lab Slicer.
It appears to be quite versatile, with an interactive and intuitive menu. On the other hand, I feel that it maximizes the speed of 3D printers to the fullest.