Inicio
Wednesday ,May (??)
Today we are going to make a direct application to connect a device (arduino) with an RGB strip through a dashboard that will be created through the arduino online platform for Iot, with nothing more to say. Let's do it!
Components and Procedure
-Arduino Mkr -WS2812 Neopixel (12v) -Adaptador DC 12 v -Jumpers
To make this application you can also use the same components that we have been using in different missions but with the difference that now we have an additional component called ESP.
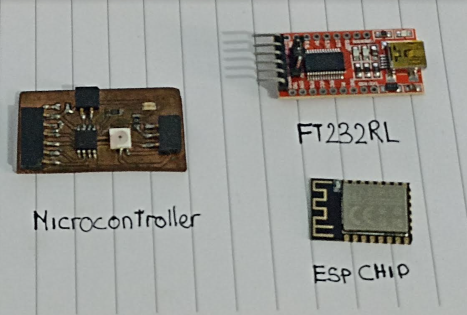
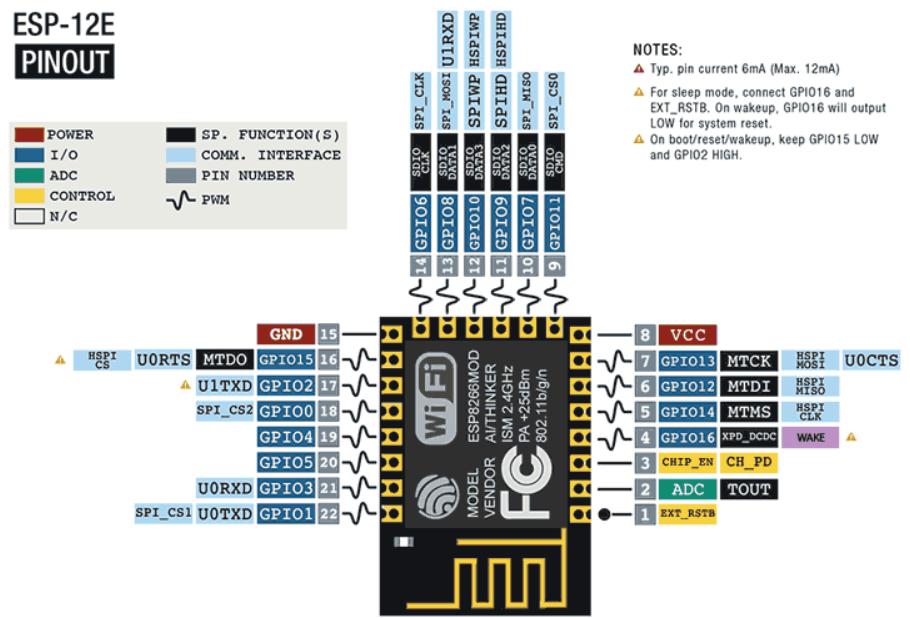
The ESP8266 chip is the module that we are going to use, it has a considerable number of pins between analog and digital that could easily be used for different missions, as seen in the image.
To use this chip we must make a small card in which it will be placed so that it can then be placed with the microcontroller.
Once the welding is done, it is time to connect it with our FT232, this module will be connected serially with our module, however the current it supplies is less than what the module needs, therefore it is necessary to have an external source to the module that be 3.3v so it can power our esp chip.
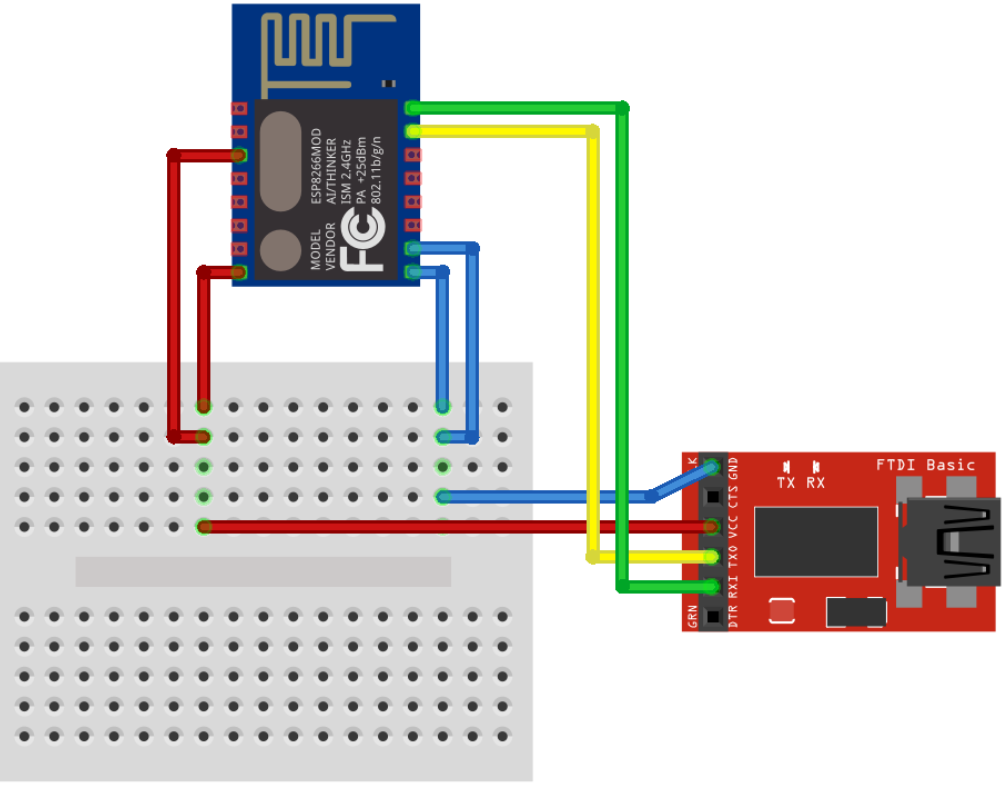
As we can see, we are using a different power source and this is due to the current requirements required by the module which the ft232 module cannot supply directly.
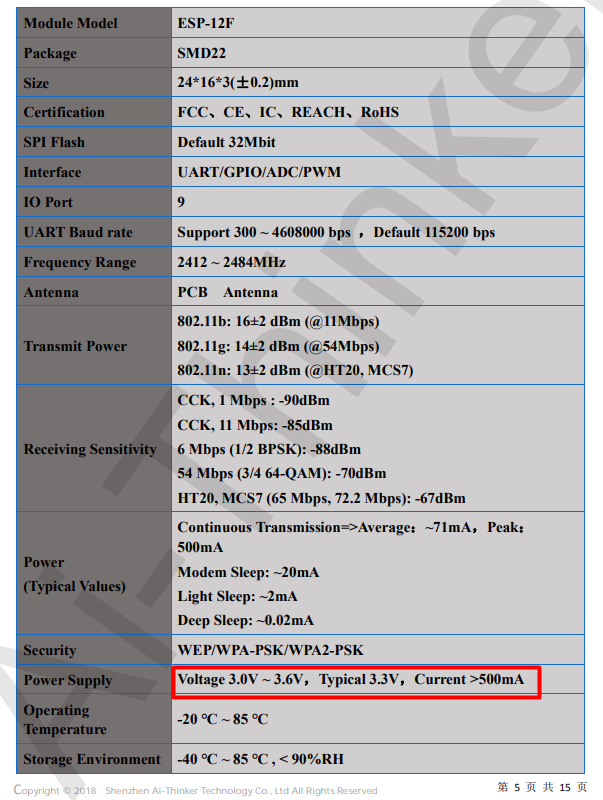

As we can see in the datasheet of our ESP chip, it needs a current greater than 500ma, something that our ft232 unfortunately cannot supply.
Now it is time to configure our module to our cloud, for this we are lucky that the arduino cloud also works with this product and has it under the name of esp8266, which is compatible with our system.
Note: In this same way we can also feed our board made with the attiny85 to be able to carry out any type of programming since the ESP chip will work as a wifi communication module and the attiny85 card will be in charge of sending the information to it.
Now it is time to configure our module to our cloud, for this we are lucky that the arduino cloud also works with this product and has it with the name of esp8266, which is compatible with our system. This is also known as nodemcu because one of the companies that used this chip baptized it with that name, which is a card that is configured as an easy-to-program board and with a micro usb port to be programmed directly and also has the same esp chip.

The second thing we must do is configure our arduino MKR or ESP module so that it can be programmed through the arduino online tool, for this we go to the following website (https://create.arduino.cc/iot/things) and create an account On the arduino website, once we have performed these steps it is time to add our arduino MKR, a very important point is that not all arduinos can be added to this platform, to add the arduino we must go to the "devices" window :

Now it is time to choose our card, in the final example you can also work with the arduino mkr card but also as we can see, thanks to the latest arduino updates, it allows us to carry out this mission with Iot compatible cards like the one that we have created in our system.

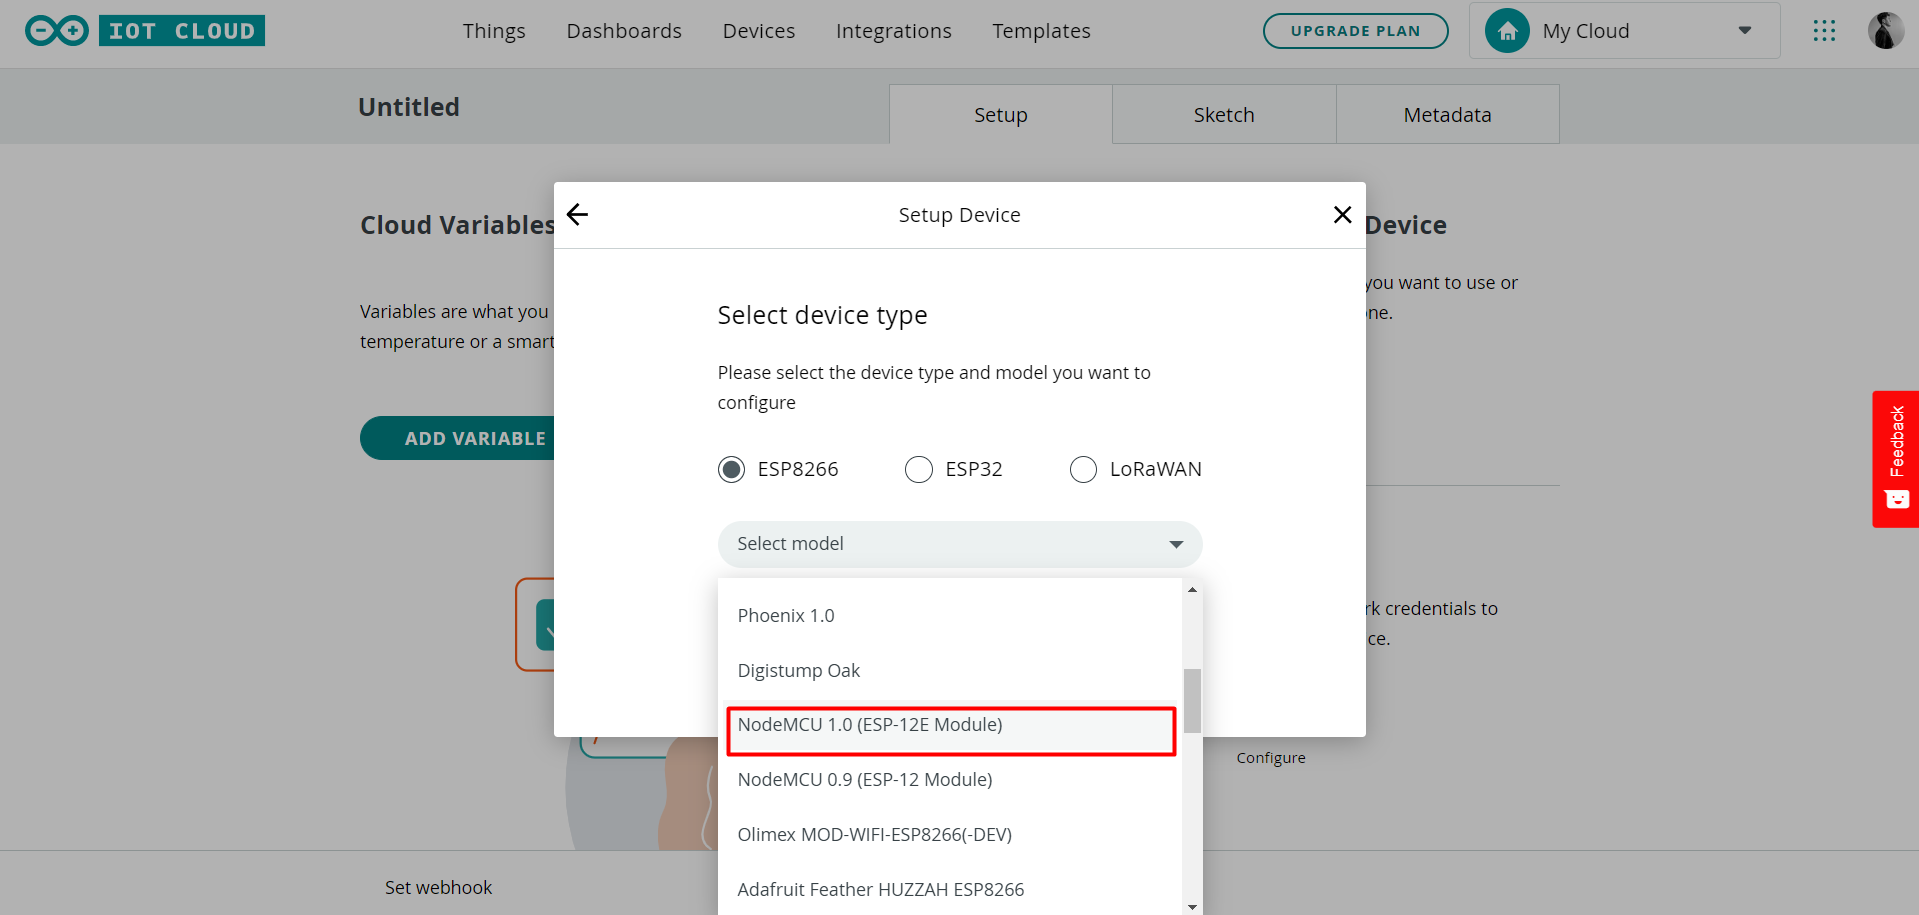
Once we give you the option to choose the third-party devices, we can notice that there is not only one module but several that arduino has added to its cloud so that it can be compatible, in this case what matters to us is the section that says esp8266 and this allows us to choose the board model with which we are working, we will find the one that says "nodemcu esp12 1.0".
Note : In order to connect your arduino with the online platform, you must have previously downloaded and installed the arduino create agent software that you can find at the following link (https://create.arduino.cc/getting-started/plugin/download).
 Once here we must press the button "add device"
 As you can see there are different devices compatible with Arduino, however there are very few unlike the large number of Arduinos on the market.After selecting our device and configuring it with a name, the device should appear as follows:
 The last step is to enter the "things" tab, to create a new program, in this place we can create variables and network connections for our device, you must click on "create thing" and a window like the following will appear:
Now we must configure this new project by adding the new device that we already have ready to connect and finally configuring it with the indicated Wi-Fi network.As you can see, the state of the arduino still appears as "offline" and that is because we must connect it to our wifi network. For this you must enter the name and password of your WIFI network to be able to make the connection and that you must place it in the following place :
The last step is to enter the "things" tab, to create a new program, in this place we can create variables and network connections for our device, you must click on "create thing" and a window like the following will appear:
Now we must configure this new project by adding the new device that we already have ready to connect and finally configuring it with the indicated Wi-Fi network.As you can see, the state of the arduino still appears as "offline" and that is because we must connect it to our wifi network. For this you must enter the name and password of your WIFI network to be able to make the connection and that you must place it in the following place :
 That would be all, now is the time to do magic, for this we will do a simple programming:
What this programming will do is receive the signal from the dashboard that we will create next to be able to modify the color of the RGB neopixel strip in real time.The dashboard will have the following appearance, the 3 components will be directly programmed for each of the variables that they modify the Red, Blue and Green components of our neopixel strip.
That would be all, now is the time to do magic, for this we will do a simple programming:
What this programming will do is receive the signal from the dashboard that we will create next to be able to modify the color of the RGB neopixel strip in real time.The dashboard will have the following appearance, the 3 components will be directly programmed for each of the variables that they modify the Red, Blue and Green components of our neopixel strip.
 Finally, remember to add the variables that were linked to the components of your dashboard so that they can save the information and then be used by the arduino MKR.

Demonstration