ELECTRONICS PRODUCTION
Group Assignment
In this assignment I have to:
*Characterize the design rules for my PCB production process: document feeds, speeds, plunge rate, depth of cut (traces and outline)
and tooling.
* Document the work.
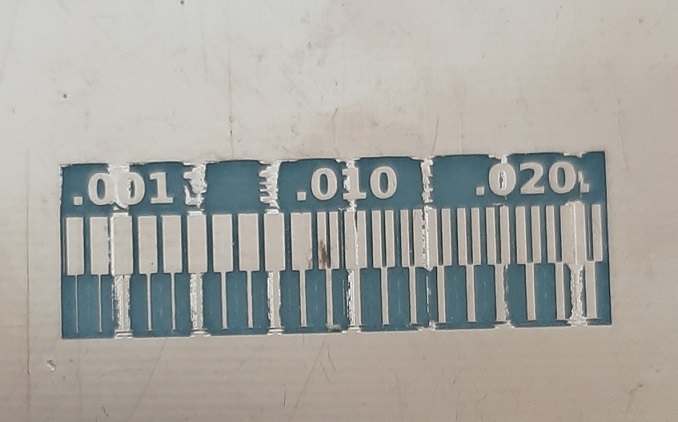
Machine Test:
I downloaded the test file from the FabAcademy site
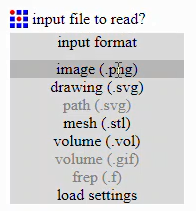
 To generate the cnc machine Gcode file I have used fabmodules.
 First select "image (.png)" from "input format".
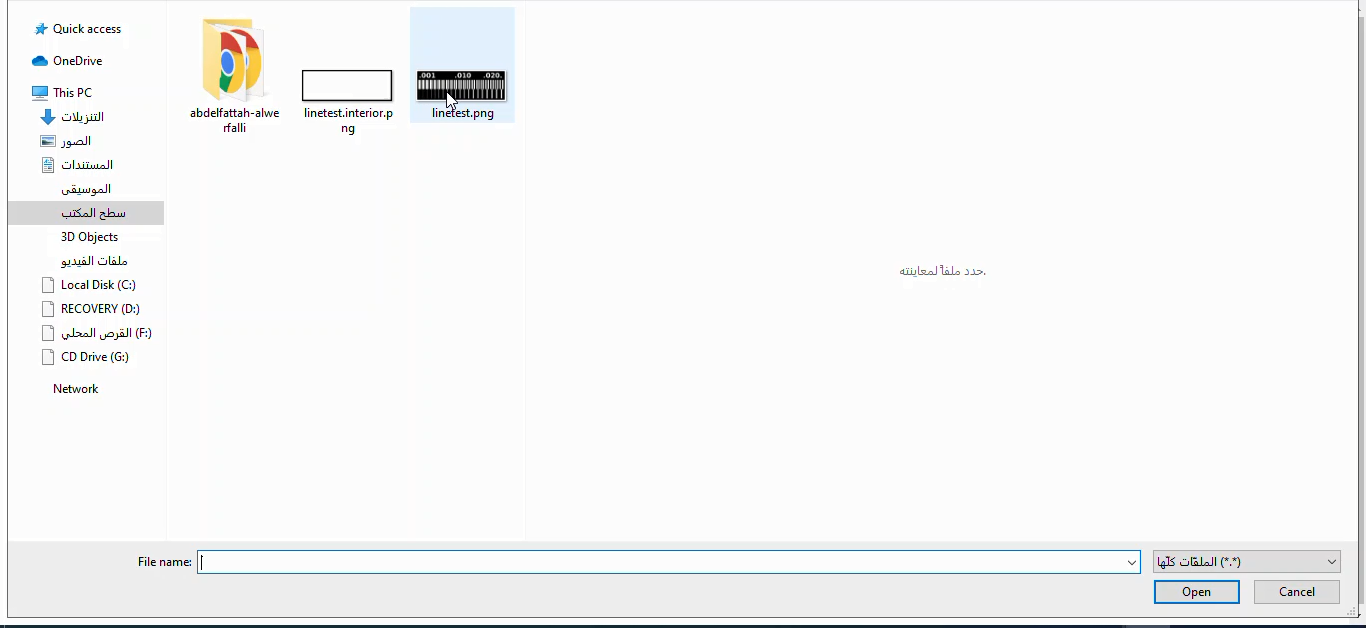
 A new window appears, select the image:
 Then I choose the output file format "depending on my machine"
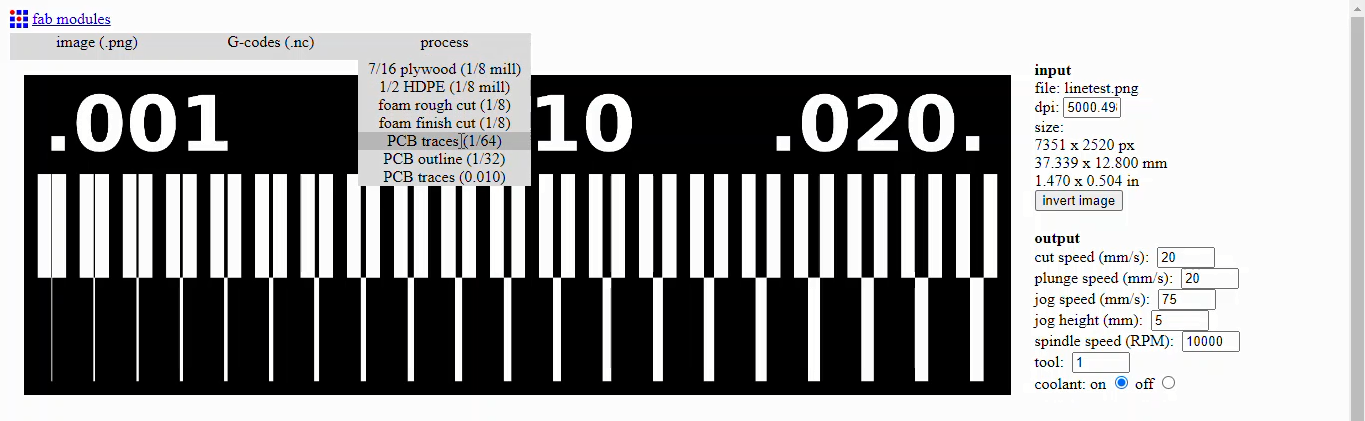
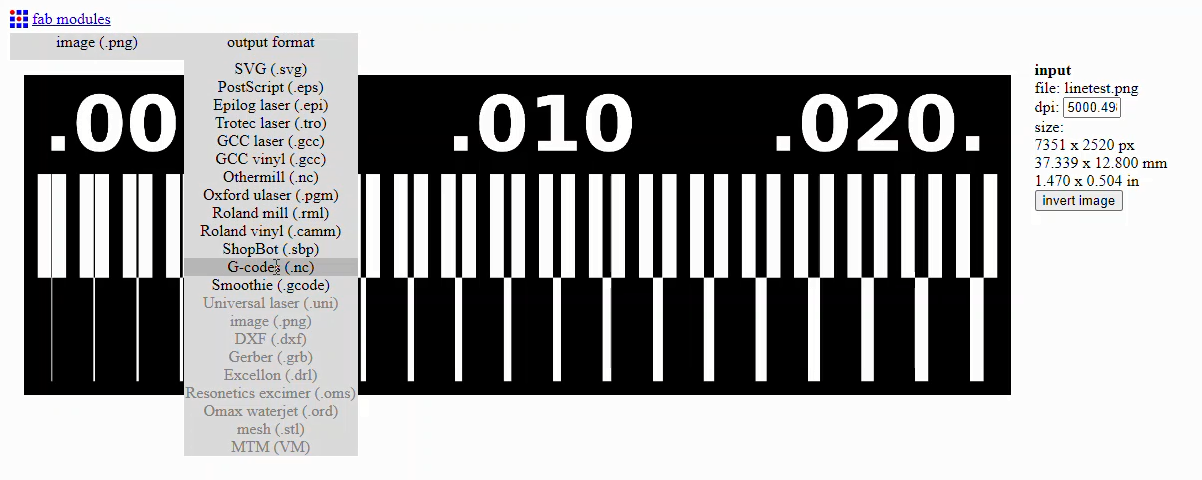 After that choose the machine process "first process is trace":
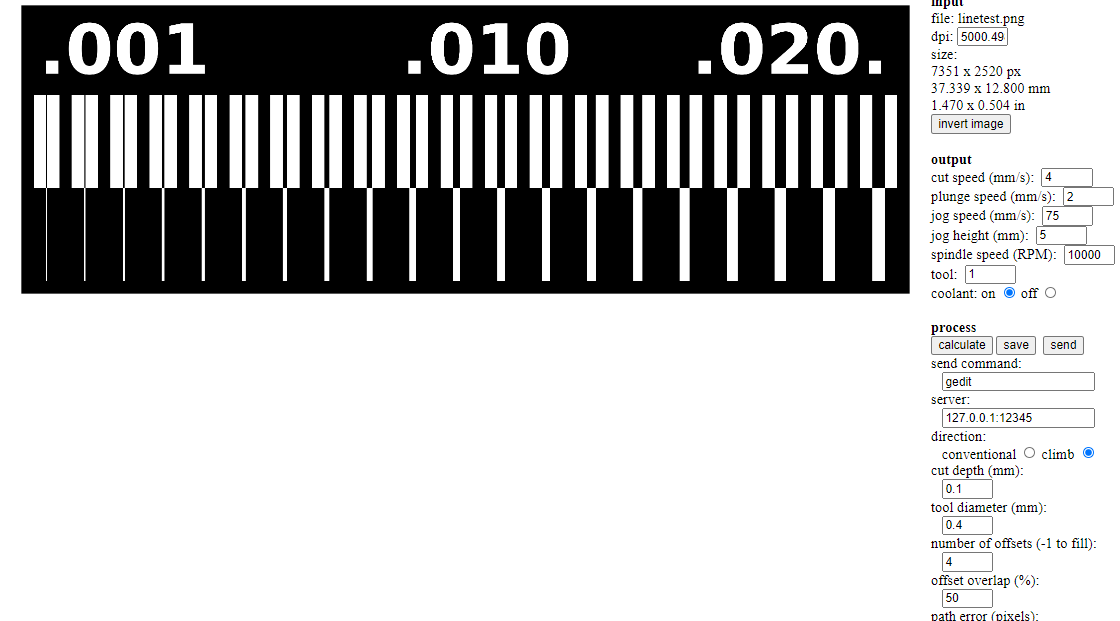
 Last, change the settings:
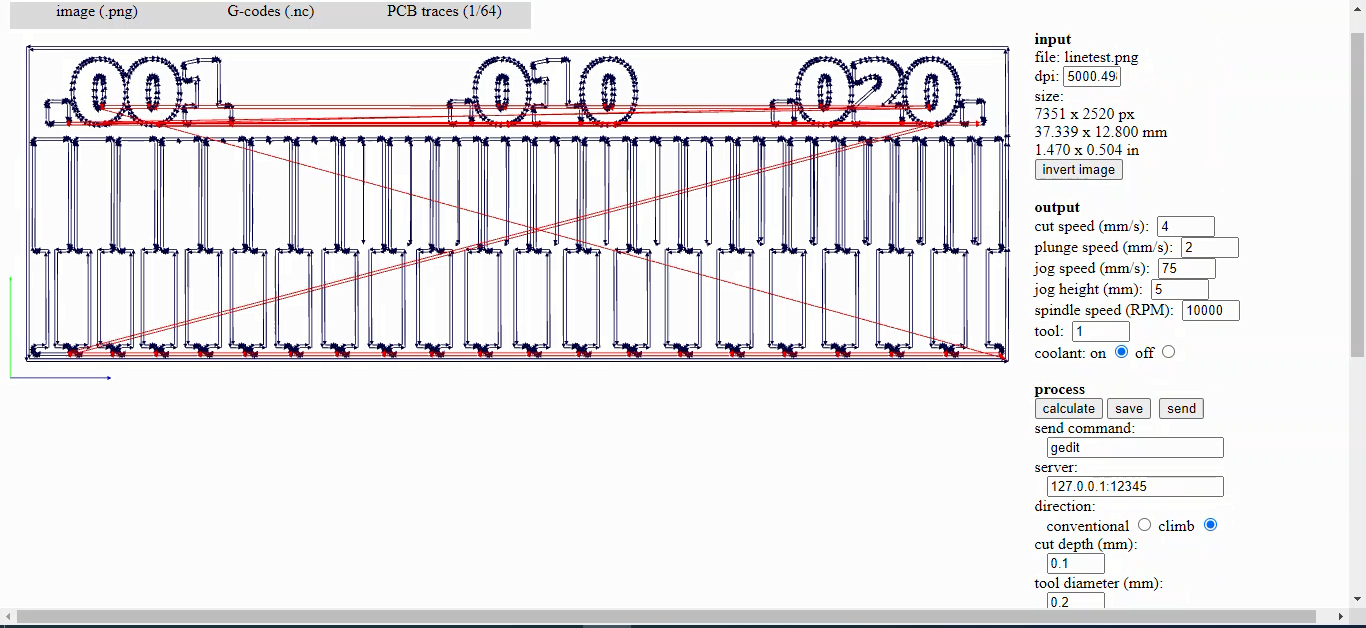
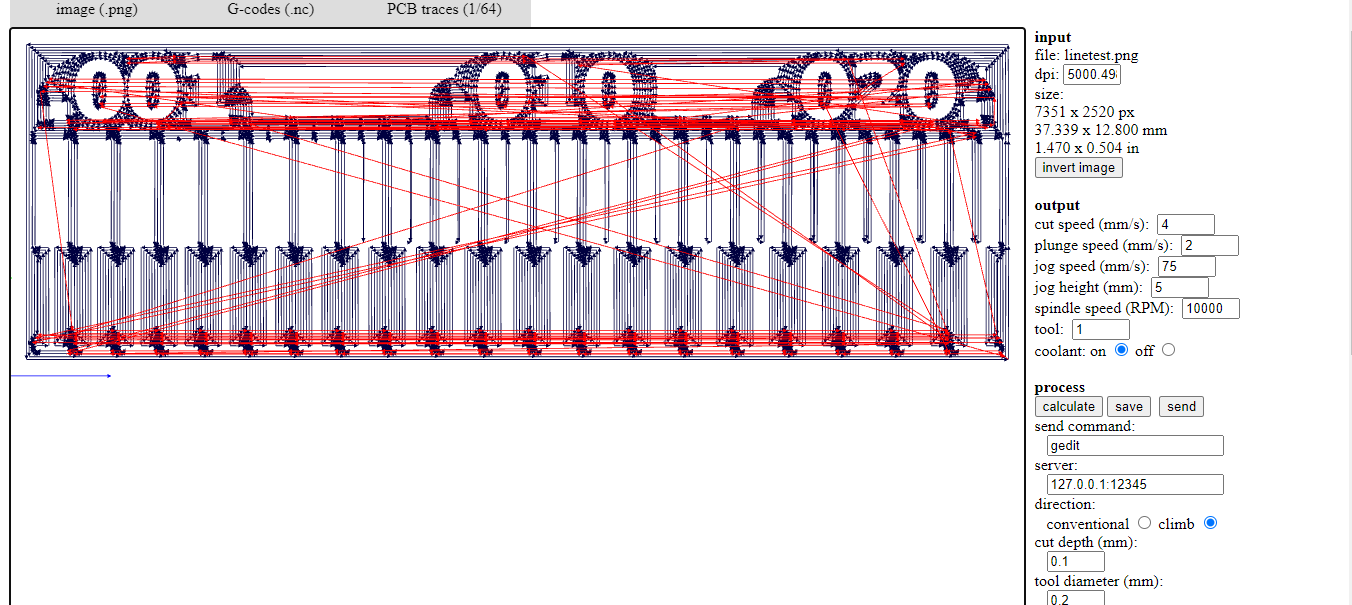
 When click "calculate" the path simulation starts to show the final board.
 Individual assignments
In this assignment I have to:
* Make an in-circuit programmer by milling and stuffing the PCB, test it, then optionally try other PCB fabrication process.
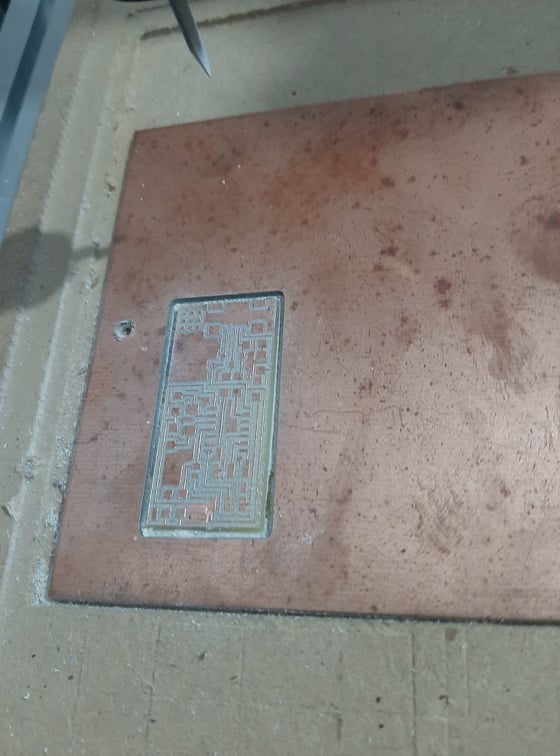
ISP milling:
To make ISP circuit, I downloaded the traces and interior design from this link. :
After that, usinf fabmodulesagain to gernerate G-code.
Now as described in week7 I milling my ISP using CNC machine.
Individual assignments
In this assignment I have to:
* Make an in-circuit programmer by milling and stuffing the PCB, test it, then optionally try other PCB fabrication process.
ISP milling:
To make ISP circuit, I downloaded the traces and interior design from this link. :
After that, usinf fabmodulesagain to gernerate G-code.
Now as described in week7 I milling my ISP using CNC machine.
 Soldering:
In my ISP, there are next component: ATtiny44 microcontroller, 2*3.3V regulators, (1KΩ, 499Ω, 100Ω, 10kΩ) resistors, (1uF, 10pF) capacitors
and 20 MHz oscillator.
Soldering:
In my ISP, there are next component: ATtiny44 microcontroller, 2*3.3V regulators, (1KΩ, 499Ω, 100Ω, 10kΩ) resistors, (1uF, 10pF) capacitors
and 20 MHz oscillator.
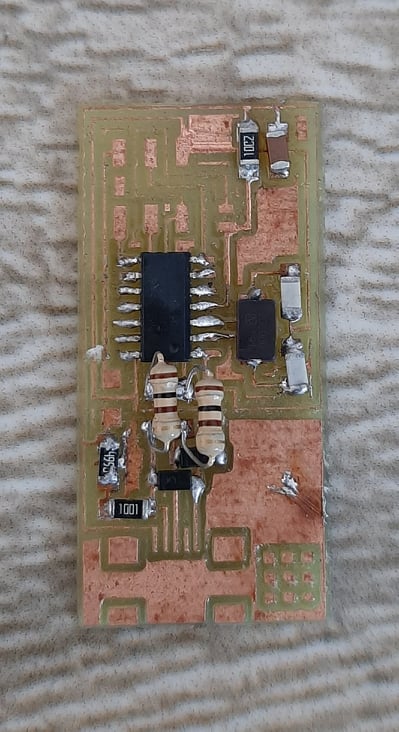 In Libya we don't have a SMD components for sale, so I bought Fab Academy start kit online but I didn't find 100Ω resistors in it.
I used DIP resistors instead. Also USB connector isn't available.
Programming:
To program the board, Fab Academy present a tutorial for different operating systems.
My issue: The board doesn't work. After check the connection by using multimeter I found a short between (Reset and MOSI) and some
bad connection. I soldered them again and start programming.
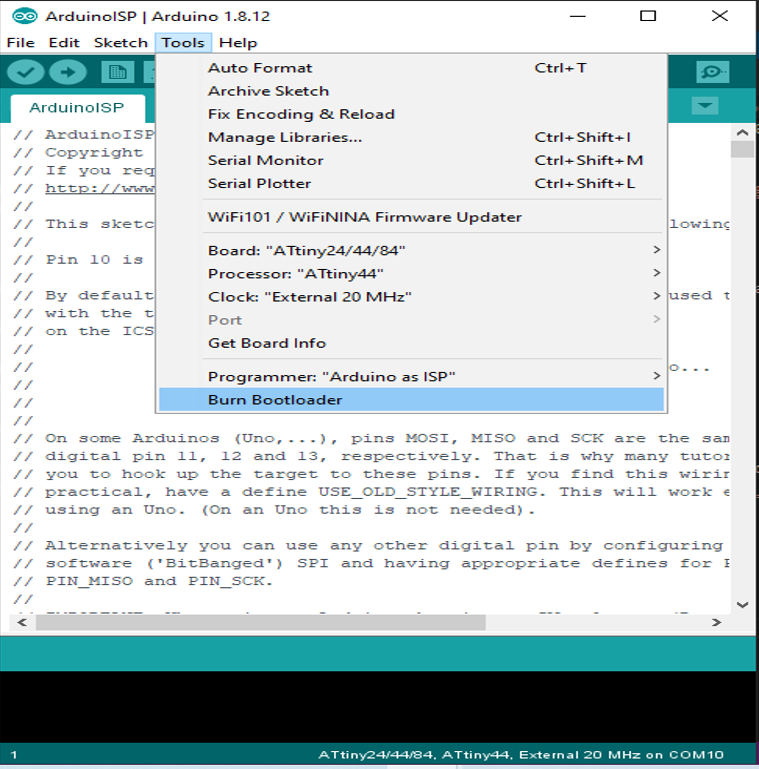
1. Burn Bootloader on Microcontroller:
To burn the Bootloader to ATtiny44 microcontroller we use the Arduino UNO as an ISP, first step is upload an example with name "ArduinoISP" to
the Arduino UNO boardr.
In Libya we don't have a SMD components for sale, so I bought Fab Academy start kit online but I didn't find 100Ω resistors in it.
I used DIP resistors instead. Also USB connector isn't available.
Programming:
To program the board, Fab Academy present a tutorial for different operating systems.
My issue: The board doesn't work. After check the connection by using multimeter I found a short between (Reset and MOSI) and some
bad connection. I soldered them again and start programming.
1. Burn Bootloader on Microcontroller:
To burn the Bootloader to ATtiny44 microcontroller we use the Arduino UNO as an ISP, first step is upload an example with name "ArduinoISP" to
the Arduino UNO boardr.
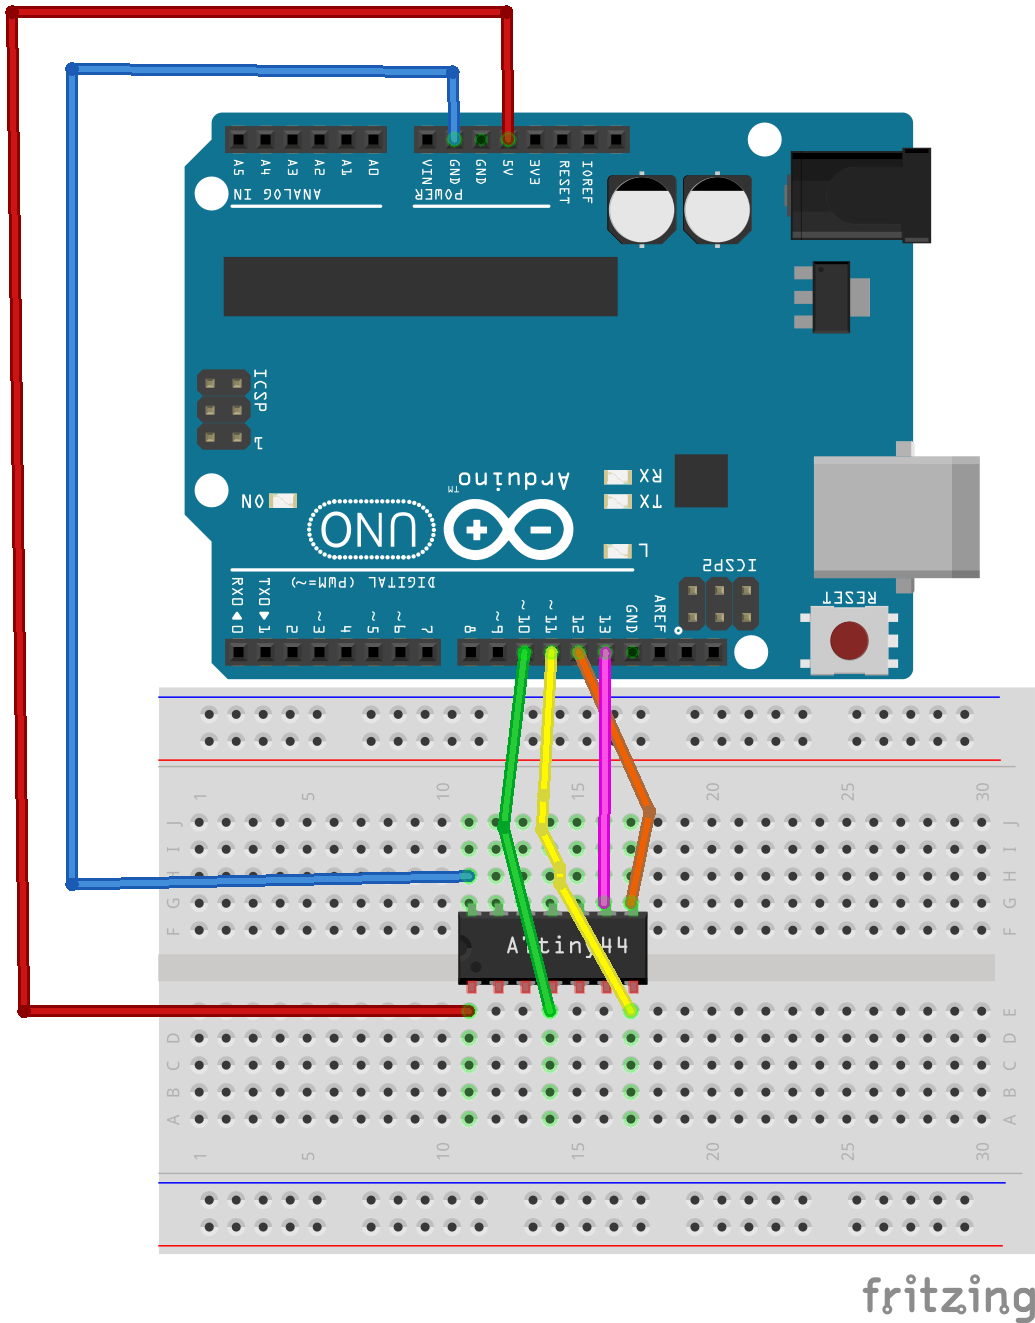
 2. Wire Connection:
The connections between the ATTIny44 and the Arduino Uno is shown in the following table:
2. Wire Connection:
The connections between the ATTIny44 and the Arduino Uno is shown in the following table:
 And the connection is described:
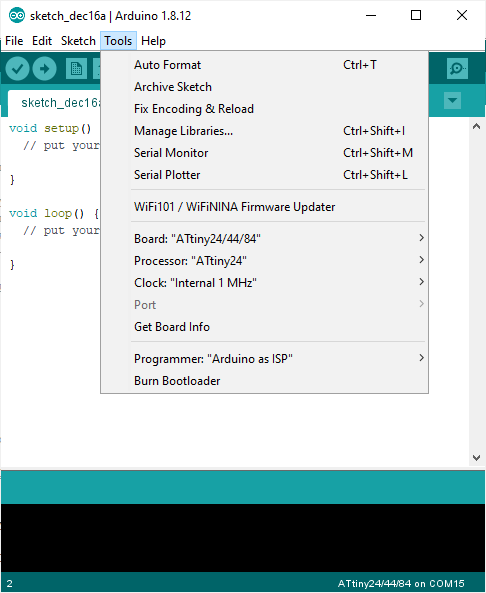
 3. Uplaod Arduino as ISP program:
After choosing ATtiny44 board and select the oscillator frequency from "Tools", upload the program using "Upload Using programmer"
3. Uplaod Arduino as ISP program:
After choosing ATtiny44 board and select the oscillator frequency from "Tools", upload the program using "Upload Using programmer"
 4. Download Needed Softwares:
According to operating system (I am using Windows), We need to download next programs and files:
4. Download Needed Softwares:
According to operating system (I am using Windows), We need to download next programs and files:
Download and Install WinAVR
Download the drivers for Windows
Download the FabISP Firmware
After downloading firmware.zip extract it to desktop and find file named with (makefile). Open it using notepad and replace:
AVRDUDE = avrdude -c avrisp2 -P usb -p $(DEVICE) # edit this line for your programmer
with this line:AVRDUDE = avrdude -c stk500v1 -b19200 -P COM13 -p $(DEVICE)
"Don't forget to change com port number"
Now using (ctrl+R) to open command prompt, type "cmd" then "enter". When it open type "cd Desktop\fabISP_mac.0.8.2_firmware".
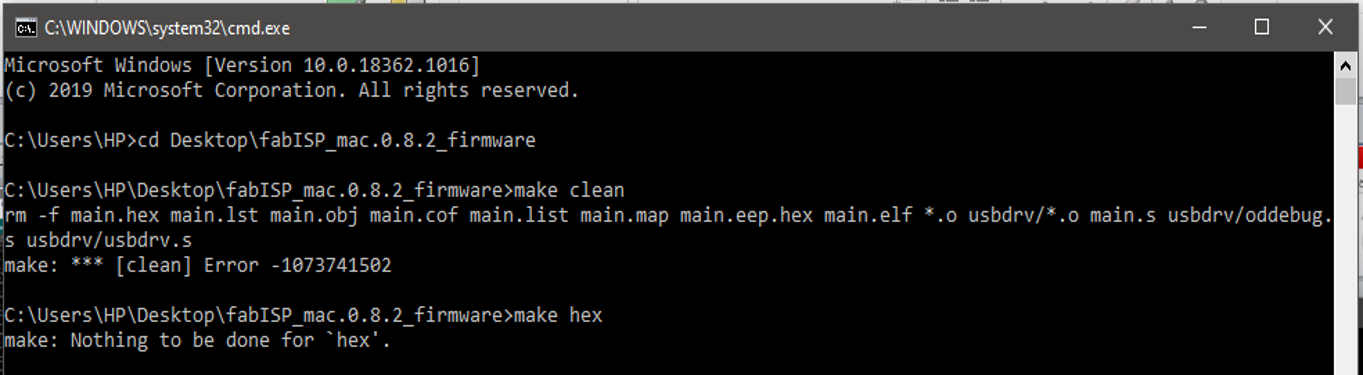
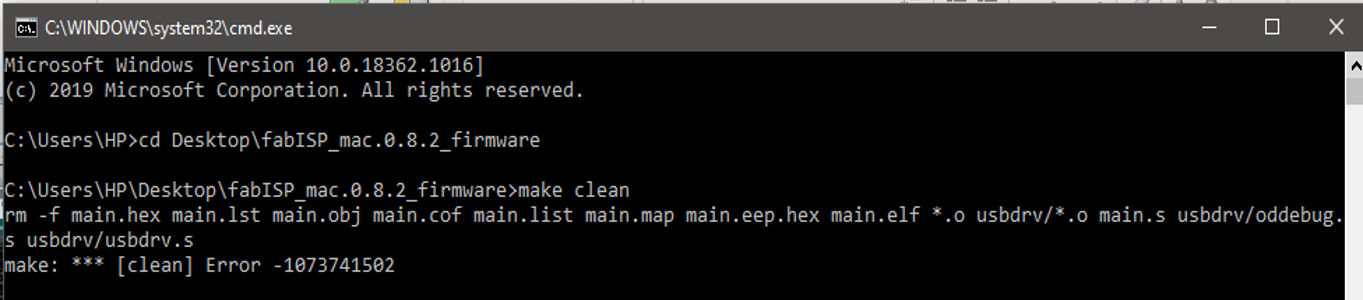 Now, type "make hex"
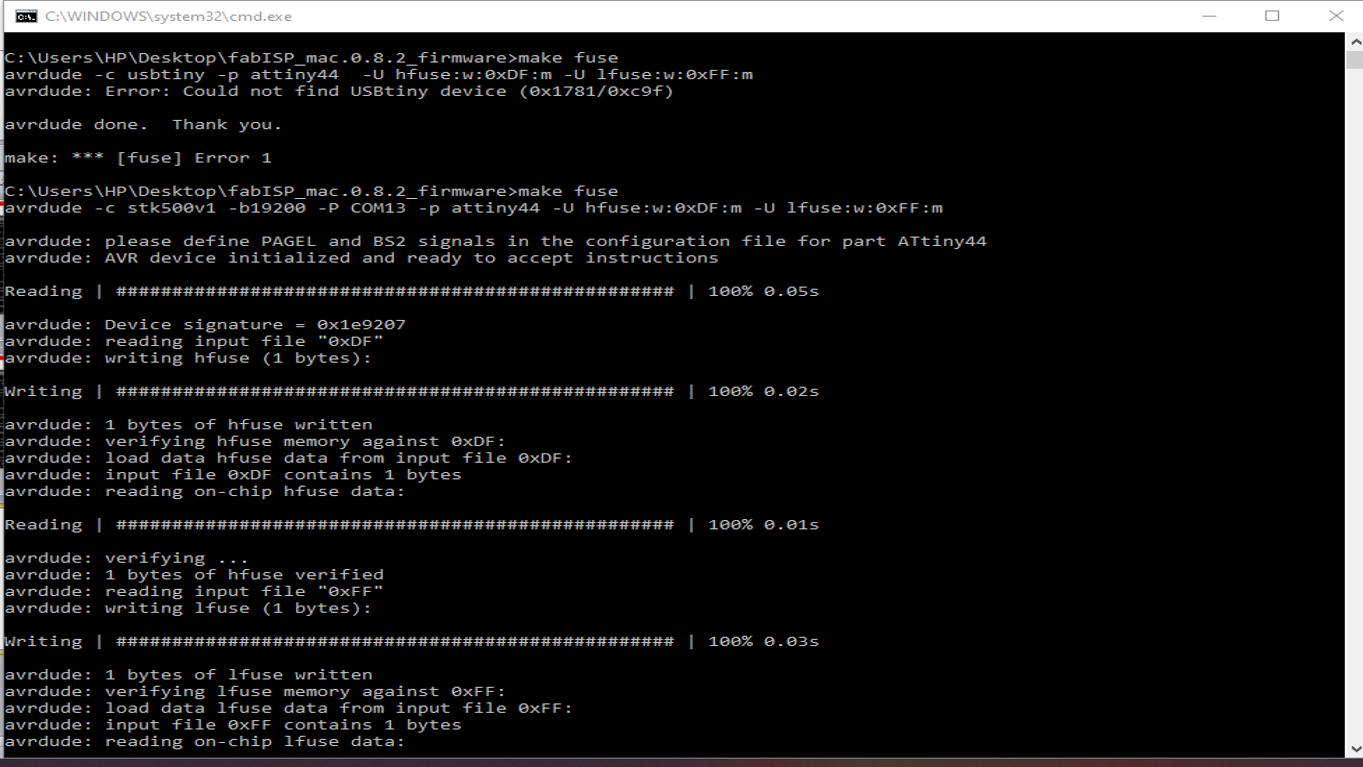
 Now, type "make fuse"
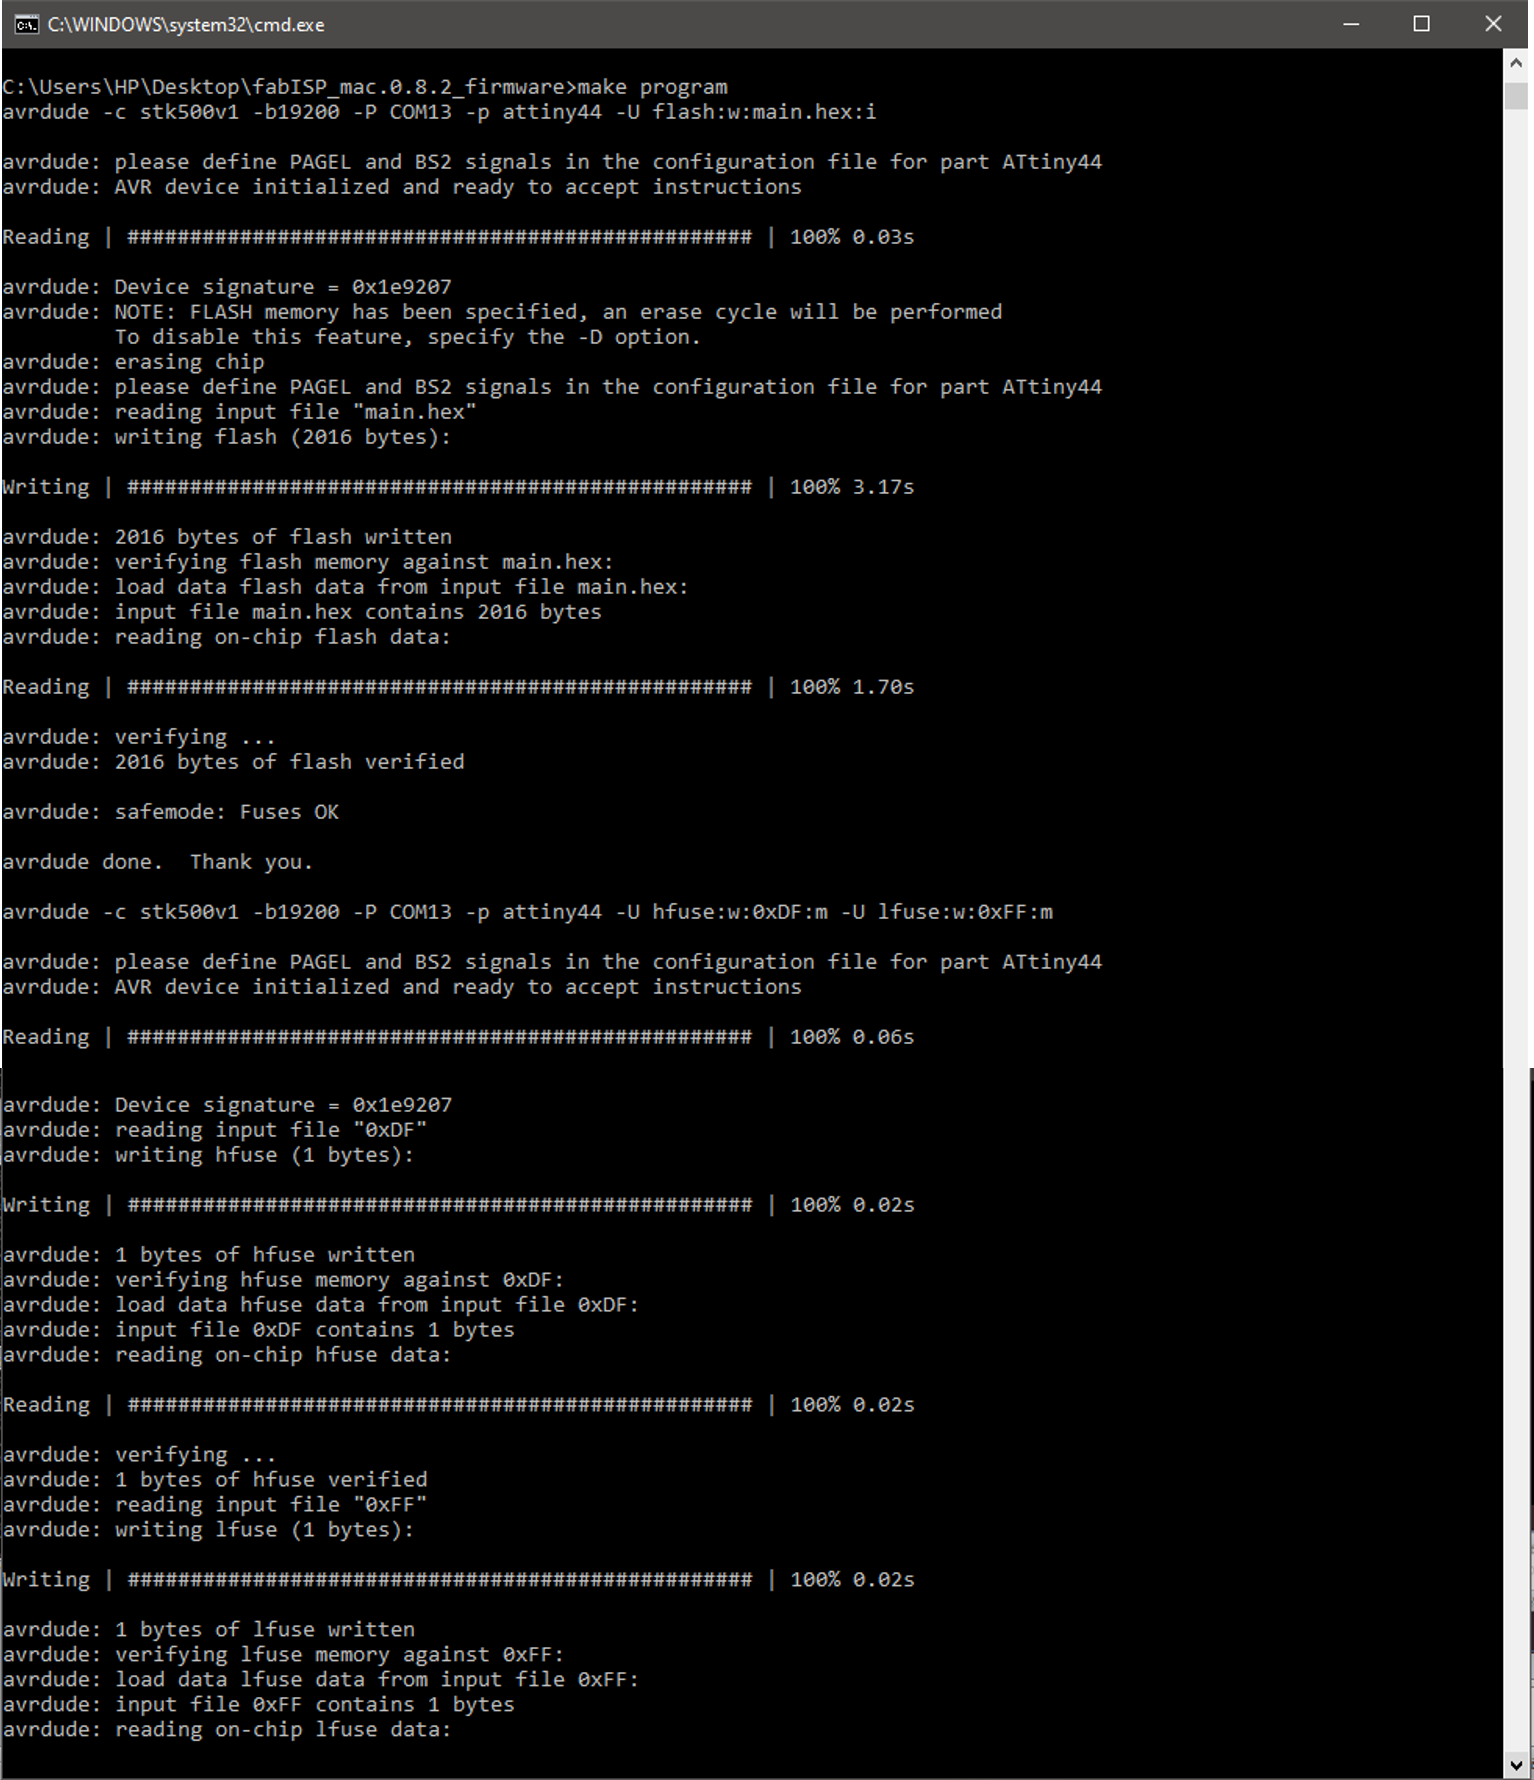
 Finally, type "make program"
 Now it is done. To start using the circuit as ISP we must remove the pridge "or 0 Ω resistor".