Interface and Application Programming
Group Assignment
* Compare as many tool options as possible.
LabVIEW Environment
LabVIEW, short for Laboratory Virtual Instrument Engineering Workbench, is a programming environment in which we create programs using
a graphical notation (connecting functional nodes via wires through which data flows); in this regard, it differs from traditional programming
languages like C, C++, or Java, in which you program with text. However, LabVIEW is much more than a programming language. It is an interactive
program development and execution system designed for people, like scientists and engineers, who need to program as part of their jobs.
What is LabVIEW
LabVIEW is a graphical programming environment you can use to quickly and efficiently create applications with professional user interfaces.
Millions of engineers and scientists use LabVIEW to develop sophisticated measurement, test, and control system applications using intuitive
icons and wires. In addition, the LabVIEW platform is scalable across different targets and OSs. LabVIEW offers unrivaled integration with
thousands of hardware devices and provides built-in libraries for advanced analysis and data visualization to create virtual instruments we
can customize to our needs.
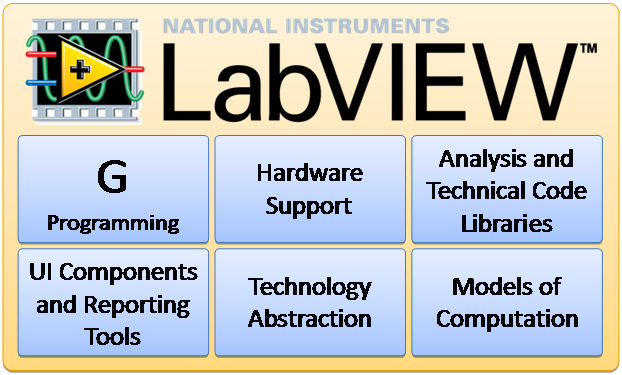 LabVIEW Characteristics:
LabVIEW programs have the following characteristics:
• A graphical and compiled nature.
• Dataflow and/or event-based programming.
• Multi-target and platform capabilities.
• Object-oriented flexibility.
• Multi-threading possibilities.
The LabVIEW Environment:
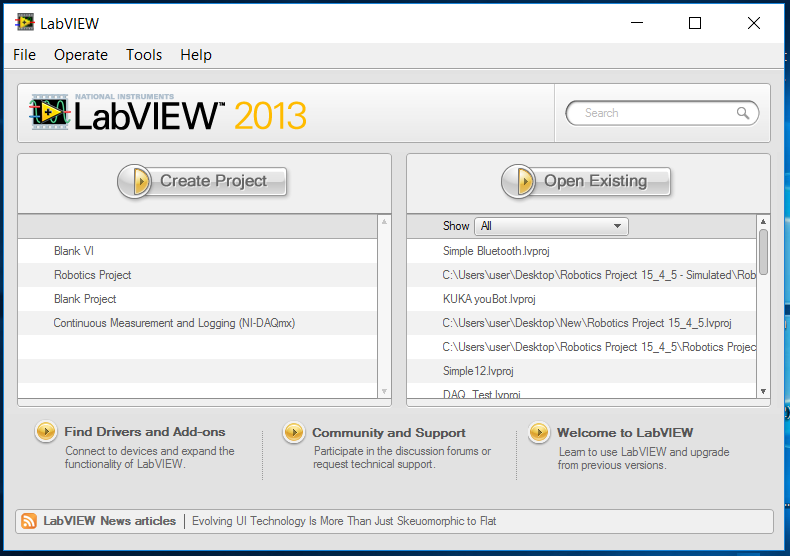
When opening LabVIEW, we first come to “Getting Started” window shown in fig3.2. To create a new VI, select “Blank VI” or in order to create
a new LabVIEW project, select “Empty project”. When you open a blank VI, an untitled front panel window appears. This window displays the front
panel and is one of the two LabVIEW windows you use to build a VI. The other window contains the block diagram. The sections below describe the
front panel and the block diagram.
LabVIEW Characteristics:
LabVIEW programs have the following characteristics:
• A graphical and compiled nature.
• Dataflow and/or event-based programming.
• Multi-target and platform capabilities.
• Object-oriented flexibility.
• Multi-threading possibilities.
The LabVIEW Environment:
When opening LabVIEW, we first come to “Getting Started” window shown in fig3.2. To create a new VI, select “Blank VI” or in order to create
a new LabVIEW project, select “Empty project”. When you open a blank VI, an untitled front panel window appears. This window displays the front
panel and is one of the two LabVIEW windows you use to build a VI. The other window contains the block diagram. The sections below describe the
front panel and the block diagram.
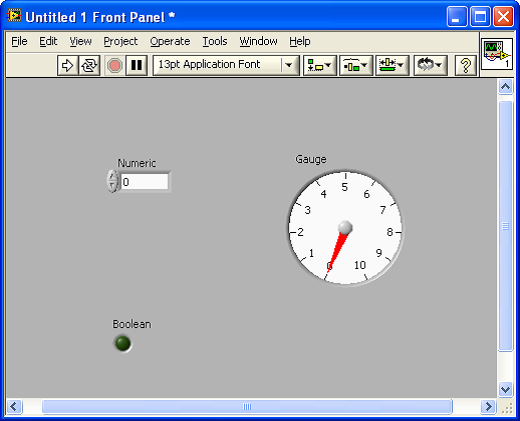
 Front Panel:
In LabVIEW, we build a user interface, or front panel with controls and indicators. Controls are knobs, push buttons, dials,and other input
devices. Indicators are graphs, LEDs, and other displays. We build the front panel with controls and indicators, which are the interactive
input and output terminals of the VI, respectively. Controls are knobs, pushbuttons, dials, and other input devices. Indicators are graphs,
LEDs, and other displays. Controls simulate instrument input devices and supply data to the block diagram of the VI. Indicators simulate
instrument output devices and display data the block diagram acquires or generates. E.g., a “Numeric” can be either a “Numeric Control” or
a “Numeric Indicator”.
Front Panel:
In LabVIEW, we build a user interface, or front panel with controls and indicators. Controls are knobs, push buttons, dials,and other input
devices. Indicators are graphs, LEDs, and other displays. We build the front panel with controls and indicators, which are the interactive
input and output terminals of the VI, respectively. Controls are knobs, pushbuttons, dials, and other input devices. Indicators are graphs,
LEDs, and other displays. Controls simulate instrument input devices and supply data to the block diagram of the VI. Indicators simulate
instrument output devices and display data the block diagram acquires or generates. E.g., a “Numeric” can be either a “Numeric Control” or
a “Numeric Indicator”.
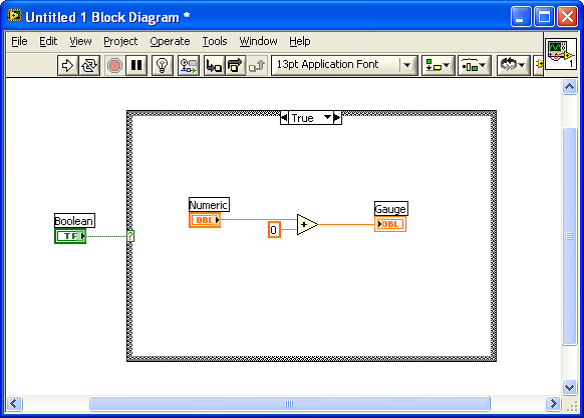
 Block diagram:
After you build the front panel, you add code using graphical representations of functions to control the front panel objects. The block
diagram contains this graphical source code. Front panel objects appear as terminals, on the block diagram. Block diagram objects include
terminals, subVIs, functions, constants, structures, and wires, which transfer data among other block diagram objects.
Block diagram:
After you build the front panel, you add code using graphical representations of functions to control the front panel objects. The block
diagram contains this graphical source code. Front panel objects appear as terminals, on the block diagram. Block diagram objects include
terminals, subVIs, functions, constants, structures, and wires, which transfer data among other block diagram objects.
 Add-on Toolkits for LabVIEW:
NI LabVIEW add-ons extend the development environment with modules and toolkits designed for different applications.
Add these prepackaged LabVIEW functions and sophisticated tools for developing specific applications to create the
best LabVIEW for the users.By extending development environment with these modules and toolkits, you can add new syntaxes,
such as state charts and textual math, or add new deployment targets, such as targets based on the LabVIEW reconfigurable
I/O architecture. You can save time by using prebuilt toolkits of common functions instead of developing common code from scratch.
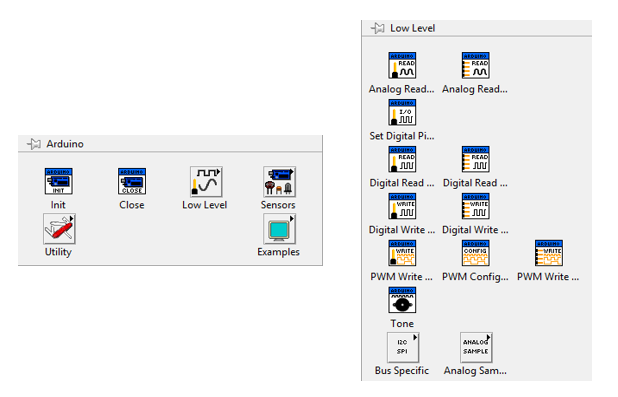
One of these Add-on is LabVIEW Interface for Arduino (LIFA) toolkit that allows developers to acquire data from the Arduino
and process it in the LabVIEW.
Add-on Toolkits for LabVIEW:
NI LabVIEW add-ons extend the development environment with modules and toolkits designed for different applications.
Add these prepackaged LabVIEW functions and sophisticated tools for developing specific applications to create the
best LabVIEW for the users.By extending development environment with these modules and toolkits, you can add new syntaxes,
such as state charts and textual math, or add new deployment targets, such as targets based on the LabVIEW reconfigurable
I/O architecture. You can save time by using prebuilt toolkits of common functions instead of developing common code from scratch.
One of these Add-on is LabVIEW Interface for Arduino (LIFA) toolkit that allows developers to acquire data from the Arduino
and process it in the LabVIEW.
 To know more about LIFA and read instruction about download it you may visit NI website.
This toolkit is old and has some problems in communication with Arduino, so another toolkit called LINX is used.
LINX toolkit support more platforms like Arduino and chipKIT and Raspberry Pi.
To know more about LIFA and read instruction about download it you may visit NI website.
This toolkit is old and has some problems in communication with Arduino, so another toolkit called LINX is used.
LINX toolkit support more platforms like Arduino and chipKIT and Raspberry Pi.
 I used LINX toolkit to control a LED on the Arduino via LabVIEW:
Other important software is MATLAB. MATLAB, or MATrix LABoratory, is a multi-paradigm numerical computing environment developed by Mathworks.
It allows matrix manipulators, plotting of functions and data, implementations of algorithms, creation of UIs and interfacing with text-based
programs written in various languages such as C, C++, Java and Python.
MATLAB supports developing applications with GUIDE, or graphical user interface (GUI) development environment, for graphically designing GUIs.
It has additional toolboxes like MuPAD symbolic
engine, which allows access to symbolic computing abilities. It also has tightly integrated graph-plotting features.
Some differences between LabVIEW and MATLAB are listed below:
1. LabVIEW is mainly a graphical programming language for visualisation and parameter tuning for remote operation; MATLAB is a computing
language for control algorithm development and simulation.
2. LabVIEW supports Windows, Linux, macOS and cross-platform, while MATLAB supports Windows, Linux and macOS.
3. MATLAB mainly provides mathematical/numerical computing environment, whereas LabVIEW is a system design platform that allows data acquisition,
test automation, instrument control and embedded system design.
4. MATLAB is used for simulations because of additional libraries that contain higher-level functions. LabVIEW is used where a functional and
intuitive GUI or interaction with hardware is required.
LabVIEW file: