Week1
Project managment/Principles and practices
Go to:Project managment Principles and practices
Getting ready/Meeting the team
A couple of weeks ago we had the first official meeting with all the participants as well as the instructos from FablabLeon.
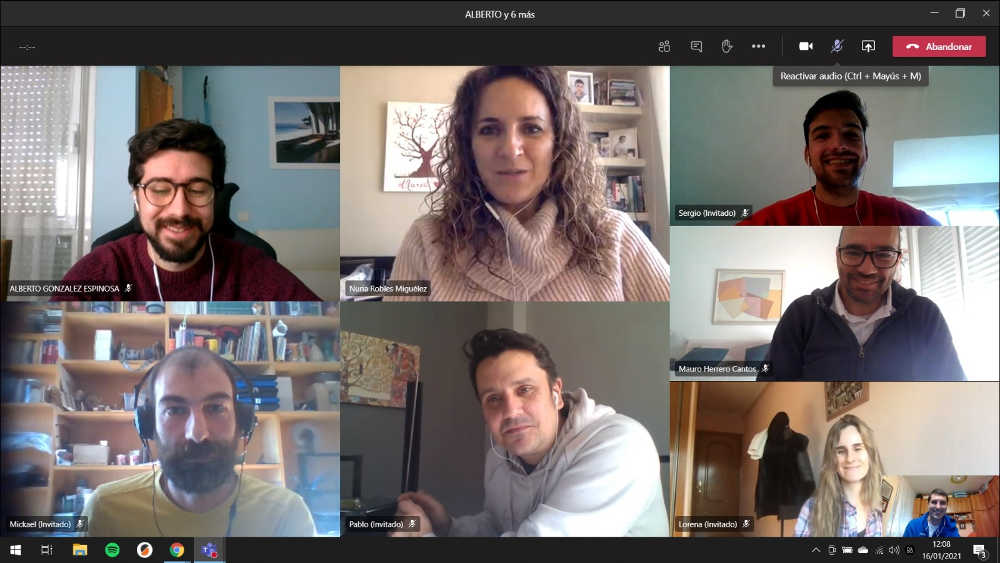
We got to introduce ourselves and had a check at the inventory, the materials needed and the communication mediums:
- Good connection
- Microphones and headphones
- Setting up the accounts and platforms with which we will be communicating
Here is a nice small video serie, very informative and funny to see before getting ready along with the fab Charter
Project management
I would like to try as many tools as possible so I´ll keep this link to the various sugested tools handy
What is GIT?
I already had an account in fablab.io and to log into gitlab, we log through fablab.io, the problem is that I never seem to find the right log in page, so here it is. So from fablab.io, we log into gitlab, and from git lab we can access Mattermost, which is where we can communicate with everyone.
To understand how it works, I went through the installation process and the documentation available here and I also found this video series that was interesting and a little clearer for me.
I installed it on windows and linux (ubuntu) machines as I would like to try both systems.
Here is the recitation and documents I looked at to find out the steps to set up git, ssh keys, Git lab, HTML and more.
Desktop sharing/Remote control
Along with the documentation in the project management, I found a lot on the web, far too much to share and it really depends on the operating systems.
I am quite interested in the remote desktop functionalities and have old plans for the future that will make great use of it. I have to try a few more tools for that purpose.
More on that later…
Documentation
First and most important is to keep the size of all documentation down, as much as possible.
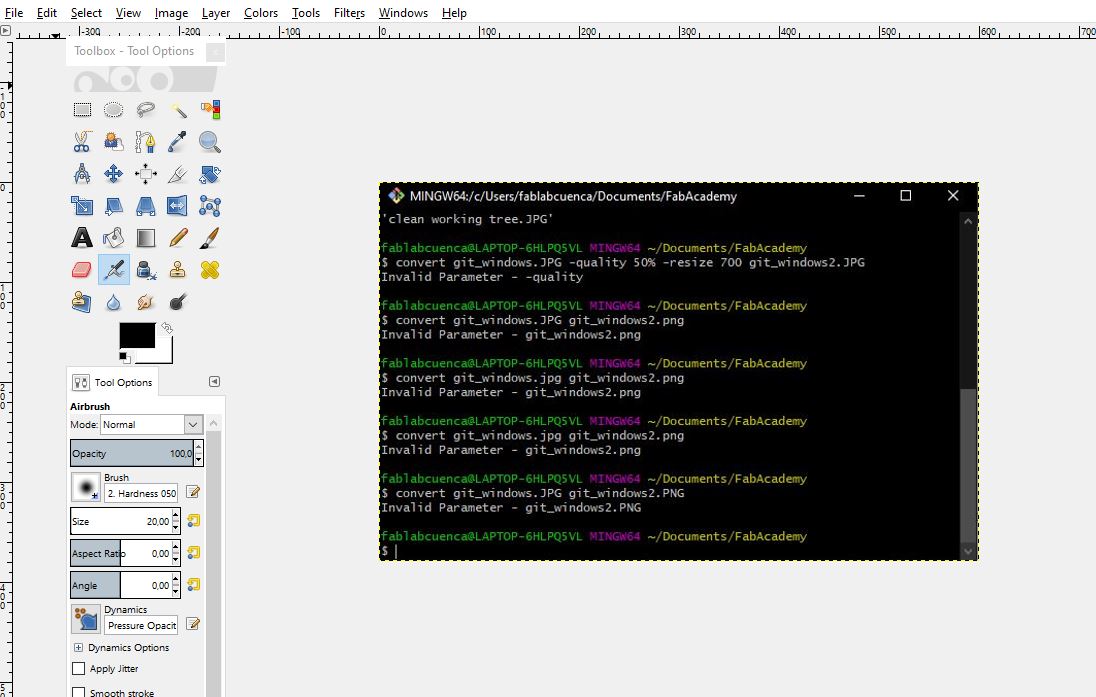
I'm looking for a quick workflow for media web content (pics, vids, etc) using Imagemagick through the terminal. I'd like to make use of the batch processing when possible but mainly I just want to know the best formats and sizes for web content.
Note: I am having issues with imagemagick on windows for the image conversion, the same commands on ubuntu works perfectly but I can not seem to be able to get it done on windows.
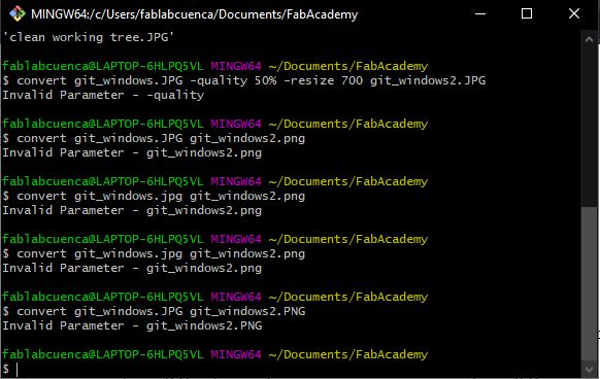
So far I can use GIMP on windows no problem so that will do for now, I´ll keep that in mind, I am not sure what I am doing wrong.
Here are the commands I keep handy.
I have enjoyed discovering and trying the version control system but still I had to turned to my sofa…, a few hours of tutorial videos later, It finally start to make sense and I am finally getting to decode some of the gibberish I forced myself to.
The conclusion, as far as push, pull, clone, set up name, create an ssh key, and commends like this, I will stick to the terminal.
Next, the access to the repo on gitlab, for this task I will try to mainly use the terminal instead of gitlab as I would like to go a little further than what I have understood so far.
Setting up Git and I pull the repo from gitlab.
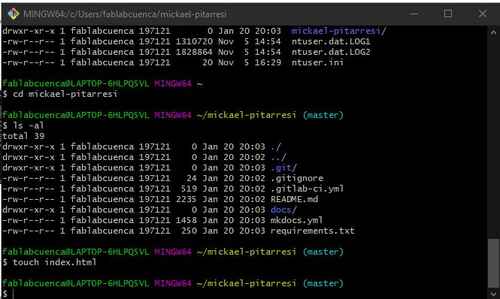
For the html stuff, I have also been trying to create a simple web page, a local repo and played a little with a few command lines to check the master branch, stage the file and commit changes with the terminal. I mean I get the idea of being able to control other apps from the terminal, now I need a text editor for the html part...
I have also tried Sublime, Atoms and in this category of tools, at least for me, the winner is Virtual studio code.…
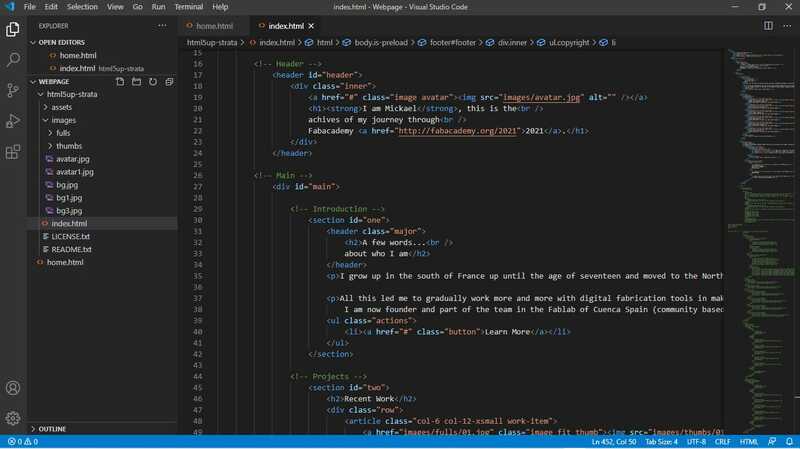
After messing around with the terminal and basic html, I had a look at all the web pages made by the 2019 students...or was it 2020?.... Of Course the one I like is one of thoses free template and I have been investigating Stéphane Muller´s page. I spent a few hours trying to see its code and how he modified his template. I used the Ctrl U while on Stephane´s page to have a look at the source code
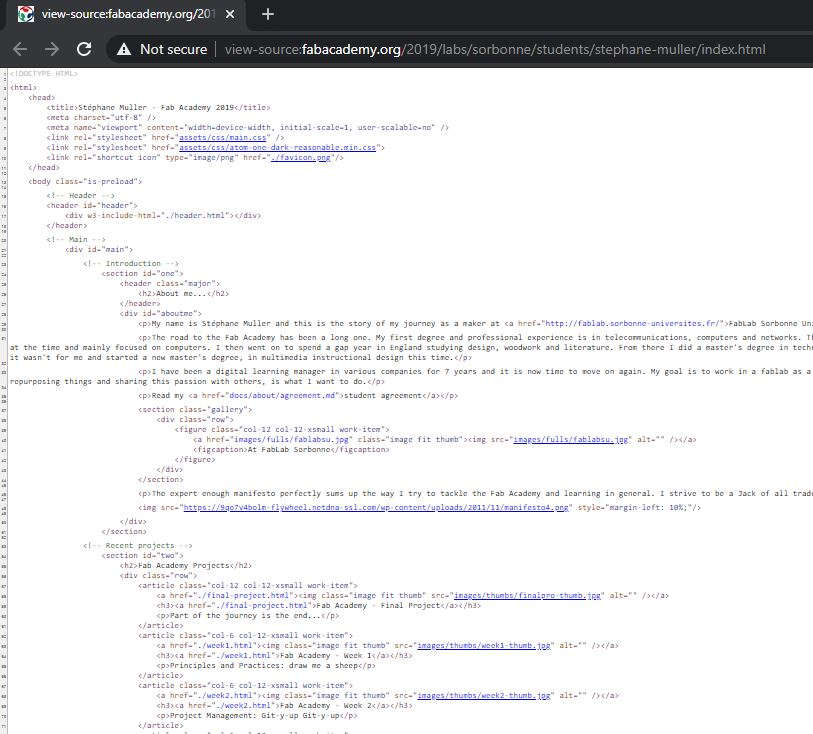
I check how the different sections were created and where to input the content. In the process I realised that it was a template from HTML5UP so I went there and downloaded it. I added content, and prepared the template pages for each week. There are still things I need to figure out and content I would like to display differently but so far I have managed to get to where I want to be.
This was quite useful to see:
Pull/push from an other computers
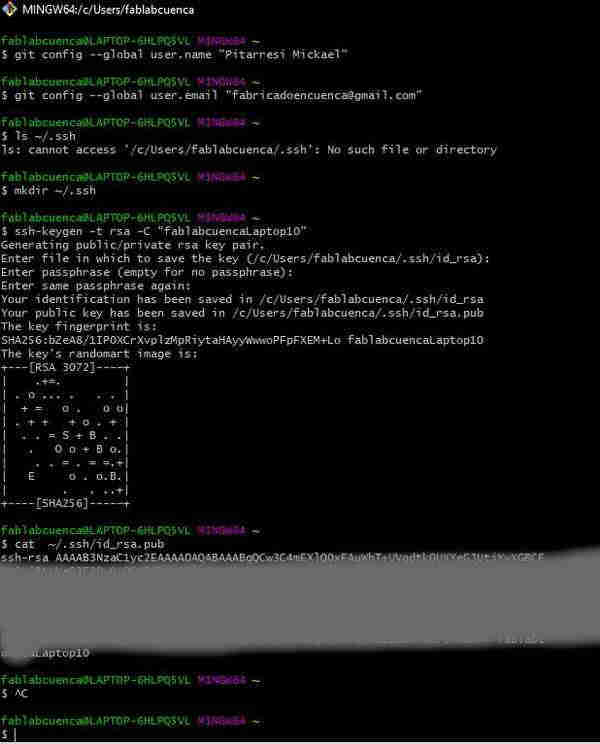
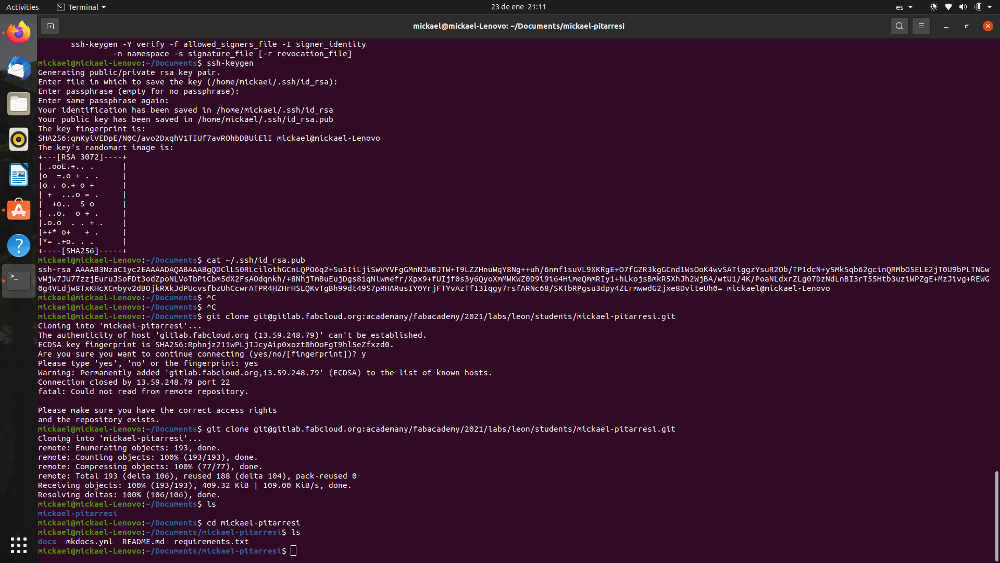
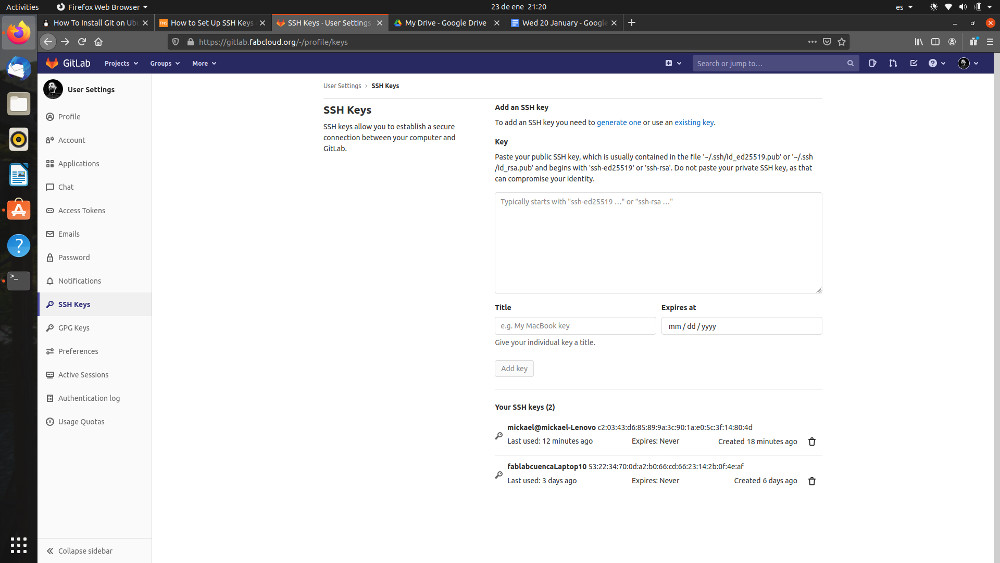
Created a new ssh key to clone from another machine, ubuntu this time. I use the same user id and email than for the first git set up, and than to set up the ssh key I seemed to have more luck following these steps and added that key directly into gitlab.
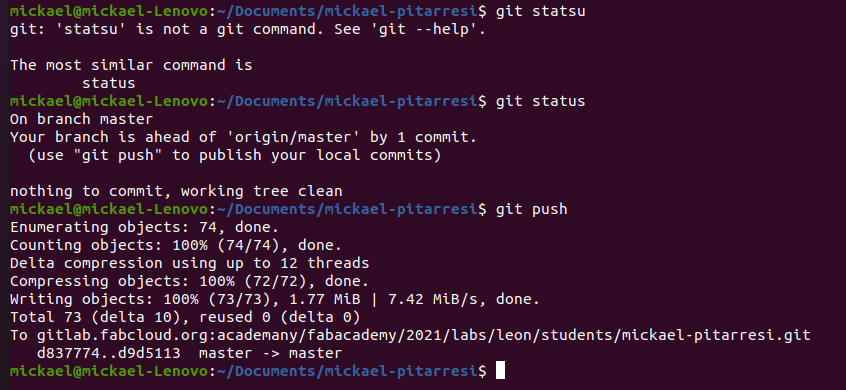
First Git Push
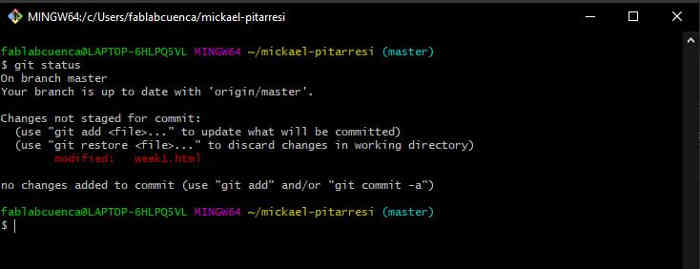
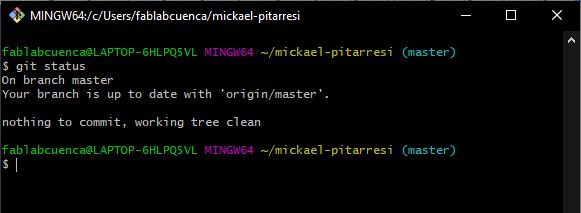
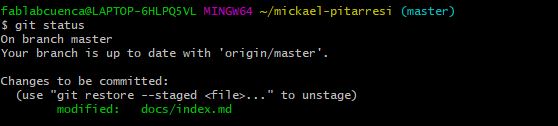
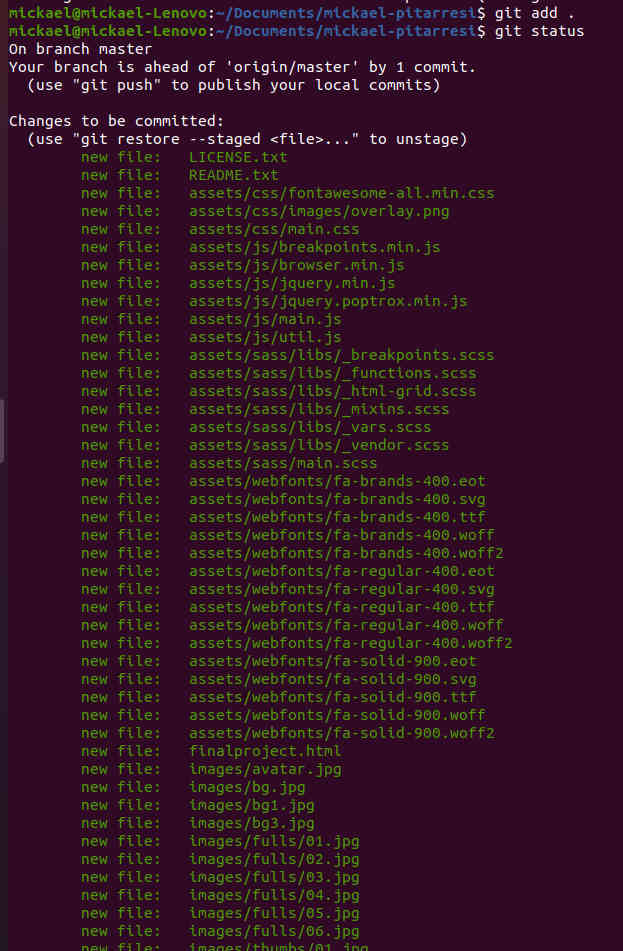
Today we looked into setting up Gitlab with user info and ssh keys, since I already had it done, I thought I would to see, as an exercise, how to modify the cloned repo from git lab, stage my changes and commit them and, finally push that on to the gitlab repo (master)... I check the status: git status
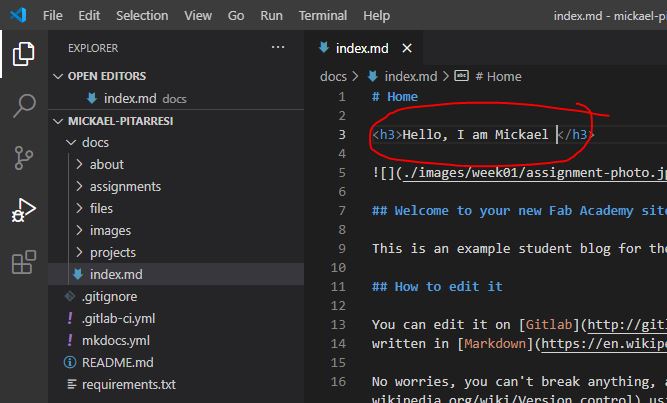
Usually, I should always pull what's on the Gitlab repo (master) before pushing but I know nobody changed anything there since it was cloned it the last time. Also I know this will be removed eventually so…With VSC I modified the index.md...
...and check the effects on the terminal: git status
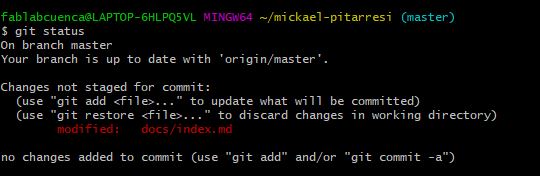
I then added this modification to the staging area: git add + file directory, stages that change git add -A stages all changes git add . stages new files and modifications, without deletions git add -u stages modifications and deletions, without new files Wiered observation:
It's funny, that time above, I didn't need to type any git commits and I can not seem to be able to replicate that process, I have to git commit every time now…?
Anyways, let's keep going…

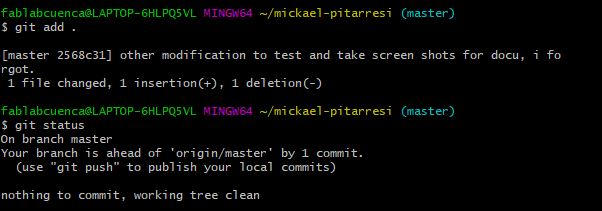
Status check again: git status, the changes are staged.
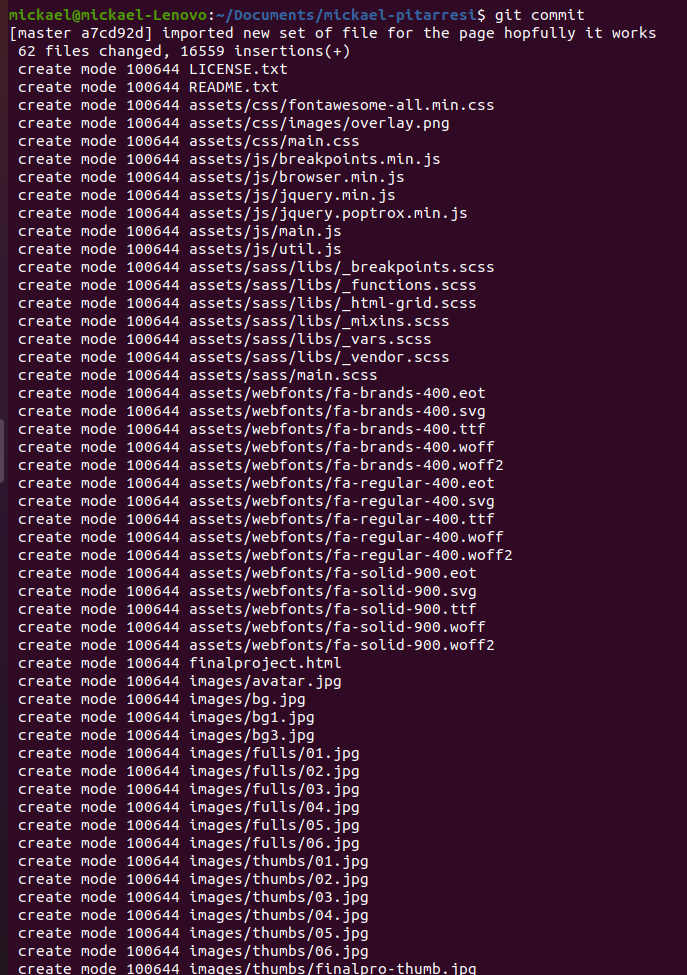
Commit the changes git commit

That's where I landed in the VI editor (a mode based editor) here you can write a more descriptive note on the changes made (usually for multiple files/changes)…
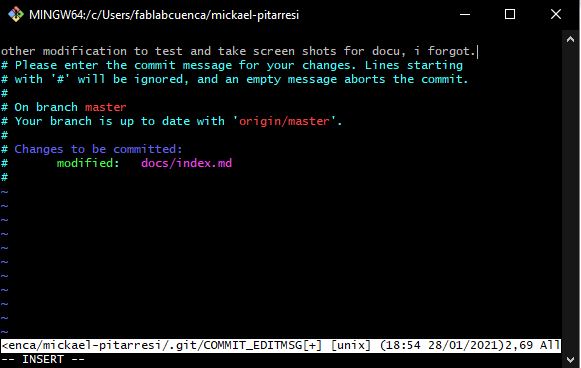
Here are a few commands that could be useful if, like me, you get stuck in there VI when you are inside the VI editor: :wq and enter to save the commit message and exit : enters in the command mode w is for "write" (save) q is for "quit" :q! Is for "exit without saving" You may need to hit escape before :wq to exit the insert mode I Got this info here
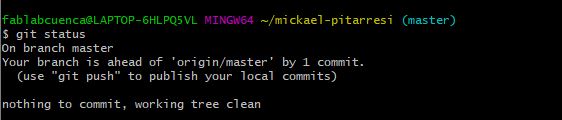
Status check again, and here I can see that my version is head of the origin/master version and that my working tree is clear.
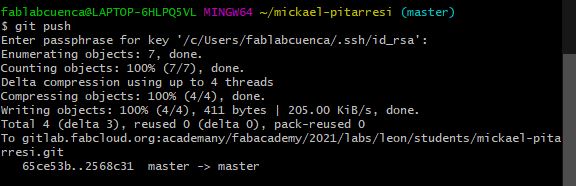
And to push that to the master repo on gitlab (passphrase needed).
Status check again…
And to push that to the master repo on gitlab (passphrase needed).
Working tree CLEAN!!
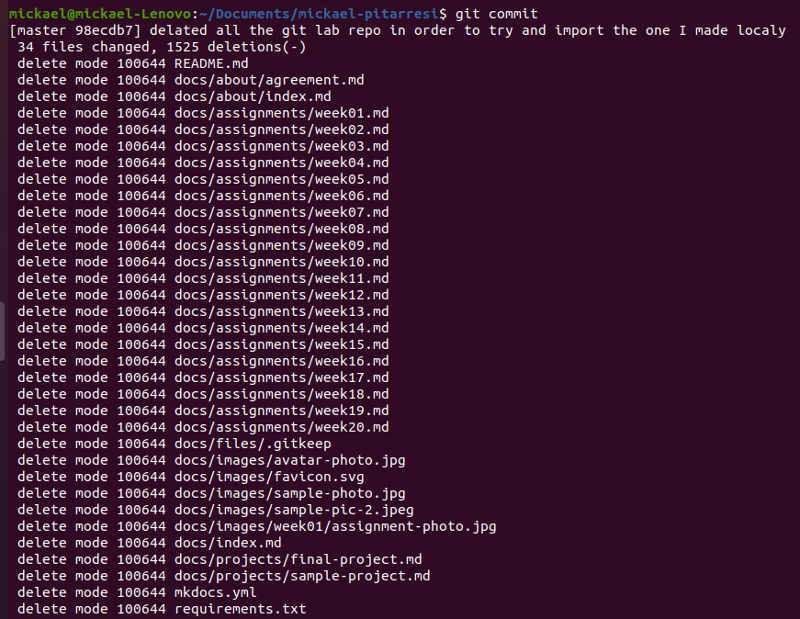
So now to get rid of everything and import my web page documents: I am switching machines again (ubuntu). I tried to get rid of the Gitlab repo from Gitlab but no luck as I find myself having to delete files one by one. Probably did not find the best way to do it yet so I went back to the terminal and edited my local repo. git rm file name will remove that file (case sensitive)
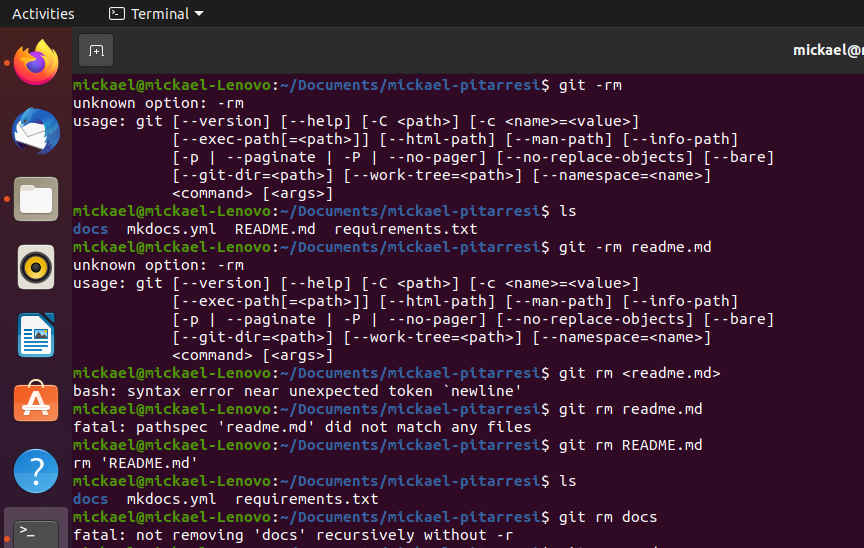
Fatal: looks like I need to use git rm -r folder-name and recursively remove a folder


Now the local repo is empty, lets see what the effects of what we messed with on Gitlab has...
Added this file removal in the staging area this time. Here I can also see the files I started to delete manually on Gitlab. Let’s commit these changes.
Now that my local repo is empty I copied the new files manually in the local repo folderNote: My local branch is head of the origin/master by 1 commit
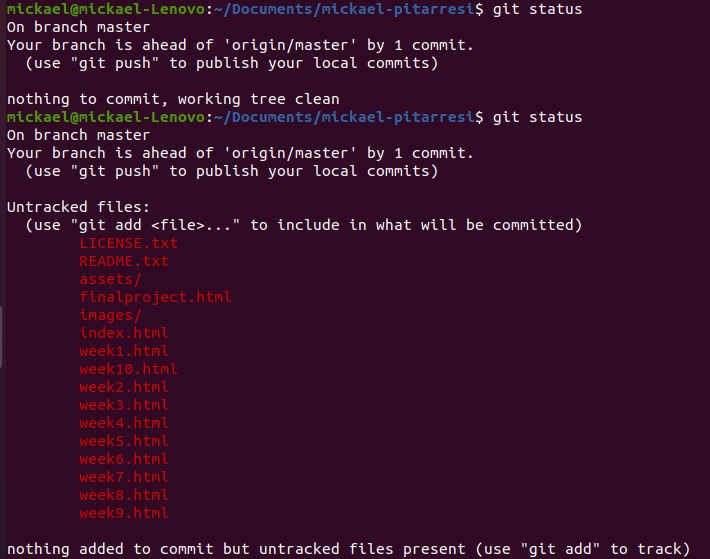
Checking status again Note: My local branch is head of the origin/master by 2 commits

Next I try to git pull and obviously, because I deleted the file directly on Gilab and on the local repo, there are some conflicts…

FATAL: resolve these conflicts first...
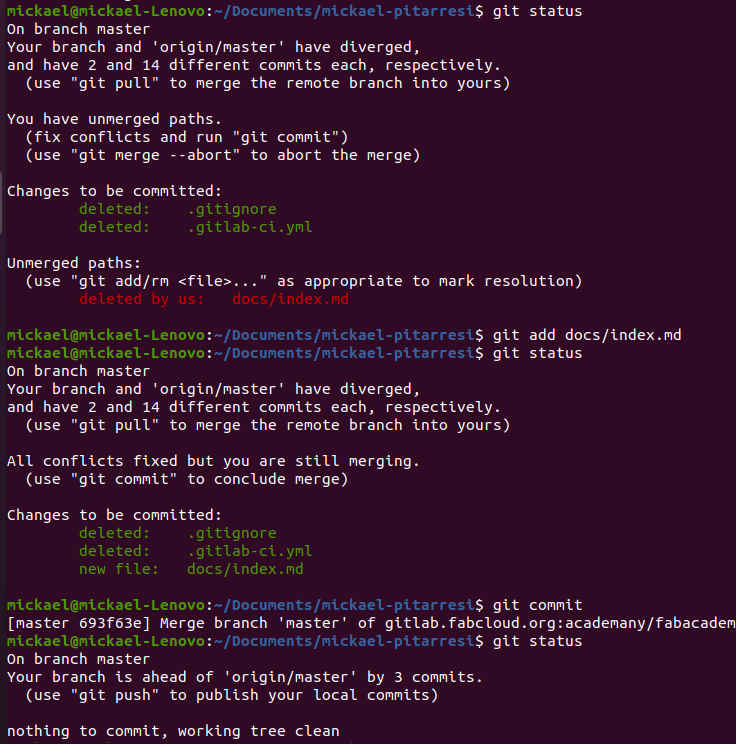
Check status, add the emerged path to the staging area and commit which merged the branches and resolved the conflicts.
Note: the local branch is head of 3 commits now.
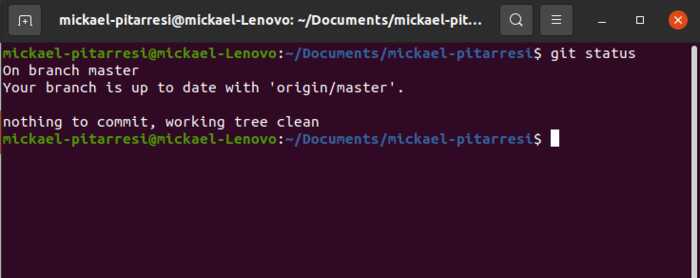
git pull again and we are up to date, ls to see my files locally.

Here I going to delete these files from the local repo manually because to see if I can push an empty directory on the origin/master
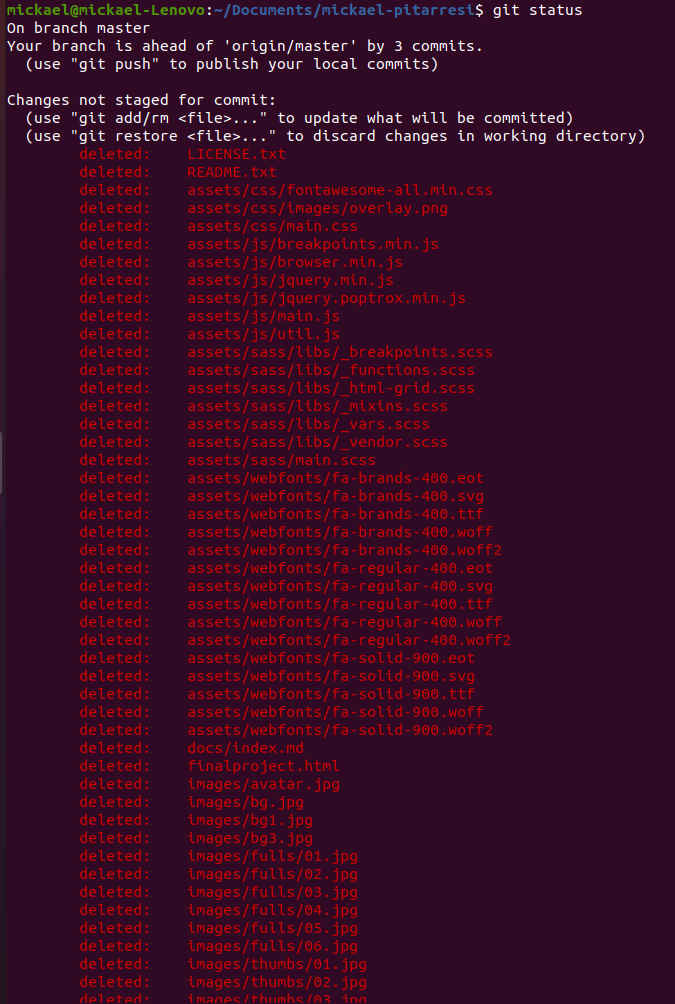
Commit those changes and finally push on to the origin/master on gitlab
Copied manually the new website files again and check status

Added to staging area and commit and push these changes on the master branch in gitlab
On to Gitlab then to create a .yml file, create new file with + drop down menu and new file
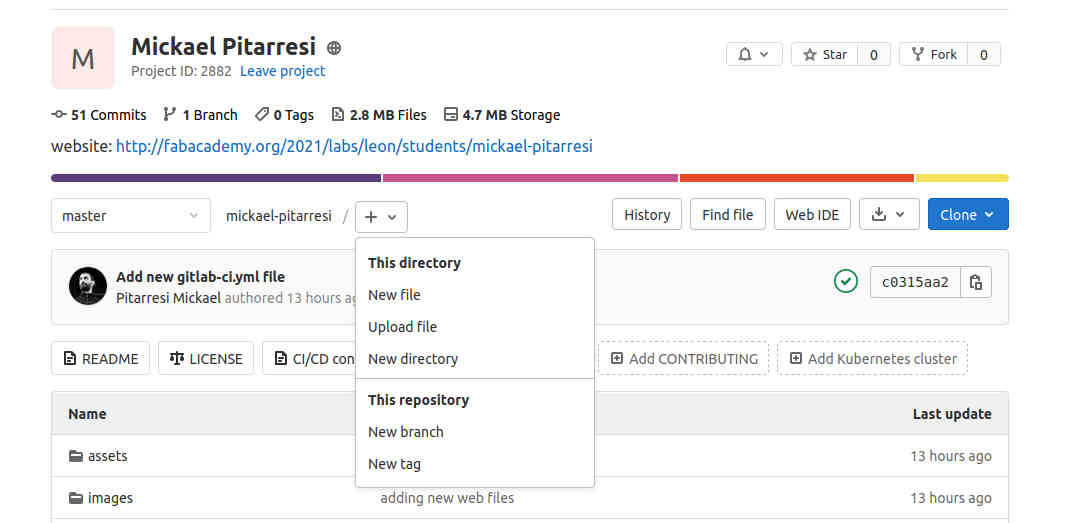
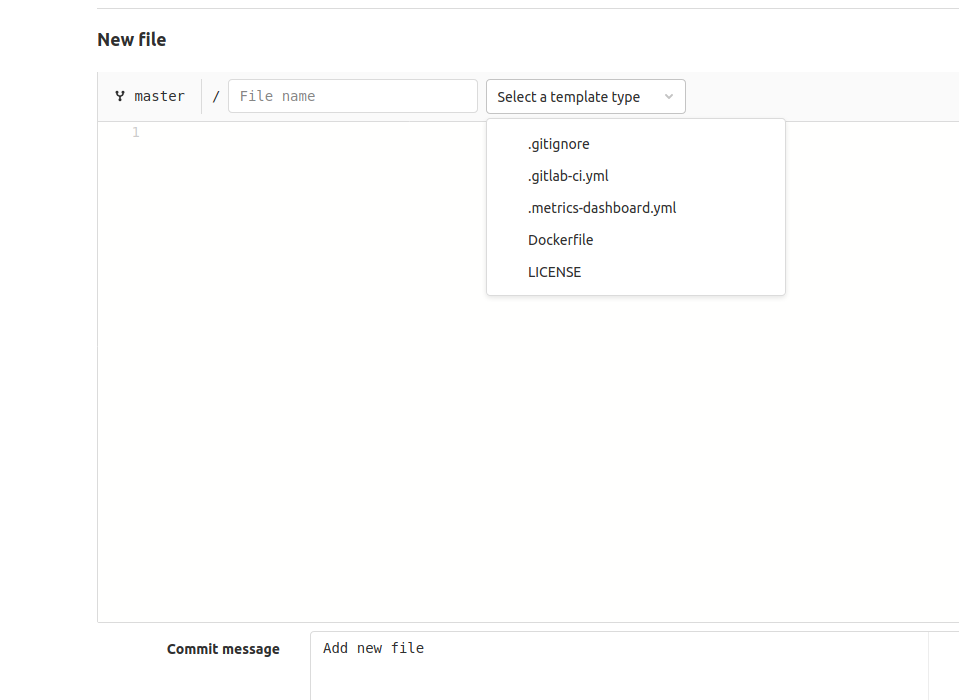
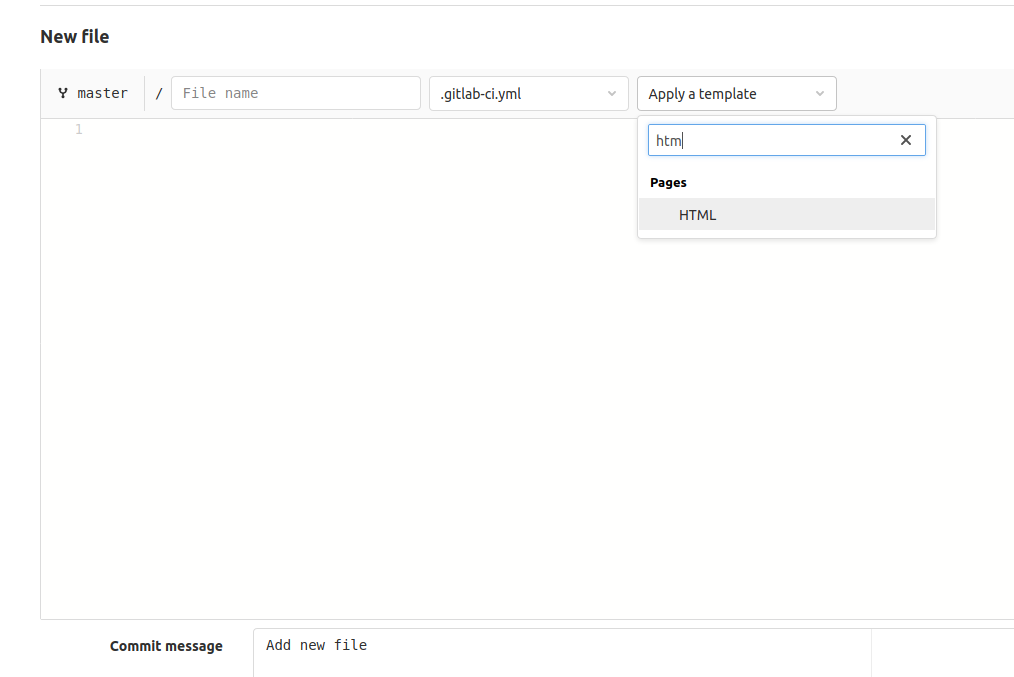
Select the format in my case .gitlab-ci.yml it will contain a pre set of instructions for git lab to read my website documentation. First we need the template format in wish the website is written in my case .html. Leave a message and create, here it is in the repo…

Let's check the link to see if it works
So far so good!
One last thing is to pull the repo again to have the .yml file in the local repo.
So to resume and avoid having problems like me:
git pull download files from the master branch
git rm . -r remove all files from the repo (-r for recursive)
git add . add all new files to your branch
git commit -m "comment" commit the changes
git push push all changes to the master repository
And now to put some content!!
Image magick through the terminal
Usefull commands
list formats: convert -list format
convert JPG to PNG: convert input.jpg output.png
convert all JPGs to PNGs: mogrify -format png *.jpg
convert SVG to PNG at 1000 DPI: convert -density 1000 -units PixelsPerInch input.svg output.png
compress JPG to quality 50% width 1000: convert input.jpg -quality 50% -resize 1000 output.jpg
compress all JPGs to quality 50% width 1000: mogrify -quality 50% -resize 1000 *.jpg
ffmpeg throught the terminal
List of usefull commands from Neil, MP4 ffmpeg encoding.
variable bit rate 1080p MP3:
ffmpeg -i input_video -vcodec libx264 -crf 25 -preset medium -vf scale=-2:1080 -acodec libmp3lame -q:a 4 -ar 48000 -ac 2 output_video.mp4
ixed bit rate 1080p MP2: rffmpeg -i input_video -vcodec libx264 -b:v 1000k -vf scale=-2:1080 -acodec mp2 -b:a 256k -ar 48000 -ac 2 output_video.mp4
no audio:ffmpeg -i input_video -vcodec libx264 -b:v 1000k -vf scale=-2:1080 -an output_video.mp4
crop size (width:height:xoffset:yoffset):ffmpeg -i input_video -vf crop=1500:800:200:100 -vcodec libx264 -b:v 1000k -an output_video.mp4
trim time (-ss start time, -t duration):fffmpeg -i input_video -vcodec libx264 -b:v 1000k -an -ss 00:00:10 -t 00:00:10 output_video.mp4
mix audio and video:ffmpeg -i input_video -vcodec libx264 -b:v 1000k -vf crop=1120:876:0:100 -i input_audio -acodec mp2 -b:a 256k -ar 48000 -ac 2 -ss 00:00:20 -t 00:00:20 output_video.mp4
crop, pan, composite:ffmpeg -i input_video_1 -i input_video_2 -filter_complex '[1:v]crop=175:95:930:860[cropout];[cropout]scale=350:190[scaleout];[0:v][scaleout]overlay=10:10[outv]' -map '[outv]' -vcodec libx264 -b:v 1000k -map 0:a -acodec mp2 -b:a 256k -ac 2 -t 00:00:05 output_video.mp4
numbered images to video:ffmpeg -r 30 -i %04d.jpg -vcodec libx264 -b:v 1000k -vf scale=-2:1080 -an output_video.mp4
Go to:Project managment Principles and practices
Principles and practices
Final project main
Touching the untouchable (interactive zone)
Final project main
Touching the untouchable (interactive zone)
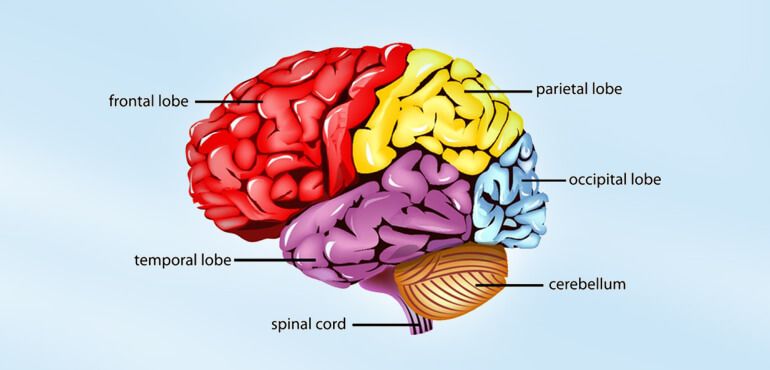
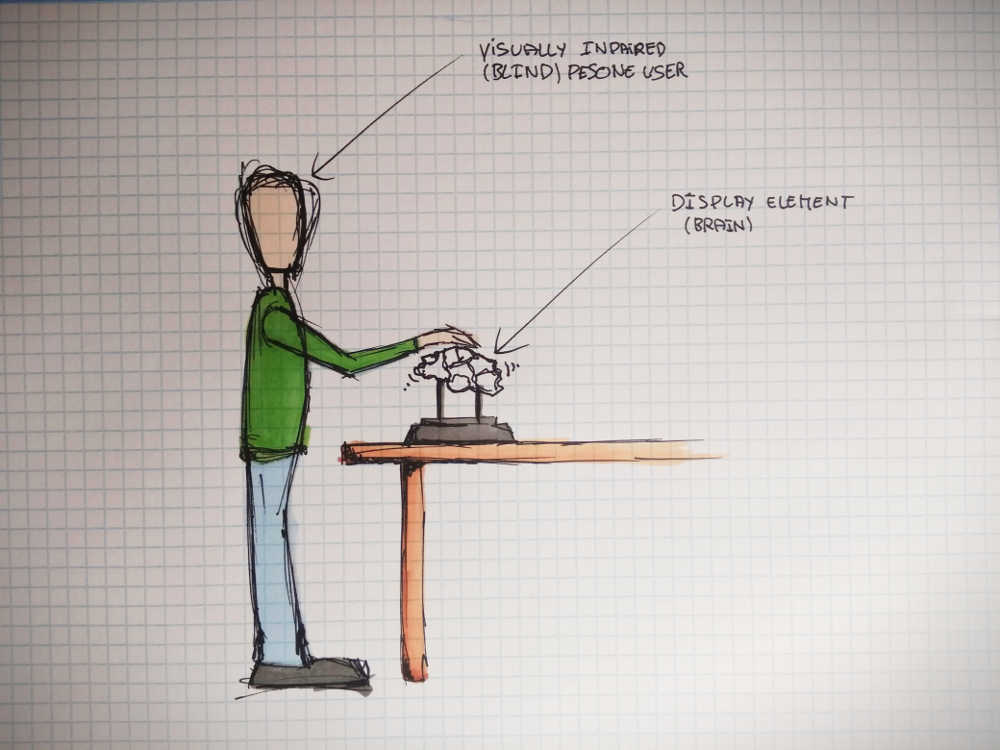
“Hoy toca neurociencia” is an interactive exhibition project for the visually inpaired and blind persons. Although it is developed specially for disabled persons, it is inclusive and accessible to everyone. This project educates on how the human body is made inside, more specificly in this case, on the functioning of the human brain.
My project will finalise the development made so far and focuses on one element of this exposition. I aim to further develop a representation of the brain that will provide a unique experience for the persons that can not see. Each individual parts of the element presented will vibrate and light up when the user explore and touches them. Furthermore, it will be implemented by adding an informative audio track that will describe the part being probed.
So far this first prototype version is printed out of PETG (brain), PLA (legs) and laser cut MDF (base). I am hoping to replace the part of the brain that will be touch with some type of silicon and to make the base heavier, maybe cast it in concrete/cement or resine (it could also be milled in wood).
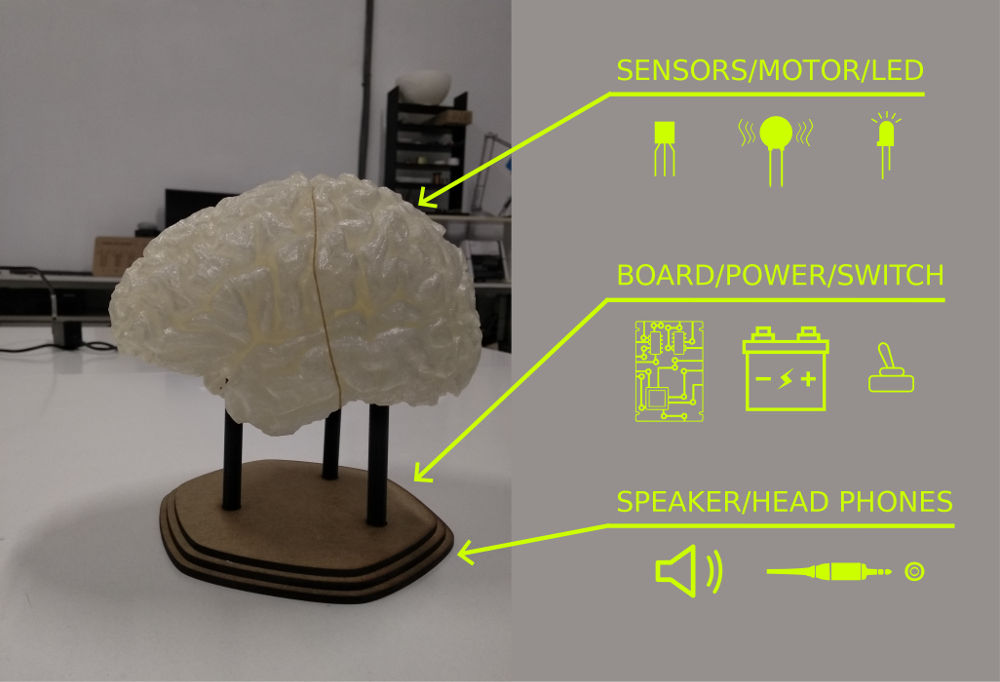
I am thinking to use different materials in order to produce the brain, I am hoping to make a mold from a 3d printed model (SLA) using alginate (alga cast/body cast first layer) reinforced with plaster (plaster rolls reinforced with textile). There should be a riggid center part (FDM) where I hope to put some of the electronics, it will also serve as an access point to incert the motor through once the silicone has set. I am not too sure of how to make the base yet, maybe wood or concret to make it heavy. It also needs to include the controls...
The user can read the instructions and activate the routine.Each motors+LED will follow that routine along with the audio, while the user listens to the information, he can touch the brain model and feel where are the different vibrations and how the location of theses vibrations changes to point out the different regions of the brain.
More in Development.