Board-To-Computer:
                #include

                  int trigPin = 3; //Trig Pin for Ultrasonic Sensor
                  int echoPin = 2; //Echo Pin for Ultrasonic Sensor
                  int ledPin = 0;

                  long duration;
                  int cm;

                  char cstr[16];

                  void setup() {
                    Wire.begin(8);
                    Wire.onRequest(requestEvent);
                    pinMode(ledPin, OUTPUT);
                    digitalWrite(ledPin, HIGH);

                    Serial.begin(9600);
                  }

                  void loop() {

                    pinMode(trigPin, OUTPUT); //Set Ultrasonic Trigger Pin as OUTPUT
                    digitalWrite(trigPin, LOW); //Write it to LOW
                    delayMicroseconds(2); // Wait for 2mus
                    digitalWrite(trigPin, HIGH); // Write the Trig Pin to HIGH
                    delayMicroseconds(10); // Wait for 10mus
                    digitalWrite(trigPin, LOW);// Write the Trig Pin to LOW
                    pinMode(echoPin, INPUT); //Set Ultrasonic Echo Pin as INPUT

                    duration = pulseIn(echoPin, HIGH); //The duration the echoPin takes to go HIGH in microseconds

                    cm = microsecondsToCentimeters(duration);
                    sprintf(cstr, "%03d", cm);

                    Serial.println(cm);
                    delay(500);

                  }

                  long microsecondsToCentimeters(long microseconds){
                    return (microseconds / 29.15 ) / 2;
                  }
The Code that is being used in "The Computer":
                const path = require('path');
                const express = require('express');
                const app = express();
                const http = require('http');
                const server = http.createServer(app);
                const port_num = process.argv[3];

                const {Server} = require('socket.io');
                const io = new Server(server)

                app.use(express.static(path.join(__dirname, '/')));

                io.on('connection', (socket) => {
                    console.log('Established');
                    socket.on('disconnect', function(){
                      console.log('disconnected');
                    });
                })//io.on

                server.listen(port_num, (req, res) => {
                    console.log(`listening on *:${port_num}`);
                })

                const serialport = require('serialport');
                const portname = process.argv[2];

                const parserBinding = require('@serialport/parser-readline')

                let myPort = new serialport(portname, {
                    baudRate: 115200,
                })

                const parser = myPort.pipe(new parserBinding({delimiter: '\r\n'}))

                myPort.on('open', onOpen);
                parser.on('data', onData);

                function onOpen() {
                    console.log("Port Opened");
                }

                function onData(data){
                    console.log(data.toString());
                    io.emit('parsed-data', data);
                }
Socket.IO is a JavaScript library for realtime web applications. It enables realtime, bi-directional communication between web clients and servers. It has two parts: a client-side library that runs in the browser, and a server-side library for Node.
                const path = require('path');
                const express = require('express');
                const app = express();
                const http = require('http');
                const server = http.createServer(app);
Boiler-plate code for starting up a server using "Express".
"Path" is a native Node.js module is a utility to work with paths of files and directories.
const port_num = process.argv[3];
Get the 3rd command-line argument. Read more about parsing command-line arguments here
                const {Server} = require('socket.io');
                const io = new Server(server)
Import "Socket.io" module and stir-up a Socket.io Server. Call it "io".
app.use(express.static(path.join(__dirname, '/')));
Find the reasoning behind this line here. Long-story short: "You will be able to use and call the files present in your current working directory."
                io.on('connection', (socket) => {
                  console.log('Established');
                  socket.on('disconnect', function(){
                    console.log('disconnected');
                  });
              })//io.on
Tell the "Socket.io" server, what to do when it receives a "connection", and when it looses a "connection".
                server.listen(port_num, (req, res) => {
                  console.log(`listening on *:${port_num}`);
              })

              const serialport = require('serialport');
              const portname = process.argv[2];
Stir-up a "Express" server at specifiec localhost port. Import "serialport" package. Get the 2nd command-line argument and store it in the variable "portname".
                const parserBinding = require('@serialport/parser-readline')

                let myPort = new serialport(portname, {
                    baudRate: 115200,
                })

                const parser = myPort.pipe(new parserBinding({delimiter: '\r\n'}))
Import a binding called "parser-readline" from the earlier imported "serialport" package.
Declare a new serialport with the name of COM Port you want to get the data from, and the "baudRate", and name it "myPort"
Get every new piece of data the " =myPort" gets, store it in "parser" until it encounters a "\n" character, do something with the formatted-data.
                myPort.on('open', onOpen);
                parser.on('data', onData);

                function onOpen() {
                    console.log("Port Opened");
                }

                function onData(data){
                    console.log(data.toString());
                    io.emit('parsed-data', data);
                }
Tell "myPort" what to do when it is first opened.
Tell "parser" what to do when it enounters a '\n' character.
"io.emit" emits the data to specified browser port.
The Computer to The Browser:
HTML:
                <!DOCTYPE html>
                <head>
                <meta charset="utf-8">
                <script src="/socket.io/socket.io.js"></script>
                <style>
        body {
            background-color: black;

        }

        .text {
            position: absolute;
            top: 50%;
            right: 50%;
            transform: translate(50%, -50%);
            text-transform: uppercase;
            font-family: verdana;
            font-size: 12em;
            font-weight: 700;
            color: #f5f5f5;
            text-shadow: 1px 1px 1px #919191,
                1px 2px 1px #919191,
                1px 3px 1px #919191,
                1px 4px 1px #919191,
                1px 5px 1px #919191,
                1px 6px 1px #919191,
                1px 7px 1px #919191,
                1px 8px 1px #919191,
                1px 9px 1px #919191,
                1px 10px 1px #919191,
                1px 18px 6px rgba(16, 16, 16, 0.4),
                1px 22px 10px rgba(16, 16, 16, 0.2),
                1px 25px 35px rgba(16, 16, 16, 0.2),
                1px 30px 60px rgba(16, 16, 16, 0.4);
        }


        </style>
        </head>

        <body>
        <h2 style="color:aliceblue">FabAcademy 2021 ~ Interface and Application Programming</h2>
        <h3 class="text" id="text-value">100</h3>
        <script src="script.js"></script>
    </body>
    </html>
Simple HTML with CSS. The point of significance is the <h3> tag with "id="text-value"", because it will hold the data that is being sent from the ultrasonic sensor.
Script.js
                let s = io();

                let d = document.getElementById("text-value");

                s.on('connect', function () {
                  s.on('parsed-data', function (data) {
                    d.innerHTML = data;
                  })
This is the client-side part of the earlier mentioned socket.io equation.
All this does is, as soon as we get 'parsed-data', we append it to the element with "text-value" id.
Starting the Script:
node index.js COM11 5500index.js is the filename
COM11 is the port you're receving the data at.
5500 is the browser port you'd like to start_the_server/display_data at.
Hero Shot:
Group Assignment:
For the Group Assignment, I tried "processing" and "WebGL". I downloaded "Processing" from here, but I abandoned it as soon as I realized how bloated it is. It is an over-kill for my usecase.
Then, I moved on to "WebGL".
WebGL is a JavaScript API for rendering interactive 2D and 3D graphics within any compatible web browser without the use of plug-ins. WebGL is fully integrated with other web standards, allowing GPU-accelerated usage of physics and image processing and effects as part of the web page canvas.
I went through the documentation offered by Mozilla Foundation: here
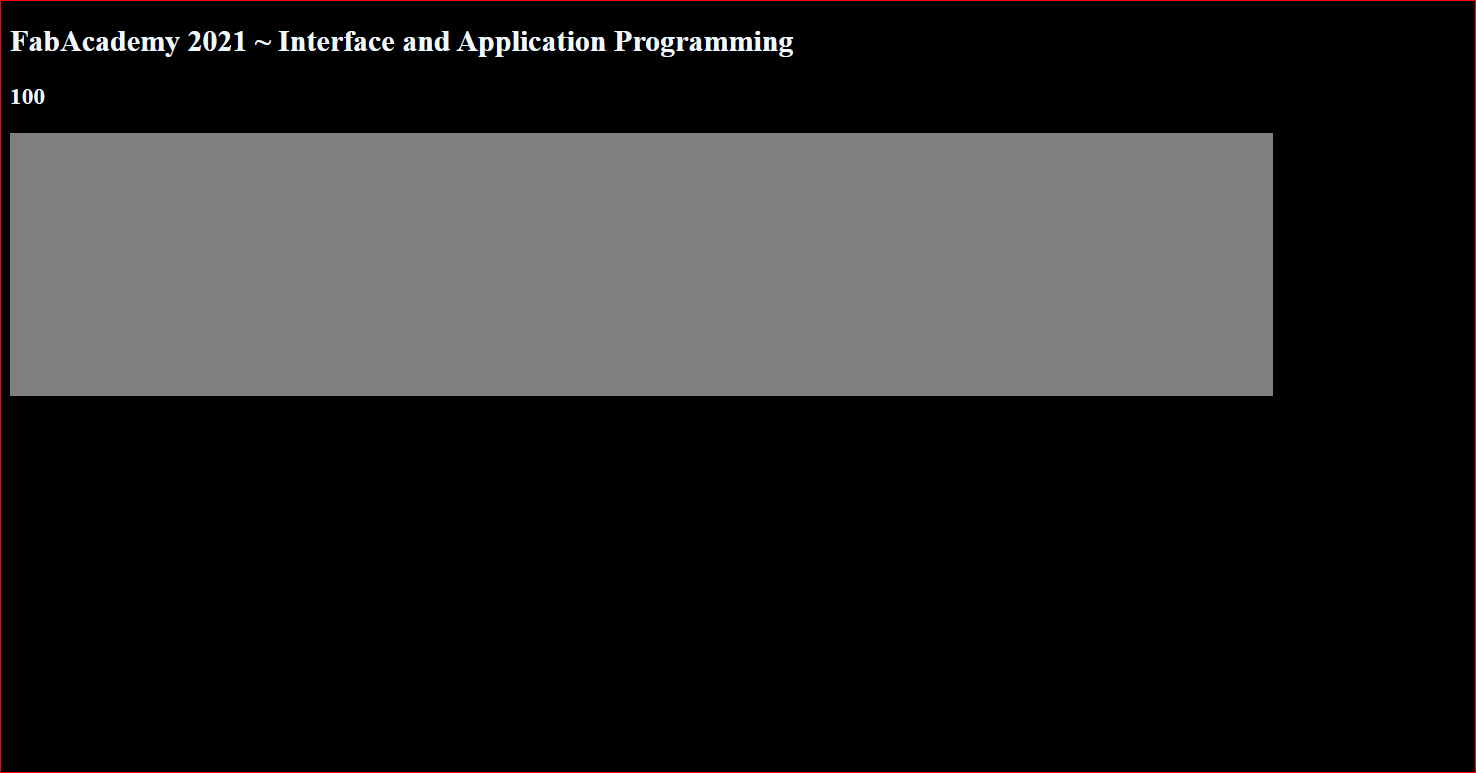
That gray rectangle expands and contracts length-wise based on the value above it.
WebGL is a complicated standard, and I was only able to get one part of it working[The expanding part].
Code:
                <!DOCTYPE html>

                <head>
                <meta charset="utf-8">
                <script src="/socket.io/socket.io.js"></script>
                <style>
        body {
            background-color: black;
        }

        canvas {
            position: relative;
            display: block;
            width: 1010px;
            height: 210px;
            background-color: gray;
        }
        </style>
        </head>

        <body>
        <h2 style="color:aliceblue">FabAcademy 2021 ~ Interface and Application Programming</h2>
        <h3 style="color:aliceblue" class="text" id="text-value">100</h3>
        <script src="script.js"></script>

    <canvas>Your browser does not seem to support
        HTML5 canvas.</canvas>

        <script>
        window.addEventListener("load", function setupWebGL(evt) {
            "use strict"
            window.removeEventListener(evt.type, setupWebGL, false);

            let canvas = document.querySelector("canvas");
            let textValue = document.querySelector("h3");

            let height = canvas.height;

            canvas.addEventListener("onChange", setBreadth, false);
            textValue.addEventListener("onChange", setBreadth, false);

            let gl;

            function setBreadth() {
                if (!gl) {
                    paragraph.innerHTML = "Failed to get WebGL context. "
                        + "Your browser or device may not support WebGL.";
                    return;
                }
                gl.viewport(0, 0,
                    gl.drawingBufferWidth, gl.drawingBufferHeight);

                // Enable scissoring operation and define the position and
                // size of the scissoring area.
                gl.enable(gl.SCISSOR_TEST);

                // let val = textValue.innerHTML
                gl.scissor(0, 0, 100, 50);

                // Clear the drawing buffer solid yellow.
                gl.clearColor(1.0, 1.0, 0.0, 1.0);
                gl.clear(gl.COLOR_BUFFER_BIT);
            }


        }, false);
        </script>

        </body>

        </html>
                <canvas>Your browser does not seem to support
        HTML5 canvas.</canvas>
This is the root element, and it will contain all the "WebGL" stuff. Incase, One's Browser does not support WebGL, it'll display "Your browser does not seem to support HTML5 canvas".
                canvas.addEventListener("onChange", setBreadth, false);
            textValue.addEventListener("onChange", setBreadth, false);
Add "onChange" event-listeners to the "Canvas" element and "textValue element".
It'll enable us to alter those elements, as soon as there's some change in those elements, using the "setBreadth" function.
    function setBreadth() {
      if (!gl) {
          paragraph.innerHTML = "Failed to get WebGL context. "
              + "Your browser or device may not support WebGL.";
          return;
      }
      gl.viewport(0, 0,
          gl.drawingBufferWidth, gl.drawingBufferHeight);

      // Enable scissoring operation and define the position and
      // size of the scissoring area.
      gl.enable(gl.SCISSOR_TEST);

      // let val = textValue.innerHTML
      gl.scissor(0, 0, 100, 50);

      // Clear the drawing buffer solid yellow.
      gl.clearColor(1.0, 1.0, 0.0, 1.0);
      gl.clear(gl.COLOR_BUFFER_BIT);
  }
"Viewport" is where we define the WebGL Context : The area in which this function should act upon.
"Scissor" is what we use filter out pixels. This is what will give the moving effect to the rectangle.
"ClearColor" will define the color to be set upon the WebGL Context
"Clear" will actually set the color.